three.js学习 01-使用最基本的方法创建出来一个threejs立方体,three.js开发环境搭建

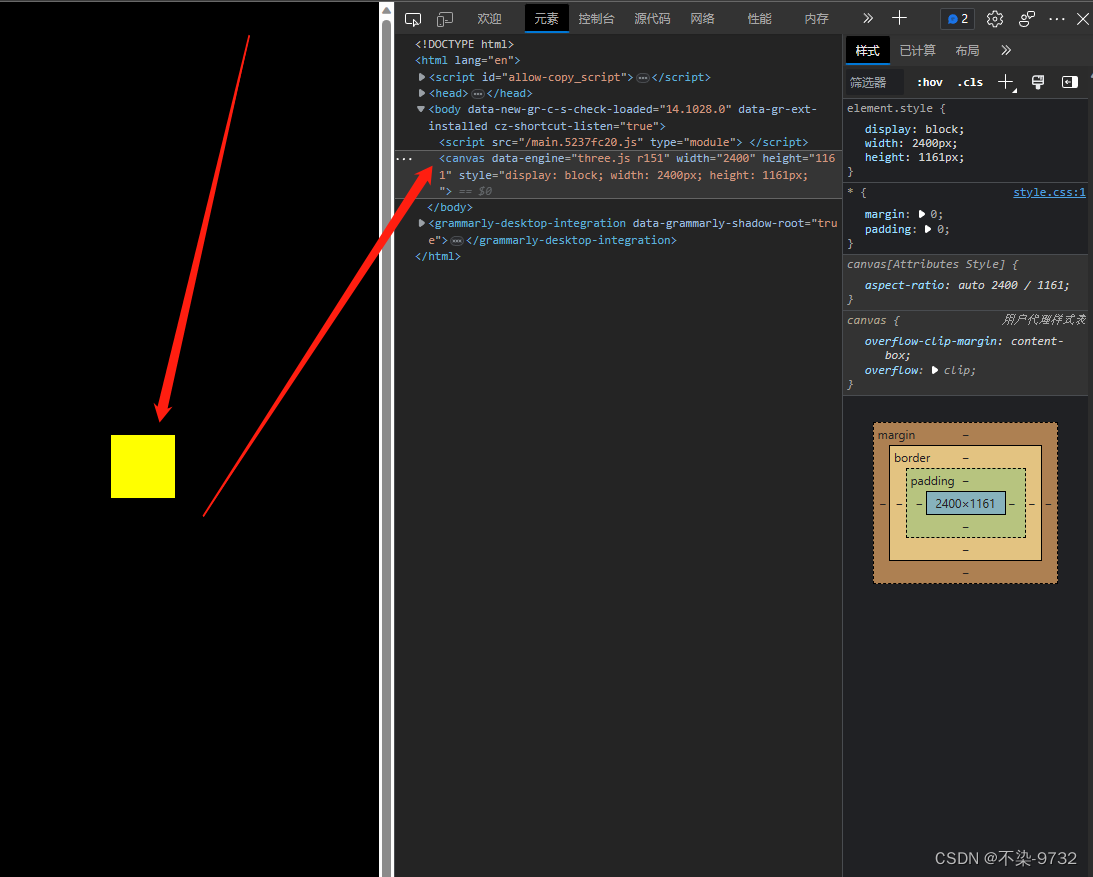
1.当前实现的最终效果:
2.环境以及工具介绍:
three中文官方文档地址:https://www.three3d.cn/docs/index.html
使用的开发工具:vscode
使用的模块打包工具:parcel
开发语言:js,css,json,html
当前案例的开发环境及其配置如下:
{"name": "01-testparcel","version": "1.0.0","description": "","main": "index.js","scripts": {"dev": "parcel index.html","build": "parcel build index.html"},"author": "","license": "ISC","dependencies": {"three": "^0.151.3"},"devDependencies": {"parcel-bundler": "^1.12.5"}
}
3.安装依赖包及项目结构搭建
npm i parcel-bundler --save-dev 我们在这里使用parcel替代webpack作为打包工具
npm i three --save threejs的资源包
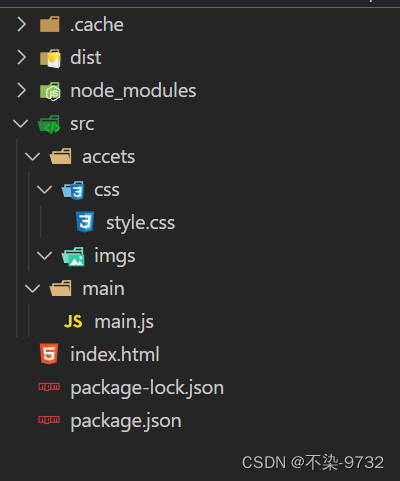
安装完成后手动创建如下项目结构
package.json:
{"name": "01-testparcel","version": "1.0.0","description": "","main": "index.js","scripts": {"dev": "parcel index.html","build": "parcel build index.html"},"author": "","license": "ISC","dependencies": {"three": "^0.151.3"},"devDependencies": {"parcel-bundler": "^1.12.5"}
}
style.css:
* {margin: 0;padding: 0;
}body {background: skyblue;
}
index.html:
<!DOCTYPE html>
<html lang="en">
<head><meta charset="UTF-8"><meta http-equiv="X-UA-Compatible" content="IE=edge"><meta name="viewport" content="width=device-width, initial-scale=1.0"><title>Document</title><link rel="stylesheet" href="./src/accets/css/style.css">
</head>
<body><script src="./src/main/main.js" type="module"></script>
</body>
</html>
main.js:
import * as THREE from 'three'
// console.log(THREE);
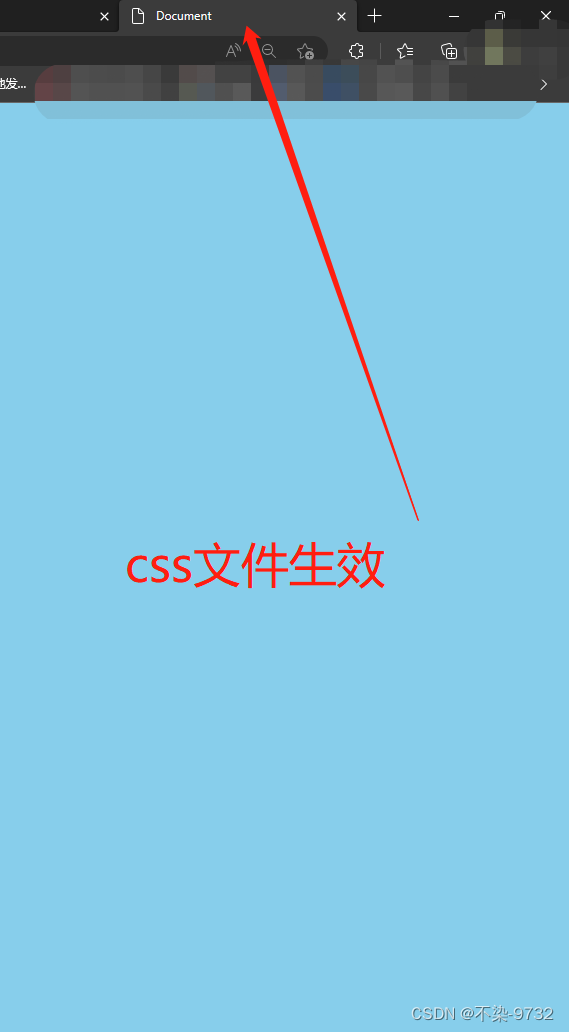
配置完成后使用 npm run dev 启动你的项目,在网页中看到 .css文件中的蓝背景效果生效则说明配置成功
4.在main.js中使用threejs创建出来一个最基础的渲染案例
import * as THREE from 'three'
// console.log(THREE);// 基础内容// 1.创建场景
const scene = new THREE.Scene()
// 2.创建相机
const camera = new THREE.PerspectiveCamera(75,window.innerWidth / window.innerHeight,0.1,1000
) //透视相机(角度,宽高比,近端,远端)camera.position.set(0, 0, 10) //修改相机位置scene.add(camera) //将相机添加到场景中// 添加物体
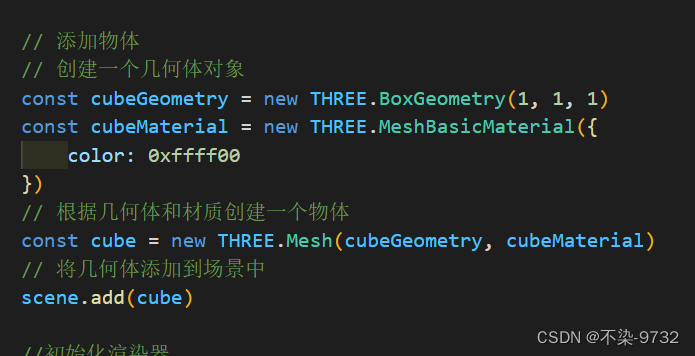
// 创建一个几何体对象
const cubeGeometry = new THREE.BoxGeometry(1, 1, 1)
const cubeMaterial = new THREE.MeshBasicMaterial({color: 0xffff00
})
// 根据几何体和材质创建一个物体
const cube = new THREE.Mesh(cubeGeometry, cubeMaterial)
// 将几何体添加到场景中
scene.add(cube)//初始化渲染器
const renderer = new THREE.WebGLRenderer()//设置渲染的尺寸大小
renderer.setSize(window.innerWidth, window.innerHeight)
console.log(renderer);// 将webgl渲染的canves内容添加到body上
document.body.appendChild(renderer.domElement)// 使用渲染器,通过相机,将场景渲染进来
renderer.render(scene, camera)
创建完成后使用npm run dev 启动项目,在页面中看到如开头演示的最基础的几何体的渲染效果