让你的three.js动起来

让你的three.js动起来
简介
本节主要是给实例添加动画效果,以及加了一些小插件用以实现帧率检测、gui可视化配置、动态监听屏幕大小变化刷新和鼠标操控功能。
引入的插件js:
- three.js
- dat.gui.js
- Stats.js
- TrackballControls.js
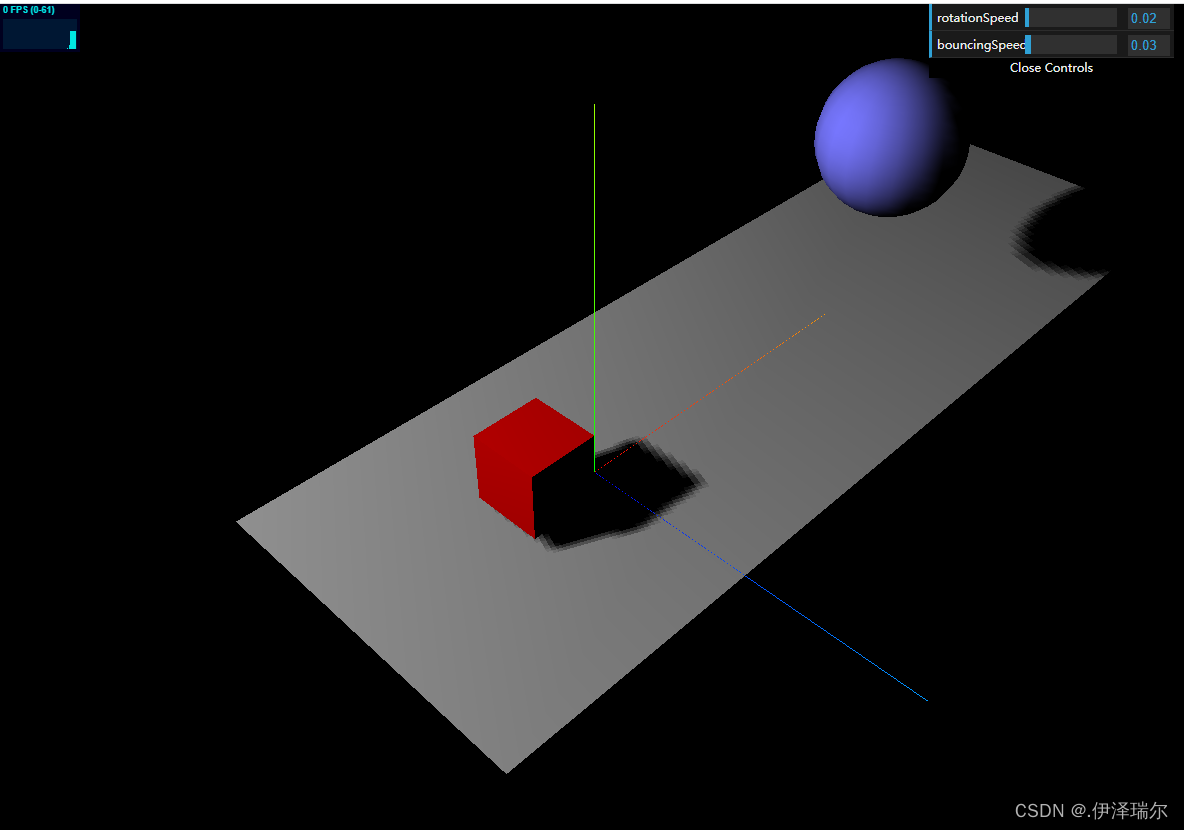
实际效果:
关键代码:
动画效果:
动画效果主要使用的是requestAnimationFrame方法,通过这个函数,你可以向浏览器提供一个回调函数。 你无须定义回调间隔,浏览器将自行决定最佳回调时机。你需要做的是在这个回调函数里完成一帧绘制操作(即在这里再次执行一遍你的渲染函数),然后将剩下的工作交给浏览器,它负责使场景绘制尽量高效和平顺地进行。
帧率检测:
主要运用的是Stats插件,主要涉及的点是
- 引用该js,
- 完成方法的初始化操作,
- 最后在渲染函数里添加触发update的事件。
gui可视化配置:
主要运用的是dat.gui插件,主要涉及的点是
- 引用该js,
- 并且完成方法的初始化操作,
- 和要可视化配置的组件进行变量绑定,
- 最后在渲染函数里将可视化的参数设置到组件的属性中。
动态监听屏幕大小变化刷新
主要应用的是浏览器的resize方法
- 绑定window的监听resize方法,
- 在resize的回调函数里变更camera的aspect和updateProjectionMatrix()方法
- 在resize的回调函数里重新setSize实例的尺寸。
鼠标操控
主要运用的是TrackballControls插件,主要涉及的点是
- 引用该js,
- 完成方法的初始化操作,
- 最后在渲染函数里添加触发update的事件。
完整代码:
// 初始化检测动画运行帧数方法
let stats = new Stats()
stats.showPanel(0)
document.body.appendChild(stats.dom)// 初始化GUI插件
let controls = new function () {this.rotationSpeed = 0.02;this.bouncingSpeed = 0.03;
};
let gui = new dat.GUI()
gui.add(controls, 'rotationSpeed', 0, 0.5)
gui.add(controls, 'bouncingSpeed', 0, 0.5)//容器
const container = document.getElementById('container')
let scale = window.innerWidth / window.innerHeight
var scene = new THREE.Scene();
var camera = new THREE.PerspectiveCamera( 45, scale, 0.1, 1000 );
var renderer = new THREE.WebGLRenderer();
renderer.setClearColor(new THREE.Color(0x000000))
renderer.setSize(window.innerWidth, window.innerHeight)// 设置渲染器支持阴影渲染功能
renderer.shadowMap.enabled = true;
// 坐标轴大小
var axes = new THREE.AxesHelper(20)
scene.add(axes)
// 创建地面
var planeGeometry = new THREE.PlaneGeometry(60, 20);// 将材质替换为可对光源产生反应的:MeshLambertMaterial
var planeMaterial = new THREE.MeshLambertMaterial({color: 0xAAAAAA
});
var plane = new THREE.Mesh(planeGeometry, planeMaterial);
// r旋转地面
plane.rotation.x = -0.5 * Math.PI;
plane.position.set(15, 0, 0);// 设置平面可接受阴影
plane.receiveShadow = true;
// 添加地面到场景中
scene.add(plane);
// 添加方块
var cubeGeometry = new THREE.BoxGeometry(4, 4, 4);
var cubeMaterial = new THREE.MeshLambertMaterial({color: 0xFF0000
});
var cube = new THREE.Mesh(cubeGeometry, cubeMaterial);
// 设置方块位置
cube.position.set(-4, 3, 0);
// 设置立方体可投射阴影
cube.castShadow = true;// 添加方块到场景中
scene.add(cube);
// 创建球体
var sphereGeometry = new THREE.SphereGeometry(4, 20, 20);
var sphereMaterial = new THREE.MeshLambertMaterial({color: 0x7777FF
});
var sphere = new THREE.Mesh(sphereGeometry, sphereMaterial);
// 设置球体位置
sphere.position.set(20, 4, 2);// a添加球体到场景中
scene.add(sphere);// 设置球体可投射阴影
sphere.castShadow = true;// 放置相机位置
camera.position.set(-30, 40, 30);
camera.lookAt(scene.position);// 设置光源
var spotLight = new THREE.SpotLight(0xFFFFFF);
spotLight.position.set(-40, 40, -15);
spotLight.castShadow = true;
spotLight.shadow.mapSize = new THREE.Vector2(1024, 1024);
spotLight.shadow.camera.far = 130;
spotLight.shadow.camera.near = 40;
scene.add(spotLight);// 添加canvas节点
container.appendChild(renderer.domElement);// 添加鼠标放大缩小移动插件
let trackballControls = initTrackballControls(camera, renderer)
let clock = new THREE.Clock()
function initTrackballControls(camera, renderer) {var trackballControls = new THREE.TrackballControls(camera, renderer.domElement);trackballControls.rotateSpeed = 1.0;trackballControls.zoomSpeed = 1.2;trackballControls.panSpeed = 0.8;trackballControls.noZoom = false;trackballControls.noPan = false;trackballControls.staticMoving = true;trackballControls.dynamicDampingFactor = 0.3;trackballControls.keys = [65, 83, 68];return trackballControls;
}// 渲染函数
let step = 0
function renderScene() {// 更新鼠标控制插件trackballControls.update(clock.getDelta())// 帧数更新stats.update()// 立方体运动方法cube.rotation.x += controls.rotationSpeedcube.rotation.y += controls.rotationSpeedcube.rotation.z += controls.rotationSpeed// 球体运动方法step += controls.bouncingSpeedsphere.position.x = 20 + 10*(Math.cos(step))sphere.position.y = 2 + 10*Math.abs(Math.sin(step))/* requestAnimationFrame :* 通过这个函数,你可以向浏览器提供一个回调函数。* 你无须定义回调间隔,浏览器将自行决定最佳回调时机。* 你需要做的是在这个回调函数里完成一帧绘制操作,* 然后将剩下的工作交给浏览器,* 它负责使场景绘制尽量高效和平顺地进行。*/requestAnimationFrame(renderScene)// 渲染renderer.render(scene, camera)
}// 渲染函数调用
renderScene();// 定义 resize方法,屏幕尺寸变更时触发
window.addEventListener('resize', onResize, false)
function onResize() {// aspect属性,这个属性表示屏幕的长宽比camera.aspect = window.innerWidth / window.innerHeightcamera.updateProjectionMatrix()renderer.setSize(window.innerWidth, window.innerHeight)
}