TiDB入门篇-模拟生产集群部署

简介
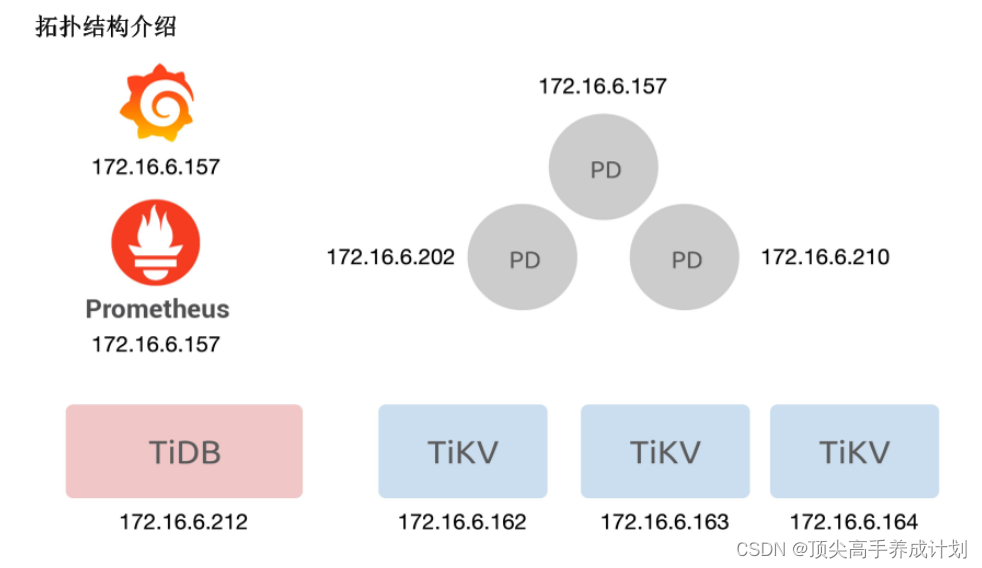
用三台电脑模拟生产集群的部署。
开始操作
同步所有机器时间(分布式数据库时间同步很重要)
#所有节点的时间要同步
sudo yum install -y ntpd
systemctl stop ntpd
#同步时间
sudo ntpdate 120.24.81.91
date
安装TiUP
#操作安装TiUP
curl --proto '=https' --tlsv1.2 -sSf https://tiup-mirrors.pingcap.com/install.sh | sh
#下面是输出内容
[root@master ~]# curl --proto '=https' --tlsv1.2 -sSf https://tiup-mirrors.pingcap.com/install.sh | sh% Total    % Received % Xferd  Average Speed   Time    Time     Time  CurrentDload  Upload   Total   Spent    Left  Speed
100 7088k  100 7088k    0     0  2966k      0  0:00:02  0:00:02 --:--:-- 2966k
WARN: adding root certificate via internet: https://tiup-mirrors.pingcap.com/root.json
You can revoke this by remove /root/.tiup/bin/7b8e153f2e2d0928.root.json
Successfully set mirror to https://tiup-mirrors.pingcap.com
Detected shell: bash
Shell profile:  /root/.bash_profile
/root/.bash_profile has been modified to add tiup to PATH
open a new terminal or source /root/.bash_profile to use it
Installed path: /root/.tiup/bin/tiup
===============================================
Have a try:     tiup playground
#更具上面内容提示执行
source /root/.bash_profile安装TiUP cluster 组件
#安装TiUP cluster 组件
tiup cluster
[root@master ~]# tiup cluster
tiup is checking updates for component cluster ...
A new version of cluster is available:The latest version: v1.11.3Local installed version: Update current component: tiup update clusterUpdate all components: tiup update --allThe component `cluster` version is not installed; downloading from repository.
download https://tiup-mirrors.pingcap.com/cluster-v1.11.3-linux-amd64.tar.gz 8.44 MiB / 8.44 MiB 100.00% 3.72 MiB/s
Starting component `cluster`: /root/.tiup/components/cluster/v1.11.3/tiup-cluster
Deploy a TiDB cluster for productionUsage:tiup cluster [command]Available Commands:check Perform preflight checks for the cluster.deploy Deploy a cluster for productionstart Start a TiDB clusterstop Stop a TiDB clusterrestart Restart a TiDB clusterscale-in Scale in a TiDB clusterscale-out Scale out a TiDB clusterdestroy Destroy a specified clusterclean (EXPERIMENTAL) Cleanup a specified clusterupgrade Upgrade a specified TiDB clusterdisplay Display information of a TiDB clusterprune Destroy and remove instances that is in tombstone statelist List all clustersaudit Show audit log of cluster operationimport Import an exist TiDB cluster from TiDB-Ansibleedit-config Edit TiDB cluster configshow-config Show TiDB cluster configreload Reload a TiDB cluster's config and restart if neededpatch Replace the remote package with a specified package and restart the servicerename Rename the clusterenable Enable a TiDB cluster automatically at bootdisable Disable automatic enabling of TiDB clusters at bootreplay Replay previous operation and skip successed stepstemplate Print topology templatetls Enable/Disable TLS between TiDB componentsmeta backup/restore meta informationhelp Help about any commandcompletion Generate the autocompletion script for the specified shellFlags:-c, --concurrency int max number of parallel tasks allowed (default 5)--format string (EXPERIMENTAL) The format of output, available values are [default, json] (default "default")-h, --help help for tiup--ssh string (EXPERIMENTAL) The executor type: 'builtin', 'system', 'none'.--ssh-timeout uint Timeout in seconds to connect host via SSH, ignored for operations that don't need an SSH connection. (default 5)-v, --version version for tiup--wait-timeout uint Timeout in seconds to wait for an operation to complete, ignored for operations that don't fit. (default 120)-y, --yes Skip all confirmations and assumes 'yes'Use "tiup cluster help [command]" for more information about a command.
更新TiUP cluster 组件
#更新TiUP cluster 组件至最新版本
tiup update --self && tiup update cluster
[root@master ~]# tiup update --self && tiup update cluster
download https://tiup-mirrors.pingcap.com/tiup-v1.11.3-linux-amd64.tar.gz 6.92 MiB / 6.92 MiB 100.00% 3.78 MiB/s
Updated successfully!
component cluster version v1.11.3 is already installed
Updated successfully!
使用TiUP部署 TiDB
查看TiUP cluster 组件的版本
#查看TiUP cluster 组件的版本
tiup --binary cluster
输出
[root@master ~]# tiup --binary cluster
/root/.tiup/components/cluster/v1.11.3/tiup-cluster
根据不同的集群拓扑编辑TiUP所需的集群初始化配置文件
#根据不同的集群拓扑编辑TiUP所需的集群初始化配置文件
tiup cluster template > topology.yaml
[root@master ~]# tiup cluster template > topology.yaml
tiup is checking updates for component cluster ...
Starting component `cluster`: /root/.tiup/components/cluster/v1.11.3/tiup-cluster template
[root@master ~]# ls
anaconda-ks.cfg topology.yaml
机器情况
192.168.66.10 (主控节点)
192.168.66.20
192.168.66.21
部署规划
| 192.168.66.10 | 192.168.66.20 | 192.168.66.21 |
|
pd_servers tikv_servers tidb_servers tiflash_servers |
pd_servers tikv_servers monitoring_servers grafana_servers alertmanager_servers |
pd_servers tikv_servers |
vi topology.yaml#把默认的ip注解掉,替换成自己的
pd_servers:# # The ip address of the PD Server.#- host: 10.0.1.11- host: 192.168.66.10- host: 192.168.66.20- host: 192.168.66.21修改如下配置对应上面的集群配置
#vi topology.yaml
pd_servers:- host: 192.168.66.10- host: 192.168.66.20- host: 192.168.66.21tidb_servers:- host: 192.168.66.10tikv_servers:- host: 192.168.66.10- host: 192.168.66.20- host: 192.168.66.21tiflash_servers:- host: 192.168.66.10monitoring_servers:- host: 192.168.66.20grafana_servers:- host: 192.168.66.20alertmanager_servers:- host: 192.168.66.20
检查和自动修复集群存在的风险
#检查和自动修复集群存在的风险
tiup cluster check ./topology.yaml --apply --user root -p
输出下面结果
[root@master ~]# tiup cluster check ./topology.yaml --apply --user root -p
tiup is checking updates for component cluster ...
Starting component `cluster`: /root/.tiup/components/cluster/v1.11.3/tiup-cluster check ./topology.yaml --apply --user root -p
Input SSH password: + Detect CPU Arch Name- Detecting node 192.168.66.10 Arch info ... Done- Detecting node 192.168.66.20 Arch info ... Done- Detecting node 192.168.66.21 Arch info ... Done+ Detect CPU OS Name- Detecting node 192.168.66.10 OS info ... Done- Detecting node 192.168.66.20 OS info ... Done- Detecting node 192.168.66.21 OS info ... Done
+ Download necessary tools- Downloading check tools for linux/amd64 ... Done
+ Collect basic system information- Getting system info of 192.168.66.10:22 ... ⠧ CopyComponent: component=insight, version=, remote=192.168.66.10:/tmp/tiup os=linux, arch=amd64- Getting system info of 192.168.66.20:22 ... ⠧ CopyComponent: component=insight, version=, remote=192.168.66.20:/tmp/tiup os=linux, arch=amd64
+ Collect basic system information- Getting system info of 192.168.66.10:22 ... Done- Getting system info of 192.168.66.20:22 ... Done- Getting system info of 192.168.66.21:22 ... Done
+ Check time zone- Checking node 192.168.66.10 ... Done- Checking node 192.168.66.20 ... Done- Checking node 192.168.66.21 ... Done
+ Check system requirements
+ Check system requirements- Checking node 192.168.66.10 ... Done
+ Check system requirements
+ Check system requirements- Checking node 192.168.66.10 ... Done
+ Check system requirements
+ Check system requirements
+ Check system requirements
+ Check system requirements- Checking node 192.168.66.10 ... Done- Checking node 192.168.66.10 ... Done- Checking node 192.168.66.20 ... Done- Checking node 192.168.66.21 ... Done- Checking node 192.168.66.10 ... Done- Checking node 192.168.66.20 ... Done- Checking node 192.168.66.21 ... Done- Checking node 192.168.66.10 ... Done- Checking node 192.168.66.20 ... Done- Checking node 192.168.66.20 ... Done- Checking node 192.168.66.20 ... Done- Checking node 192.168.66.10 ... Done- Checking node 192.168.66.20 ... Done- Checking node 192.168.66.21 ... Done
+ Cleanup check files- Cleanup check files on 192.168.66.10:22 ... Done- Cleanup check files on 192.168.66.20:22 ... Done- Cleanup check files on 192.168.66.21:22 ... Done
Node           Check         Result  Message
----           -----         ------  -------
192.168.66.20  memory        Pass    memory size is 4096MB
192.168.66.20  disk          Warn    mount point / does not have 'noatime' option set, auto fixing not supported
192.168.66.20  sysctl        Fail    will try to set 'fs.file-max = 1000000'
192.168.66.20  sysctl        Fail    will try to set 'net.core.somaxconn = 32768'
192.168.66.20  sysctl        Fail    will try to set 'net.ipv4.tcp_syncookies = 0'
192.168.66.20  sysctl        Fail    will try to set 'vm.swappiness = 0'
192.168.66.20  selinux       Pass    SELinux is disabled
192.168.66.20  command       Fail    numactl not usable, bash: numactl: command not found, auto fixing not supported
192.168.66.20  cpu-governor  Warn    Unable to determine current CPU frequency governor policy, auto fixing not supported
192.168.66.20  os-version    Pass    OS is CentOS Linux 7 (Core) 7.5.1804
192.168.66.20  cpu-cores     Pass    number of CPU cores / threads: 2
192.168.66.20  network       Pass    network speed of ens33 is 1000MB
192.168.66.20  network       Pass    network speed of veth8d81021 is 10000MB
192.168.66.20  limits        Fail    will try to set 'tidb    soft    nofile    1000000'
192.168.66.20  limits        Fail    will try to set 'tidb    hard    nofile    1000000'
192.168.66.20  limits        Fail    will try to set 'tidb    soft    stack    10240'
192.168.66.20  thp           Fail    will try to disable THP, please check again after reboot
192.168.66.20  timezone      Pass    time zone is the same as the first PD machine: Asia/Shanghai
192.168.66.21  limits        Fail    will try to set 'tidb    soft    stack    10240'
192.168.66.21  limits        Fail    will try to set 'tidb    soft    nofile    1000000'
192.168.66.21  limits        Fail    will try to set 'tidb    hard    nofile    1000000'
192.168.66.21  thp           Fail    will try to disable THP, please check again after reboot
192.168.66.21  command       Fail    numactl not usable, bash: numactl: command not found, auto fixing not supported
192.168.66.21  timezone      Pass    time zone is the same as the first PD machine: Asia/Shanghai
192.168.66.21  cpu-governor  Warn    Unable to determine current CPU frequency governor policy, auto fixing not supported
192.168.66.21  swap          Warn    will try to disable swap, please also check /etc/fstab manually
192.168.66.21  memory        Pass    memory size is 4096MB
192.168.66.21  sysctl        Fail    will try to set 'fs.file-max = 1000000'
192.168.66.21  sysctl        Fail    will try to set 'net.core.somaxconn = 32768'
192.168.66.21  sysctl        Fail    will try to set 'net.ipv4.tcp_syncookies = 0'
192.168.66.21  sysctl        Fail    will try to set 'vm.swappiness = 0'
192.168.66.21  selinux       Pass    SELinux is disabled
192.168.66.21  os-version    Pass    OS is CentOS Linux 7 (Core) 7.9.2009
192.168.66.21  cpu-cores     Pass    number of CPU cores / threads: 2
192.168.66.21  network       Pass    network speed of ens33 is 1000MB
192.168.66.21  disk          Warn    mount point / does not have 'noatime' option set, auto fixing not supported
192.168.66.10  cpu-cores     Pass    number of CPU cores / threads: 2
192.168.66.10  memory        Pass    memory size is 8192MB
192.168.66.10  network       Pass    network speed of veth158307f is 10000MB
192.168.66.10  network       Pass    network speed of veth2066b2c is 10000MB
192.168.66.10  network       Pass    network speed of vethfd4ba64 is 10000MB
192.168.66.10  network       Pass    network speed of ens33 is 1000MB
192.168.66.10  network       Pass    network speed of veth1551b5d is 10000MB
192.168.66.10  selinux       Pass    SELinux is disabled
192.168.66.10  thp           Fail    will try to disable THP, please check again after reboot
192.168.66.10  command       Fail    numactl not usable, bash: numactl: command not found, auto fixing not supported
192.168.66.10  os-version    Pass    OS is CentOS Linux 7 (Core) 7.9.2009
192.168.66.10  cpu-governor  Warn    Unable to determine current CPU frequency governor policy, auto fixing not supported
192.168.66.10  swap          Warn    will try to disable swap, please also check /etc/fstab manually
192.168.66.10  limits        Fail    will try to set 'tidb    soft    nofile    1000000'
192.168.66.10  limits        Fail    will try to set 'tidb    hard    nofile    1000000'
192.168.66.10  limits        Fail    will try to set 'tidb    soft    stack    10240'
192.168.66.10  sysctl        Fail    will try to set 'net.core.somaxconn = 32768'
192.168.66.10  sysctl        Fail    will try to set 'net.ipv4.tcp_syncookies = 0'
192.168.66.10  sysctl        Fail    will try to set 'vm.swappiness = 0'+ Try to apply changes to fix failed checks
+ Try to apply changes to fix failed checks
+ Try to apply changes to fix failed checks
+ Try to apply changes to fix failed checks- Applying changes on 192.168.66.20 ... Done- Applying changes on 192.168.66.21 ... Done- Applying changes on 192.168.66.10 ... Done
更具提示修改上面的fail选项
sudo yum install -y numactl
#修改下资源配置(每一台机器都修改下)
sudo vi /etc/sysctl.conf
fs.file-max = 1000000
net.core.somaxconn = 32768
net.ipv4.tcp_syncookies = 0
vm.swappiness = 0正常情况下在执行(如果没有错误了那么就可以进行下一步了)
tiup cluster check ./topology.yaml --apply --user root -p 部署集群
前提配置下root的ssh免密
ssh-keygen
ssh-copy-id 192.168.66.10
ssh-copy-id 192.168.66.20
ssh-copy-id 192.168.66.21
#部署集群
tiup cluster deploy tidb-deploy v6.5.1 ./topology.yaml --user root -p输出结果如下
[root@master ~]# tiup cluster deploy tidb-deploy  v6.5.1 ./topology.yaml --user root -p
tiup is checking updates for component cluster ...
Starting component `cluster`: /root/.tiup/components/cluster/v1.11.3/tiup-cluster deploy tidb-deploy v6.5.1 ./topology.yaml --user root -p
Input SSH password: + Detect CPU Arch Name- Detecting node 192.168.66.10 Arch info ... Done- Detecting node 192.168.66.20 Arch info ... Done- Detecting node 192.168.66.21 Arch info ... Done+ Detect CPU OS Name- Detecting node 192.168.66.10 OS info ... Done- Detecting node 192.168.66.20 OS info ... Done- Detecting node 192.168.66.21 OS info ... Done
Please confirm your topology:
Cluster type:    tidb
Cluster name:    tidb-deploy
Cluster version: v6.5.1
Role          Host           Ports                            OS/Arch       Directories
----          ----           -----                            -------       -----------
pd            192.168.66.10  2379/2380                        linux/x86_64  /tidb-deploy/pd-2379,/tidb-data/pd-2379
pd            192.168.66.20  2379/2380                        linux/x86_64  /tidb-deploy/pd-2379,/tidb-data/pd-2379
pd            192.168.66.21  2379/2380                        linux/x86_64  /tidb-deploy/pd-2379,/tidb-data/pd-2379
tikv          192.168.66.10  20160/20180                      linux/x86_64  /tidb-deploy/tikv-20160,/tidb-data/tikv-20160
tikv          192.168.66.20  20160/20180                      linux/x86_64  /tidb-deploy/tikv-20160,/tidb-data/tikv-20160
tikv          192.168.66.21  20160/20180                      linux/x86_64  /tidb-deploy/tikv-20160,/tidb-data/tikv-20160
tidb          192.168.66.10  4000/10080                       linux/x86_64  /tidb-deploy/tidb-4000
tiflash       192.168.66.10  9000/8123/3930/20170/20292/8234  linux/x86_64  /tidb-deploy/tiflash-9000,/tidb-data/tiflash-9000
prometheus    192.168.66.20  9090/12020                       linux/x86_64  /tidb-deploy/prometheus-9090,/tidb-data/prometheus-9090
grafana       192.168.66.20  3000                             linux/x86_64  /tidb-deploy/grafana-3000
alertmanager  192.168.66.20  9093/9094                        linux/x86_64  /tidb-deploy/alertmanager-9093,/tidb-data/alertmanager-9093
Attention:1. If the topology is not what you expected, check your yaml file.2. Please confirm there is no port/directory conflicts in same host.
Do you want to continue? [y/N]: (default=N) y
+ Generate SSH keys ... Done
+ Download TiDB components- Download pd:v6.5.1 (linux/amd64) ... Done- Download tikv:v6.5.1 (linux/amd64) ... Done- Download tidb:v6.5.1 (linux/amd64) ... Done- Download tiflash:v6.5.1 (linux/amd64) ... Done- Download prometheus:v6.5.1 (linux/amd64) ... Done- Download grafana:v6.5.1 (linux/amd64) ... Done- Download alertmanager: (linux/amd64) ... Done- Download node_exporter: (linux/amd64) ... Done- Download blackbox_exporter: (linux/amd64) ... Done
+ Initialize target host environments- Prepare 192.168.66.10:22 ... Done- Prepare 192.168.66.20:22 ... Done- Prepare 192.168.66.21:22 ... Done
+ Deploy TiDB instance- Copy pd -> 192.168.66.10 ... Done- Copy pd -> 192.168.66.20 ... Done- Copy pd -> 192.168.66.21 ... Done- Copy tikv -> 192.168.66.10 ... Done- Copy tikv -> 192.168.66.20 ... Done- Copy tikv -> 192.168.66.21 ... Done- Copy tidb -> 192.168.66.10 ... Done- Copy tiflash -> 192.168.66.10 ... Done- Copy prometheus -> 192.168.66.20 ... Done- Copy grafana -> 192.168.66.20 ... Done- Copy alertmanager -> 192.168.66.20 ... Done- Deploy node_exporter -> 192.168.66.10 ... Done- Deploy node_exporter -> 192.168.66.20 ... Done- Deploy node_exporter -> 192.168.66.21 ... Done- Deploy blackbox_exporter -> 192.168.66.10 ... Done- Deploy blackbox_exporter -> 192.168.66.20 ... Done- Deploy blackbox_exporter -> 192.168.66.21 ... Done
+ Copy certificate to remote host
+ Init instance configs- Generate config pd -> 192.168.66.10:2379 ... Done- Generate config pd -> 192.168.66.20:2379 ... Done- Generate config pd -> 192.168.66.21:2379 ... Done- Generate config tikv -> 192.168.66.10:20160 ... Done- Generate config tikv -> 192.168.66.20:20160 ... Done- Generate config tikv -> 192.168.66.21:20160 ... Done- Generate config tidb -> 192.168.66.10:4000 ... Done- Generate config tiflash -> 192.168.66.10:9000 ... Done- Generate config prometheus -> 192.168.66.20:9090 ... Done- Generate config grafana -> 192.168.66.20:3000 ... Done- Generate config alertmanager -> 192.168.66.20:9093 ... Done
+ Init monitor configs- Generate config node_exporter -> 192.168.66.20 ... Done- Generate config node_exporter -> 192.168.66.21 ... Done- Generate config node_exporter -> 192.168.66.10 ... Done- Generate config blackbox_exporter -> 192.168.66.21 ... Done- Generate config blackbox_exporter -> 192.168.66.10 ... Done- Generate config blackbox_exporter -> 192.168.66.20 ... Done
Enabling component pdEnabling instance 192.168.66.21:2379Enabling instance 192.168.66.10:2379Enabling instance 192.168.66.20:2379Enable instance 192.168.66.20:2379 successEnable instance 192.168.66.21:2379 successEnable instance 192.168.66.10:2379 success
Enabling component tikvEnabling instance 192.168.66.21:20160Enabling instance 192.168.66.10:20160Enabling instance 192.168.66.20:20160Enable instance 192.168.66.20:20160 successEnable instance 192.168.66.21:20160 successEnable instance 192.168.66.10:20160 success
Enabling component tidbEnabling instance 192.168.66.10:4000Enable instance 192.168.66.10:4000 success
Enabling component tiflashEnabling instance 192.168.66.10:9000Enable instance 192.168.66.10:9000 success
Enabling component prometheusEnabling instance 192.168.66.20:9090Enable instance 192.168.66.20:9090 success
Enabling component grafanaEnabling instance 192.168.66.20:3000Enable instance 192.168.66.20:3000 success
Enabling component alertmanagerEnabling instance 192.168.66.20:9093Enable instance 192.168.66.20:9093 success
Enabling component node_exporterEnabling instance 192.168.66.21Enabling instance 192.168.66.10Enabling instance 192.168.66.20Enable 192.168.66.20 successEnable 192.168.66.21 successEnable 192.168.66.10 success
Enabling component blackbox_exporterEnabling instance 192.168.66.21Enabling instance 192.168.66.10Enabling instance 192.168.66.20Enable 192.168.66.21 successEnable 192.168.66.20 successEnable 192.168.66.10 success
Cluster `tidb-deploy` deployed successfully, you can start it with command: `tiup cluster start tidb-deploy --init`
查看TiUP管理集群情况
[root@master ~]# tiup cluster list
tiup is checking updates for component cluster ...
Starting component `cluster`: /root/.tiup/components/cluster/v1.11.3/tiup-cluster list
Name         User  Version  Path                                              PrivateKey
----         ----  -------  ----                                              ----------
tidb-deploy  tidb  v6.5.1   /root/.tiup/storage/cluster/clusters/tidb-deploy  /root/.tiup/storage/cluster/clusters/tidb-deploy/ssh/id_rsa
检查集群情况
[root@master ~]# tiup cluster display tidb-deploy
tiup is checking updates for component cluster ...
Starting component `cluster`: /root/.tiup/components/cluster/v1.11.3/tiup-cluster display tidb-deploy
Cluster type:       tidb
Cluster name:       tidb-deploy
Cluster version:    v6.5.1
Deploy user:        tidb
SSH type:           builtin
Grafana URL:        http://192.168.66.20:3000
ID                   Role          Host           Ports                            OS/Arch       Status  Data Dir                      Deploy Dir
--                   ----          ----           -----                            -------       ------  --------                      ----------
192.168.66.20:9093   alertmanager  192.168.66.20  9093/9094                        linux/x86_64  Down    /tidb-data/alertmanager-9093  /tidb-deploy/alertmanager-9093
192.168.66.20:3000   grafana       192.168.66.20  3000                             linux/x86_64  Down    -                             /tidb-deploy/grafana-3000
192.168.66.10:2379   pd            192.168.66.10  2379/2380                        linux/x86_64  Down    /tidb-data/pd-2379            /tidb-deploy/pd-2379
192.168.66.20:2379   pd            192.168.66.20  2379/2380                        linux/x86_64  Down    /tidb-data/pd-2379            /tidb-deploy/pd-2379
192.168.66.21:2379   pd            192.168.66.21  2379/2380                        linux/x86_64  Down    /tidb-data/pd-2379            /tidb-deploy/pd-2379
192.168.66.20:9090   prometheus    192.168.66.20  9090/12020                       linux/x86_64  Down    /tidb-data/prometheus-9090    /tidb-deploy/prometheus-9090
192.168.66.10:4000   tidb          192.168.66.10  4000/10080                       linux/x86_64  Down    -                             /tidb-deploy/tidb-4000
192.168.66.10:9000   tiflash       192.168.66.10  9000/8123/3930/20170/20292/8234  linux/x86_64  N/A     /tidb-data/tiflash-9000       /tidb-deploy/tiflash-9000
192.168.66.10:20160  tikv          192.168.66.10  20160/20180                      linux/x86_64  N/A     /tidb-data/tikv-20160         /tidb-deploy/tikv-20160
192.168.66.20:20160  tikv          192.168.66.20  20160/20180                      linux/x86_64  N/A     /tidb-data/tikv-20160         /tidb-deploy/tikv-20160
192.168.66.21:20160  tikv          192.168.66.21  20160/20180                      linux/x86_64  N/A     /tidb-data/tikv-20160         /tidb-deploy/tikv-20160
启动集群(遇到错误及解决办法)
#启动集群
tiup cluster start tidb-deploy
#启动集群的时候遇到下面错误(权限错误,由于启动的用户是tidb所以没有权限操作/tmp里面相应的目录文件,设置下权限删除就好了)
[2023/03/25 15:48:32.128 +08:00] [FATAL] [main.go:787] ["failed to create the server"] [error="failed to cleanup stale Unix socket file /tmp/tidb-4000.sock: dial unix /tmp/tidb-4000.sock: connect: permission denied"] [stack="main.createServer\\n\\t/home/jenkins/agent/workspace/build-common/go/src/github.com/pingcap/tidb/tidb-server/main.go:787\\nmain.main\\n\\t/home/jenkins/agent/workspace/build-common/go/src/github.com/pingcap/tidb/tidb-server/main.go:219\\nruntime.main\\n\\t/usr/local/go/src/runtime/proc.go:250"] [stack="main.createServer\\n\\t/home/jenkins/agent/workspace/build-common/go/src/github.com/pingcap/tidb/tidb-server/main.go:787\\nmain.main\\n\\t/home/jenkins/agent/workspace/build-common/go/src/github.com/pingcap/tidb/tidb-server/main.go:219\\nruntime.main\\n\\t/usr/local/go/src/runtime/proc.go:250"]
tiup cluster stop tidb-deploy
chmod -R 777 /tmp
rm -rf /tmp/tidb-4000.sock
tiup cluster display tidb-deploy
下面表示成功启动
[root@master tmp]# tiup cluster display tidb-deploy
tiup is checking updates for component cluster ...
Starting component `cluster`: /root/.tiup/components/cluster/v1.11.3/tiup-cluster display tidb-deploy
Cluster type:       tidb
Cluster name:       tidb-deploy
Cluster version:    v6.5.1
Deploy user:        tidb
SSH type:           builtin
Dashboard URL:      http://192.168.66.20:2379/dashboard
Grafana URL:        http://192.168.66.20:3000
ID                   Role          Host           Ports                            OS/Arch       Status  Data Dir                      Deploy Dir
--                   ----          ----           -----                            -------       ------  --------                      ----------
192.168.66.20:9093   alertmanager  192.168.66.20  9093/9094                        linux/x86_64  Up      /tidb-data/alertmanager-9093  /tidb-deploy/alertmanager-9093
192.168.66.20:3000   grafana       192.168.66.20  3000                             linux/x86_64  Up      -                             /tidb-deploy/grafana-3000
192.168.66.10:2379   pd            192.168.66.10  2379/2380                        linux/x86_64  Up      /tidb-data/pd-2379            /tidb-deploy/pd-2379
192.168.66.20:2379   pd            192.168.66.20  2379/2380                        linux/x86_64  Up|UI   /tidb-data/pd-2379            /tidb-deploy/pd-2379
192.168.66.21:2379   pd            192.168.66.21  2379/2380                        linux/x86_64  Up|L    /tidb-data/pd-2379            /tidb-deploy/pd-2379
192.168.66.20:9090   prometheus    192.168.66.20  9090/12020                       linux/x86_64  Up      /tidb-data/prometheus-9090    /tidb-deploy/prometheus-9090
192.168.66.10:4000   tidb          192.168.66.10  4000/10080                       linux/x86_64  Up      -                             /tidb-deploy/tidb-4000
192.168.66.10:9000   tiflash       192.168.66.10  9000/8123/3930/20170/20292/8234  linux/x86_64  Up      /tidb-data/tiflash-9000       /tidb-deploy/tiflash-9000
192.168.66.10:20160  tikv          192.168.66.10  20160/20180                      linux/x86_64  Up      /tidb-data/tikv-20160         /tidb-deploy/tikv-20160
192.168.66.20:20160  tikv          192.168.66.20  20160/20180                      linux/x86_64  Up      /tidb-data/tikv-20160         /tidb-deploy/tikv-20160
192.168.66.21:20160  tikv          192.168.66.21  20160/20180                      linux/x86_64  Up      /tidb-data/tikv-20160         /tidb-deploy/tikv-20160
Total nodes: 11
连接集群
mysql --comments --host 192.168.66.10 --port 4000 -u root -p