CentOS7(一)安装和基础配置

文章目录
环境变量参考文章:Centos7环境变量设置
一、CentOs 7 下载与安装
官网地址:CentOS官网地址
百度网盘下载地址:链接: https://pan.baidu.com/s/1KELOdji6YuS6eIzCTFzr4g 提取码: qiao
二、安装过程
使用虚拟机或者直接pe引导安装
三、安装Ohmyzsh
不想用就只装一个 命令补全。
yum install bash-completion -y
参考:Centos7 安装oh my zsh
主题选择我一般常用: af-magic
1、基础软件安装
1. 安装zsh
yum install zsh
2. 安装git
yum install git
3. 安装wget
yum install wget
4. 安装vim
yum install vim
5. 下载 zsh 安装脚本
# gitee 源
wget https://gitee.com/mirrors/oh-my-zsh/raw/master/tools/install.sh
2、编辑 install.sh
vim install.sh
找到以下部分
# Default settings
ZSH=${ZSH:-~/.oh-my-zsh}
REPO=${REPO:-ohmyzsh/ohmyzsh}
REMOTE=${REMOTE:-https://github.com/${REPO}.git}
BRANCH=${BRANCH:-master}
把
REPO=${REPO:-ohmyzsh/ohmyzsh}
REMOTE=${REMOTE:-https://github.com/${REPO}.git}
替换为
REPO=${REPO:-mirrors/oh-my-zsh}
REMOTE=${REMOTE:-https://gitee.com/${REPO}.git}
## 3、编辑后保存, 运行安装```bash
# 赋予可执行权限
chmod +x install.sh
# 运行
sh install.sh
4、修改仓库地址
cd ~/.oh-my-zsh
git remote set-url origin https://gitee.com/mirrors/oh-my-zsh.git
git pull
5、修改shell
# 查看当前 shell 列表
cat /etc/shells
# 查看当前使用的 shell
echo $SHELL
# 切换shell - 确认要切换的shell是列表中有的
chsh -s /bin/zsh
6、编辑主题和插件
vim ~/.zshrc
主题:https://github.com/ohmyzsh/ohmyzsh/wiki/Themes
ZSH_THEME="af-magic"
插件
plugins=(git
sublime
z
web-search
wd
zsh-autosuggestions
extract
zsh-syntax-highlighting)
# 执行
git clone https://github.com/zsh-users/zsh-autosuggestions ~/.oh-my-zsh/custom/plugins/zsh-autosuggestions
git clone https://github.com/zsh-users/zsh-syntax-highlighting.git ~/.oh-my-zsh/custom/plugins/zsh-syntax-highlighting
7、刷新配置
source ~/.zshrc
8、创建用户级别配置文件
1. 进入家目录
cd ~
2. 创建 .bash_profile 配置文件
touch ./.bash_profile
将文件内容清空
3. 编辑 ~/.zshrc 在结尾添加
source /root/.bash_profile
如果遇到 打印了一堆,history命令执行 和一个命令未找到
可以将.bash_profile文件删除后,重新创建
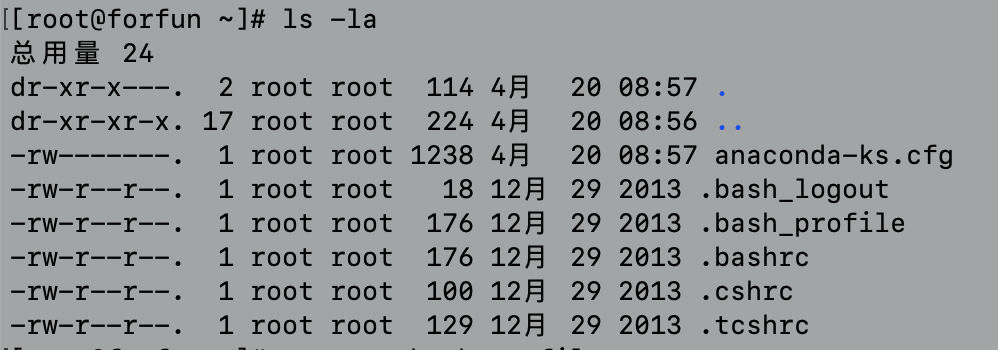
- 环境变量执行顺序
/etc/profile
/etc/profile.d
/etc/bashrc
# 当用户登录时执行,每个用户都可以使用该文件来配置专属于自己的环境变量。
用户的.bash_profile
# 当用户登录时以及每次打开新的Shell时该文件都将被读取,不推荐在里面配置用户专用的环境变量,
# 因为每开一个Shell,该文件都会被读取一次,效率肯定受影响。
用户的.bashrc
推荐在第四个文件中执行

- .bash_logout
当每次退出系统(退出bash shell)时执行该文件。 - .bash_history
保存了当前用户使用过的历史命令。
四、研发环境配置
常用环境变量
-
PATH
可执行程序的搜索目录,可执行程序包括Linux系统命令和用户的应用程序,PATH变量的具体用法本文后面的章节中有详细的介绍。
-
LANG
Linux系统的语言、地区、字符集,LANG变量的具体用法本文后面的章节中有详细的介绍。 -
HOSTNAME
服务器的主机名。 -
SHELL
用户当前使用的Shell解析器。 -
HISTSIZE
保存历史命令的数目。 -
USER
当前登录用户的用户名。 -
HOME
当前登录用户的主目录。 -
PWD
当前工作目录。 -
LD_LIBRARY_PATH
C/C++语言动态链接库文件搜索的目录,它不是Linux缺省的环境变量,但对C/C++程序员来说非常重要,具体用法本文后面的章节中有详细的介绍。 -
CLASSPATH
JAVA语言库文件搜索的目录,它也不是Linux缺省的环境变量,但对JAVA程序员来说非常重要
四、centos不能访问github,速度慢
获取GitHub官方CDN地址:
首先,打开
https://www.ipaddress.com/
查询以下三个链接的DNS解析地址
github.com
assets-cdn.github.com
github.global.ssl.fastly.net
接着,打开系统 /etc下的 hosts文件,需要切入到root用户修改,并在末尾添加三行记录并保存
windows文件位置:C:\\Windows\\System32\\drivers\\etc\\hosts
140.82.113.3 github.com
185.199.108.153 assets-cdn.github.com
199.232.69.194 github.global.ssl.fastly.net
刷新系统DNS缓存
windows运行 ipconfig /flushdns 手动刷新系统DNS缓存。
mac系统修改完hosts文件,保存并退出就可以了.不要要多一步刷新操作.
centos系统执行 /etc/init.d/network restart命令 使得hosts生效
参考链接:centos 配置github加速 - 简书 (jianshu.com)
五、防火墙相关
# 安装防火墙
yum install firewalld firewalld-config# 防火墙状态,是否开启
systemctl status firewalld# 防火墙开启
systemctl start firewalld# 防火墙关闭
systemctl stop firewalld# 设置开机启动防火墙
systemctl enable firewalld# 重启防火墙命令
service firewalld restart
firewall-cmd --reload# 开启常用端口
firewall-cmd --zone=public --add-port=80/tcp --permanent
firewall-cmd --zone=public --add-port=443/tcp --permanent
firewall-cmd --zone=public --add-port=22/tcp --permanent
firewall-cmd --zone=public --add-port=21/tcp --permanent
firewall-cmd --zone=public --add-port=53/udp --permanent# 批量开启端口
firewall-cmd --zone=public --add-port=4400-4600/udp --permanent
firewall-cmd --zone=public --add-port=4400-4600/tcp --permanent# 查看开启的端口列表
firewall-cmd --permanent --list-port
用的是 iptables ?
1、查看防火墙状态
service iptables status2、暂时关闭防火墙
service iptables stop3、永久关闭防火墙
chkconfig iptables off4、重启防火墙
service iptables restart5、开放指定端口
vi /etc/sysconfig/iptables
编辑文件,然后添加。
iptables -I INPUT -p tcp --dport 端口号 -j ACCEPT
保存配置
service iptables save重启防火墙
service iptables restart
六、wget 下载速度慢
通过更换国内源解决,之前默认时国外源,下载速度慢:
cd /etc/yum.repos.d/mv CentOS-Base.repo CentOS-Base.repo.back #建议备份或者改名wget -O CentOS-Base.repo http://mirrors.aliyun.com/repo/Centos-7.repo yum makecache #生成缓存
