Springboot整合redis实现缓存

此次笔记是在实现了数据库的增删改查操作的基础上进行的,因此需要准备数据库、数据表,以及实现相对应的服务层、持久层、控制层。可参考之前的笔记Spring Boot整合 druid、Mybatis-plus
一、Redis安装
Redis 是完全开源免费的,遵守BSD协议,是一个高性能(NOSQL)的key-value数据库,Redis是一个开源的使用ANSI C语言编写、支持网络、可基于内存亦可持久化的日志型、Key-Value数据库,并提供多种语言的API。
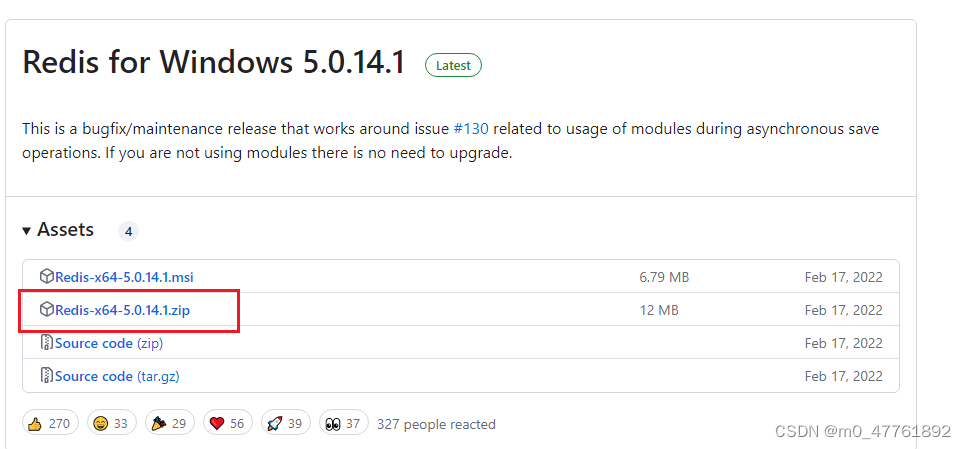
1.redis下载,
在GitHub上下载redis,下载地址:https://github.com/tporadowski/redis/releases,如图所示
2. Redis服务开启与连接配置
Redis安装文件为压缩文件,不需要安装,解压缩到自定义目录即可,不需要额外配置。
2.1 开启服务。进入解压目录,双击运行redis-server.exe,即可开启服务
2.2 打开终端。双击运行 redis-cli.exe,即可开启客户端工具。
3. Redis可视化工具安装。
由于redis-cli.exe打开的终端界面不友好,官方和第三放均推出了可视化管理工具。
Redis DeskTop Manager官方版是一款开源软件,支持通过SSH Tunnel连接,支持windows、mac等多平台。自从进入了0.9.9版本就开始付费使用或者贡献代码获得免费使用期限。
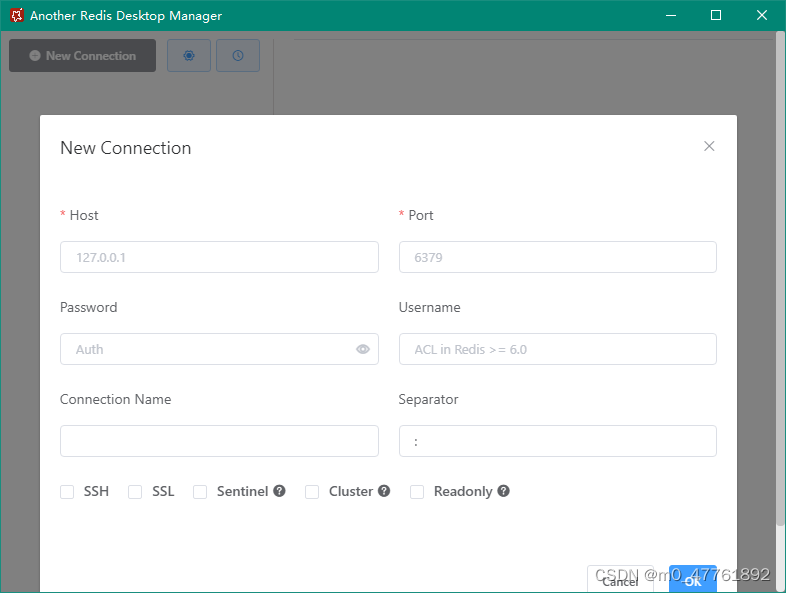
Another Redis DeskTop Manager作为一款基于nodejs开发的免费的Redis可视化管理工具,可以运行在Windows、Linux、Mac平台,而且是开源免费应用,=推荐使用。官方地址:https://gitee.com/qishibo/AnotherRedisDesktopManager,下载安装后,打开界面如下。
二、使用springboot整个redis
1. 添加依赖。
在项目的pom.xml文件中添加Redis依赖
<dependency><groupId>org.springframework.boot</groupId><artifactId>spring-boot-starter-redis</artifactId>
</dependency>
2. Redis服务连接配置
在项目的全局配置文件application.properties中添加redis服务的连接配置,这些配置与可视化工具连接时的参数基本一致。代码如下
#redis服务地址
spring.redis.host=127.0.0.1
#redis服务器连接端口
spring.redis.port=6379
#redis服务器连接密码,默认为空
spring.redis.password=
三、使用注解方式实现Redis缓存
1 添加缓存注解
在项目的启动类上添加注解,开启基于注解的的缓存支持
@EnableCaching
@SpringBootApplication
// 加载 properties 配置文件
@PropertySource(value = {"classpath:/application-druid.properties","classpath:/application-mybatisp.properties"})
public class   CrudApplication {public static void main(String[] args) {SpringApplication.run(CrudApplication.class, args);}
}
2 实体类序列化
实体类Stu必须实现序列化 implements Serializable implements Serializable
package dzxx.crud.pojo;import com.baomidou.mybatisplus.annotation.*;
import lombok.AllArgsConstructor;
import lombok.Data;
import java.io.Serializable;
import java.util.Date;@Data
@TableName(value = "stu")
@NoArgsConstructor
@AllArgsConstructor
public class Stu implements Serializable {@TableId(value = "id",type = IdType.AUTO)// Integer默认值是null,可以区分未赋值和值为0的情况.需要区分未赋值的情况下用Integerprivate Integer id;private String name;private String pass;private int age;    @TableField( fill=FieldFill.INSERT)private Date currenttime;  @TableField(fill = FieldFill.INSERT_UPDATE)private Date modifytime;//注解@version ,用于测试乐观锁,@Versionprivate Integer version;
}
3.在service类或者方法上添加注解。
创建service包,并创建接口StuService.java 及实现类StuServiceImpl.java
在查找方法、更新方法和删除方法上添加@Cacheable、@CachePut、@CacheEvict注解实现缓存存储、缓存更新和缓存删除使。
1.@Cacheable ,作用与类或者方法上,通常用在数据查询方法上。用于对方法的返回结果进行缓存存储。执行顺序是:先进行缓存查询,如果为空则执行方法查询数据库,并以形参:返回结果的键值对形式将返回结果缓存;如果缓存中有数据,不执行方法查询,直接使用缓存数据。
通过刷新浏览器,在idea终端查看是否多次执行sql语句进行验证
- @CachePut ,作用于类上或者方法上,通常用在数据更新上,用于更新缓存数据。执行顺序是:首先执行方法将
新的数据更新到数据库,然后将新的数据更新到缓存中 - @CacheEvict ,作用于类上或者方法上,通常用在数据删除上,作用是删除缓存数据。执行顺序是:首先执行方法删除数据库中的数据,然后再清除缓存中的数据
package dzxx.crud.service;
import com.baomidou.mybatisplus.extension.service.IService;
import dzxx.crud.pojo.Stu;
import java.util.List;
public interface StuService extends IService<Stu> {public Stu findById(int id);public Stu updateStu(Stu stu);
}
package dzxx.crud.service.serviceImpl;import com.baomidou.mybatisplus.core.conditions.query.QueryWrapper;
import com.baomidou.mybatisplus.core.conditions.update.UpdateWrapper;
import com.baomidou.mybatisplus.extension.service.impl.ServiceImpl;
import dzxx.crud.pojo.Stu;
import dzxx.crud.repository.StuMapper;
import dzxx.crud.service.StuService;
import io.github.ms100.cacheasmulti.cache.annotation.CacheAsMulti;
import org.springframework.beans.factory.annotation.Autowired;
import org.springframework.cache.annotation.CachePut;
import org.springframework.cache.annotation.Cacheable;
import org.springframework.stereotype.Service;
import java.util.ArrayList;
import java.util.List;@Service
public class StuServiceImpl extends ServiceImpl<StuMapper,Stu> implements StuService {@Autowired(required = false)StuMapper stuMapper;@Override@Cacheable(cacheNames = "stu")public Stu findById(int id) {  // //用 id 生成缓存 key ,用 Stu 为缓存值//如果没有形参则key的值为默认的SimpleKey[]Stu stu = stuMapper.selectById(id);return stu;}@CachePut(cacheNames = "stu",key = "#result.id")@Overridepublic Stu updateStu(Stu stu) {UpdateWrapper<Stu> wrapper=new UpdateWrapper<>();wrapper.eq("id", stu.getId());int update = stuMapper.update(stu,wrapper);   //将新的数据更新到数据库中return stu;   //将新的数据存入缓存中,}
}
4.在controller包中创建控制类
创建控制类StuController.java 文件并添加方法和映射路径,调用service方法。
package dzxx.crud.controller;
import dzxx.crud.pojo.Stu;
import dzxx.crud.service.StuService;
import org.springframework.beans.factory.annotation.Autowired;
import org.springframework.web.bind.annotation.CrossOrigin;
import org.springframework.web.bind.annotation.GetMapping;
import org.springframework.web.bind.annotation.RestController;@RestController
public class StuController {@Autowired(required = false)private StuService stuService;@GetMapping("/getbyId")public Stu findById() {Stu stu = stuService.findById(2);return stu;}@GetMapping("/updateStu")public Stu updateStu() {Stu stu=new Stu(2,"zhangsan","rewr",22,null,null,1);stuService.updateStu(stu);return stu;}
}
5.批量缓存
SpringBoot 的缓存注解实现只能操作单个缓存,并不支持批量。想要实现批量操作,可以引入一个依赖 cache-as-multi。通过在形参上添加注解 @CacheAsMuti,指明要生成批量缓存key的参数,就可以实现缓存的批量操作。 详细用法参考Git:https://github.com/ms100/cache-as-multi
5.1 在项目的pom.xml文件中添加cache-as-multi依赖
<dependency><groupId>io.github.ms100</groupId><artifactId>cache-as-multi</artifactId><version>1.1.3</version></dependency>
5.2 在service包中的接口和实现类中添加方法
由于要批量生成key,所以需要通过getIds()接口来获取所有的id, getAll(List ids)和getAll();作为对比。
public List<String> getIds();public List<Stu> getAll(List<String> ids);public List<Stu> getAll();
@Cacheable(cacheNames = "stu")@Overridepublic List<Stu> getAll() {//查询的结果列表作为value存入缓存,key为SimpleKey[]return stuMapper.selectList(null);}@Cacheable(cacheNames = "stu")public List<String> getIds(){List<String> ids=new ArrayList<>();List<Stu> lists = stuMapper.selectList(new QueryWrapper<Stu>().select("id"));lists.forEach(i->{ids.add(i.getId().toString());});return ids;}@Cacheable(cacheNames = "stu")public List<Stu> getAll(@CacheAsMulti List<String> ids) {//@CacheAsMulti注解 为 ids 集合中每个元素分别生成缓存 key// 用 List 中对应的值作为缓存值return stuMapper.selectList(null);}
5.3在控制层添加映射路径,并调用service方法。
@GetMapping("/getAll")public List<Stu> getAll(){return stuService.getAll();}@GetMapping("/getAllBatch")public List<Stu> getAABatch(){List<String> ids = stuService.getIds();return stuService.getAll(ids);}
5.4 运行效果图对比
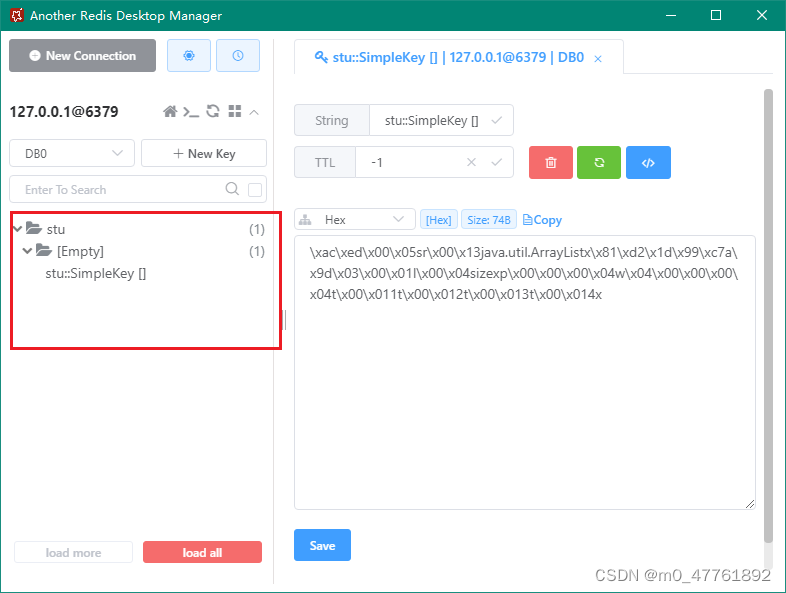
注解实现只能操作单个缓存,返回的对象列表作为value值。
在形参上添加注解 @CacheAsMuti,指明要生成批量缓存key的参数,就可以实现缓存的批量操作。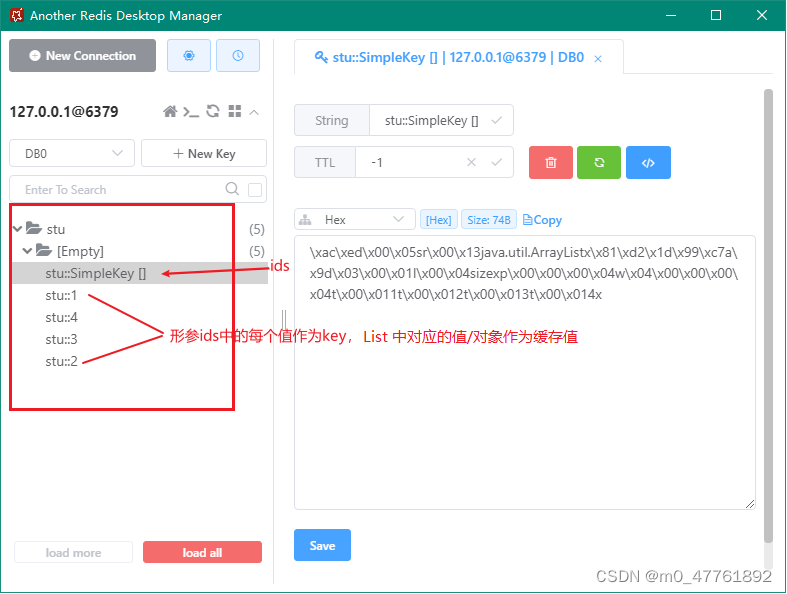
6 自定义序列化
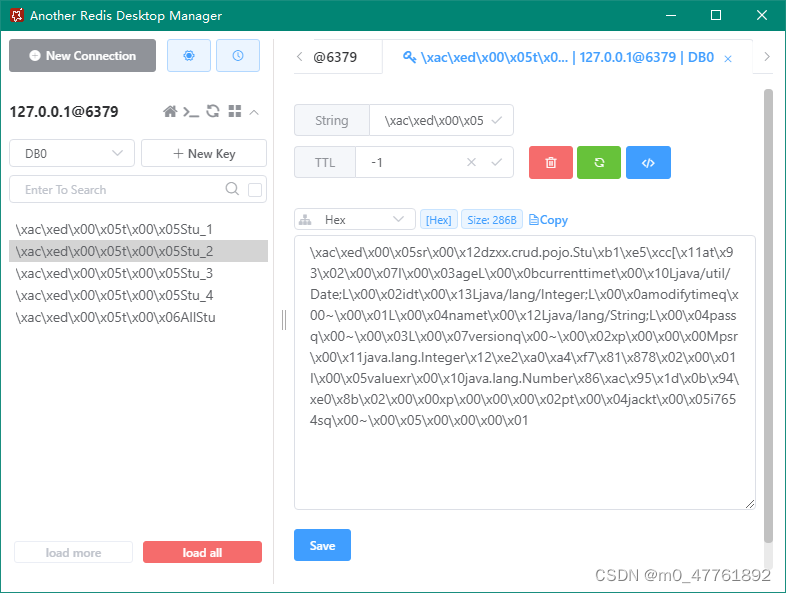
从上图可以看出,数据存储的格式是Hex,不便于使用查看和管理,因为默认的序列化方式是JDK序列化机制。所以我们可以自定义Json格式的序列化机制进行数据缓存管理
新建config包,并创建自定义配置类RedisConfig.java文件。
package dzxx.crud.config;import com.fasterxml.jackson.annotation.JsonAutoDetect;
import com.fasterxml.jackson.annotation.PropertyAccessor;
import com.fasterxml.jackson.databind.ObjectMapper;
import org.springframework.cache.annotation.CachingConfigurerSupport;
import org.springframework.context.annotation.Bean;
import org.springframework.context.annotation.Configuration;
import org.springframework.data.redis.cache.RedisCacheConfiguration;
import org.springframework.data.redis.cache.RedisCacheManager;
import org.springframework.data.redis.connection.RedisConnectionFactory;
import org.springframework.data.redis.serializer.Jackson2JsonRedisSerializer;
import org.springframework.data.redis.serializer.RedisSerializationContext;
import org.springframework.data.redis.serializer.RedisSerializer;
import org.springframework.data.redis.serializer.StringRedisSerializer;import javax.annotation.Resource;
import java.time.Duration;@Configuration
public class RedisConfig extends CachingConfigurerSupport {@Resourceprivate RedisConnectionFactory connectionFactory;//缓存管理器,针对基于注解的RedisTemplate进行自定义序列化机制改进@Beanpublic RedisCacheManager cacheManager(){RedisSerializer<String> stringRedisSerializer=new StringRedisSerializer();RedisCacheConfiguration config = RedisCacheConfiguration.defaultCacheConfig().entryTtl(Duration.ofDays(1)).serializeKeysWith(RedisSerializationContext.SerializationPair.fromSerializer(stringRedisSerializer)).serializeValuesWith(RedisSerializationContext.SerializationPair.fromSerializer(jsonSerializer())).disableCachingNullValues();return RedisCacheManager.builder(connectionFactory).cacheDefaults(config).build();}//缓存序列化策略private Jackson2JsonRedisSerializer<Object> jsonSerializer(){//使用json方式格式序列化对象,对缓存数据的key和value进行转换Jackson2JsonRedisSerializer<Object> jackson2JsonRedisSerializer=new Jackson2JsonRedisSerializer<Object>(Object.class);//解决查询缓存转换异常的问题ObjectMapper om=new ObjectMapper();om.setVisibility(PropertyAccessor.ALL,JsonAutoDetect.Visibility.ANY);om.enableDefaultTyping(ObjectMapper.DefaultTyping.NON_FINAL);jackson2JsonRedisSerializer.setObjectMapper(om);return jackson2JsonRedisSerializer;}
}
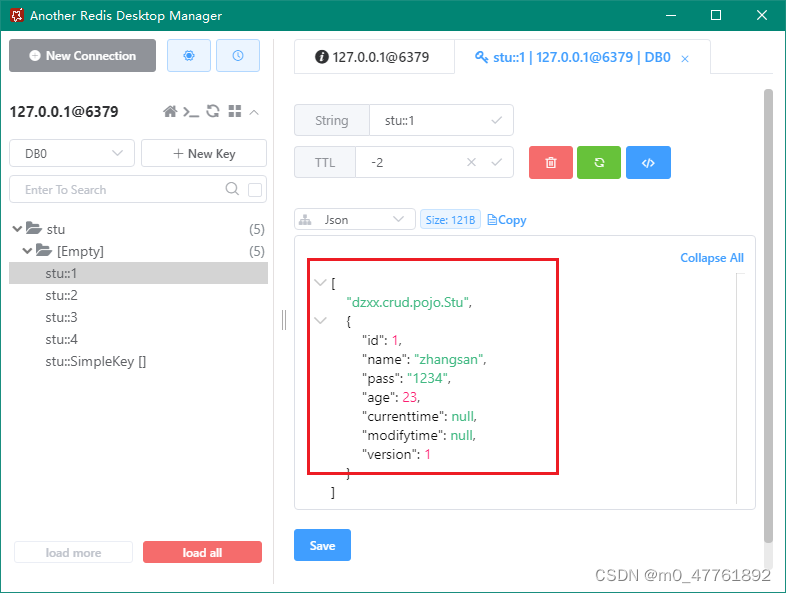
运行效果如图所示,可以看到以json格式存储到了缓存中。
四、使用API的方式实现Redis缓存
除了基于注解的方式实现缓存,也可以使用基于API的方式实现缓存
1. 创建service接口和实现类
新建接口ApiStuService.java和实现类ApiStuServiceImp.java
package dzxx.crud.service;import com.baomidou.mybatisplus.extension.service.IService;
import dzxx.crud.pojo.Stu;
import java.util.List;
public interface ApiStuService extends IService<Stu> {public Stu findById(int id);public Stu updateStu(Stu stu);public List<String> getIds();public List<Stu> getAll(List<String> ids);public List<Stu> getAll();
}
package dzxx.crud.service.serviceImpl;import com.baomidou.mybatisplus.core.conditions.update.UpdateWrapper;
import com.baomidou.mybatisplus.extension.service.impl.ServiceImpl;
import dzxx.crud.pojo.Stu;
import dzxx.crud.repository.StuMapper;
import dzxx.crud.service.ApiStuService;
import org.springframework.beans.factory.annotation.Autowired;
import org.springframework.data.redis.core.RedisTemplate;
import org.springframework.stereotype.Service;
import java.util.List;
import java.util.Objects;
import java.util.concurrent.TimeUnit;
public class ApiStuServiceImp extends ServiceImpl<StuMapper,Stu> implements ApiStuService {StuMapper stuMapper;private RedisTemplate redisTemplate;public Stu findById(int id) {Object object=redisTemplate.opsForValue().get(id);// Object object=redisTemplate.opsForValue().get("stu_"+id);if (object!=null) {return (Stu)object;}else{//缓存中没有此信息,进入数据库查询Stu stu=stuMapper.selectById(id);if (!Objects.isNull(stu)){redisTemplate.opsForValue().set("stu_"+id, stu,1,TimeUnit.DAYS);return stu;}elsereturn null;}}public Stu updateStu(Stu stu) {UpdateWrapper<Stu> wrapper=new UpdateWrapper<>();wrapper.eq("id", stu.getId());int update = stuMapper.update(stu,wrapper);redisTemplate.opsForValue().set("stu_"+stu.getId(), stu);return stu;}public List<String> getIds() {return null;}public List<Stu> getAll(List<String> ids) {return null;}public List<Stu> getAll() {List<Stu> redisStuList= (List<Stu>) redisTemplate.opsForValue().get("AllStu");if(redisStuList!=null){ //redis缓存中有全部数据System.out.println("redis。。。");return redisStuList;}else{ //缓存中没有此信息,进入数据库查询List<Stu> stuList = stuMapper.selectList(null);//全部数据作为value缓存redisTemplate.opsForValue().set("AllStu", stuList);// 遍历全部数据中的每行数据单独缓存,以便单独修改某条数据stuList.forEach(stu -> {redisTemplate.opsForValue().set("Stu_"+stu.getId(),stu );});System.out.println("数据库。。。");return stuList;}}
}
2. 创建controller方法
新建控制类ApiStuController.java,并添加映射路径
package dzxx.crud.controller;import dzxx.crud.pojo.Stu;
import dzxx.crud.service.ApiStuService;
import org.springframework.beans.factory.annotation.Autowired;
import org.springframework.web.bind.annotation.GetMapping;
import org.springframework.web.bind.annotation.RequestMapping;
import org.springframework.web.bind.annotation.RestController;import java.util.List;
("/api")
public class ApiStuController {(required = false)private ApiStuService apiStuService;("/getbyId")public Stu findById() {Stu stu = apiStuService.findById(2);return stu;}("/updateStu")public Stu updateStu() {Stu stu=new Stu(2,"jack","i7654",77,null,null,1);apiStuService.updateStu(stu);return stu;}("/getAll")public List<Stu> getAll(){return apiStuService.getAll();}
}3. 运行效果如图所示;
4 自定义序列化
从上图同样可以看出,数据存储的格式是Hex,我们可以自定义Json格式的序列化机制进行数据缓存管理
在配置类RedisConfig.java中添加以下方法。
//RedisTemplate 序列化方式,针对基于API的RedisTemplate进行自定义序列化机制改进@Beanpublic RedisTemplate<String ,Object> redisTemplate(){RedisTemplate<String,Object> redisTemplate=new RedisTemplate<>();redisTemplate.setConnectionFactory(connectionFactory);//设置redistemplate模板Api的序列化方式为jsonredisTemplate.setDefaultSerializer(jsonSerializer());return redisTemplate;}
运行效果如图所示
