搭建sentry来监控Django项目

sentry搭建
我的环境:
centos7,已安装docker和docker compose
下载最新zip包到 /usr/local/
https://github.com/getsentry/self-hosted/tags![]() https://github.com/getsentry/self-hosted/tags解压
https://github.com/getsentry/self-hosted/tags解压
unzip self-hosted-23.4.0.zip安装期间会提示是否上传,填n;然后会提示创建管理员账号密码;等待安装完成
cd self-hosted-23.4.0./install.sh报错解决:
- has active endpoint
重启docker解决 sudo service docker restart
- 其他
compose版本与sentry不兼容
ip+9000访问sentry服务,登录账号密码为安装时设置的
http://192.168.38.34:9000/

下一步到欢迎界面,直接点下一步
监控Django项目
安装sentry-sdk
pip install --upgrade sentry-sdkDjango项目中修改settings.py
import sentry_sdk
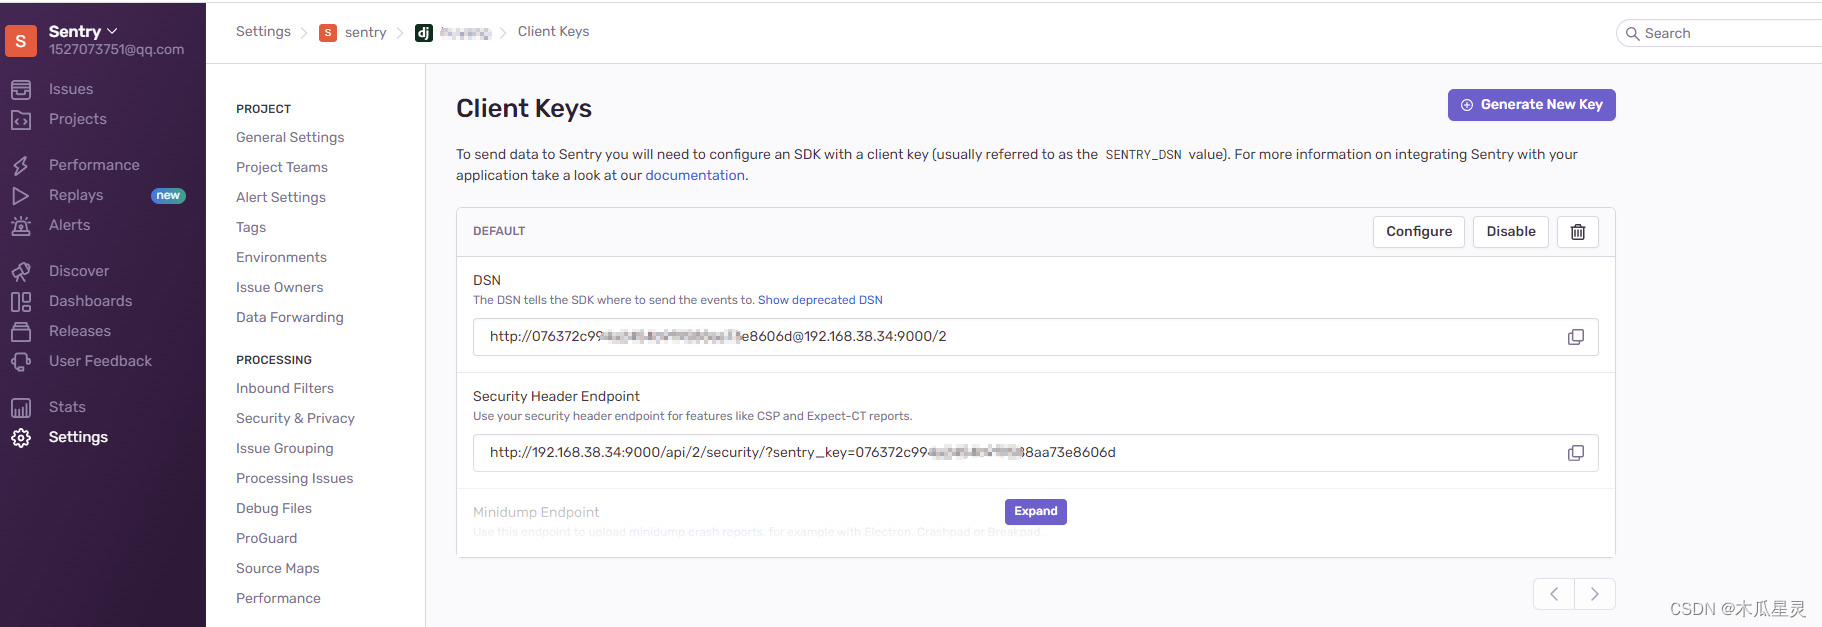
from sentry_sdk.integrations.django import DjangoIntegrationsentry_sdk.init(dsn="http://XXXXXXXXXXXXXXXXXXXXX@192.168.38.34:9000/2",integrations=[DjangoIntegration(),],# Set traces_sample_rate to 1.0 to capture 100%# of transactions for performance monitoring.# We recommend adjusting this value in production.traces_sample_rate=1.0,# If you wish to associate users to errors (assuming you are using# django.contrib.auth) you may enable sending PII data.send_default_pii=True
)
其中dsn在sentry中一个项目有一个唯一的dsn(客户端秘钥)
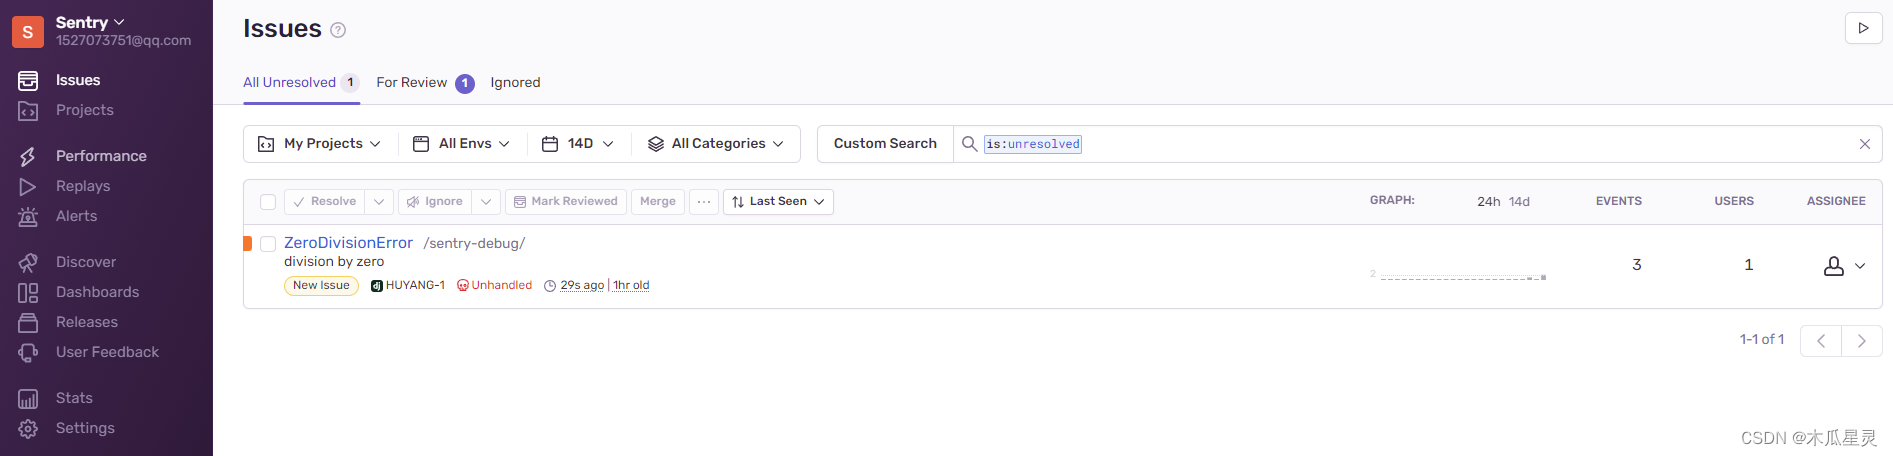
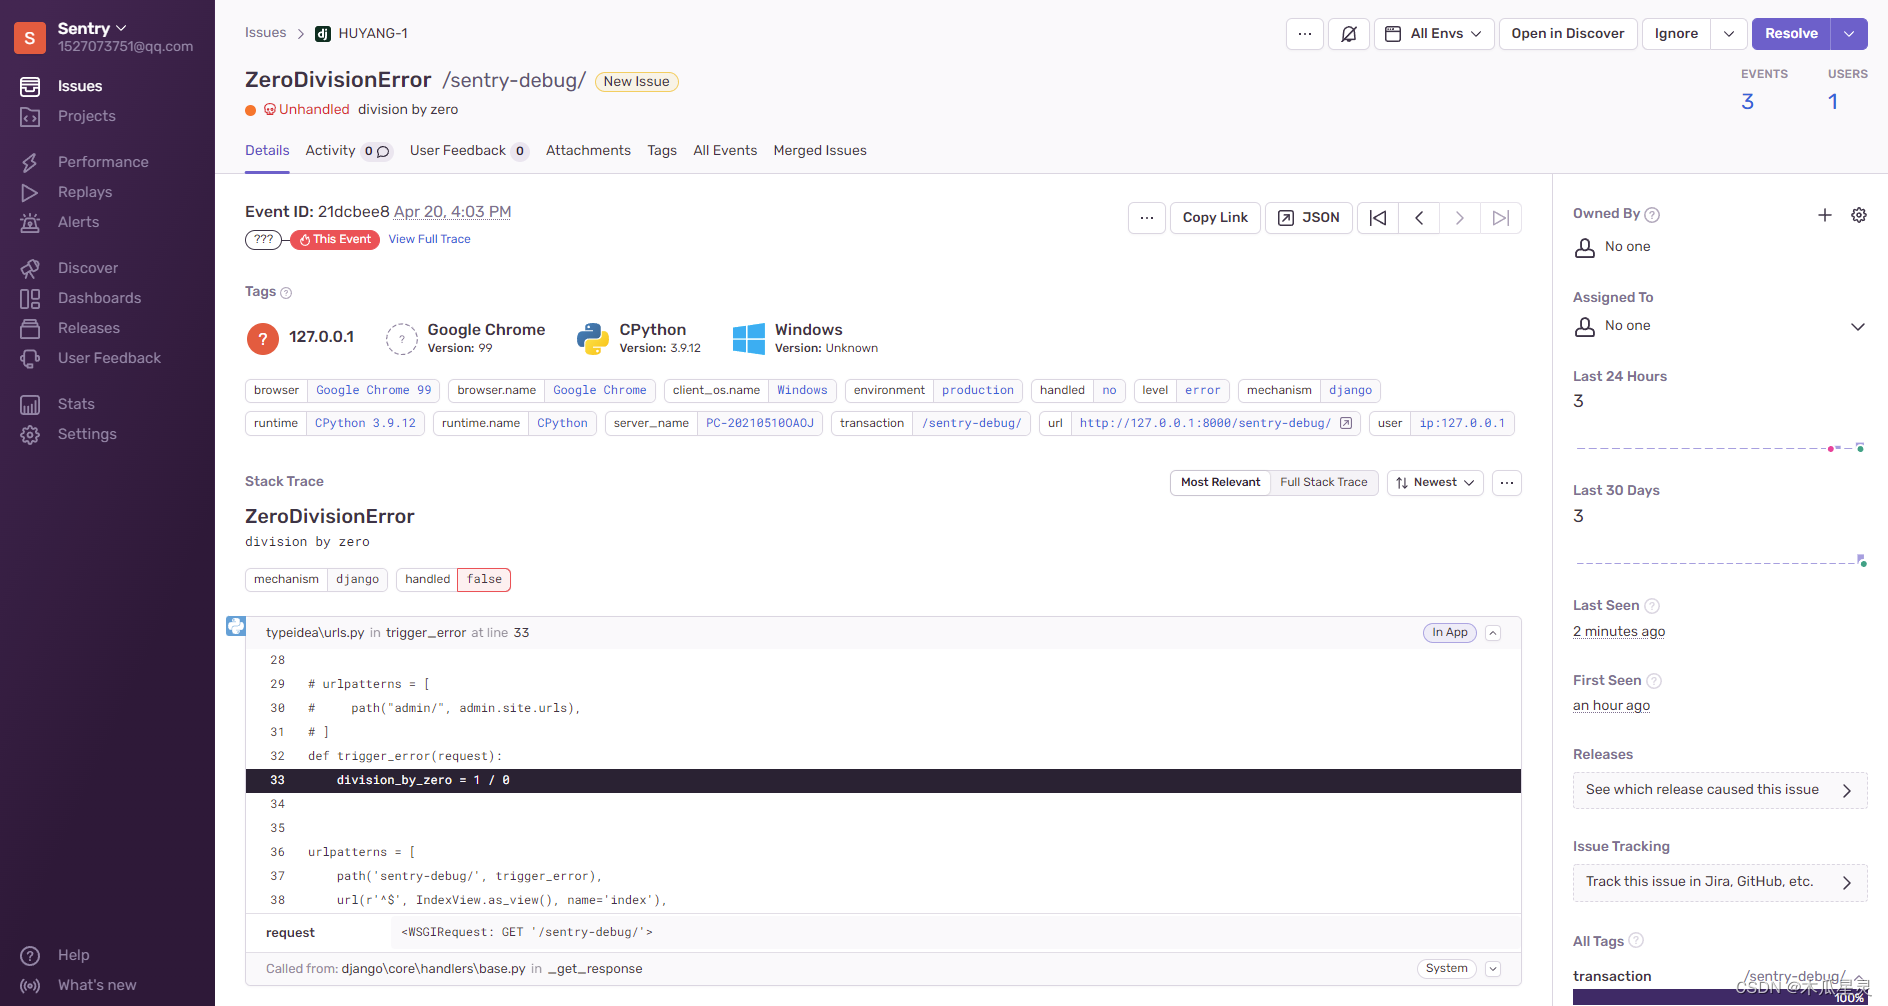
我们故意制造一个错误,在访问指定url时来触发它,然后看看sentry有没有相关记录
修改urls.py
from django.urls import pathdef trigger_error(request):division_by_zero = 1 / 0urlpatterns = [path('sentry-debug/', trigger_error),# ...
]
python manage.py runserver启动Django服务后再访问url,可见sentry监控到了
http://127.0.0.1:8000/sentry-debug/
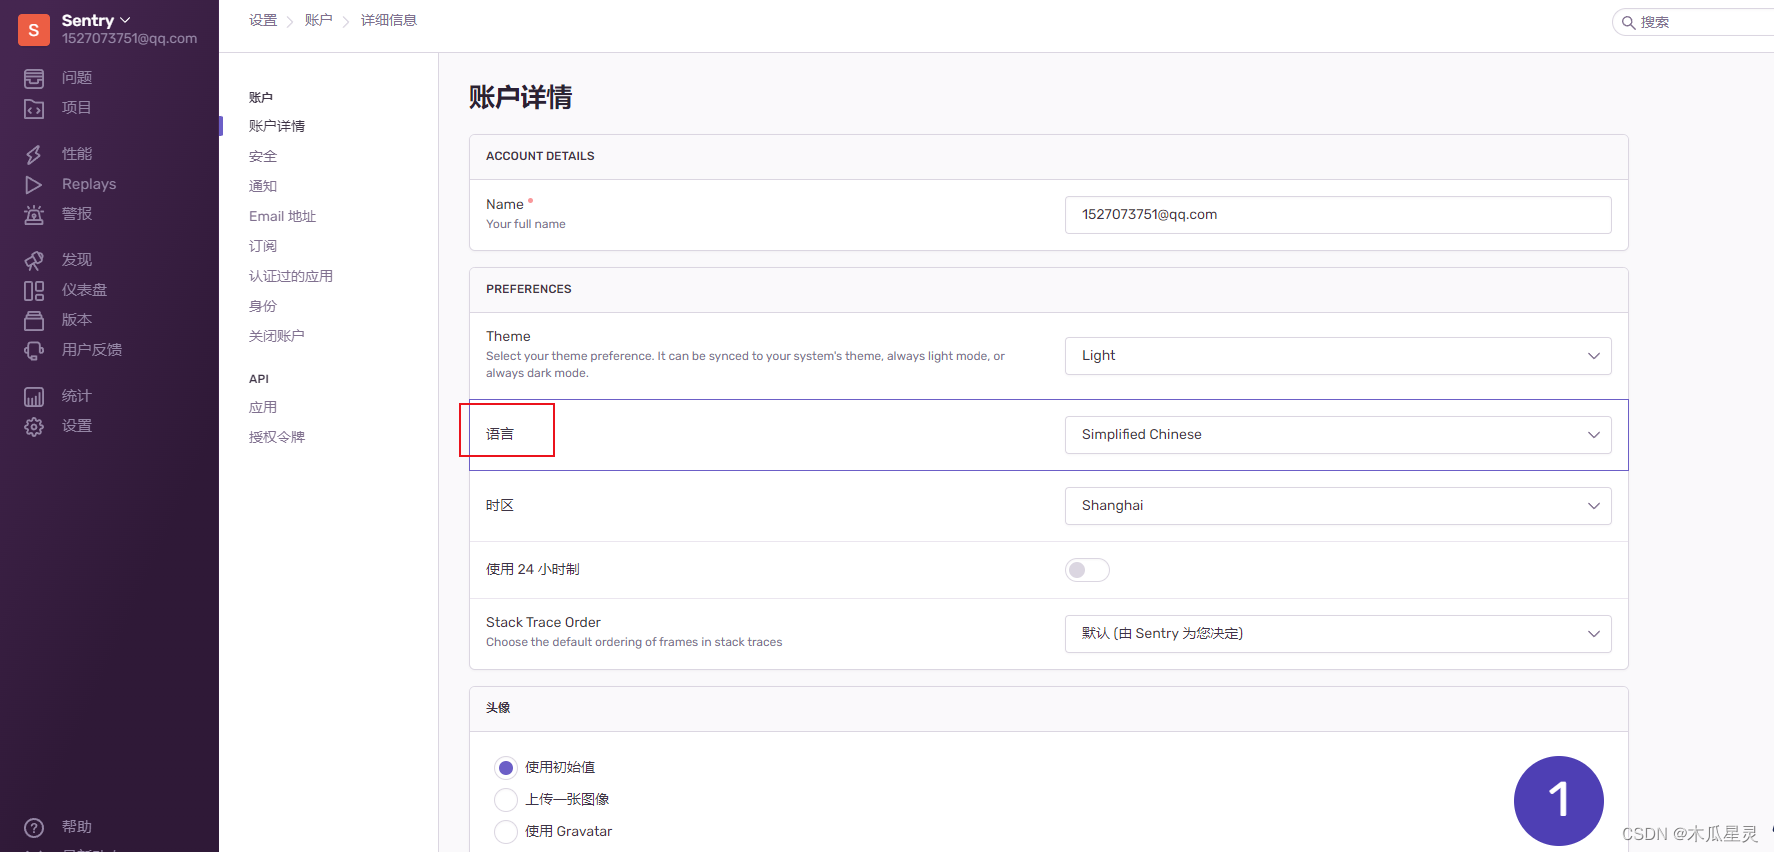
切换为中文