CCS5.5环境设置

CCS5.5环境设置
- 文件编码格式设置
- 利用断点导入*.dat文件
-
- 先用Python生成*.dat文件
- DSP代码(sys/bios)
- 步骤
- 利用strip6x工具去除.out文件中的调试信息
- 硬件跟踪功能
-
-
- 应用
- 名词解释
- 使用方法
-
- ccs显示图片参数设置
文件编码格式设置
可分别对工作空间、工程、单个文件设置编码格式:
☆工作空间:Windows->Preferences->General->Workspace->Tex file encoding: Other
工程:工程文件名右键->Properties->Resource-> Tex file encoding: Other
单个文件:文件名右键->Properties->Resource-> Tex file encoding: Other
利用断点导入*.dat文件
参考 《TI C66x多核软件开发(MCSDK)技术》 第二章
先用Python生成*.dat文件
保存以下代码为py文件并运行。
import numpy as npimport matplotlib.pyplot as pltx = np.array (list(range(0,10000,1)))
y = np.sin(x/5)
print(y)
plt.plot(x,y,color='green',label = 'y = sin(x)')
plt.show()file0 = open ("C:\\\\Users\\\\penguin\\\\Desktop\\\\sin.dat",'w')
## CCS5软件可识别数据文件头格式,其中后面3个参数可设置为0,后面可以在开发环境中指定
## 1651 - 固定数
## 1    - 数据格式(1:十六进制数、2:十进制整型、3:十进制长整型、4:十进制浮点型)
## 0    - 起始地址
## 0    - 页类型
## 0    - 数据长度
file0.write('1651 1 0 0 0\\n')
for  i in range(10000): file0.write(str(hex(round(y[i]*256)+256)))file0.write('\\n')
file0.close
DSP代码(sys/bios)
/ ======== main.c ========*/#include <xdc/std.h>#include <xdc/runtime/Error.h>
#include <xdc/runtime/System.h>#include <ti/sysbios/BIOS.h>#include <ti/sysbios/knl/Task.h>#include <ti/sysbios/knl/Clock.h>#define BUFSIZE 100unsigned int task_run_counnect = 0;unsigned int in_buf[BUFSIZE];
unsigned int out_buf[BUFSIZE];
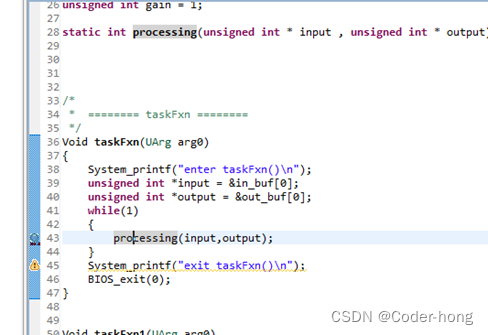
unsigned int gain = 1;static int processing(unsigned int * input , unsigned int * output);/ ======== taskFxn ========*/
Void taskFxn(UArg arg0)
{System_printf("enter taskFxn()\\n");unsigned int *input = &in_buf[0];unsigned int *output = &out_buf[0];while(1){processing(input,output);}System_printf("exit taskFxn()\\n");BIOS_exit(0);
}Void taskFxn1(UArg arg0)
{task_run_counnect++;//Task_sleep(10);System_printf("task taskFxn1 run counnect is %d\\n",task_run_counnect);}Void taskFxn2(UArg arg0)
{task_run_counnect++;//Task_sleep(10);System_printf("task taskFxn2 run counnect is %d\\n",task_run_counnect);}Void taskFxn3(UArg arg0)
{task_run_counnect++;//Task_sleep(10);System_printf("task taskFxn3 run counnect is %d\\n",task_run_counnect);}/ ======== main ========*/
Int main()
{ Task_Handle task;Error_Block eb;System_printf("enter main()\\n");
/*Error_init(&eb);task = Task_create(taskFxn, NULL, &eb);if (task == NULL) {System_printf("Task_create() failed!\\n");BIOS_exit(0);}
*/Clock_Handle clk2;Clock_Params clkParams;/* Create a periodic Clock Instance with period = 5 system time units */Clock_Params_init(&clkParams);clkParams.period = 30;clkParams.startFlag = TRUE;Clock_create(taskFxn1, 1, &clkParams, NULL);clkParams.period = 30;clkParams.startFlag = TRUE;Clock_create(taskFxn2, 10, &clkParams, NULL);clkParams.period = 30;clkParams.startFlag = TRUE;Clock_create(taskFxn3, 20, &clkParams, NULL);clkParams.period = 0;clkParams.startFlag = FALSE;clk2 = Clock_create(taskFxn, 100, &clkParams, NULL);Clock_start(clk2);BIOS_start(); /* does not return */return(0);
}static int processing(unsigned int * input , unsigned int * output)
{unsigned int size;size = BUFSIZE;while(size--){*output++ = *input++ * gain;}return 1;
}步骤
创建、编译并调试CCS工程,在processing(input,output) 行打断点,点击Debug进入调试界面。
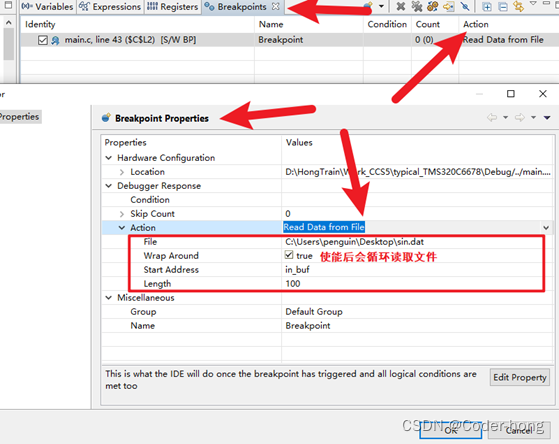
打开断电管理器,Windows->Show View->Breakpoint,右键断点属性,设置为Read Data from File,并配置文件路径、是否循环读取、起始地址、长度等参数。
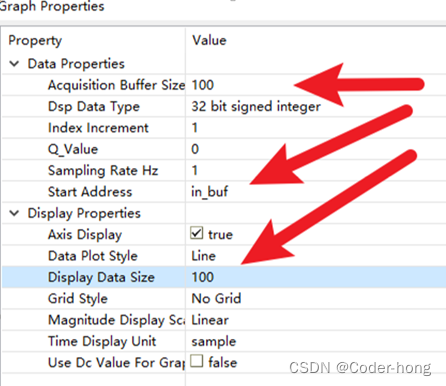
打开绘图界面 Tool->Graph->Single Time,配置绘图参数,运行程序。
效果:

利用strip6x工具去除.out文件中的调试信息
工具路径:
“C:\\ti\\ccsv5\\tools\\compiler\\c6000_7.4.4\\bin\\strip6x.exe”
使用方法:
- 在CMD命令行打开到.out文件路径,输入指令:
C:\\ti\\ccsv5\\tools\\compiler\\c6000_7.4.4\\bin\\strip6x.exe tp_gpio.out -o tp_gpio_lit.out
第一参数为输入文件名,-o 后面是输出文件名,该方法可有效降低*.out文件大小。

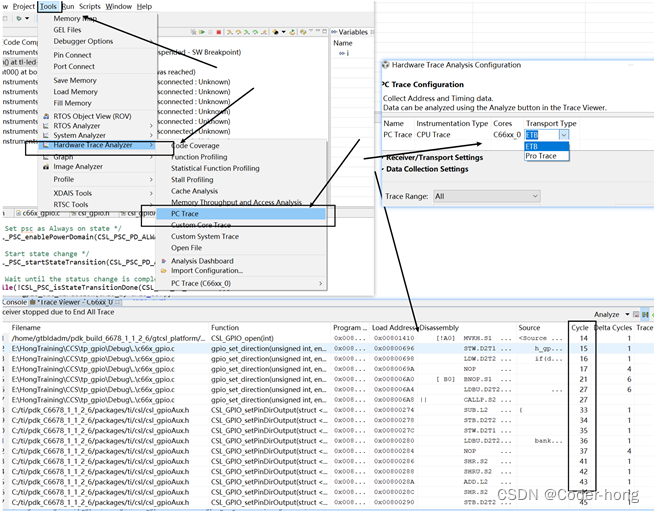
硬件跟踪功能
应用
可以分析程序算法执行时间等信息。
名词解释
ETB是一个片上跟踪缓存,每个核大小为4Kb,用于记录程序运行信息。
Pro Trace是通过仿真器抓取方式,根据不同型号支持的缓冲大小和速度不同。
使用方法
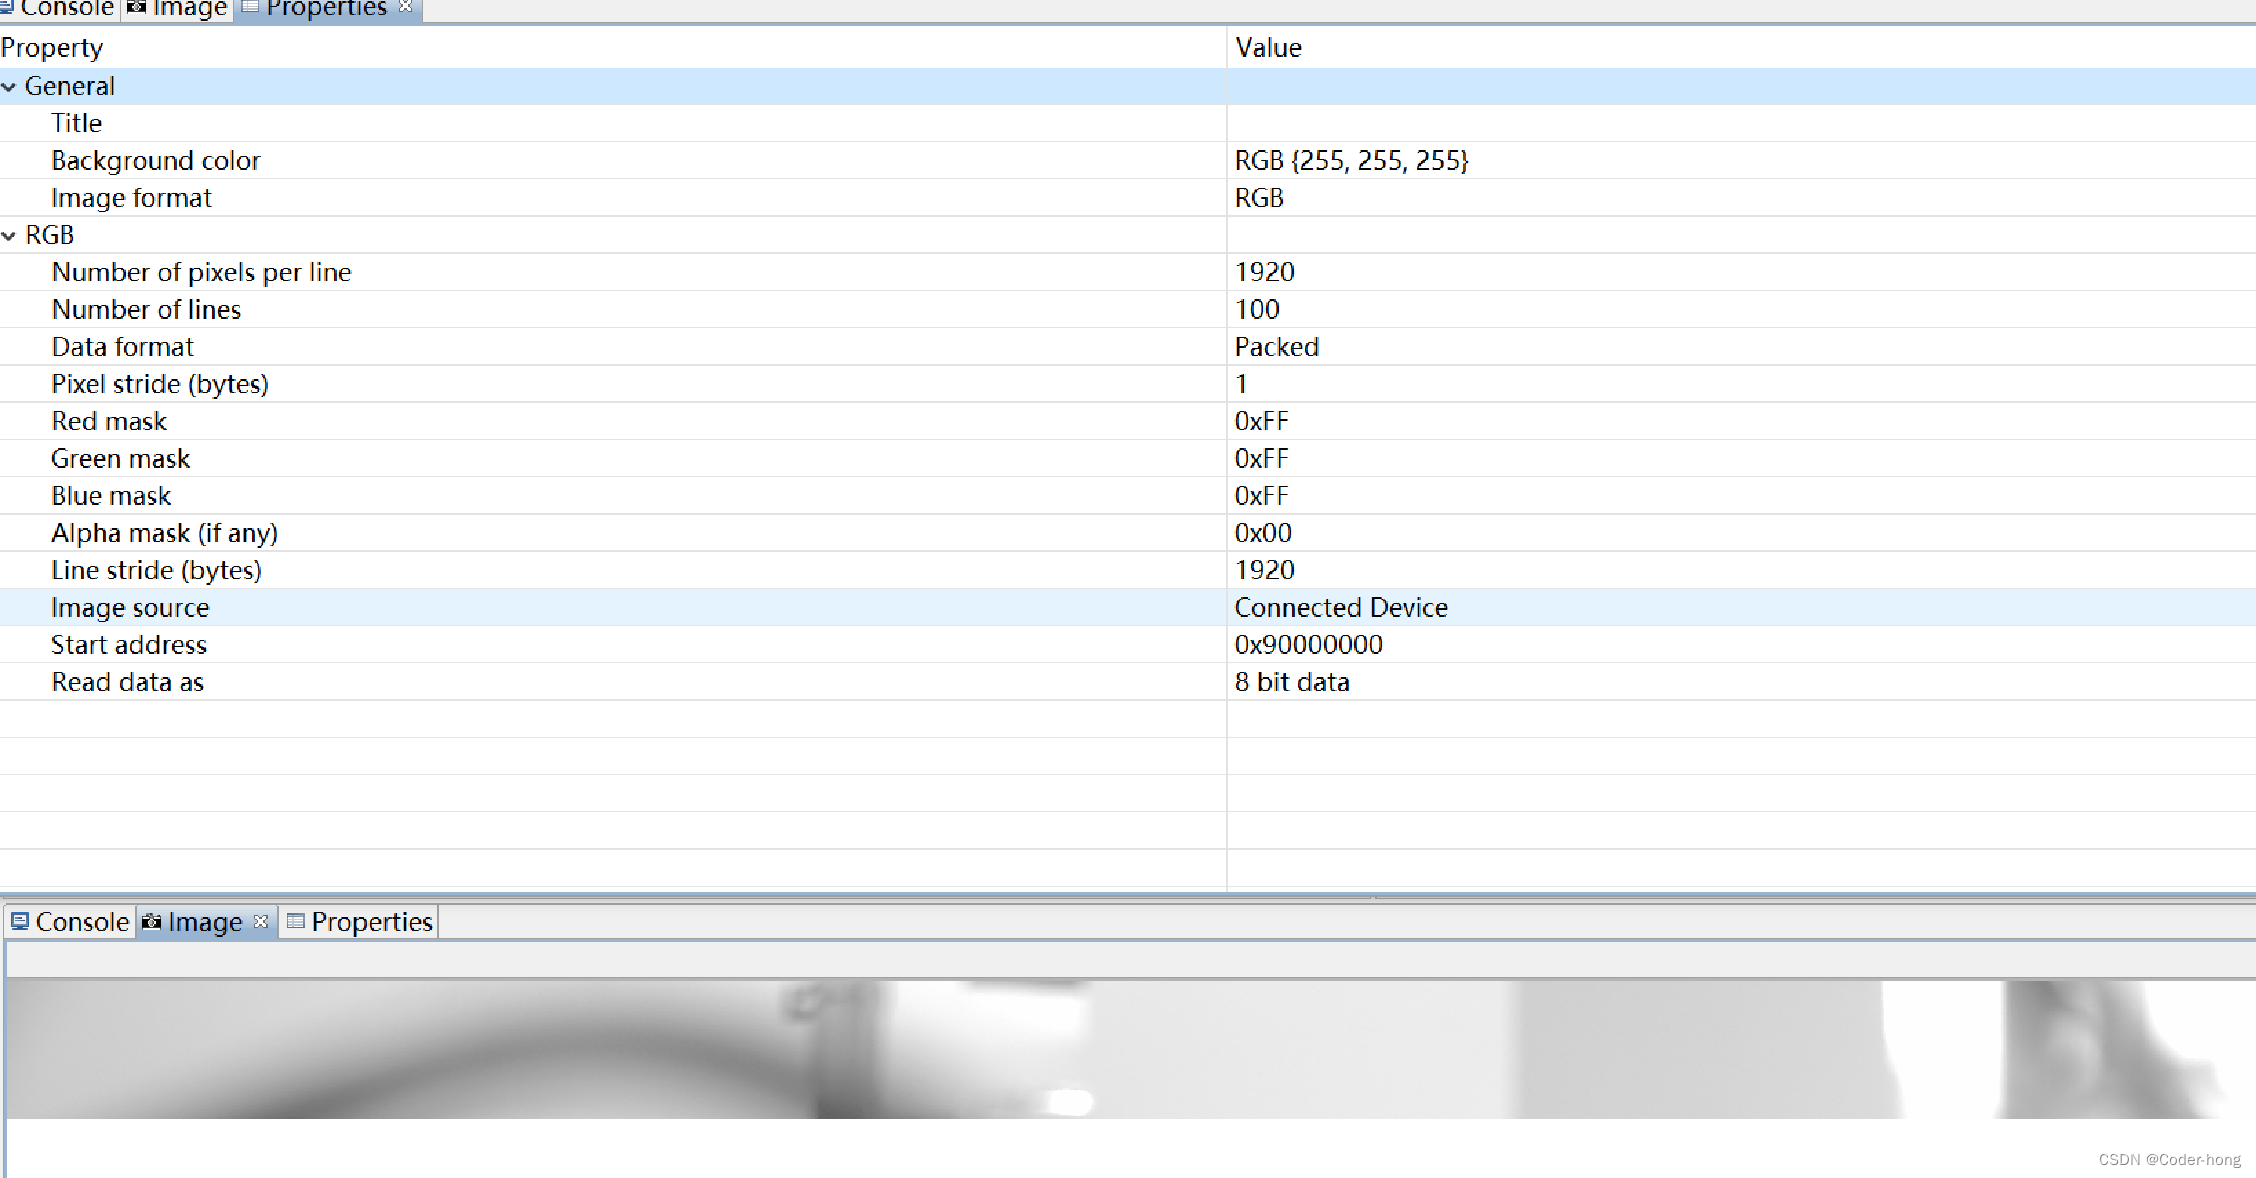
ccs显示图片参数设置