用huggingface.transformers.AutoModelForTokenClassification实现命名实体识别任务

诸神缄默不语-个人CSDN博文目录
huggingface transformers包 文档学习笔记(持续更新ing…)
本文主要介绍使用AutoModelForTokenClassification在典型序列识别任务,即命名实体识别任务 (NER) 上,微调Bert模型。
主要参考huggingface官方教程:Token classification
本文中给出的例子是英文数据集,且使用transformers.Trainer来训练,以后可能会补充使用中文数据、使用原生PyTorch框架的训练代码。
使用原生PyTorch框架反正不难,可以参考文本分类那边的改法:用huggingface.transformers.AutoModelForSequenceClassification在文本分类任务上微调预训练模型
整个代码是用VSCode内置对Jupyter Notebook支持的编辑器来写的,所以是分cell的。
序列标注和NER都是啥我就不写了,之前笔记写过的我也尽量都不写了。
本文直接使用本地已下载好的checkpoint文件夹路径来调取预训练模型。checkpoint下载自:https://huggingface.co/distilbert-base-uncased
需要预先安装包:pip install datasets evaluate seqeval
文章目录
- 1. 登录huggingface
- 2. 数据集:WNUT 17
- 3. 数据预处理
- 4. 建立评估指标
- 5. 训练
- 6. 推理
-
- 6.1 直接使用pipeline
- 6.2 使用模型实现推理
- 7. 其他本文撰写过程中使用的参考资料
1. 登录huggingface
虽然不用,但是登录一下(如果在后面训练部分,将push_to_hub入参置为True的话,可以直接将模型上传到Hub)
from huggingface_hub import notebook_loginnotebook_login()
输出:
Login successful
Your token has been saved to my_path/.huggingface/token
Authenticated through git-credential store but this isn't the helper defined on your machine.
You might have to re-authenticate when pushing to the Hugging Face Hub. Run the following command in your terminal in case you want to set this credential helper as the defaultgit config --global credential.helper store
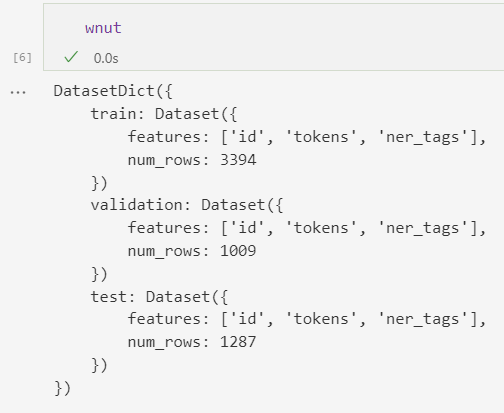
2. 数据集:WNUT 17
直接运行load_dataset()会报ConnectionError,所以可参考之前我写过的huggingface.datasets无法加载数据集和指标的解决方案先下载到本地,然后加载:
import datasets
wnut=datasets.load_from_disk('/data/datasets_file/wnut17')
ner_tags数字对应的标签:

3. 数据预处理
from transformers import AutoTokenizertokenizer = AutoTokenizer.from_pretrained("/data/pretrained_model/distilbert-base-uncased")
在上面可以看到,文本已经以词为单位进行了分割。对这种文本用DisdilBert进行tokenize的示例:
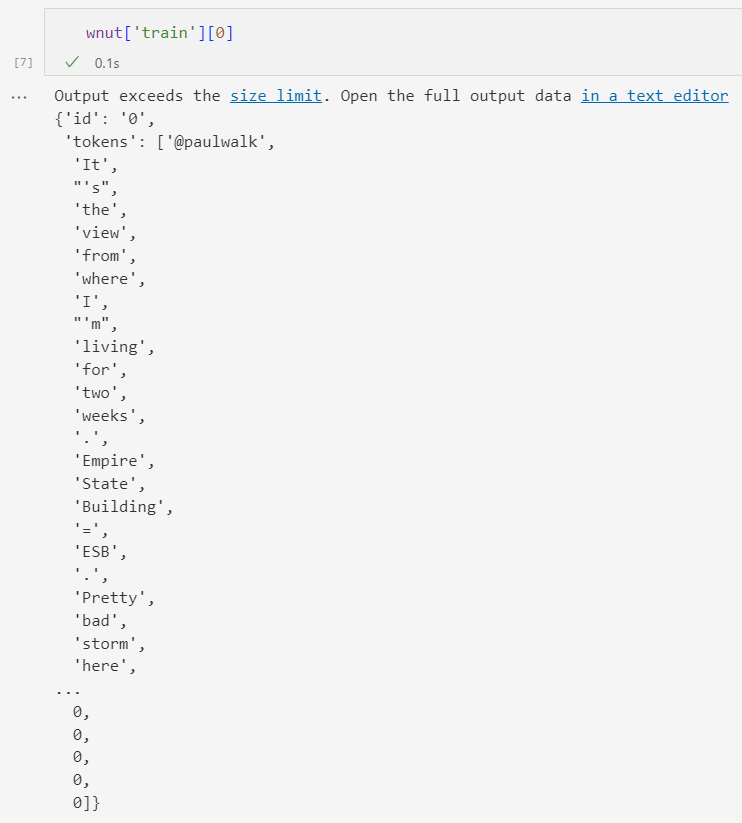
example = wnut["train"][0]
tokenized_input = tokenizer(example["tokens"], is_split_into_words=True)
tokens = tokenizer.convert_ids_to_tokens(tokenized_input["input_ids"])
tokens
输出:
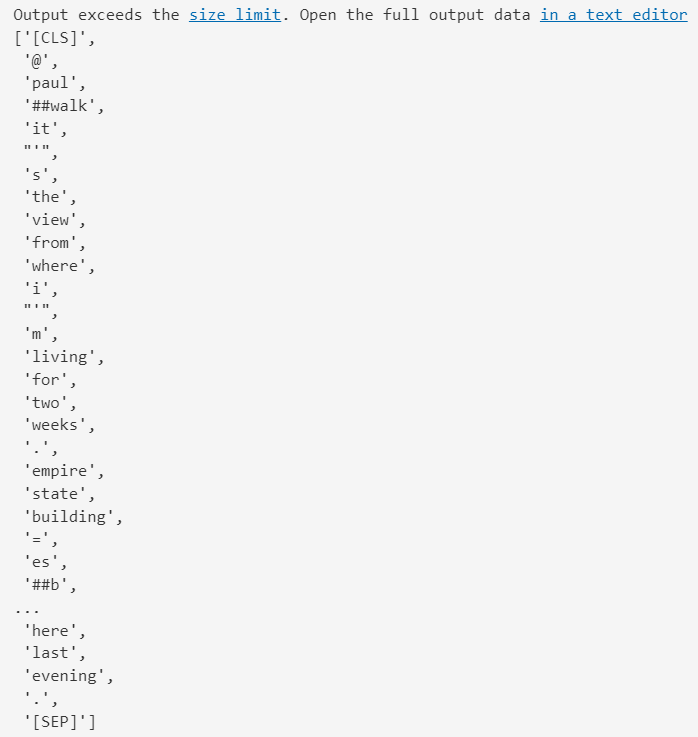
可以看出,有增加special tokens、还有把word变成subword,这都使原标签序列与现在的token序列不再对应,因此现在需要重新匹配与token序列对应的标签序列:
3. 用token对应的word_ids1匹配原属的word,也就匹配到了原属的标签。只标注第一个subword的标签
4. 第二个及以后subword,和special tokens的标签标注为-100。这样会自动使PyTorch计算交叉熵损失函数时忽略这些token。在后续计算指标时需要另行考虑对这些token进行处理
(注意这里的-100,在教程中说这样会被PyTorch损失函数忽略,我一开始很震惊,因为在教程中没有在损失函数处考虑-100,而且DistilBertForTokenClassifcation源码2里面算loss时显然也没有考虑这回事,
然后我去百度了一下,发现……
是PyTorch的CrossEntropyLoss默认忽略-100值(捂脸):

(图片截自PyTorch官方文档3)
我之前还在huggingface论坛里提问了,我还猜想是别的原因,跑去提问,果然没人回4,最后还得靠我自己查)
5. truncation=True:将文本truncate到模型的最大长度
这是一个批量处理代码:
def tokenize_and_align_labels(examples):tokenized_inputs = tokenizer(examples["tokens"], truncation=True, is_split_into_words=True)labels = []for i, label in enumerate(examples[f"ner_tags"]):word_ids = tokenized_inputs.word_ids(batch_index=i) #返回batch_index对应的batch中的序列索引的token对应的word id列表(special tokens是None)previous_word_idx = Nonelabel_ids = []for word_idx in word_ids: # Set the special tokens to -100.if word_idx is None:label_ids.append(-100)elif word_idx != previous_word_idx: # Only label the first token of a given word.label_ids.append(label[word_idx])else:label_ids.append(-100)previous_word_idx = word_idxlabels.append(label_ids)tokenized_inputs["labels"] = labelsreturn tokenized_inputs
- is_split_into_words:以词为列表元素输入文本
- return_offsets_mapping:返回每个token的
(char_start, char_end) - truncation / padding(这里没有直接应用padding,应该是因为后面直接使用DataCollatorWithPadding来实现padding了)
将批量预处理的代码应用在数据集上(batched=True入参使一次可处理多个元素):
tokenized_wnut = wnut.map(tokenize_and_align_labels, batched=True)

为了实现mini-batch,直接用原生PyTorch框架的话就是建立DataSet和DataLoader对象之类的,也可以直接用DataCollatorWithPadding:动态将每一batch padding到最长长度,而不用直接对整个数据集进行padding;能够同时padding label:
from transformers import DataCollatorForTokenClassificationdata_collator = DataCollatorForTokenClassification(tokenizer=tokenizer)
(没查具体pad label的方式。总之如果想手动预处理数据的话,可以先定义一个所有值都是-100的列表)
4. 建立评估指标
evaluate库:🤗 Evaluate
import evaluateseqeval = evaluate.load("seqeval")
建立计算指标的函数:将logits转换为预测标签(过argmax),删除-100标签的token
label_list = wnut["train"].features[f"ner_tags"].feature.names #BIOimport numpy as npdef compute_metrics(p):predictions, labels = ppredictions = np.argmax(predictions, axis=2)true_predictions = [[label_list[p] for (p, l) in zip(prediction, label) if l != -100]for prediction, label in zip(predictions, labels)]true_labels = [[label_list[l] for (p, l) in zip(prediction, label) if l != -100]for prediction, label in zip(predictions, labels)]results = seqeval.compute(predictions=true_predictions, references=true_labels)return {"precision": results["overall_precision"],"recall": results["overall_recall"],"f1": results["overall_f1"],"accuracy": results["overall_accuracy"],}
compute()的文档:https://huggingface.co/docs/evaluate/v0.4.0/en/package_reference/main_classes#evaluate.EvaluationModule.compute
5. 训练
id2label = {0: "O",1: "B-corporation",2: "I-corporation",3: "B-creative-work",4: "I-creative-work",5: "B-group",6: "I-group",7: "B-location",8: "I-location",9: "B-person",10: "I-person",11: "B-product",12: "I-product",
}
label2id = {"O": 0,"B-corporation": 1,"I-corporation": 2,"B-creative-work": 3,"I-creative-work": 4,"B-group": 5,"I-group": 6,"B-location": 7,"I-location": 8,"B-person": 9,"I-person": 10,"B-product": 11,"I-product": 12,
}
from transformers import AutoModelForTokenClassification, TrainingArguments, Trainermodel = AutoModelForTokenClassification.from_pretrained("/data/pretrained_model/distilbert-base-uncased/", num_labels=13, id2label=id2label, label2id=label2id
)
- 定义训练超参(需要指定保存模型的文件夹路径)
如果将push_to_hub置True,将使训练好的模型自动上传到Hub,这需要登录huggingface账号(可以用hub_model_id入参设置完整的repo名,需要包括namespace,如sgugger/bert-finetuned-ner)
每个epoch最后会评估seqeval指标
https://huggingface.co/docs/transformers/v4.27.2/en/main_classes/trainer#transformers.TrainingArguments
(本项目中没有传入,默认的第一个入参是model_name) - 将超参、模型、数据集、指标计算函数传入Trainer
https://huggingface.co/docs/transformers/v4.27.2/en/main_classes/trainer#transformers.Trainer - 微调模型
https://huggingface.co/docs/transformers/v4.27.2/en/main_classes/trainer#transformers.Trainer.train
(注意这个代码会自动调用wandb包……我是没想到的,港真。项目是huggingface,run的名称就是output_dir的值)
training_args = TrainingArguments(output_dir="/data/wanghuijuan/pretrained_model/my_awesome_wnut_model",learning_rate=2e-5,per_device_train_batch_size=16,per_device_eval_batch_size=16,num_train_epochs=2,weight_decay=0.01,evaluation_strategy="epoch",save_strategy="epoch",load_best_model_at_end=True,push_to_hub=False,
)trainer = Trainer(model=model,args=training_args,train_dataset=tokenized_wnut["train"],eval_dataset=tokenized_wnut["test"],tokenizer=tokenizer,data_collator=data_collator,compute_metrics=compute_metrics,
)trainer.train()
模型会自动上多卡进行训练。我服务器上4张卡都能用,所以1个batch可以跑64个样本
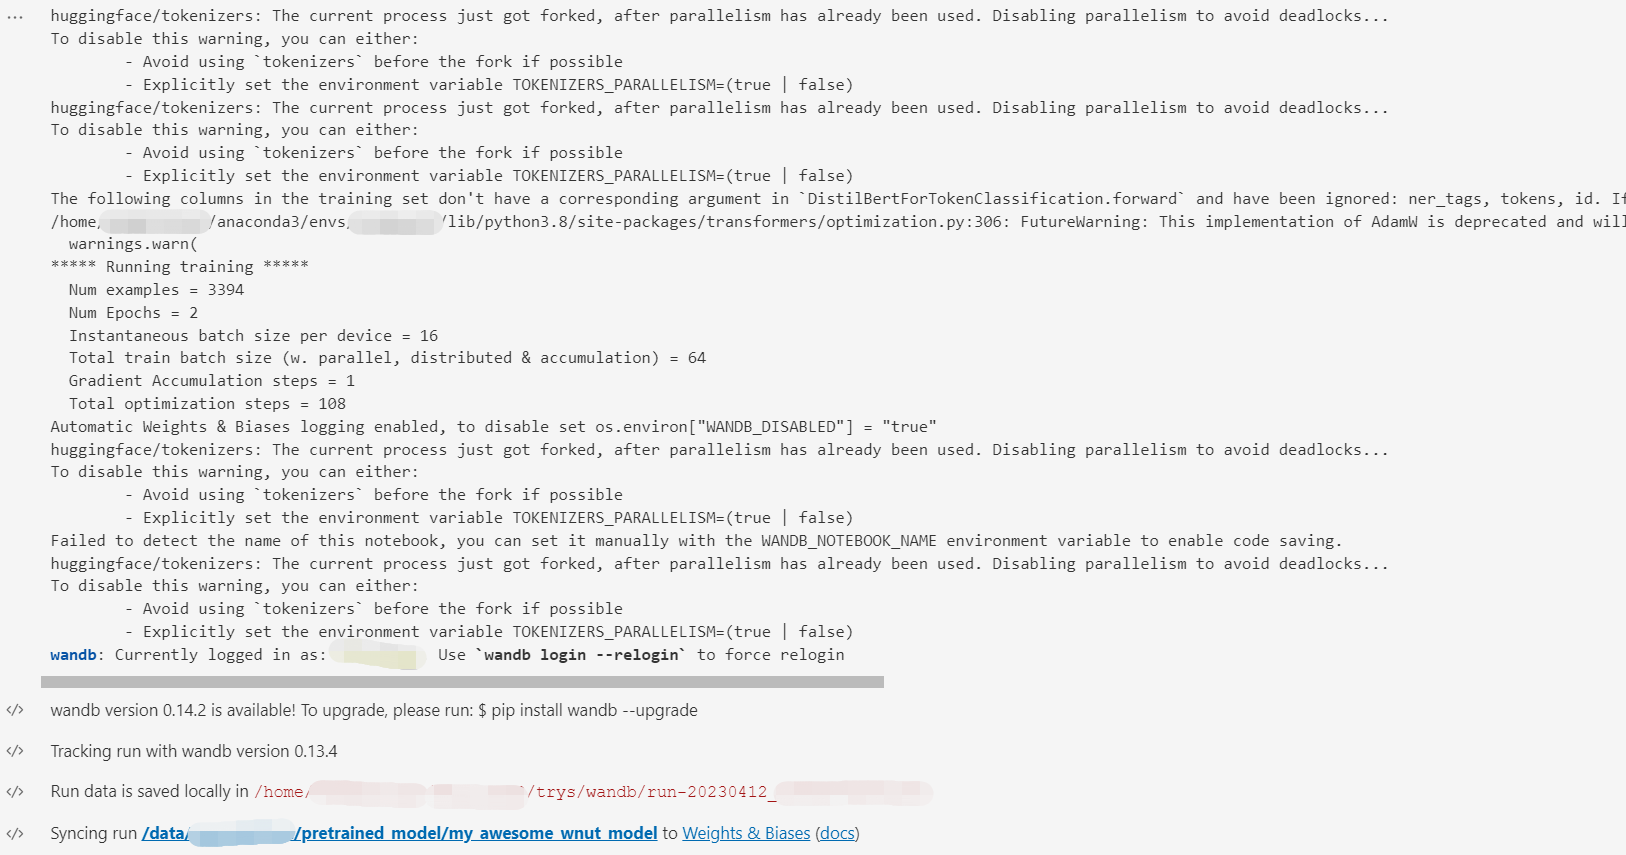
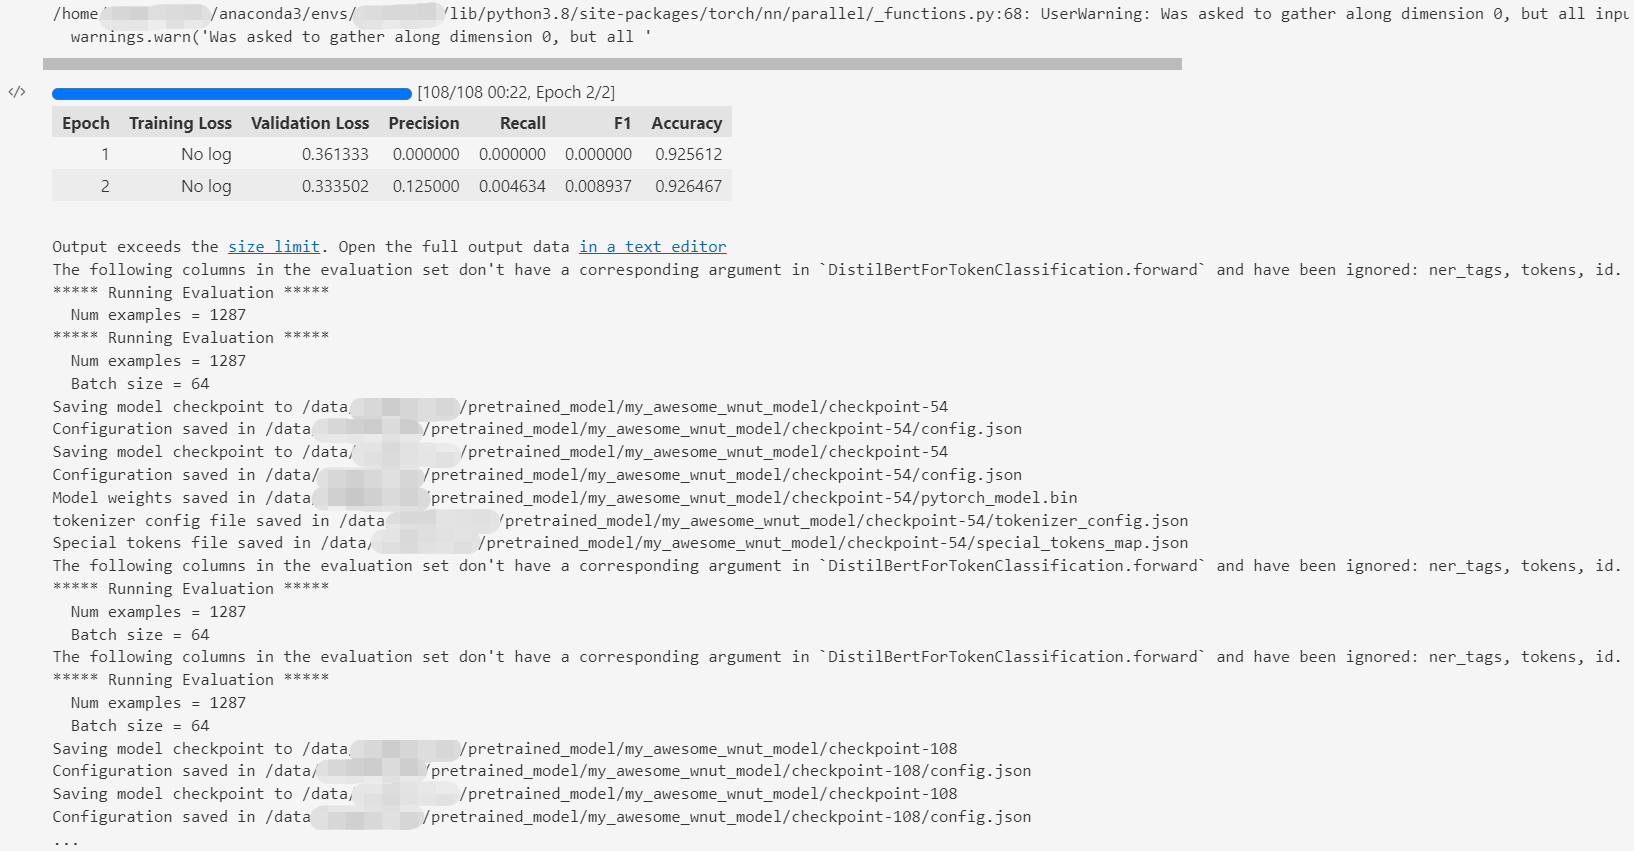
Training completed. Do not forget to share your model on huggingface.co/models =)Loading best model from /data/pretrained_model/my_awesome_wnut_model/checkpoint-108 (score: 0.3335016071796417).
TrainOutput(global_step=108, training_loss=0.42667872817428026, metrics={'train_runtime': 38.1861, 'train_samples_per_second': 177.761, 'train_steps_per_second': 2.828, 'total_flos': 103933773439080.0, 'train_loss': 0.42667872817428026, 'epoch': 2.0})
wandb的图懒得截了
如果想把模型上传到Hub:trainer.push_to_hub()(https://huggingface.co/docs/transformers/v4.27.2/en/main_classes/trainer#transformers.Trainer.push_to_hub)
另外一种写法:https://colab.research.google.com/github/huggingface/notebooks/blob/main/examples/token_classification.ipynb#scrollTo=7sZOdRlRIrJd(别的都差不多,比较明显的区别就是:计算指标是用datasets库,数据集是按照比较标准的训练集-验证集-测试集模式来实现的)
6. 推理
text = "The Golden State Warriors are an American professional basketball team based in San Francisco."
(我第一次跑出来的结果有问题,完全不能正确预测结果,所以我重跑了一次,就不改上面一节的截图了)
6.1 直接使用pipeline
from transformers import pipelineclassifier=pipeline("ner",model="/data/pretrained_model/my_awesome_wnut_model/checkpoint-108")
classifier(text)
输出的警告内容:
loading configuration file /data/pretrained_model/my_awesome_wnut_model/checkpoint-108/config.json
Model config DistilBertConfig {"_name_or_path": "/data/pretrained_model/my_awesome_wnut_model/checkpoint-108","activation": "gelu","architectures": ["DistilBertForTokenClassification"],"attention_dropout": 0.1,"dim": 768,"dropout": 0.1,"hidden_dim": 3072,"id2label": {"0": "O","1": "B-corporation","2": "I-corporation","3": "B-creative-work","4": "I-creative-work","5": "B-group","6": "I-group","7": "B-location","8": "I-location","9": "B-person","10": "I-person","11": "B-product","12": "I-product"},"initializer_range": 0.02,"label2id": {"B-corporation": 1,"B-creative-work": 3,"B-group": 5,"B-location": 7,"B-person": 9,"B-product": 11,"I-corporation": 2,"I-creative-work": 4,"I-group": 6,"I-location": 8,"I-person": 10,"I-product": 12,"O": 0},"max_position_embeddings": 512,"model_type": "distilbert","n_heads": 12,"n_layers": 6,"pad_token_id": 0,"qa_dropout": 0.1,"seq_classif_dropout": 0.2,"sinusoidal_pos_embds": false,"tie_weights_": true,"torch_dtype": "float32","transformers_version": "4.21.1","vocab_size": 30522
}loading configuration file /data/pretrained_model/my_awesome_wnut_model/checkpoint-108/config.json
Model config DistilBertConfig {"_name_or_path": "/data/pretrained_model/my_awesome_wnut_model/checkpoint-108","activation": "gelu","architectures": ["DistilBertForTokenClassification"],"attention_dropout": 0.1,"dim": 768,"dropout": 0.1,"hidden_dim": 3072,"id2label": {"0": "O","1": "B-corporation","2": "I-corporation","3": "B-creative-work","4": "I-creative-work","5": "B-group","6": "I-group","7": "B-location","8": "I-location","9": "B-person","10": "I-person","11": "B-product","12": "I-product"},"initializer_range": 0.02,"label2id": {"B-corporation": 1,"B-creative-work": 3,"B-group": 5,"B-location": 7,"B-person": 9,"B-product": 11,"I-corporation": 2,"I-creative-work": 4,"I-group": 6,"I-location": 8,"I-person": 10,"I-product": 12,"O": 0},"max_position_embeddings": 512,"model_type": "distilbert","n_heads": 12,"n_layers": 6,"pad_token_id": 0,"qa_dropout": 0.1,"seq_classif_dropout": 0.2,"sinusoidal_pos_embds": false,"tie_weights_": true,"torch_dtype": "float32","transformers_version": "4.21.1","vocab_size": 30522
}loading weights file /data/pretrained_model/my_awesome_wnut_model/checkpoint-108/pytorch_model.bin
All model checkpoint weights were used when initializing DistilBertForTokenClassification.All the weights of DistilBertForTokenClassification were initialized from the model checkpoint at /data/pretrained_model/my_awesome_wnut_model/checkpoint-108.
If your task is similar to the task the model of the checkpoint was trained on, you can already use DistilBertForTokenClassification for predictions without further training.
Didn't find file /data/pretrained_model/my_awesome_wnut_model/checkpoint-108/added_tokens.json. We won't load it.
loading file /data/pretrained_model/my_awesome_wnut_model/checkpoint-108/vocab.txt
loading file /data/pretrained_model/my_awesome_wnut_model/checkpoint-108/tokenizer.json
loading file None
loading file /data/pretrained_model/my_awesome_wnut_model/checkpoint-108/special_tokens_map.json
loading file /data/pretrained_model/my_awesome_wnut_model/checkpoint-108/tokenizer_config.json
Asking to truncate to max_length but no maximum length is provided and the model has no predefined maximum length. Default to no truncation.
输出:
[{'entity': 'B-group','score': 0.28309435,'index': 1,'word': 'the','start': 0,'end': 3},{'entity': 'B-location','score': 0.41352233,'index': 2,'word': 'golden','start': 4,'end': 10},{'entity': 'I-location','score': 0.44743603,'index': 3,'word': 'state','start': 11,'end': 16},{'entity': 'B-group','score': 0.2455212,'index': 4,'word': 'warriors','start': 17,'end': 25},{'entity': 'B-location','score': 0.2583066,'index': 7,'word': 'american','start': 33,'end': 41},{'entity': 'B-location','score': 0.54653203,'index': 13,'word': 'san','start': 80,'end': 83},{'entity': 'B-location','score': 0.43548092,'index': 14,'word': 'francisco','start': 84,'end': 93},{'entity': 'I-location','score': 0.16240601,'index': 15,'word': '.','start': 93,'end': 94}]
6.2 使用模型实现推理
import torchmodel.to('cpu')
inputs = tokenizer(text, return_tensors="pt")
with torch.no_grad():logits = model(inputs).logits
predictions = torch.argmax(logits, dim=2)
predicted_token_class = [model.config.id2label[t.item()] for t in predictions[0]]
predicted_token_class
['O','B-group','B-location','I-location','I-group','O','O','O','O','O','O','O','O','B-location','B-location','I-location','I-location']
理论上这里还应该有一步把原始token和预测值对应起来,但是教程里没写,我也懒得写了。
7. 其他本文撰写过程中使用的参考资料
- 利用huggingface的transformers库在自己的数据集上实现中文NER(命名实体识别) - 知乎
- HuggingFace Datasets来写一个数据加载脚本_名字填充中的博客-CSDN博客:这个是讲如何将自己的数据集构建为datasets格式的数据集的
- huggingface使用BERT对自己的数据集进行命名实体识别方法_vanilla_hxy的博客-CSDN博客:这个是用transformers官方token classification示例代码来改的代码
- Huggingface-transformers项目源码剖析及Bert命名实体识别实战_野猪向前冲_真的博客-CSDN博客:这篇前半部分看起来还可以,看到第5节的时候发现图挂了……天涯何处无芳草,我不看了,润!
- PyTorch学习—12.损失函数_ignore_index is not supported for floating point t_哎呦-_-不错的博客-CSDN博客
-
https://huggingface.co/docs/transformers/v4.27.2/en/main_classes/tokenizer#transformers.BatchEncoding.word_ids
(顺带一提,原文档的超链接似乎给错了,我已经提issue了:Report a hyperlink mistake · Issue #739 · huggingface/hub-docs) ↩︎ -
https://github.com/huggingface/transformers/blob/fe1f5a639d93c9272856c670cff3b0e1a10d5b2b/src/transformers/models/distilbert/modeling_distilbert.py#L939 ↩︎
-
https://pytorch.org/docs/stable/generated/torch.nn.CrossEntropyLoss.html#torch.nn.CrossEntropyLoss ↩︎
-
https://discuss.huggingface.co/t/will-trainer-loss-functions-automatically-ignore-100/36134 ↩︎