django channels(websocket)的使用,实现网页间实时聊天

目录
一、创建项目mysite和应用chat
1. 创建项目mysite
2. 创建应用chat并添加应用到settings.py的INSTALLED_APPS中
3. 添加模板文件
4. 添加视图及路由
5.配置根路由指定chat应用的路由
6. 集成channels
二、实现聊天服务器
1. 创建一个新文件chat/templates/chat/room.html,并添加以下内容
2. 创建视图room及配置路由
3. 配置消费者consumers.py
4. 配置routings.py
5. 再次配置asgi.py
6. 启用通道层CHANNEL_LAYERS
7. 再次配置consumers.py
三、改进:将消费者重写为异步
版本
python==3.7
django==3.2.18
channels==3.0.3
channels-redis==4.0.0
一、创建项目mysite和应用chat
1. 创建项目mysite
使用pycharm创建项目mysite
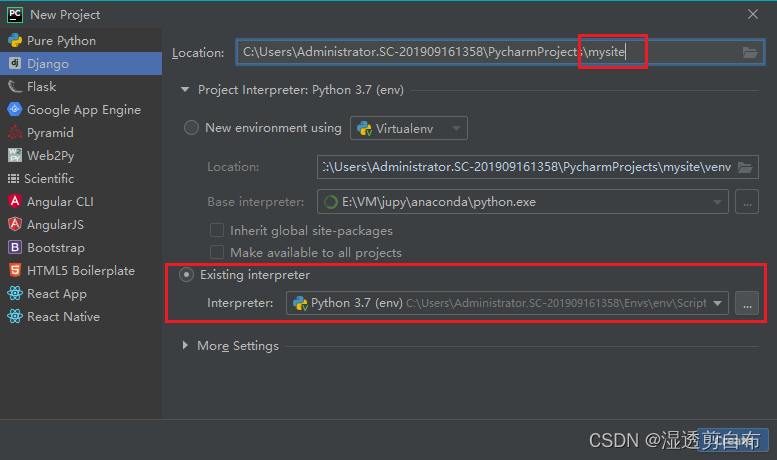
使用命令创建项目mysite
django-admin startproject mysite
2. 创建应用chat并添加应用到settings.py的INSTALLED_APPS中
python manage.py startapp chat
# settings.pyINSTALLED_APPS = ['django.contrib.admin','django.contrib.auth','django.contrib.contenttypes','django.contrib.sessions','django.contrib.messages','django.contrib.staticfiles','chat',
]
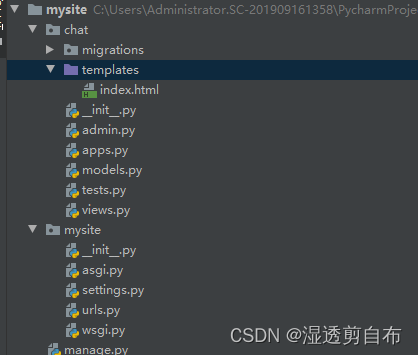
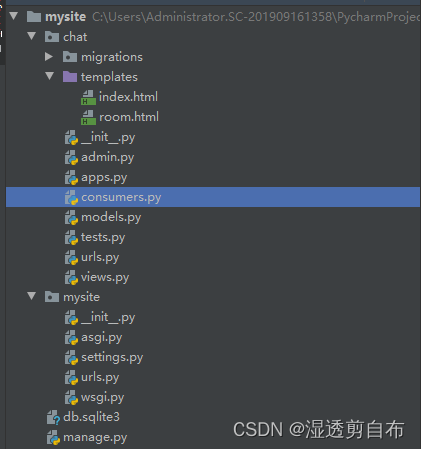
完成之后项目的目录结构:

3. 添加模板文件
在chat应用下新建templates文件夹,并右键选择Mark Direcory as >> Template Folder,templates的文件夹将变为紫色,并创建index.html文件
index.html添加以下内容
<!-- chat/templates/chat/index.html -->
<!DOCTYPE html>
<html>
<head><meta charset="utf-8"/><title>Chat Rooms</title>
</head>
<body>What chat room would you like to enter?<br><input id="room-name-input" type="text" size="100"><br><input id="room-name-submit" type="button" value="Enter"><script>document.querySelector('#room-name-input').focus();document.querySelector('#room-name-input').onkeyup = function(e) {if (e.keyCode === 13) {  // enter, returndocument.querySelector('#room-name-submit').click();}};document.querySelector('#room-name-submit').onclick = function(e) {var roomName = document.querySelector('#room-name-input').value;window.location.pathname = '/chat/' + roomName + '/';};</script>
</body>
</html>
4. 添加视图及路由
# chat/views.py
from django.shortcuts import renderdef index(request):return render(request, "index.html")
# chat/urls.py
from django.urls import pathfrom . import viewsurlpatterns = [path("", views.index, name="index"),
]
5.配置根路由指定chat应用的路由
# mysite/urls.py
from django.contrib import admin
from django.urls import include, pathurlpatterns = [path("chat/", include("chat.urls")),path("admin/", admin.site.urls),
]
此时启动django项目,浏览器访问http://127.0.0.1:8000/chat/
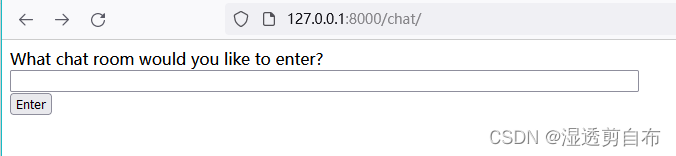
这里在输入框中输入字符串后点击Enter会报404的错误,所以我们接下来继续配置
6. 集成channels
a.安装channels
pip3 install -i https://pypi.douban.com/simple channels==3.0.3
指定安装channels==3.0.3,不要安装最新的4.0版本,否则websocket在连接时会报404错误
b. 调整mysite/asgi.py里的代码
import osfrom channels.routing import ProtocolTypeRouter
from django.core.asgi import get_asgi_applicationos.environ.setdefault("DJANGO_SETTINGS_MODULE", "mysite.settings")application = ProtocolTypeRouter({"http": get_asgi_application(),}
)
c.在settings.py中添加channels应用及配置ASGI_APPLICATION
# mysite/settings.py
INSTALLED_APPS = ['django.contrib.admin','django.contrib.auth','django.contrib.contenttypes','django.contrib.sessions','django.contrib.messages','django.contrib.staticfiles','chat','channels'
]ASGI_APPLICATION = "mysite.asgi.application"
二、实现聊天服务器
1. 创建一个新文件chat/templates/chat/room.html,并添加以下内容
<!-- chat/templates/chat/room.html -->
<!DOCTYPE html>
<html>
<head><meta charset="utf-8"/><title>Chat Room</title>
</head>
<body><textarea id="chat-log" cols="100" rows="20"></textarea><br><input id="chat-message-input" type="text" size="100"><br><input id="chat-message-submit" type="button" value="Send">{{ room_name|json_script:"room-name" }}<script>const roomName = JSON.parse(document.getElementById('room-name').textContent);const chatSocket = new WebSocket('ws://'+ window.location.host+ '/ws/chat/'+ roomName+ '/');chatSocket.onmessage = function(e) {const data = JSON.parse(e.data);document.querySelector('#chat-log').value += (data.message + '\\n');};chatSocket.onclose = function(e) {console.error('Chat socket closed unexpectedly');};document.querySelector('#chat-message-input').focus();document.querySelector('#chat-message-input').onkeyup = function(e) {if (e.keyCode === 13) {  // enter, returndocument.querySelector('#chat-message-submit').click();}};document.querySelector('#chat-message-submit').onclick = function(e) {const messageInputDom = document.querySelector('#chat-message-input');const message = messageInputDom.value;chatSocket.send(JSON.stringify({'message': message}));messageInputDom.value = '';};</script>
</body>
</html>
2. 创建视图room及配置路由
# chat/views.py
from django.shortcuts import renderdef index(request):return render(request, "chat/index.html")# 新添加
def room(request, room_name):return render(request, "room.html", {"room_name": room_name})
# chat/urls.py
from django.urls import pathfrom . import viewsurlpatterns = [path("", views.index, name="index"),path("<str:room_name>/", views.room, name="room"), # 新添加
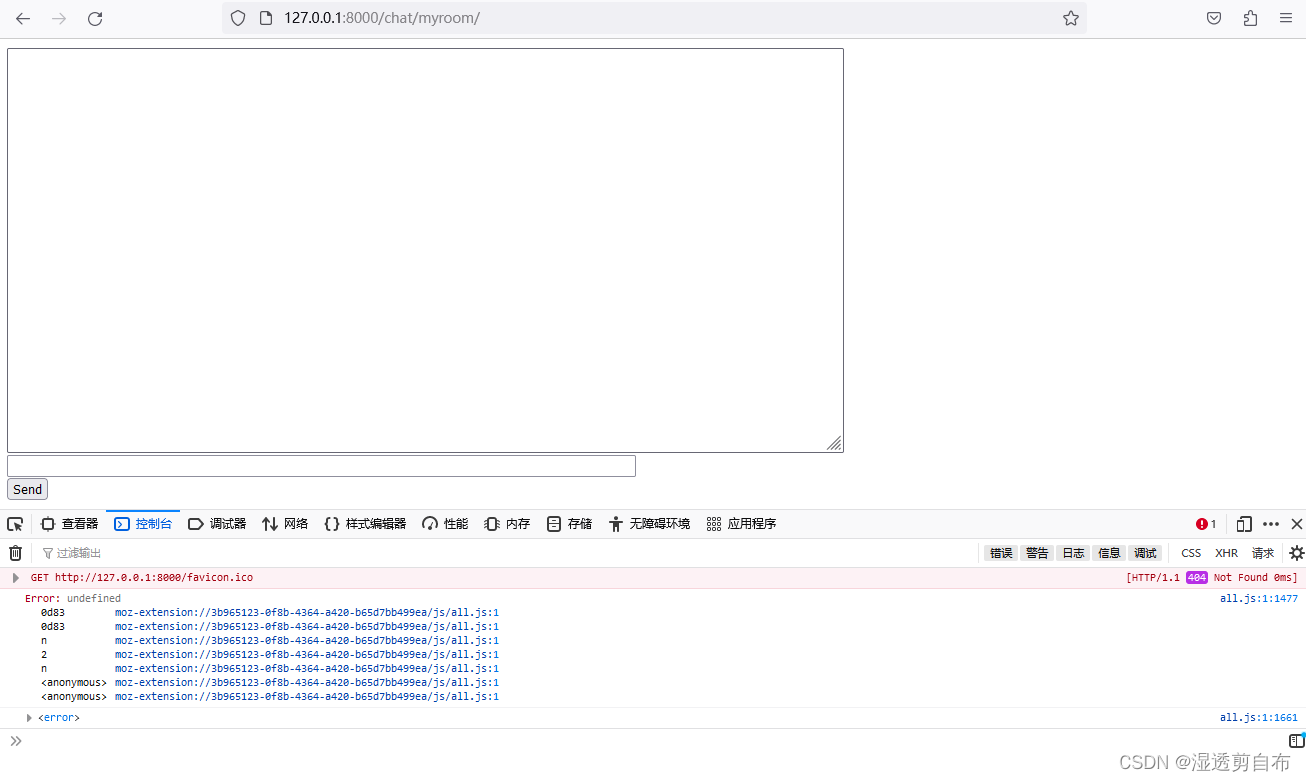
]此时启动django项目,浏览器打开控制台输入地址http://127.0.0.1:8000/chat/
输入myroom,并Enter
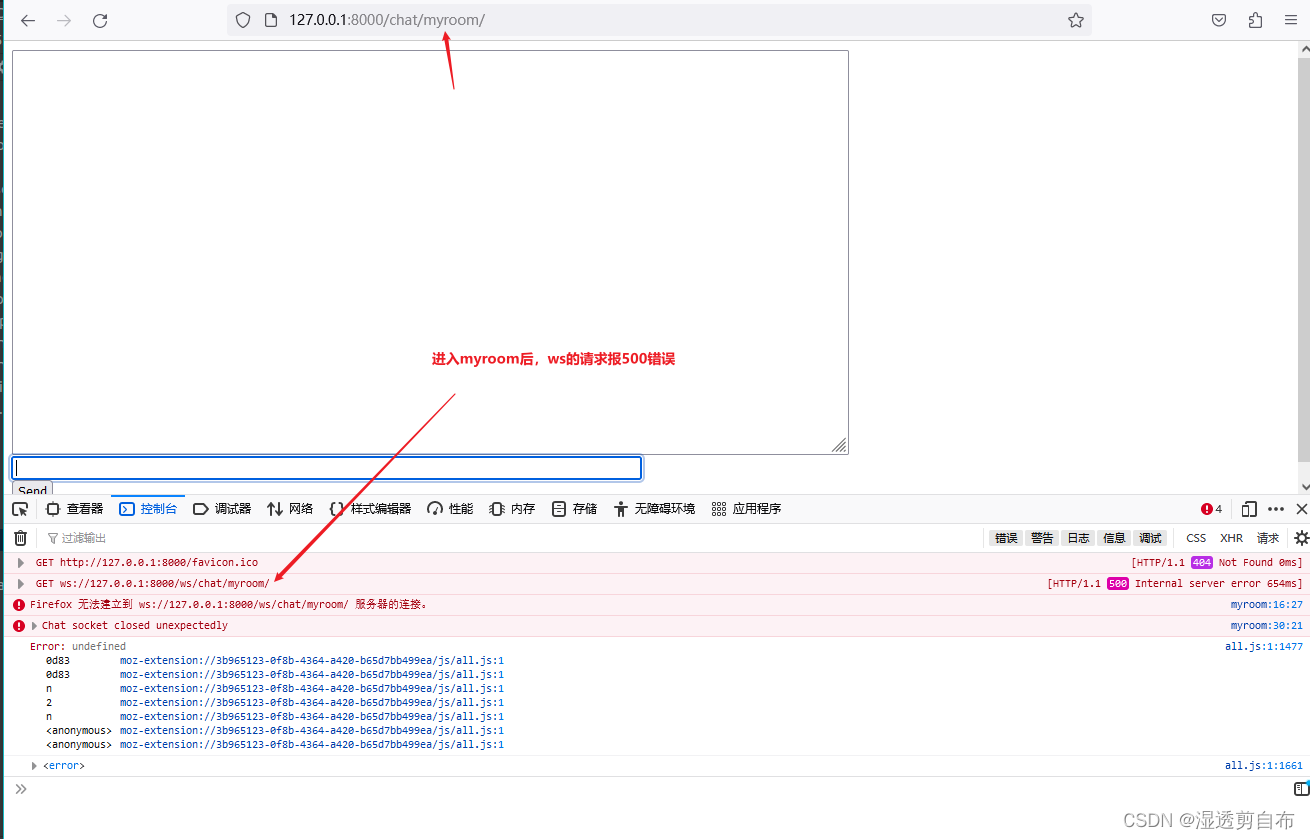
输入消息并点击Send没有任何事发生,所以接下来继续配置消费者consumers
3. 配置消费者consumers.py
在chat应用下添新建consumers.py文件,并添加以下内容
# chat/consumers.py
import jsonfrom channels.generic.websocket import WebsocketConsumerclass ChatConsumer(WebsocketConsumer):def connect(self):self.accept()def disconnect(self, close_code):passdef receive(self, text_data):text_data_json = json.loads(text_data)message = text_data_json["message"]self.send(text_data=json.dumps({"message": message}))
目录结构
4. 配置routings.py
在chat应用下新建routing.py文件,并添加以下内容
# chat/routing.py
from django.urls import re_pathfrom . import consumerswebsocket_urlpatterns = [re_path(r"ws/chat/(?P<room_name>\\w+)/$", consumers.ChatConsumer.as_asgi()),
]
5. 再次配置asgi.py
# mysite/asgi.py
import osfrom channels.auth import AuthMiddlewareStack
from channels.routing import ProtocolTypeRouter, URLRouter
from channels.security.websocket import AllowedHostsOriginValidator
from django.core.asgi import get_asgi_applicationfrom chat.routing import websocket_urlpatternsos.environ.setdefault("DJANGO_SETTINGS_MODULE", "mysite.settings")
# Initialize Django ASGI application early to ensure the AppRegistry
# is populated before importing code that may import ORM models.
django_asgi_app = get_asgi_application()import chat.routingapplication = ProtocolTypeRouter({"http": django_asgi_app,"websocket": AllowedHostsOriginValidator(AuthMiddlewareStack(URLRouter(websocket_urlpatterns))),}
)
运行迁移命令
python manage.py migrate
此时启动django项目,浏览器打开控制台访问 http://127.0.0.1:8000/,输入myroom并Enter后,不再报ws连接500的错误了
此时输入消息并点击Send,消息将出现在聊天框中,但是打开新标签页输入同一网址(http://127.0.0.1:8000/chat/myroom/)时,再发消息并不会出现在新标签页的网址消息聊天框中
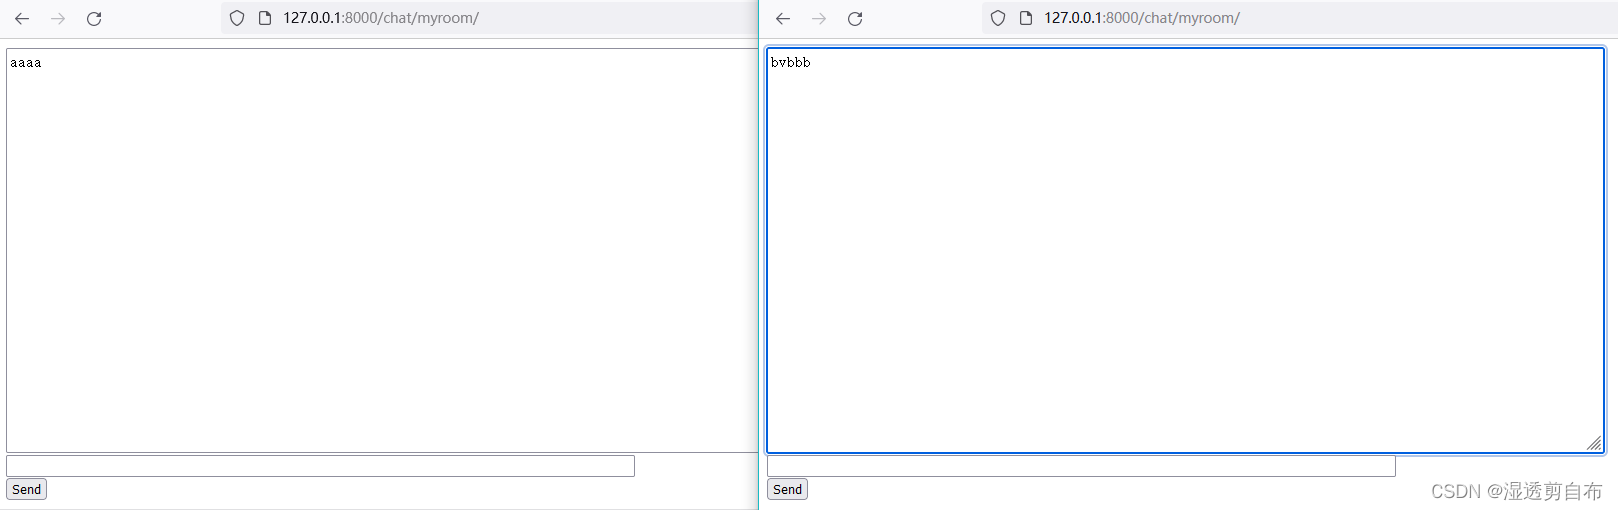
要做到能接收到另一个标签页发送的消息,还需要继续配置启动通道层CHANNEL_LAYERS
6. 启用通道层CHANNEL_LAYERS
- 先安装 channels-redis
pip3 install -i https://pypi.douban.com/simple channels-redis==4.0.0
- settings.py中添加CHANNEL_LAYERS的配置(请确认在这之前已经安装了redis)
# settings.py
CHANNEL_LAYERS = {"default": {"BACKEND": "channels_redis.core.RedisChannelLayer","CONFIG": {"hosts": [("127.0.0.1", 6379)],},},
}- 确保通道层可以与Redis通信。打开Django shell并运行以下命令:
$ python3 manage.py shell
>>> import channels.layers
>>> channel_layer = channels.layers.get_channel_layer()
>>> from asgiref.sync import async_to_sync
>>> async_to_sync(channel_layer.send)('test_channel', {'type': 'hello'})
>>> async_to_sync(channel_layer.receive)('test_channel')
{'type': 'hello'}
7. 再次配置consumers.py
将以下代码替换之前chat/consumers.py里的代码
# chat/consumers.py
import jsonfrom asgiref.sync import async_to_sync
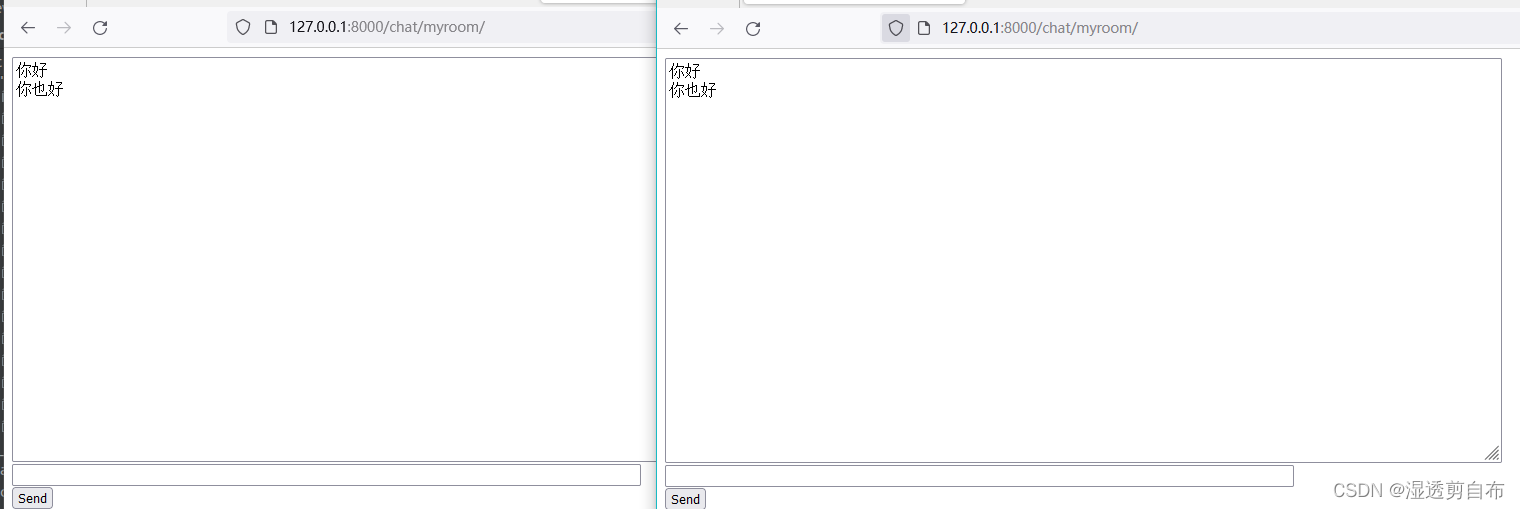
from channels.generic.websocket import WebsocketConsumerclass ChatConsumer(WebsocketConsumer):def connect(self):self.room_name = self.scope["url_route"]["kwargs"]["room_name"]self.room_group_name = f"chat_{self.room_name}"# Join room groupasync_to_sync(self.channel_layer.group_add)(self.room_group_name, self.channel_name)self.accept()def disconnect(self, close_code):# Leave room groupasync_to_sync(self.channel_layer.group_discard)(self.room_group_name, self.channel_name)# Receive message from WebSocketdef receive(self, text_data):text_data_json = json.loads(text_data)message = text_data_json["message"]# Send message to room groupasync_to_sync(self.channel_layer.group_send)(self.room_group_name, {"type": "chat.message", "message": message})# Receive message from room groupdef chat_message(self, event):message = event["message"]# Send message to WebSocketself.send(text_data=json.dumps({"message": message}))此时启动django项目,浏览器打开两个标签页,都进入到http://127.0.0.1:8000/chat/myroom/下,再次发送消息,另一个标签页就能接收到啦~
到目前为止,一个基本的全功能聊天服务器就完成了
三、改进:将消费者重写为异步
我们之前写的consumers.py里的代码都是同步的。同步使用很方便,因为他们可以调用常规的同步I/O函数 例如那些不需要编写特殊代码就可以访问Django模型。然而异步消费者可以提供更高级别的性能,因为它们在处理请求时不需要创建额外的线程。
所以我们再次重写chat/consumers.py里的代码,用以下代码替换之前写的同步代码
# chat/consumers.py
import jsonfrom channels.generic.websocket import AsyncWebsocketConsumerclass ChatConsumer(AsyncWebsocketConsumer):async def connect(self):self.room_name = self.scope["url_route"]["kwargs"]["room_name"]self.room_group_name = f"chat_{self.room_name}"# Join room groupawait self.channel_layer.group_add(self.room_group_name, self.channel_name)await self.accept()async def disconnect(self, close_code):# Leave room groupawait self.channel_layer.group_discard(self.room_group_name, self.channel_name)# Receive message from WebSocketasync def receive(self, text_data):text_data_json = json.loads(text_data)message = text_data_json["message"]# Send message to room groupawait self.channel_layer.group_send(self.room_group_name, {"type": "chat.message", "message": message})# Receive message from room groupasync def chat_message(self, event):message = event["message"]# Send message to WebSocketawait self.send(text_data=json.dumps({"message": message}))
这个新的代码是ChatConsumer非常类似于原来的代码,有以下区别:
ChatConsumer现在继承自AsyncWebsocketConsumer,而不是WebsocketConsumer。- 所有方法都是
async def而不仅仅是def。 await用于调用执行I/O的异步函数。当在通道层调用方法时,不再需要async_to_sync。
此时再次启动django项目,浏览器打开两个标签页,都进入到http://127.0.0.1:8000/chat/myroom/下,再次发送消息,这时聊天服务器是完全异步的
参考: Tutorial — Channels 4.0.0 documentation