YOLOv7+单目跟踪

YOLOv7+单目跟踪
- 1. 目标跟踪
- 2. 测距模块
-
- 2.1 设置测距模块
- 2.2 添加测距
- 3. 实验效果
相关链接
1. YOLOv5+单目测距(python)
2. YOLOv7+单目测距(python)
3. 具体效果已在Bilibili发布,点击跳转
1. 目标跟踪
用yolov7实现跟踪步骤比较简单,去官网下载yolov7源码,然后下载跟踪模块相关代码,链接:https://download.csdn.net/download/qq_45077760/87712810
将下载的内容全部拖进yolov7-main文件夹里,把环境装好,然后运行代码 detect_or_track.py
此时如果不出问题就完成了普通检测
也可以用终端运行命令python detect_or_track.py --weight yolov7.pt --no-trace --view-img --source 1.mp4
--show-fps #显示fps
--seed 2 #初始数字,直接改变目标方框颜色和序号
--track  #每个方框左上角有ID数字
--classes 0 1 # 只显示前两种类型 (总共80种在data/coco.yaml里)
--show-track #显示跟踪轨迹
--unique-track-color # 每条轨迹不同颜色
--nobbox
--nolabel
--nosave# 不保存,把上边那行删掉,会保存到XXX\\yolov7\\runs\\detect\\exp
2. 测距模块
2.1 设置测距模块
测距部分之前已经写过了,具体见这篇文章,我们在yolov7-main文件夹里创建一个名为distance.py的文件,或者直接把测距那篇文章里的distance.py文件拖进来也可以
distance.py
foc = 1990.0        # 镜头焦距
real_hight_person = 66.9   # 行人高度
real_hight_car = 57.08      # 轿车高度# 自定义函数,单目测距
def person_distance(h):dis_inch = (real_hight_person * foc) / (h - 2)dis_cm = dis_inch * 2.54dis_cm = int(dis_cm)dis_m = dis_cm/100return dis_mdef car_distance(h):dis_inch = (real_hight_car * foc) / (h - 2)dis_cm = dis_inch * 2.54dis_cm = int(dis_cm)dis_m = dis_cm/100return dis_m
2.2 添加测距
接下来调用测距代码到主代码 detect_or_track.py 文件中,先在代码开头导入库,添加
from distance import person_distance,car_distance
与测距那篇文章不同,由于跟踪代码自带画框,我们只需要将测距模块写进画框这里,具体如下(注释部分是我添加修改的)
def draw_boxes(img, bbox, identities=None, categories=None, confidences = None, names=None, colors = None):global distancefor i, box in enumerate(bbox):x1, y1, x2, y2 = [int(i) for i in box]tl = opt.thickness or round(0.002 * (img.shape[0] + img.shape[1]) / 2) + 1 # line/font thicknesscat = int(categories[i]) if categories is not None else 0id = int(identities[i]) if identities is not None else 0# conf = confidences[i] if confidences is not None else 0color = colors[cat]if not opt.nobbox:cv2.rectangle(img, (x1, y1), (x2, y2), color, tl)if not opt.nolabel:h =y2-y1 #计算人的像素高度dis_m = person_distance(h) # 调用函数,计算行人实际高度#label = str(id) + ":" + names[cat] if identities is not None else f'{names[cat]} {confidences[i]:.2f}'label = str(id) + ":"+ names[cat]+ " "+"dis:"+str(dis_m)+"m" if identities is not None else f'{names[cat]} {confidences[i]:.2f}' # 将显示内容写进label,以便接下来画框显示tf = max(tl - 1, 1) # font thicknesst_size = cv2.getTextSize(label, 0, fontScale=tl / 3, thickness=tf)[0]c2 = x1 + t_size[0], y1 - t_size[1] - 3cv2.rectangle(img, (x1, y1), c2, color, -1, cv2.LINE_AA) # filledcv2.putText(img, label, (x1, y1 - 2), 0, tl / 3, [225, 255, 255], thickness=tf, lineType=cv2.LINE_AA)return img
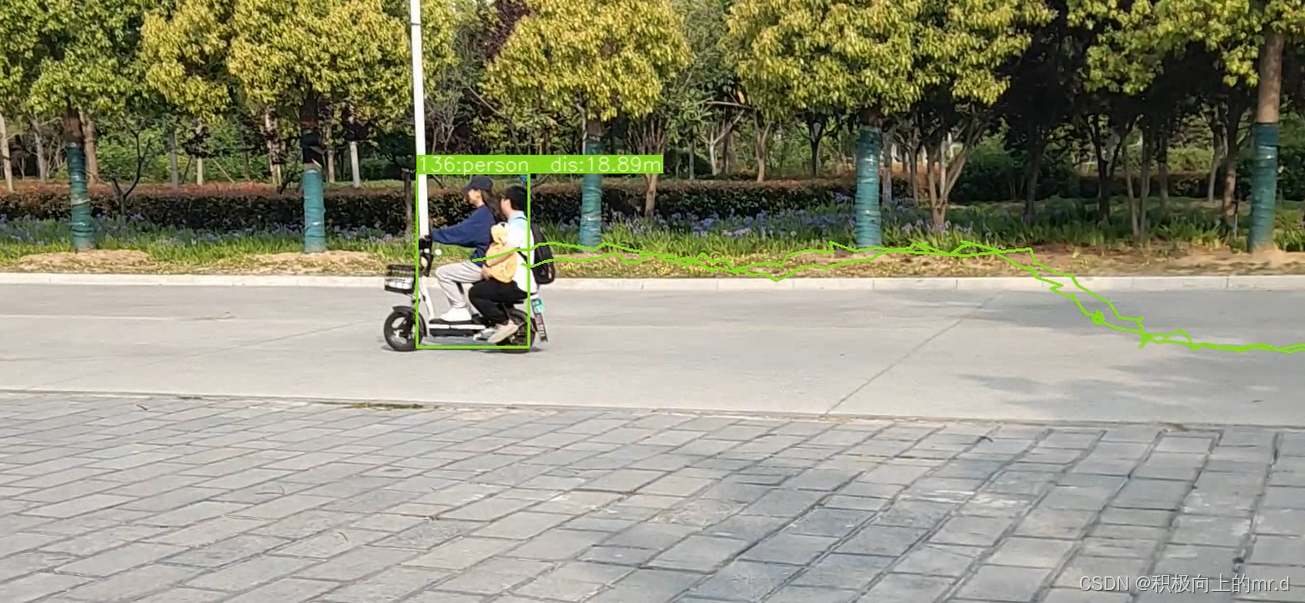
3. 实验效果
同理,运行 detect_or_track.py 或者用终端运行命令python detect_or_track.py --weight yolov7.pt --no-trace --view-img --source 1.mp4
代码打包下载
链接1:https://download.csdn.net/download/qq_45077760/87712914
链接2:https://github.com/up-up-up-up/yolov7_Monocular_track(求STAR)
博客主页有更多有关测距的内容