SpringBoot集成模板引擎Thymeleaf

本博文重点内容共3个方面,分别是:
- 在SpringBoot中使用thymeleaf
- 自定义thymeleaf工具类导出静态网页
- thymeleaf常用的标签
一、在SpringBoot中使用thymeleaf
pom.xml
<!--Thymeleaf 启动器--><dependency><groupId>org.springframework.boot</groupId><artifactId>spring-boot-starter-thymeleaf</artifactId></dependency>
application.yml
server:port: 8070
spring:mvc:static-path-pattern: /static/thymeleaf:#去除thymeleaf的html严格校验mode: LEGACYHTML5#设定thymeleaf文件路径,默认为src/main/resources/templatesprefix: classpath:/templates/#是否开启模板缓存,默认true,建议在开发时关闭缓存,不然没法看到实时页面,也就是修改了html后不用重启,刷新页面就能看到效果,修改完html后一定要ctrl+f9重新build一下。cache: false#模板编码encoding: UTF-8
实体Dept
package demo.entity;import lombok.AllArgsConstructor;
import lombok.Data;
import lombok.NoArgsConstructor;@Data
@AllArgsConstructor
@NoArgsConstructor
public class Dept {private Integer id;private String deptName;private String location;
}
thymeleaf模板:deptList.html
在resources/templates文件夹中创建thymeleaf模板文件deptList.html
注意:使用xmlns命名空间
<html xmlns="http://www.w3.org/1999/xhtml" xmlns:th="http://www.thymeleaf.org">
<head><meta charset="UTF-8"><title>Hello Thymeleaf</title>
</head>
<body>
<div><span>访问列表</span><table><thead><tr><th>部门编号</th><th>部门名称</th><th>部门地址</th></tr></thead><tbody><!--/*@thymesVar id="depts" type=""*/--><tr th:each="dept : ${depts}"><td th:text="${dept.id}"></td><td th:text="${dept.deptName}"></td><td th:text="${dept.location}"></td></tr></tbody></table>
</div>
</body>
</html>
controller中渲染数据
package demo;import demo.entity.Dept;
import org.springframework.boot.SpringApplication;
import org.springframework.boot.autoconfigure.SpringBootApplication;
import org.springframework.stereotype.Controller;
import org.springframework.ui.ModelMap;
import org.springframework.web.bind.annotation.RequestMapping;import java.util.ArrayList;
import java.util.List;@SpringBootApplication
@Controller
public class Demo {public static void main(String[] args) {SpringApplication.run(Demo.class);}@RequestMapping("/list")public String gen(ModelMap modelMap){List<Dept> depts = new ArrayList<>();depts.add(new Dept(10, "ACCOUNTING", "NEWYORK"));depts.add(new Dept(20, "RESEARCH", "DALLAS"));depts.add(new Dept(30, "SALES", "CHICAGO"));depts.add(new Dept(40, "OPERATIONS", "BOSTON"));modelMap.addAttribute("depts", depts);return "deptList";}
}
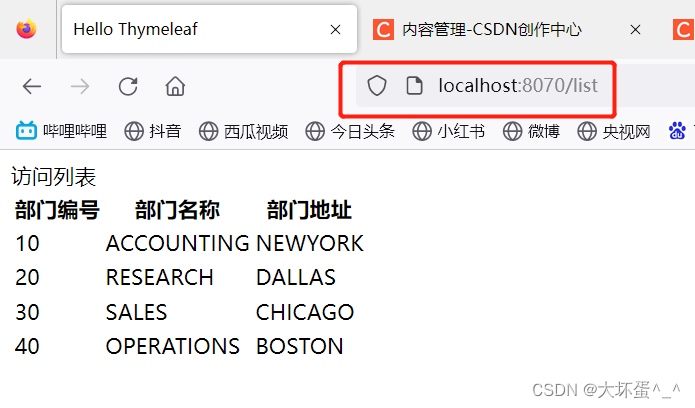
浏览器请求list路径,将跳转到templates/deptList.html页面(前缀是通过application.yml配置的),效果如下图,可以看到数据已经成功渲染到了HTML页面上
二、导出静态化HTML页面
接上面的案例,添加thymeleaf导出静态页面的工具类
工具类ThymeleafUtil.java
package demo.utils;import org.springframework.stereotype.Component;
import org.thymeleaf.TemplateEngine;
import org.thymeleaf.context.Context;import javax.annotation.Resource;
import java.io.File;
import java.io.FileNotFoundException;
import java.io.PrintWriter;
import java.io.UnsupportedEncodingException;
import java.util.HashMap;
import java.util.Map;@Component
public class ThymeleafUtil {@Resourceprivate TemplateEngine templateEngine;/* 生成静态页面 @param templateName 放在根路径templates下的的模板文件的名称* @param dest         带路径的目标文件* @param data         数据* @param key          模板中的key* @return 成功返回true,失败返回false*/public boolean genPage(String templateName, String dest, Object data, String key) {// 创建上下文,Context context = new Context();// 把数据加入上下文Map<String, Object> vars = new HashMap<>();vars.put(key, data);context.setVariables(vars);// 创建输出流,关联到一个临时文件File destFile = new File(dest);// 备份原页面文件try (PrintWriter writer = new PrintWriter(destFile, "UTF-8")) {// 利用thymeleaf模板引擎生成 静态页面templateEngine.process(templateName, context, writer);return true;} catch (FileNotFoundException | UnsupportedEncodingException e) {e.printStackTrace();return false;}}
}
创建单元测试导出静态化页面
package demo;import demo.entity.Dept;
import demo.utils.ThymeleafUtil;
import org.junit.jupiter.api.Test;
import org.springframework.beans.factory.annotation.Autowired;
import org.springframework.boot.test.context.SpringBootTest;import java.util.ArrayList;
import java.util.List;@SpringBootTest(classes = {Demo.class})
public class JTest {@Autowiredprivate ThymeleafUtil thymeleafUtil;/* 使用thymeleaf工具类生成静态文件*/@Testpublic void testGen(){List<Dept> depts = new ArrayList<>();depts.add(new Dept(10, "ACCOUNTING", "NEWYORK"));depts.add(new Dept(20, "RESEARCH", "DALLAS"));depts.add(new Dept(30, "SALES", "CHICAGO"));depts.add(new Dept(40, "OPERATIONS", "BOSTON"));boolean res = thymeleafUtil.genPage("deptList", "asdf1234.html", depts, "depts");System.out.println(res ? "ok" : "error");}
}
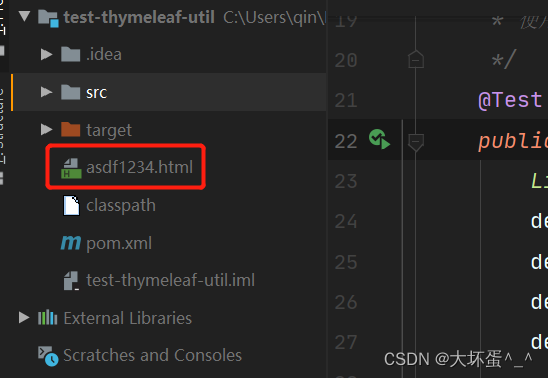
运行之后可以看到项目根目录已经导出了asdf1234.html
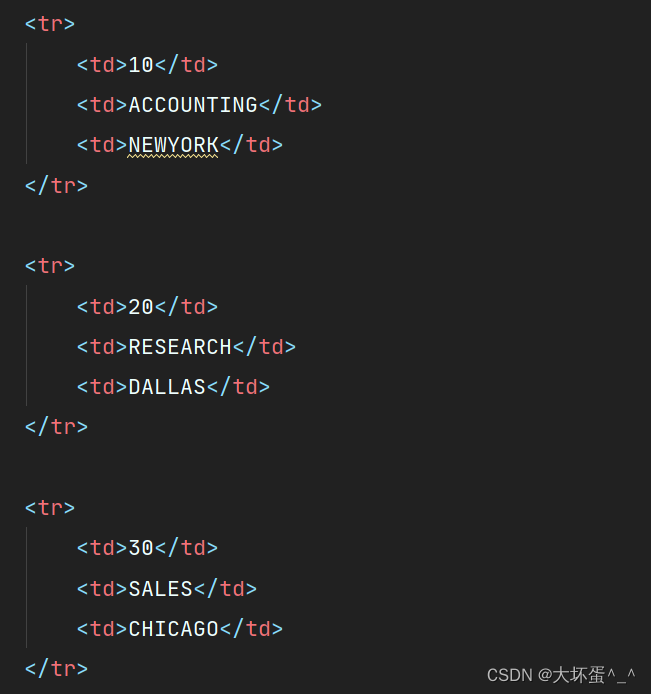
打开这个html文件,发现数据已经成功渲染
三、常用th标签
该部分参考自:Thymeleaf 的简单语法和常用th标签
th的常用标签
| 关键字 | 功能介绍 | 案例 |
|---|---|---|
| th:id | 替换id | <input th:id="'xxx' + ${collect.id}"/> |
| th:text | 文本替换 | <p th:text="${collect.description}">description</p> |
| th:utext | 支持html的文本替换 | <p th:utext="${htmlcontent}">conten</p> |
| th:object | 替换对象 | <div th:object="${session.user}"> |
| th:value | 属性赋值 | <input th:value="${user.name}" /> |
| th:with | 变量赋值运算 | <div th:with="isEven=${prodStat.count}%2==0"></div> |
| th:style | 设置样式 | th:style="'display:' + @{(${sitrue} ? 'none' : 'inline-block')} + ''" |
| th:onclick | 点击事件 | th:onclick="'getCollect()'" |
| th:each | 属性赋值 | tr th:each="user,userStat:${users}"> |
| th:if | 判断条件 | <a th:if="${userId == collect.userId}" > |
| th:unless | 和th:if判断相反 | <a th:href="@{/login}" th:unless=${session.user != null}>Login</a> |
| th:href | 链接地址 | <a th:href="@{/login}" th:unless=${session.user != null}>Login</a> /> |
| th:switch | 多路选择 配合th:case 使用 | <div th:switch="${user.role}"> |
| th:case | th:switch的一个分支 | <p th:case="'admin'">User is an administrator</p> |
| th:fragment | 布局标签,定义一个代码片段,方便其它地方引用 | <div th:fragment="alert"> |
| th:include | 布局标签,替换内容到引入的文件 | <head th:include="layout :: htmlhead" th:with="title='xx'"></head> /> |
| th:replace | 布局标签,替换整个标签到引入的文件 | <div th:replace="fragments/header :: title"></div> |
| th:selected | selected选择框 选中 | th:selected="(${xxx.id} == ${configObj.dd})" |
| th:src | 图片类地址引入 | <img class="img-responsive" alt="App Logo" th:src="@{/img/logo.png}" /> |
| th:inline | 定义js脚本可以使用变量 | <script type="text/javascript" th:inline="javascript"> |
| th:action | 表单提交的地址 | <form action="subscribe.html" th:action="@{/subscribe}"> |
| th:remove | 删除某个属性 | |
| th:attr | 设置标签属性,多个属性可以用逗号分隔 | 比如 th:attr="src=@{/image/aa.jpg},title=#{logo}",此标签不太优雅,一般用的比较少。 |
1.all:删除包含标签和所有的孩子。 2.body:不包含标记删除,但删除其所有的孩子。 3.tag:包含标记的删除,但不删除它的孩子。 4.all-but-first:删除所有包含标签的孩子,除了第一个。 5.none:什么也不做。这个值是有用的动态评估。