OpenAI最新官方ChatGPT聊天插件接口《插件身份验证》全网最详细中英文实用指南和教程,助你零基础快速轻松掌握全新技术(三)(附源码)

Plugin authentication 插件身份验证
- 前言
- Plugin authentication 插件身份验证
- No authentication 无认证
- Service level 服务级别
- User level 用户级别
- OAuth
- 其它资料下载
前言
“如果你不能信任插件,那么你就不能信任整个应用程序。”正因为如此,ChatGPT始终把插件认证放在极为重要的位置上,确保每一个插件都是可靠的、安全的。在ChatGPT中,插件认证机制可以保证用户数据和访问控制的安全。一个好的插件认证机制不仅需要能够验证插件的身份,还需要保护用户的隐私信息,并且确保插件只能访问其被授权的资源。
Plugin authentication 插件身份验证
Plugins offer numerous authentication schemas to accommodate various use cases. To specify the authentication schema for your plugin, use the manifest file. Our plugin domain policy outlines our strategy for addressing domain security issues. For examples of available authentication options, refer to the examples section, which showcases all the different choices.
插件提供了许多身份验证模式以适应各种用例。要指定插件的身份验证模式,请使用清单文件。我们的插件域策略概述了我们解决域安全问题的策略。有关可用身份验证选项的示例,请参阅示例部分,其中展示了所有不同的选项。
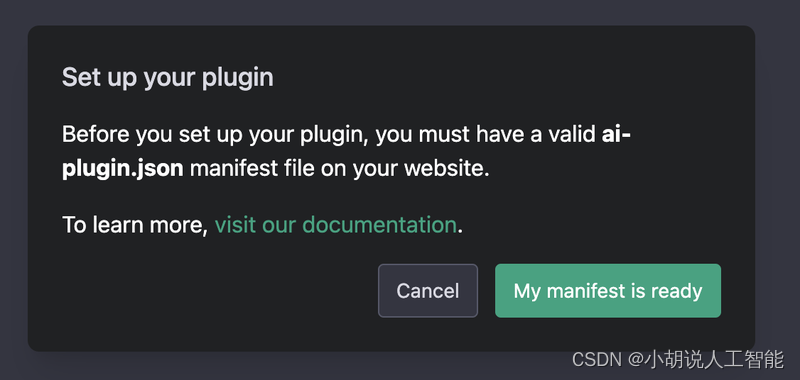
Note that the ai-plugin.json file requires an auth schema to be set. Even if you elect to use no authentication, it is still required to specify "auth": { "type": "none" }.
请注意, ai-plugin.json 文件需要设置 auth 模式。即使您选择不使用身份验证,仍然需要指定 "auth": { "type": "none" } 。
No authentication 无认证
We support no-auth flow for applications that do not require authentication, where a user is able to send requests directly to your API without any restrictions. This is particularly useful if you have an open API that you want to make available to everyone, as it allows traffic from sources other than just OpenAI plugin requests.
对于不需要身份验证的应用程序,我们支持无身份验证流,其中用户能够直接向您的API发送请求,而不受任何限制。如果你有一个开放的API,你想让每个人都可以使用,这是特别有用的,因为它允许来自其他来源的流量,而不仅仅是OpenAI插件请求。
"auth": {"type": "none"
},
Service level 服务级别
If you want to specifically enable OpenAI plugins to work with your API, you can provide a client secret during the plugin installation flow. This means that all traffic from OpenAI plugins will be authenticated but not on a user level. This flow benefits from a simple end user experience but less control from an API perspective.
如果你想专门启用OpenAI插件来与你的API一起工作,你可以在插件安装流程中提供一个客户端密码。这意味着来自OpenAI插件的所有流量都将进行身份验证,但不会在用户级别进行身份验证。此流程受益于简单的最终用户体验,但从API角度来看控制较少。
- To start, a developer pastes in their access token (global key)
首先,开发人员粘贴他们的访问令牌(全局密钥) - Then, they have to add the verification token to their manifest file
然后,他们必须将验证令牌添加到他们的清单文件中 - We store an encrypted version of the token
我们存储令牌的加密版本 - Users don’t need to do anything when they install the plugin
用户在安装插件时不需要做任何事情 - Last, we pass it in the Authorization header when making requests to the plugin (“Authorization”: “[Bearer/Basic][user’s token]”)
最后,我们在向插件发出请求时将其传递到Authorization头中(“Authorization”:“[Bearer/Basic][user’s token]”)
"auth": {"type": "service_http","authorization_type": "bearer","verification_tokens": {"openai": "cb7cdfb8a57e45bc8ad7dea5bc2f8324"}
},
User level 用户级别
Just like how a user might already be using your API, we allow user level authentication through enabling end users to copy and paste their secret API key into the ChatGPT UI during plugin install. While we encrypt the secret key when we store it in our database, we do not recommend this approach given the poor user experience.
就像用户可能已经在使用您的API一样,我们允许最终用户在插件安装期间将其API密钥复制并粘贴到ChatGPT UI中,从而实现用户级身份验证。虽然我们在将密钥存储在数据库中时会对其进行加密,但考虑到用户体验较差,我们不建议使用这种方法。
- To start, a user pastes in their access token when installing the plugin
首先,用户在安装插件时粘贴他们的访问令牌 - We store an encrypted version of the token
我们存储令牌的加密版本 - We then pass it in the Authorization header when making requests to the plugin (“Authorization”: “[Bearer/Basic][user’s token]”)
然后,我们在向插件发出请求时将其传递到Authorization头中(“Authorization”:“[Bearer/Basic][user’s token]”)
"auth": {"type": "user_http","authorization_type": "bearer",
},
OAuth
The plugin protocol is compatible with OAuth. A simple example of the OAuth flow we are expecting in the manifest looks like the following:
插件协议与OAuth兼容。我们在清单中期望的OAuth流的一个简单示例如下所示:
- To start, a developer pastes in their OAuth client id and client secret
首先,开发人员粘贴他们的OAuth客户端ID和客户端密码- Then they have to add the verification token to their manifest file
然后他们必须将验证令牌添加到他们的清单文件中
- Then they have to add the verification token to their manifest file
- We store an encrypted version of the client secret
我们存储客户端机密的加密版本 - Users log in through the plugin’s website when they install the plugin
用户在安装插件时通过插件的网站登录- That gives us an OAuth access token (and optionally a refresh token) for the user, which we store encrypted
这为我们提供了一个用户的OAuth访问令牌(以及可选的刷新令牌),我们将其加密存储
- That gives us an OAuth access token (and optionally a refresh token) for the user, which we store encrypted
- Last, we pass that user’s token in the Authorization header when making requests to the plugin (“Authorization”: “[Bearer/Basic][user’s token]”)
最后,当向插件发出请求时,我们在Authorization头中传递该用户的令牌(“Authorization”:“[Bearer/Basic][user’s token]”)
"auth": {"type": "oauth","client_url": "https://my_server.com/authorize","scope": "","authorization_url": "https://my_server.com/token","authorization_content_type": "application/json","verification_tokens": {"openai": "abc123456"}
},
To better understand the URL structure for OAuth, here is a short description of the fields:
为了更好地理解OAuth的URL结构,下面是字段的简短说明:
- When you set up your plugin with ChatGPT, you will be asked to provide your OAuth
client_idandclient_secret
当您使用ChatGPT设置插件时,系统会要求您提供OAuthclient_id和client_secret - When a user logs into the plugin, ChatGPT will direct the user’s browser to
"[client_url]?response_type=code&client_id=[client_id]&scope=[scope]&redirect_uri=https%3A%2F%2Fchat.openai.com%2Faip%2F[plugin_id]%2Foauth%2Fcallback"
当用户登录插件时,ChatGPT会将用户的浏览器引导到"[client_url]?response_type=code&client_id=[client_id]&scope=[scope]&redirect_uri=https%3A%2F%2Fchat.openai.com%2Faip%2F[plugin_id]%2Foauth%2Fcallback" - After your plugin redirects back to the given redirect_uri, ChatGPT will complete the OAuth flow by making a POST request to authorization_url with content type
authorization_content_typeand parameters{ “grant_type”: “authorization_code”, “client_id”: [client_id], “client_secret”: [client_secret], “code”: [the code that was returned with the redirect], “redirect_uri”: [the same redirect uri as before] }
在插件重定向回给定的redirect_uri之后,ChatGPT将通过使用内容类型authorization_content_type和参数{ “grant_type”: “authorization_code”, “client_id”: [client_id], “client_secret”: [client_secret], “code”: [the code that was returned with the redirect], “redirect_uri”: [the same redirect uri as before] }向authorization_url发出POST请求来完成OAuth流程
其它资料下载
如果大家想继续了解人工智能相关学习路线和知识体系,欢迎大家翻阅我的另外一篇博客《重磅 | 完备的人工智能AI 学习——基础知识学习路线,所有资料免关注免套路直接网盘下载》
这篇博客参考了Github知名开源平台,AI技术平台以及相关领域专家:Datawhale,ApacheCN,AI有道和黄海广博士等约有近100G相关资料,希望能帮助到所有小伙伴们。