跨平台开发 uni-app

目录:
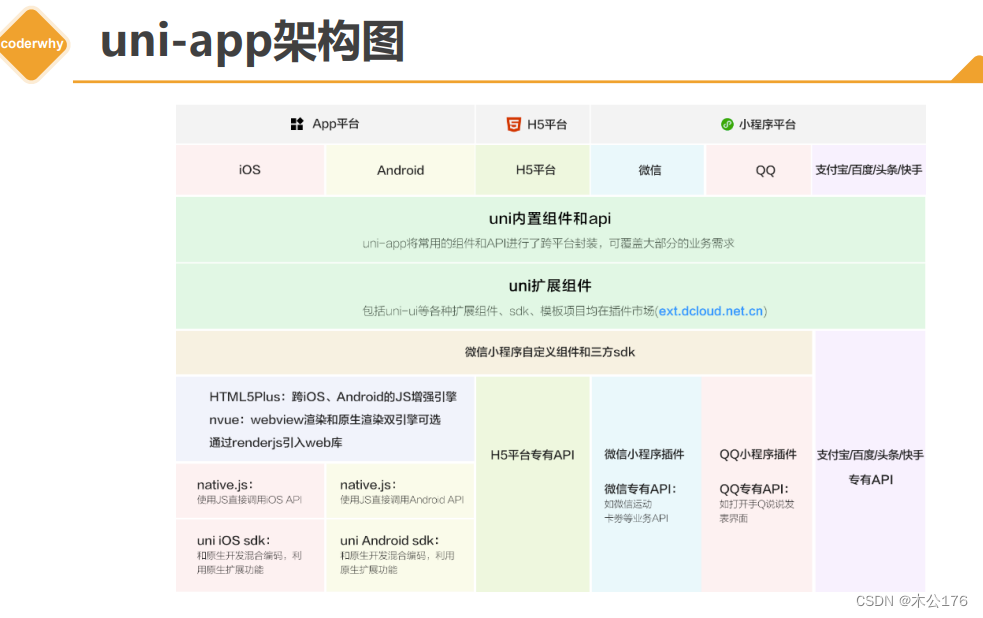
1 邂逅跨平台开发
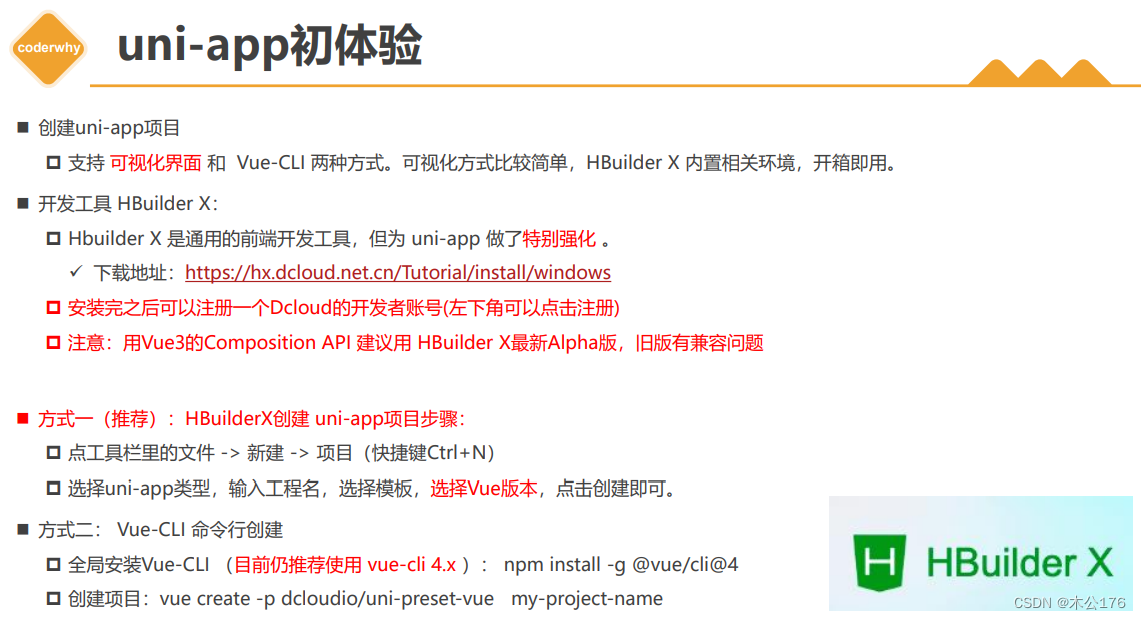
2 初体验uni-app
3 uni-app全局文件
4 内置组件和样式
5 扩展组件 uni-ui
6 跨端兼容实现
7 路由和生命周期
8、扩展组件 uni-ui
9、跨端兼容实现
10、页面路由和传参
11、其它常用API
12、自定义组件
13、状态管理Pinia
创建的uniapp项目使用的vue3
hbuilder遇到没有的环境,会在右下角提示下载插件,如果没提示就去工具的插件安装安装需要的插件即可。例如vue3编译环境、scss环境
准备阶段:
预设快捷方案:
设置代码字体大小:
1、按住ctrl 再按+号
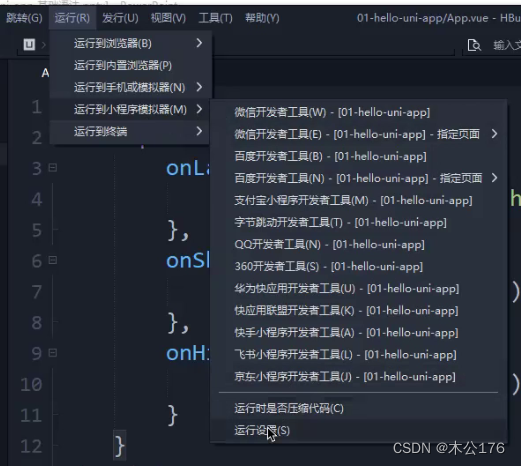
2、在运行的运行设置的常用配置设置字体大小。
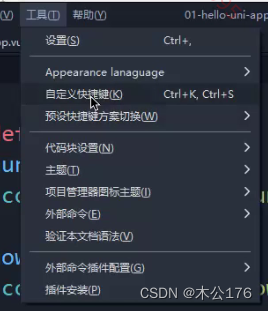
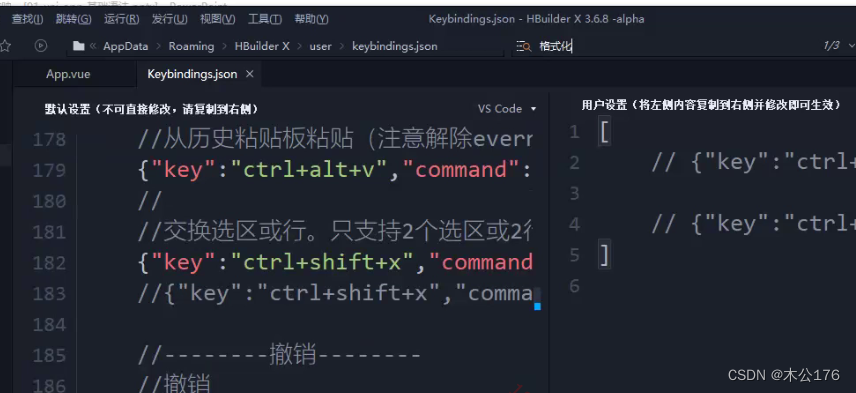
查找快捷键:
在工具点击自定义快捷键会弹出一个文件,通过查找你需要的快捷键名称可以找到已有的快捷键。
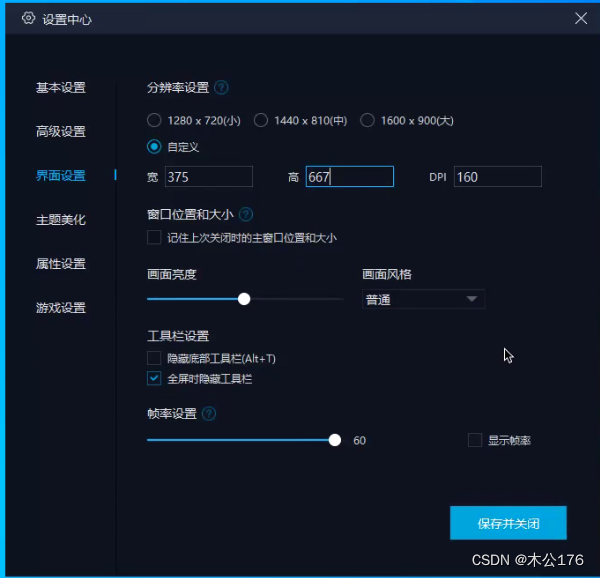
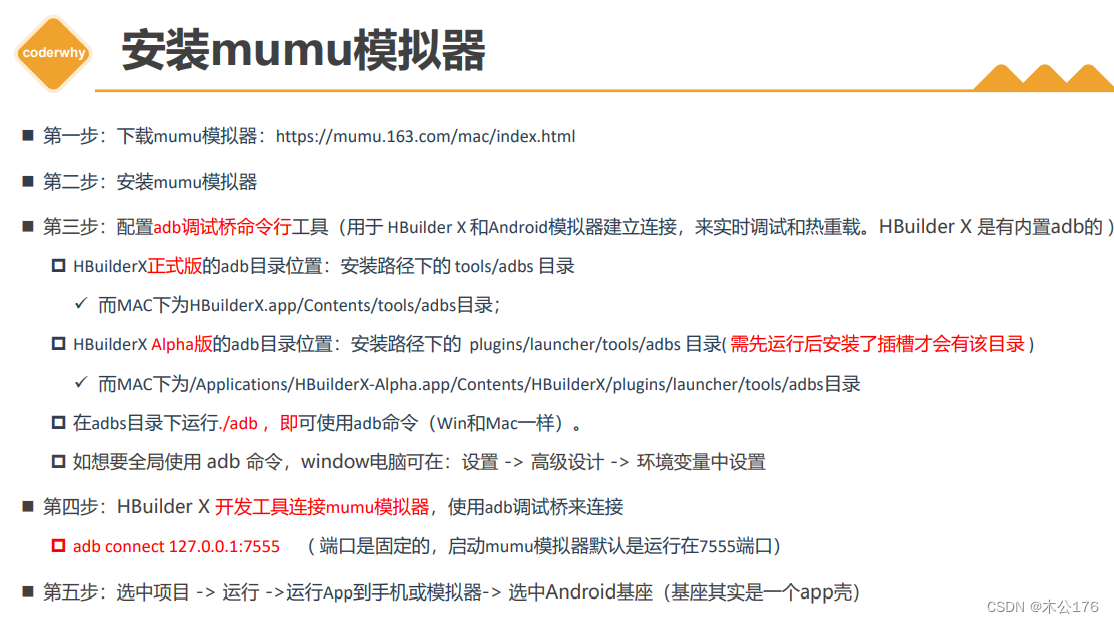
mumu模拟器设置成iPhone5的样式并通过adb调试桥连通hbuilder:
mumu模拟器设置分辨率自定义
旋转屏幕
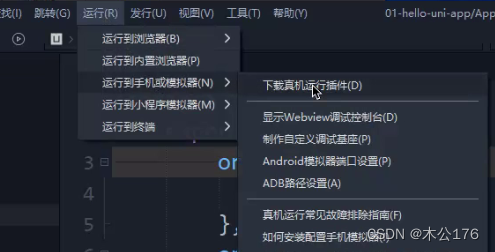
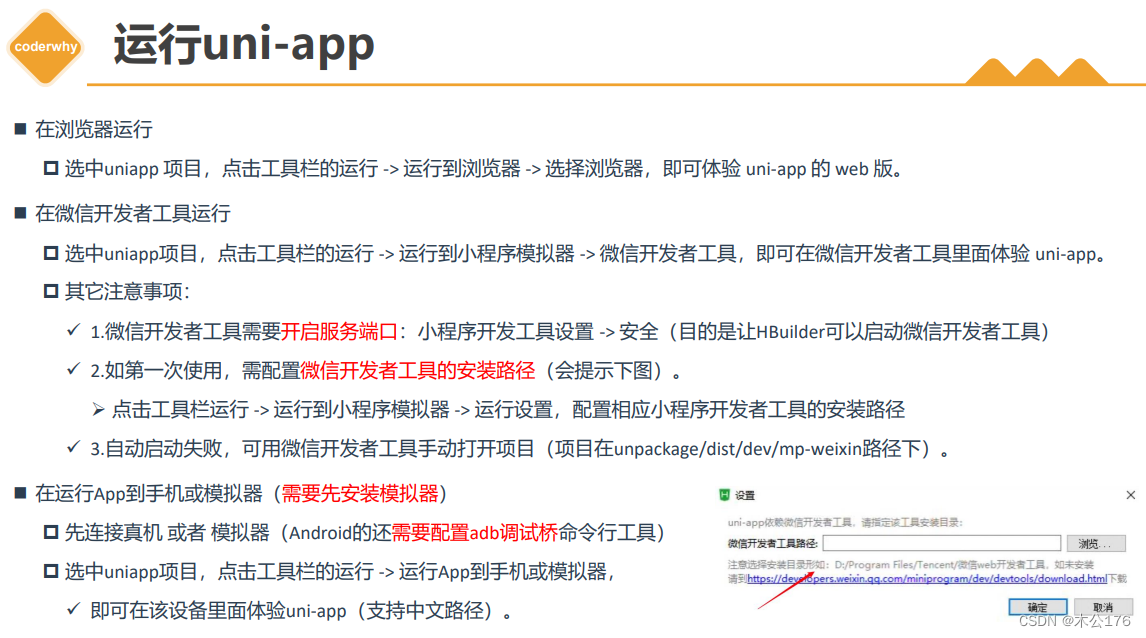
如果刚安装hbuilder文件底下可能没有adb工具,这时候先打开hbuilder,在运行到手机那栏,点击下载真机运行插件,安装完成之后在HBuilderX\\plugins\\launcher\\tools\\adbs就可以找到adb调试桥工具了。
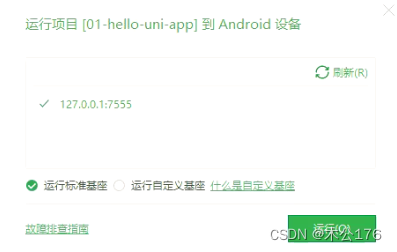
使用adb调试桥工具:
在adb调试桥文件夹位置打开dos命令,输入两行代码
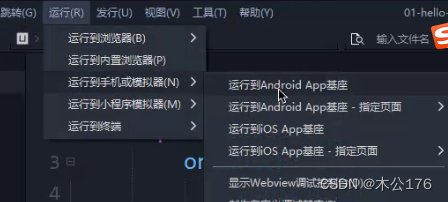
./adb connect 127.0.0.1:7555./adb devices然后继续运行hbuilder的真机运行会有如下选项
注意:每次打开hbuilder需要使用mumu模拟器的话都是需要执行代码的,否则hbuilder找不到模拟器。
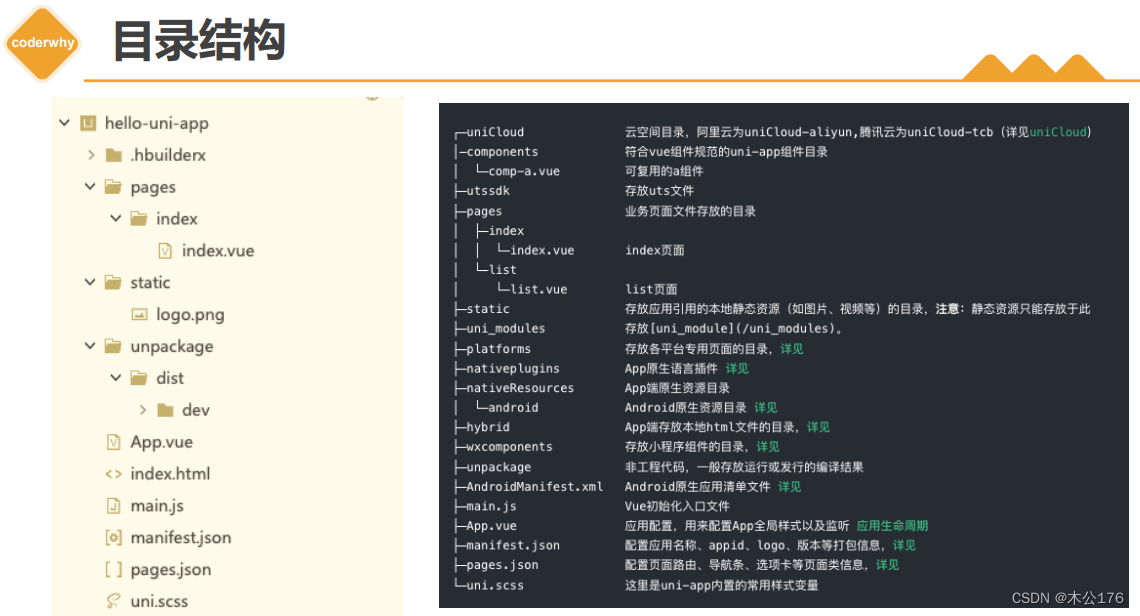
./adb connect 127.0.0.1:7555关于uniapp项目的目录结构:
工程简介 | uni-app官网 (dcloud.net.cn)
https://uniapp.dcloud.net.cn/tutorial/project.html#%E7%9B%AE%E5%BD%95%E7%BB%93%E6%9E%84
配置文件介绍:
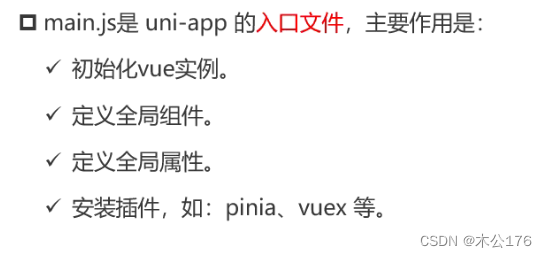
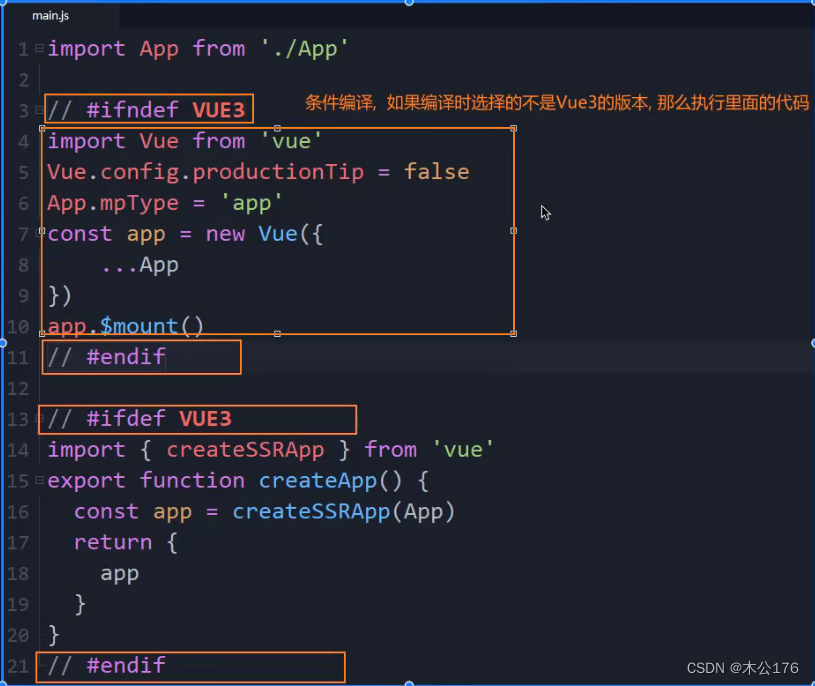
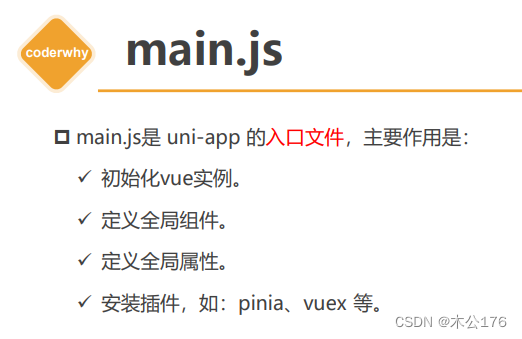
1、main.js 入口文件
(1)条件编译,上面包裹的是vue2环境才会执行,下面包裹的是vue3环境才会执行
需要修改vue版本可以在这里修改
uni-app官网 (dcloud.net.cn)
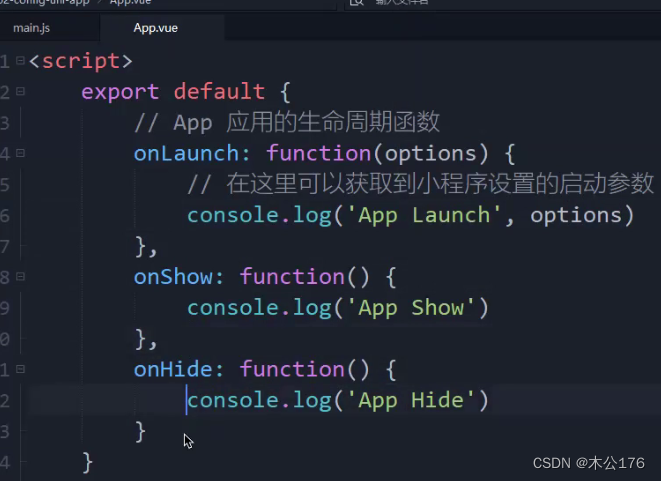
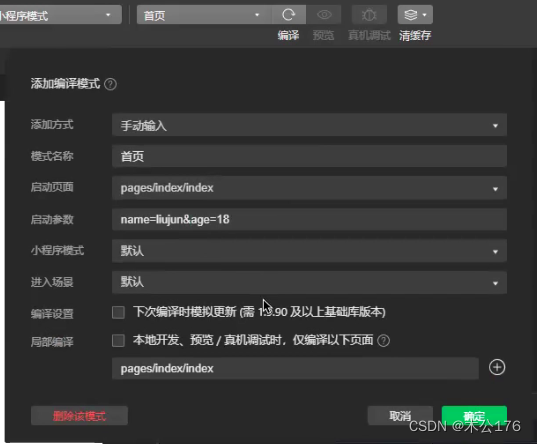
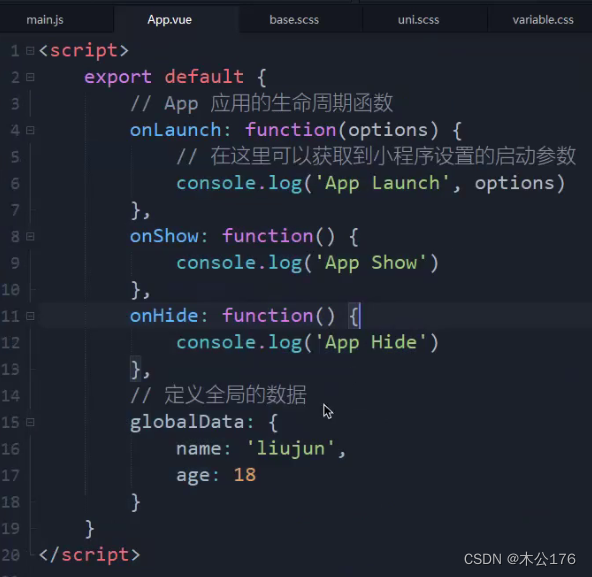
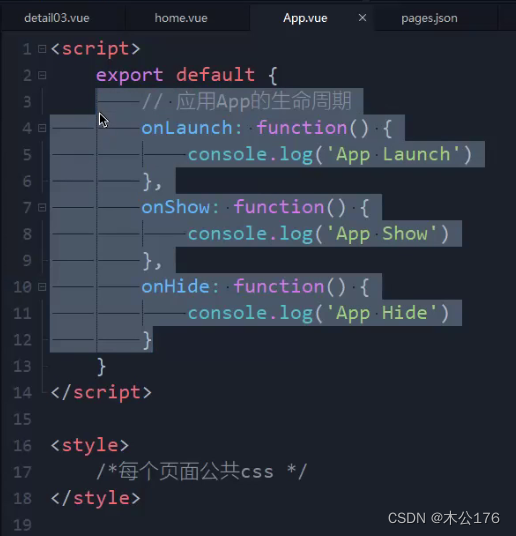
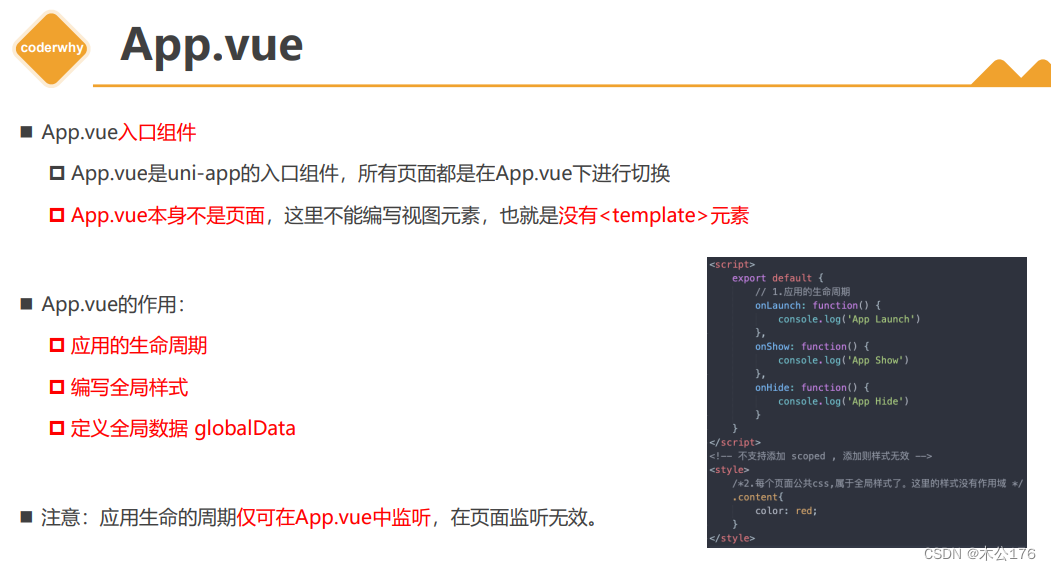
2、App.vue
用于编写app生命周期要做的事情,option可以获取微信小程序进入时给的参数。
微信 小程序进入时给的参数:
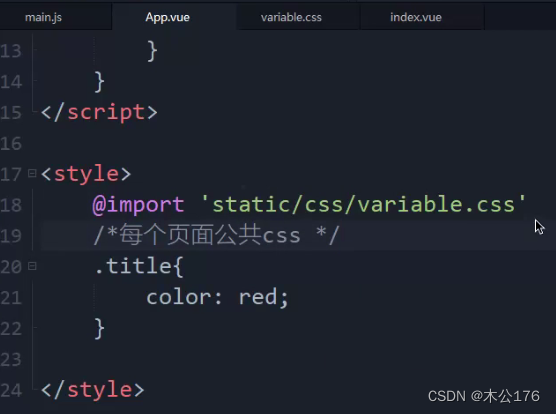
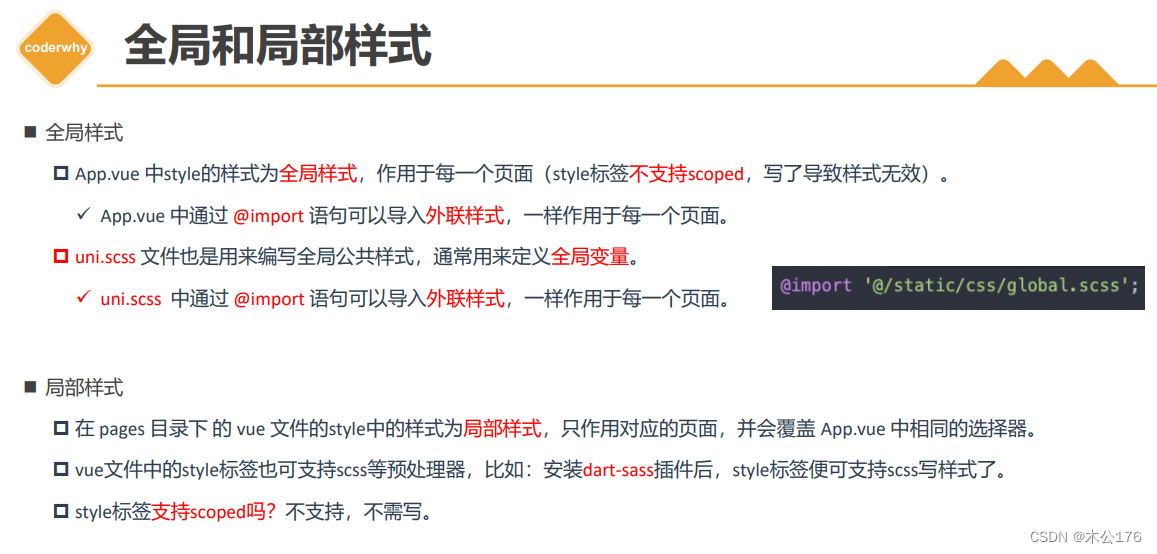
app。vue还可以设置全局样式。可以是引入的css文件。
注意:
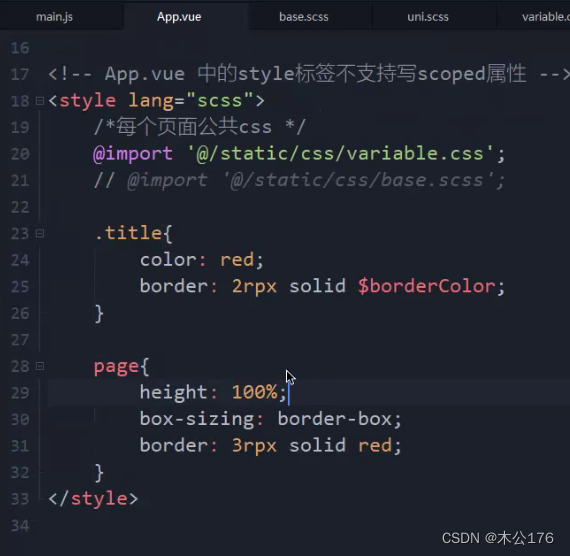
i:style标签不支持使用scoped,用了之后style 的样式就无效了。
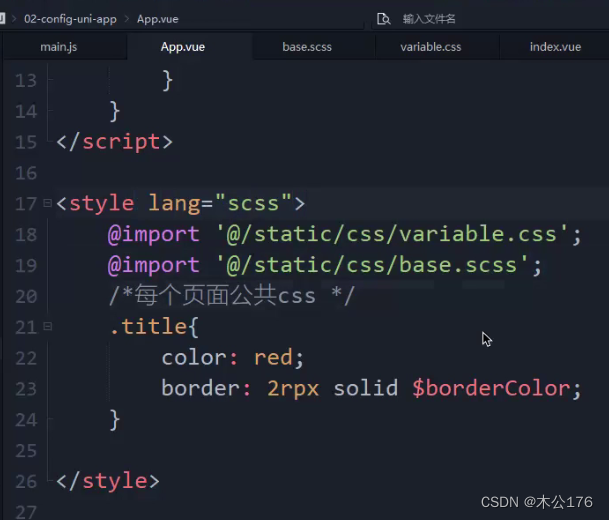
ii:@import url(' ')可以获取网络在线的文件或本地文件,@import 引入本地 ,@为根目录,可以引入scss文件,hbuilder需要下载插件后正常使用scss文件。
iii:设置全局样式变量只能在uni.scss文件,在app。vue定义样式变量在其他页面用不了
iiii:app.vue这个style标签里面@import 引入的scss样式不是说其他页面也可以直接使用该样式变量(在app.vue引入的scss只能在app.vue文件里面使用scss的样式变量)。其他页面还是需要引入scss样式才能使用样式文件的内容。如果你的某个scss样式文件很常用,想要每个页面文件都能使用,那就在uni.scss文件里面引入就好了,在uni.scss引入的样式变量是全页面通用的。
在app.vue文件的style标签里面还可以控制page的css样式。page是每个页面的根标签,就是说页面的template里面的最外层标签外还被page标签包裹着。
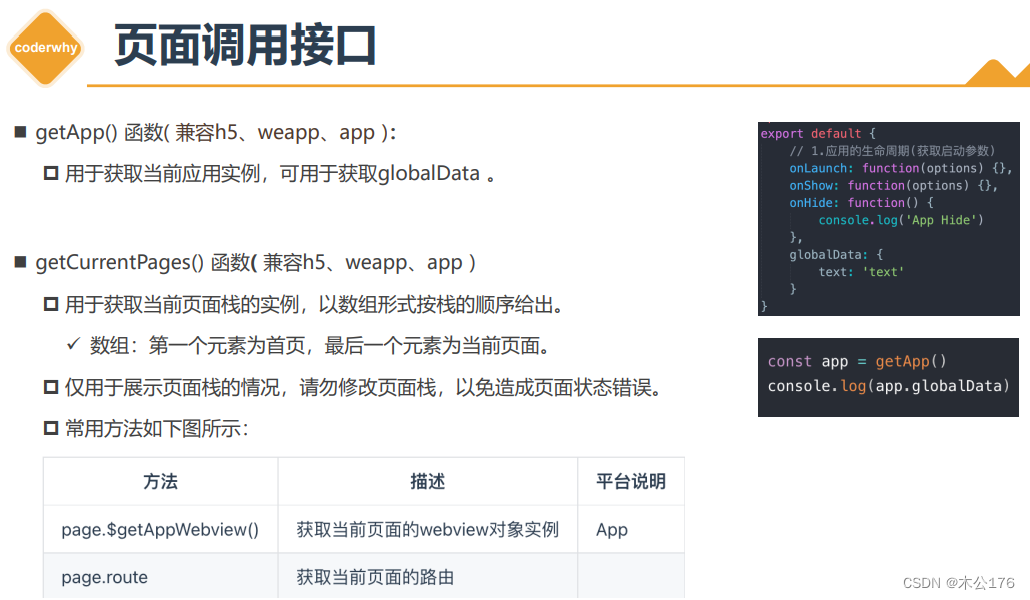
app。vue还可以设置全局变量参数。
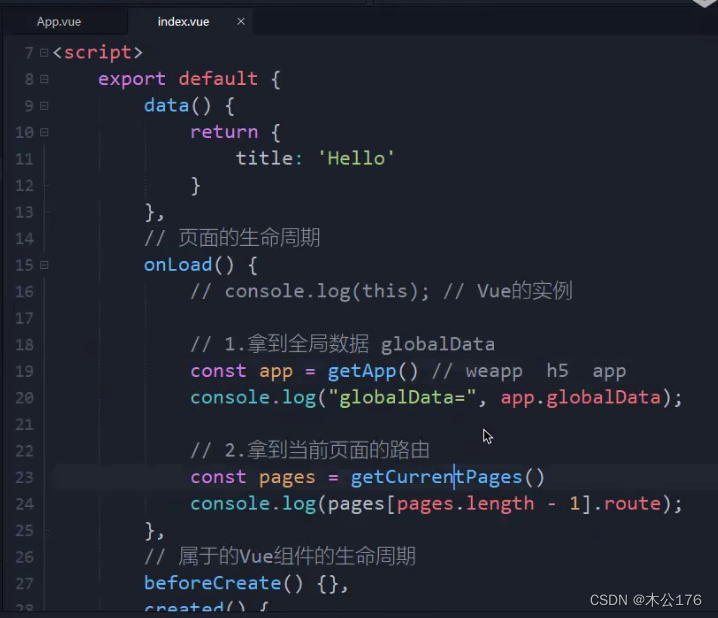
页面获取全局数据和页面路由
uni-app官网 (dcloud.net.cn)
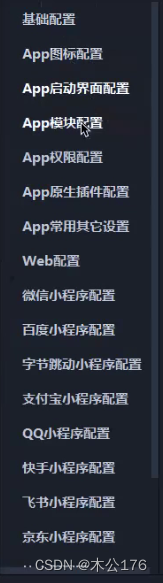
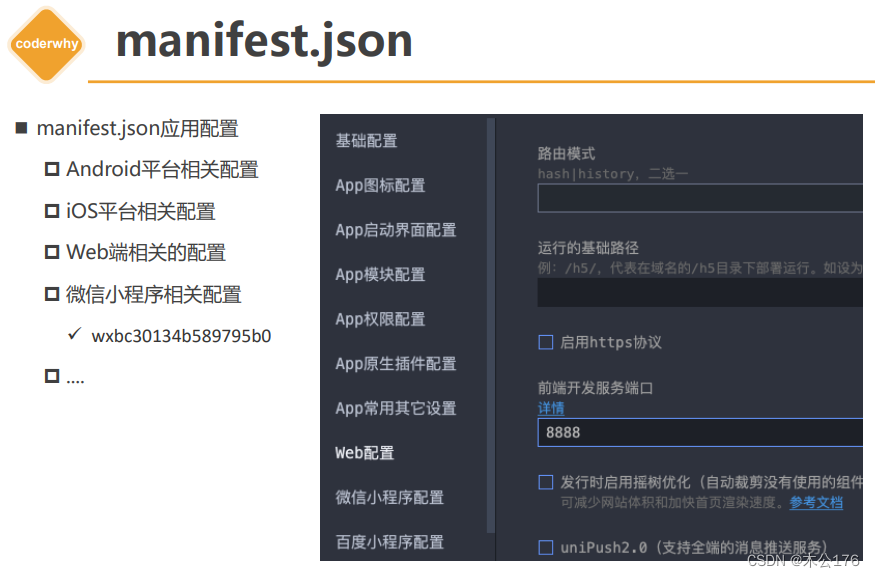
3、manifest.json 应用配置文件
可以用来设置启动端口,使用的协议、修改应用的名称,应用的icon等
uni-app官网 (dcloud.net.cn)
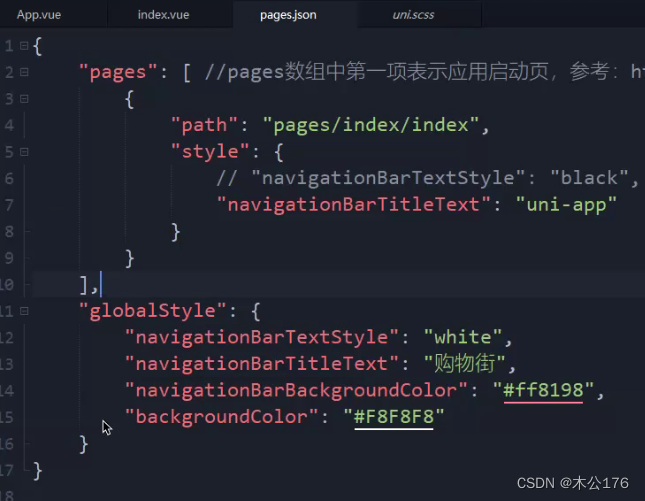
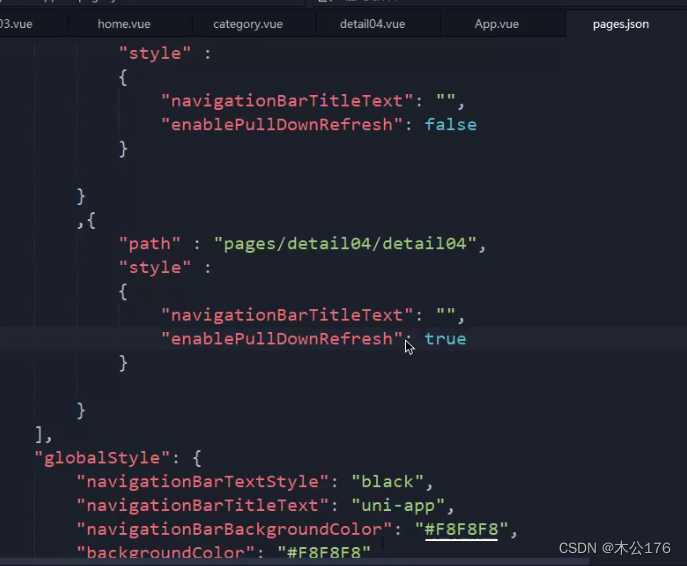
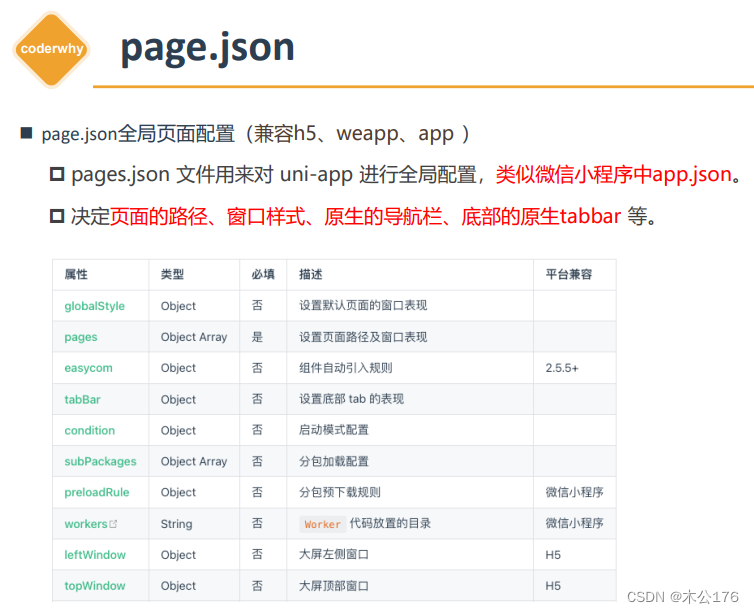
4、pages.json 页面路由
类似于微信小程序的app.json、app.config.json,pages可以设置各自页面的风格;globalStyle可以设置整体的界面风格。
概述 | uni-app官网 (dcloud.net.cn)
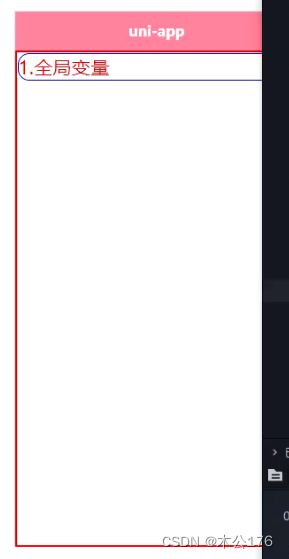
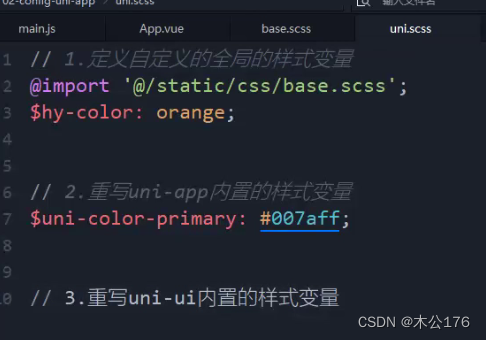
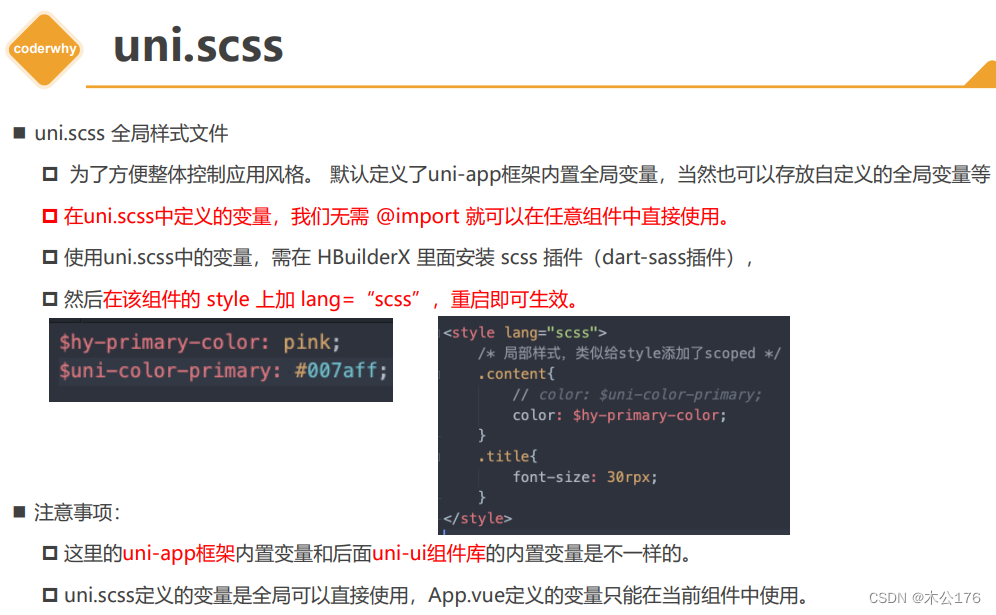
5、uni.scss 整体控制应用的风格
修改该文件的内容后需要重新启动项目才生效。
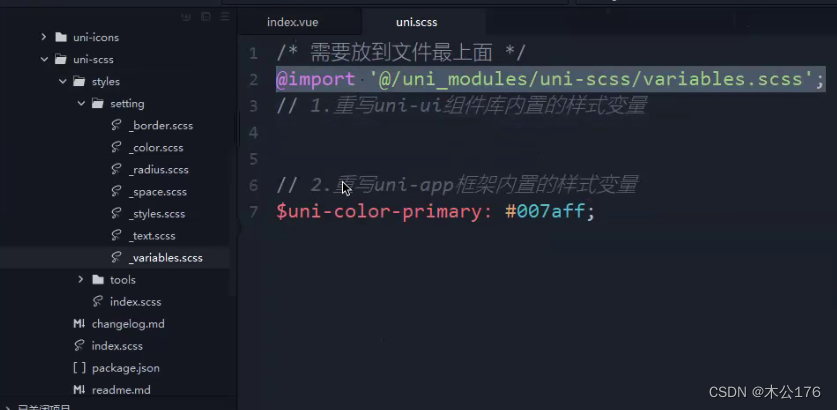
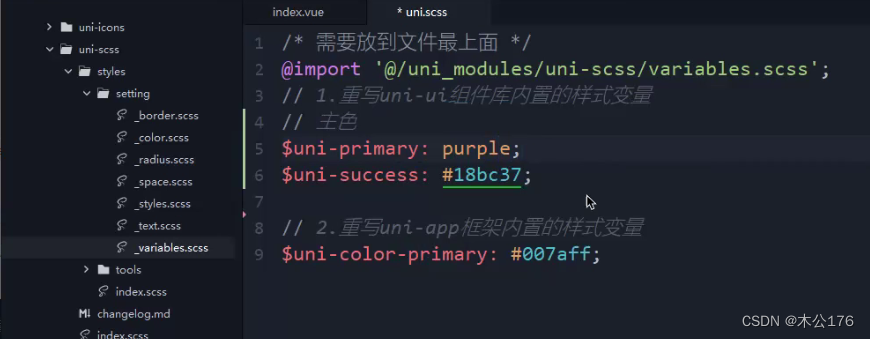
如果是想要修改uni-ui引入的组件的样式可以通过以下方法修改:
必须引入variables.scss的文件到uni.scss文件中
uni-app官网 (dcloud.net.cn)
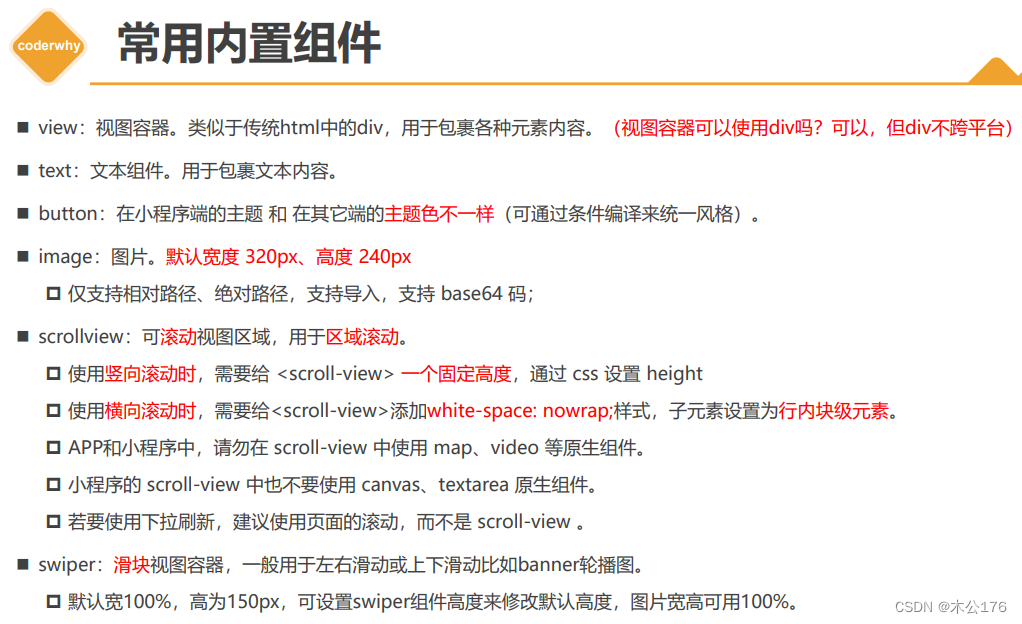
常用内置组件:
不建议使用div,因为在uniapp里面不会转换成跨平台的其他标签,只在h5里面生效。
1、view
2、text
3、button组件的type='primary'在h5、app、小程序显示的时候是不一样的,这时候需要我们做条件编译来达到统一。
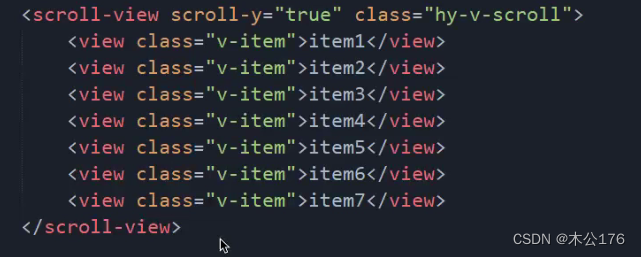
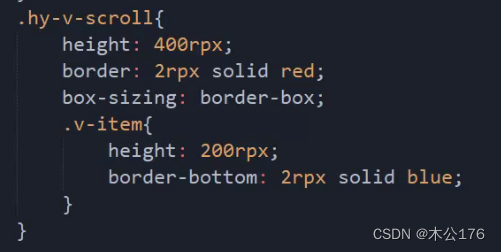
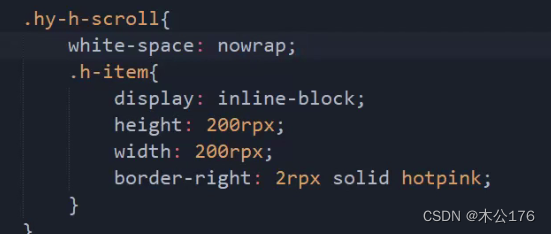
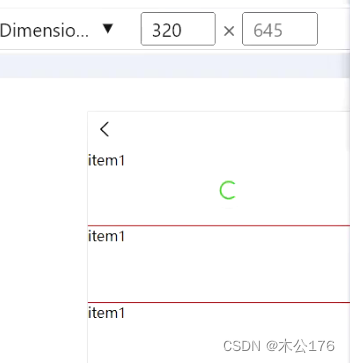
4、scrollview:必须要给scroll-x或scroll-y并且还得给高度。
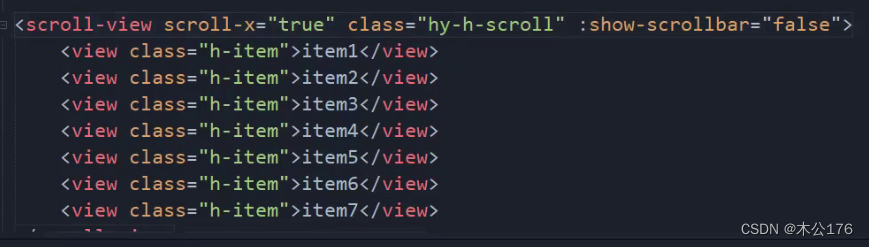
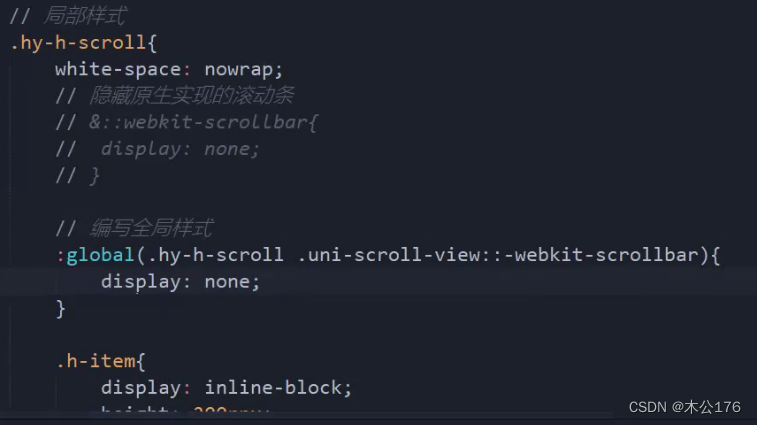
如果想要隐藏滚动条,我们可以使用show-scrollbar='false',这个方法只对app和nvue有效,h5和小程序想要隐藏的话就要做兼容处理:编写全局样式里面修改掉显示
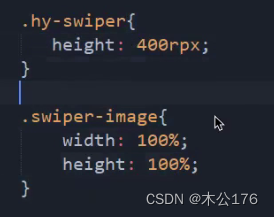
5、swiper
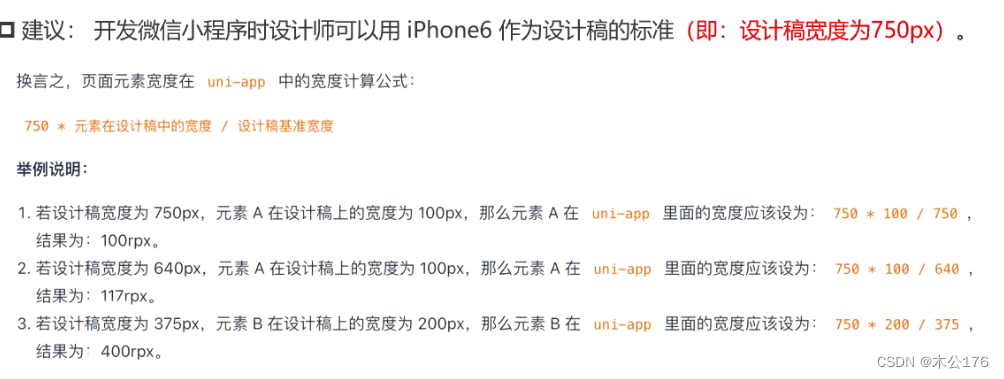
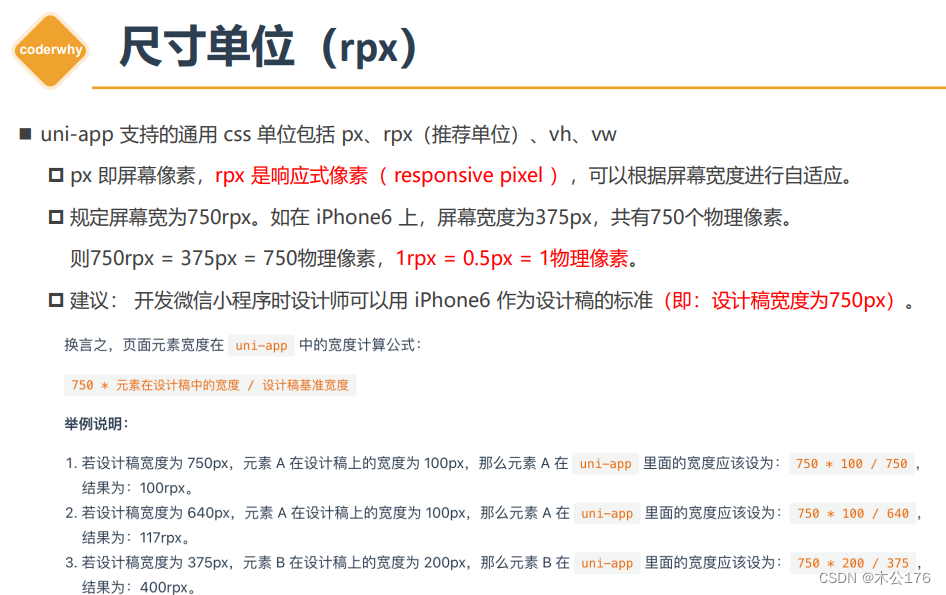
尺寸单位(rpx)不同设计稿如何转换成想要的rpx?
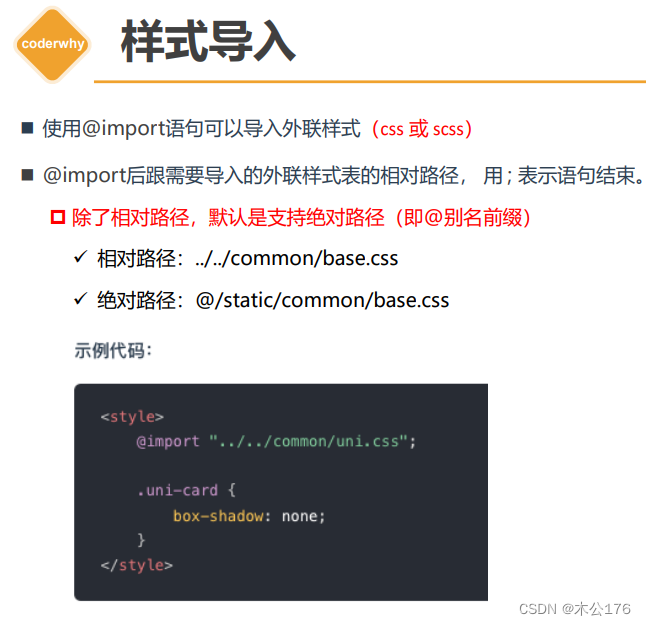
引入文件的方法:
✓ 相对路径:../../common/base.css
✓ 绝对路径:@/static/common/base.css
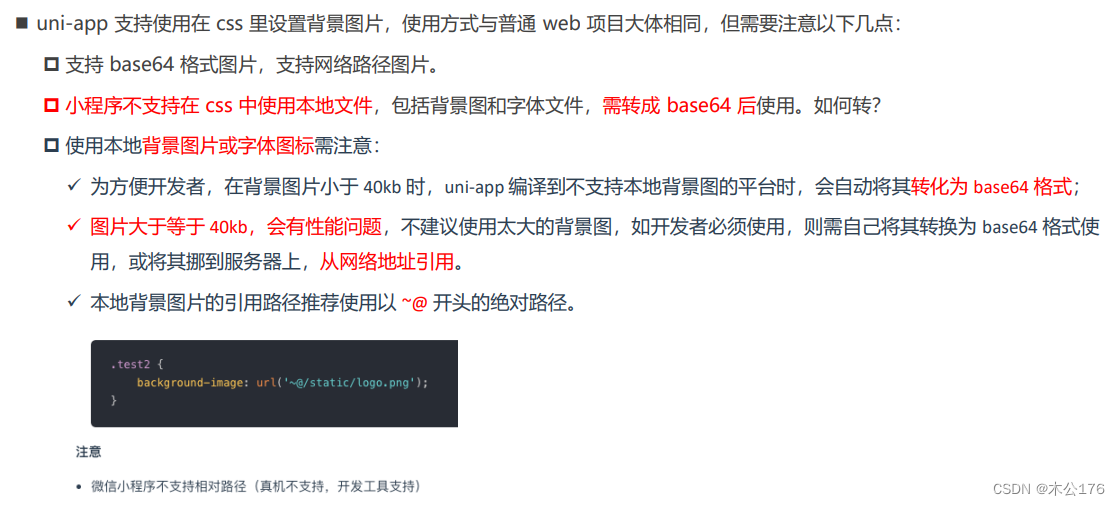
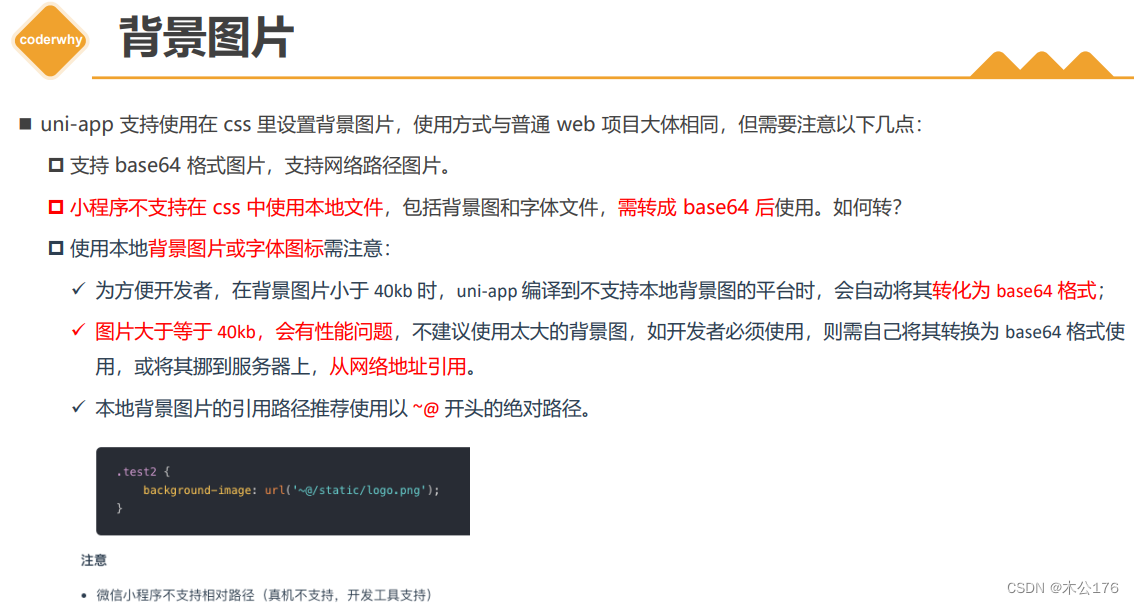
背景图片注意:
注意:在兼容上会出现小程序不支持本地图片文件的情况,这个时候如果图片大小小于40 kb,uniapp会把该图片转换成base64给小程序使用,转换的前提是小于40kb并且把图片文件放在state文件根目录底下才能自动转换。
建议使用~@的绝对路径来引入图片。
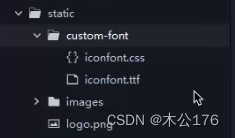
关于引入字体图标文件:
从字体图标文件网站获取的文件里面包含很多文件,我们仅使用为iconfont.ttf和iconfont.css的2个文件就可以了。
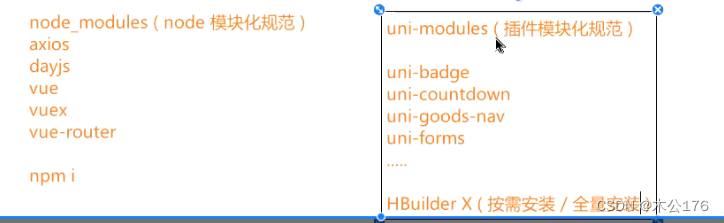
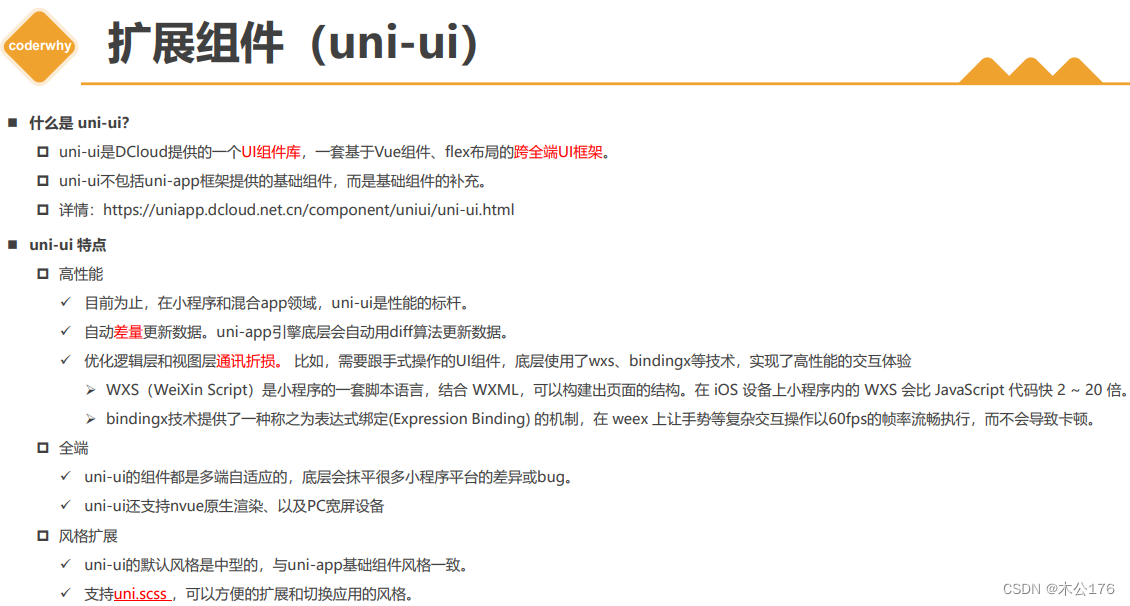
<text class="iconfont icon-shouye"></text>
<text class="iconfont icon-Video"></text>
扩展组件uni-ui:
uni-app官网 (dcloud.net.cn)
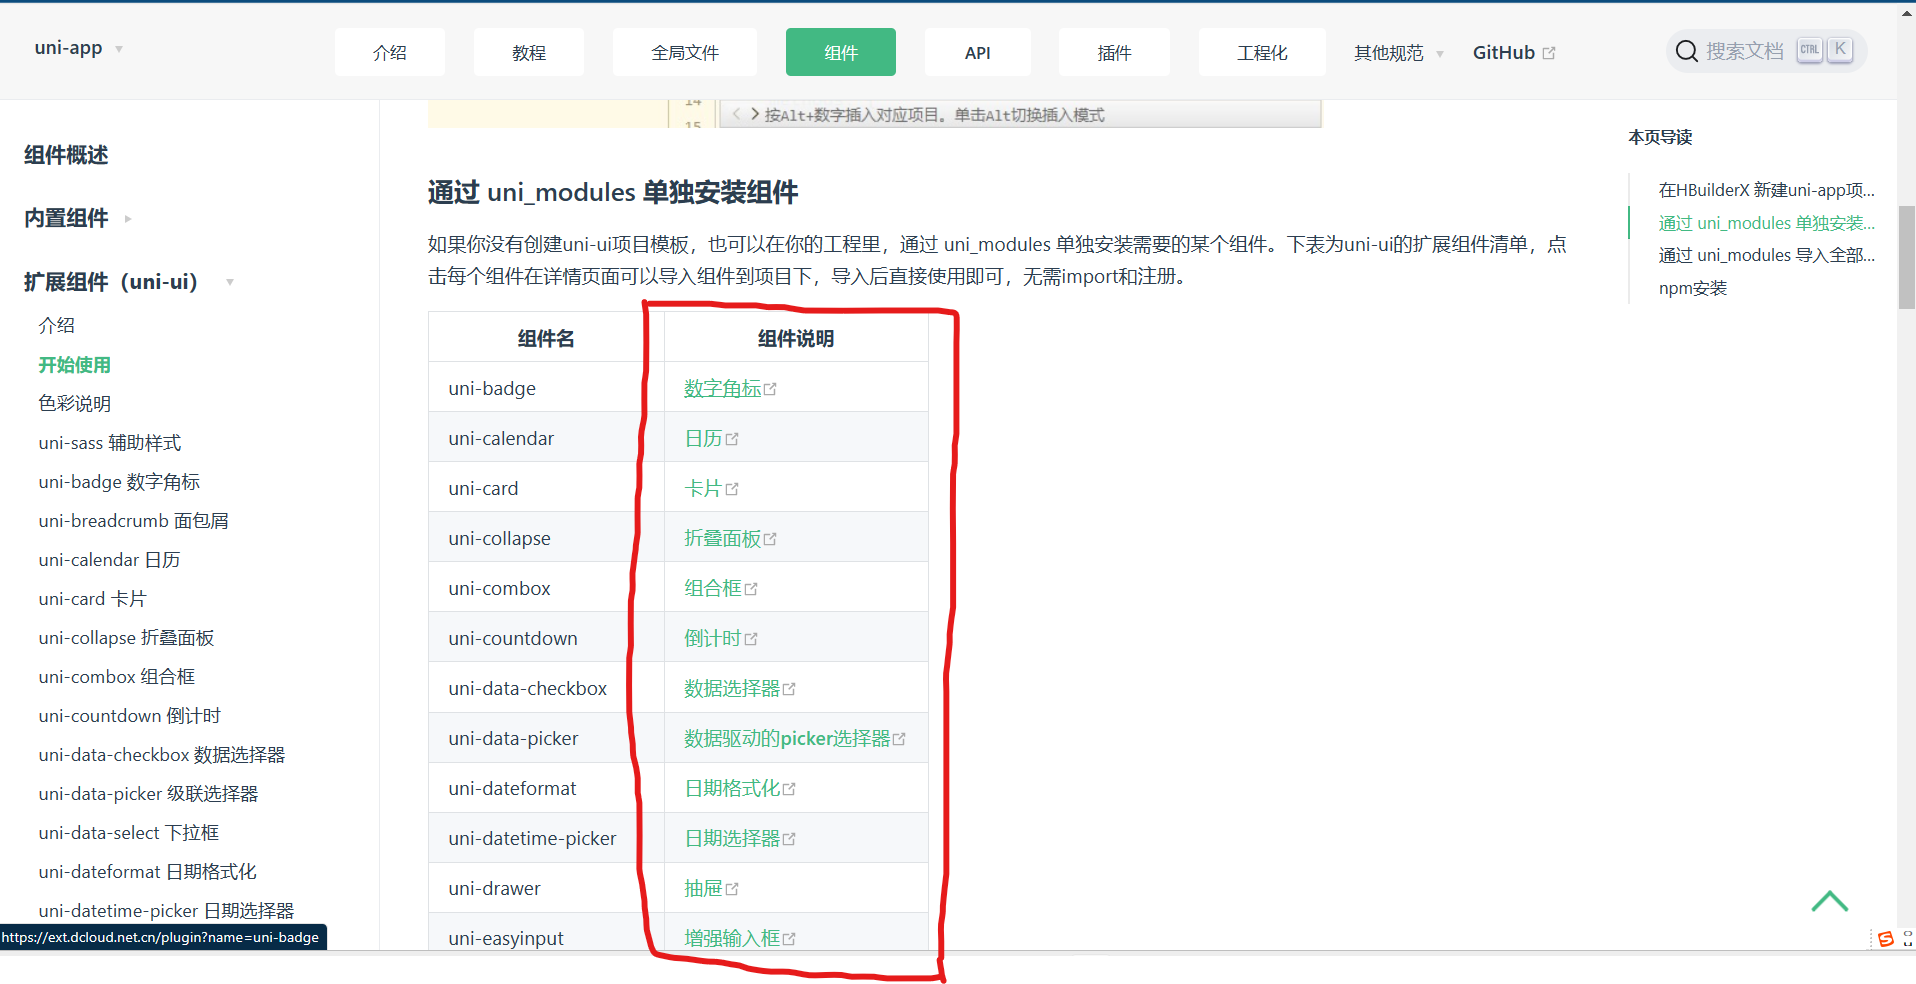
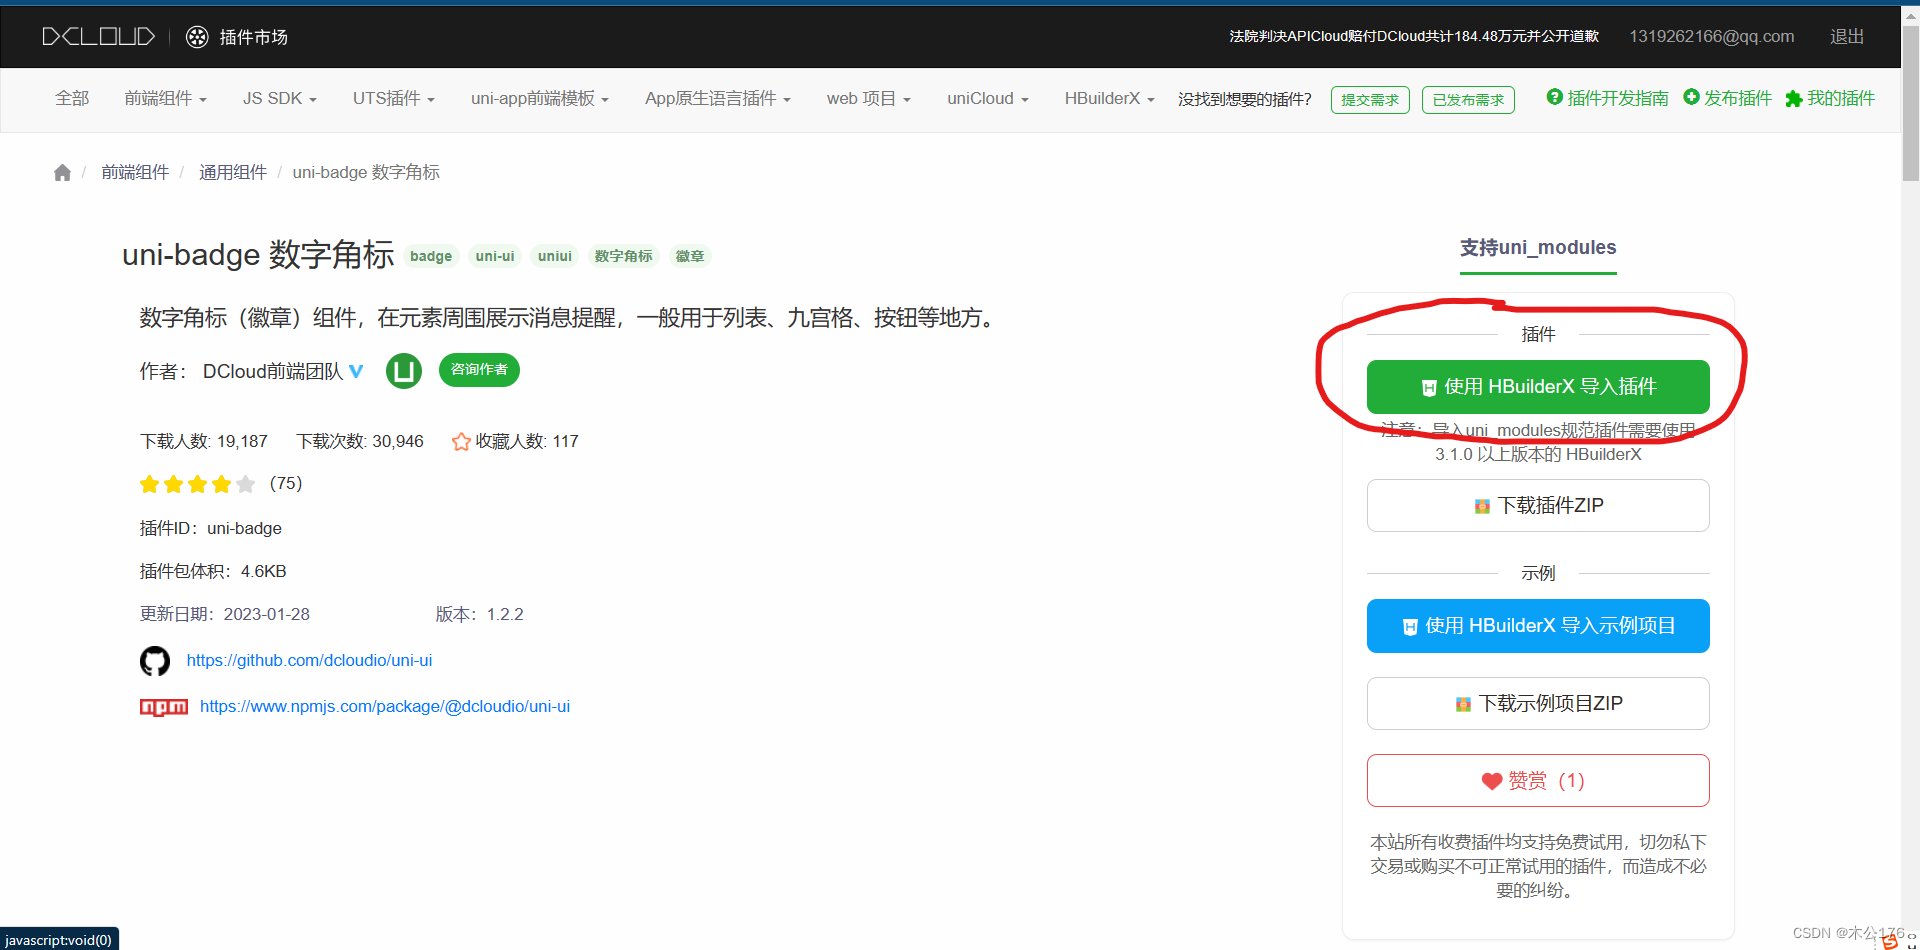
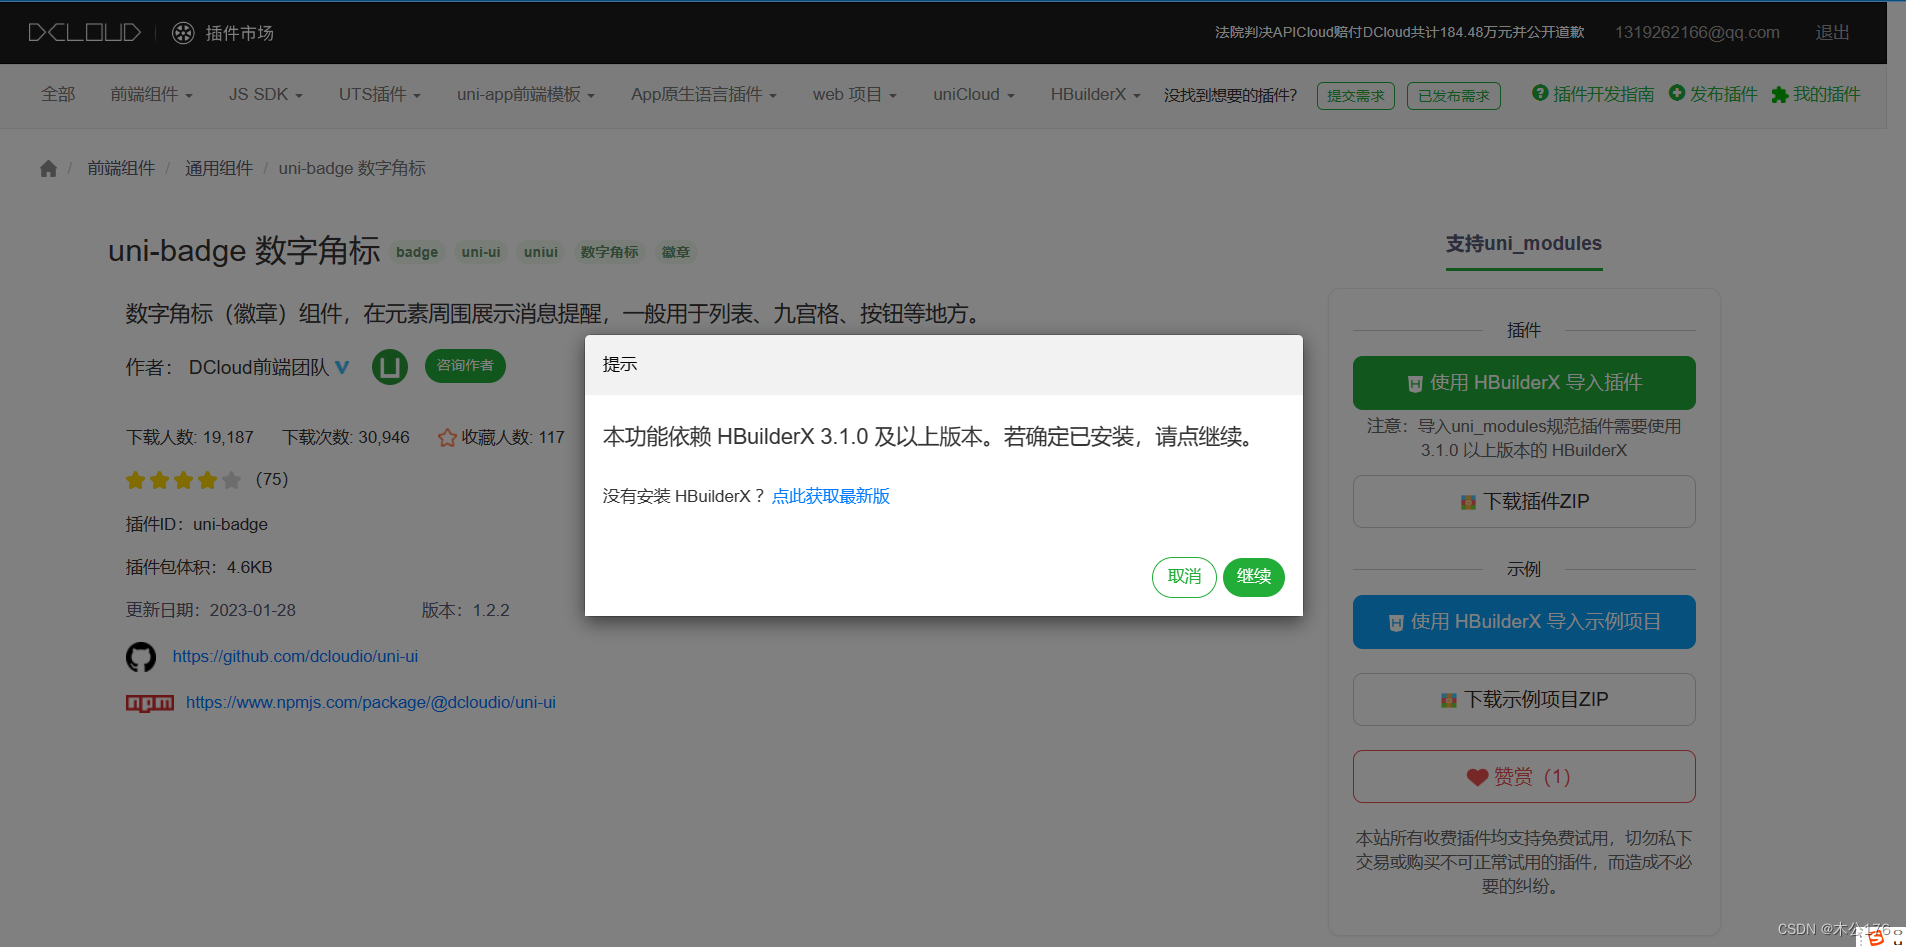
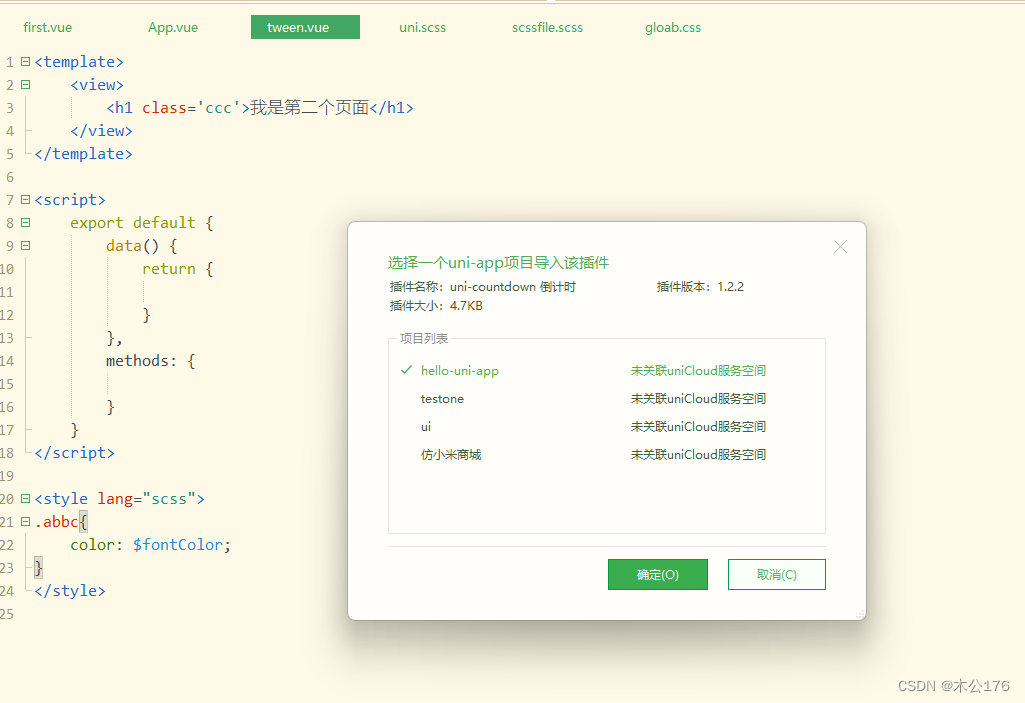
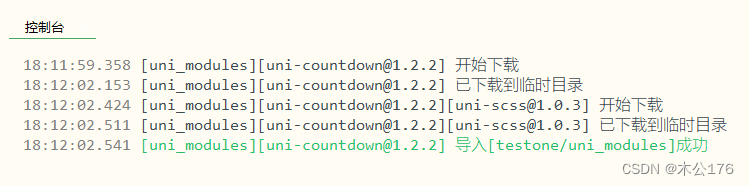
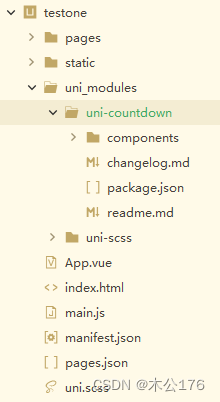
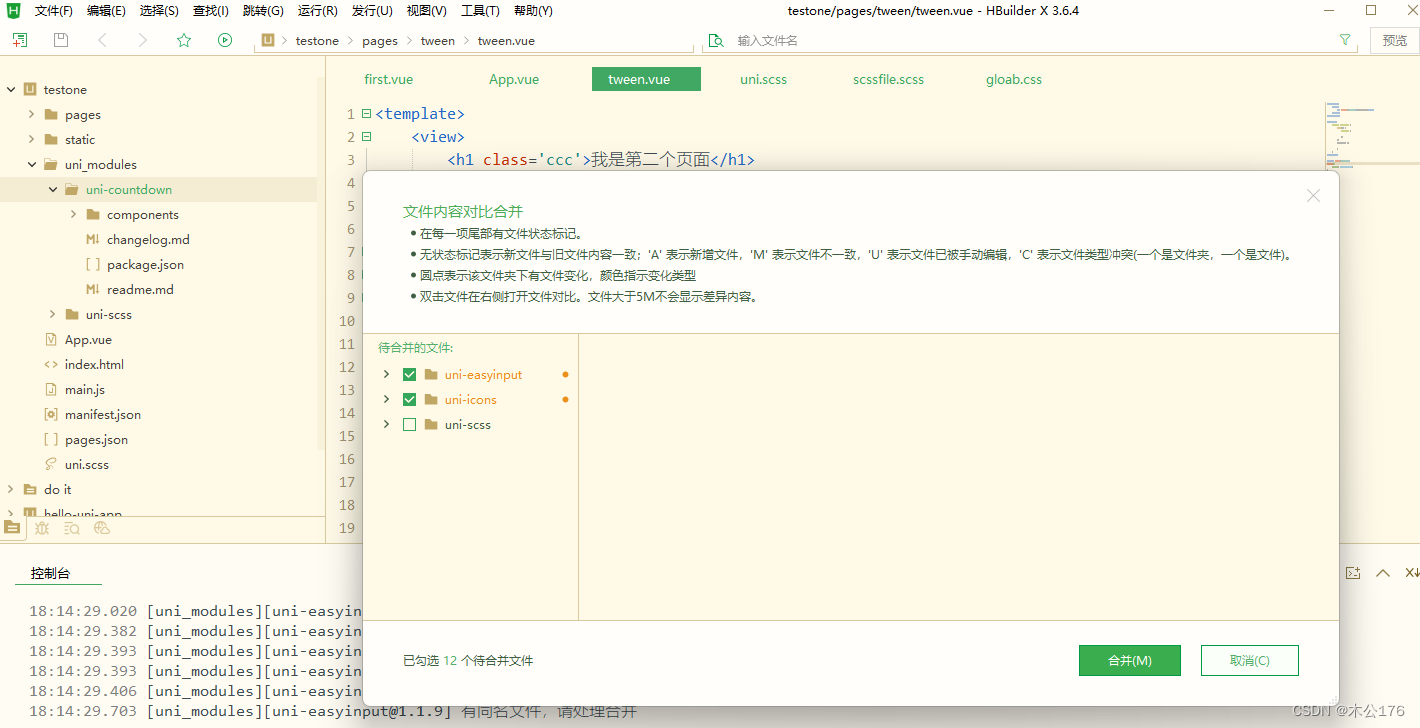
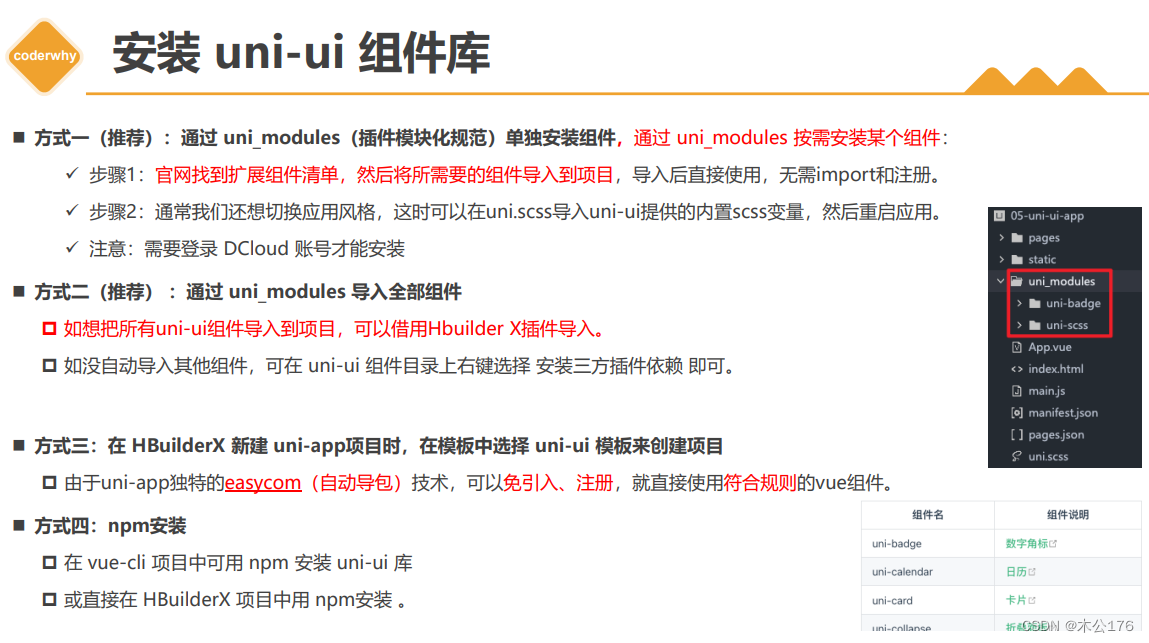
按需引入(单独引入某个)想要的扩展组件的步骤:
往后的安装其他组件都会跳出下面这个合并框,按合并就好。
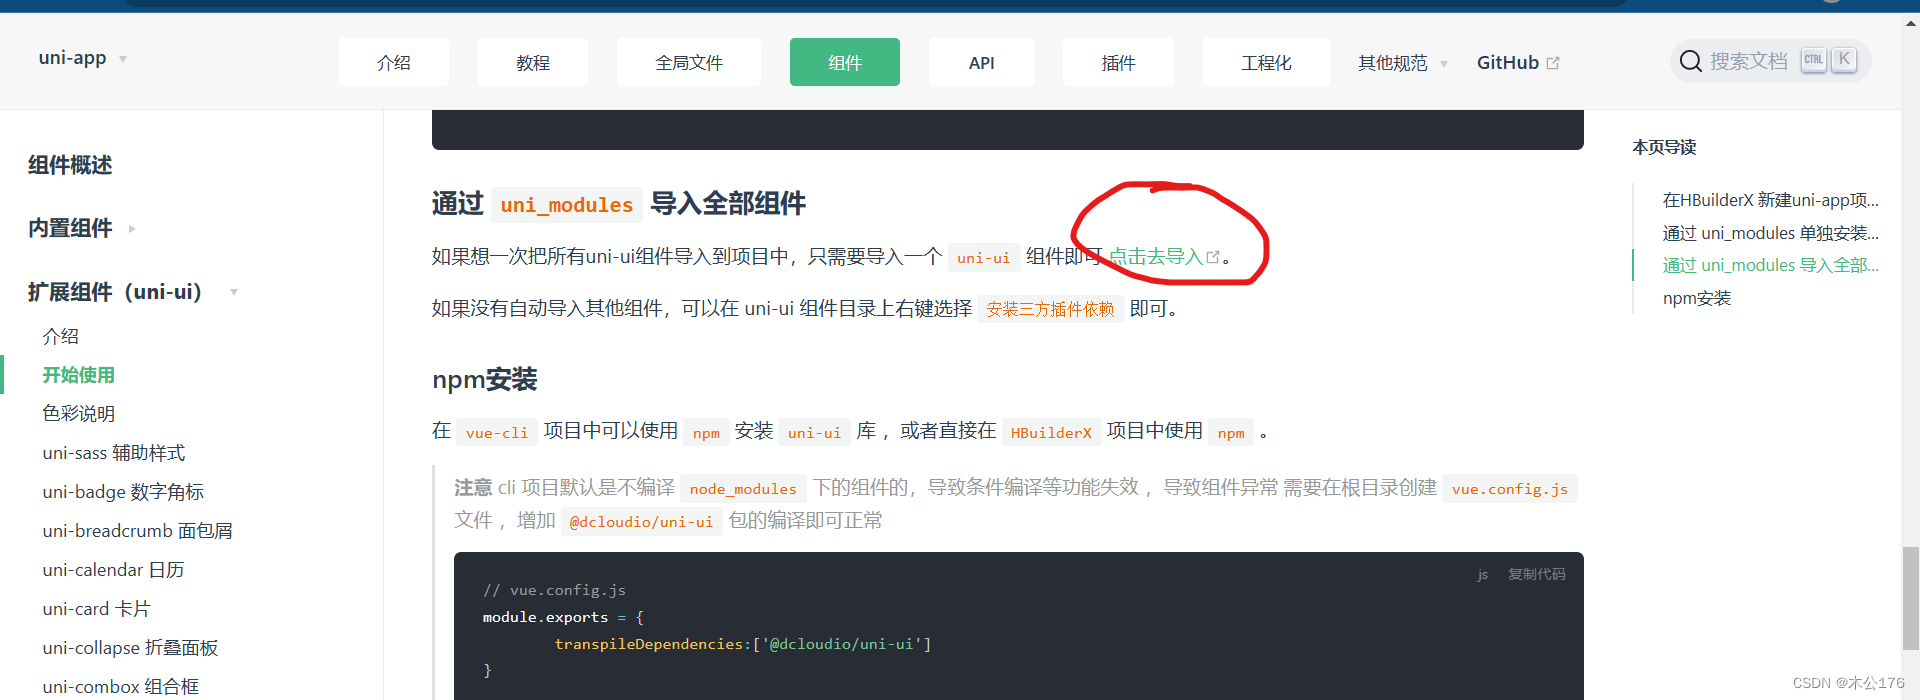
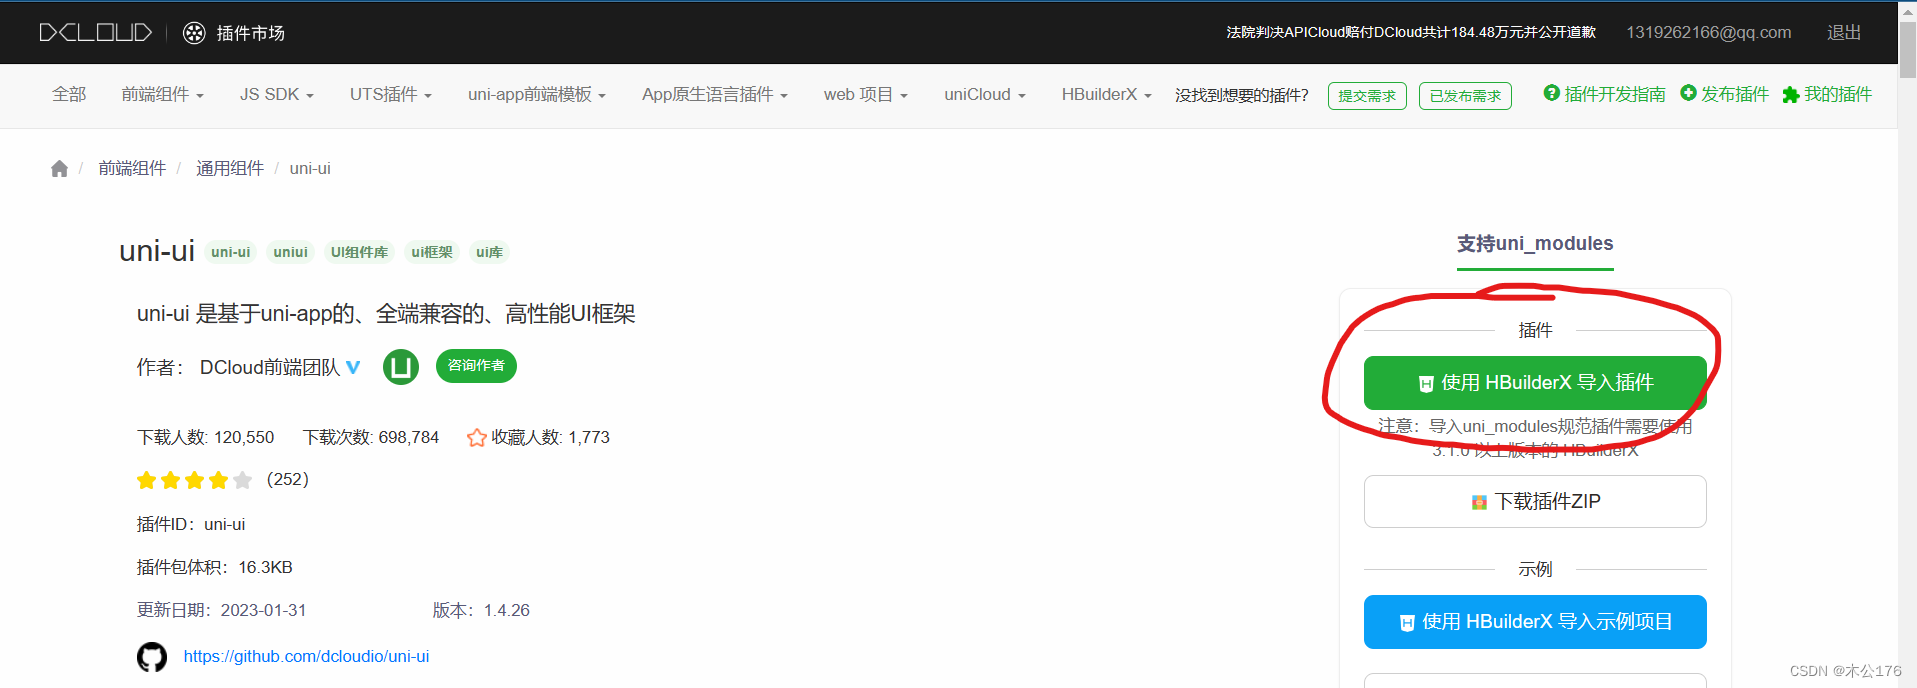
如果要引入全部的uni-ui的组件:
后续按照按需引入的方法即可。
另外一种引入全部uni-ui组件的办法是在编辑器创建一个uni-ui的demo,再从中把uni_module文件复制到项目中取即可。
uni-app官网 (dcloud.net.cn)
第一次安装完成之后,后续的组件都需要合并文件,功能会增加。
关于常用的uni-ui的一些组件:
uni-forms组件
<template><view class="login"><uni-forms ref="form" :modelValue="formData" :rules="rules"><!-- 第一个表单向 --><uni-forms-item label="账号" name="username" required><!-- <input type="text" v-model="formData.username" placeholder="请输入账号" /> --><uni-easyinput type="text" v-model="formData.username" placeholder="请输入账号" /></uni-forms-item><!-- 第一个表单向 --><uni-forms-item label="密码" name="password" required><!-- <input type="password" v-model="formData.password" placeholder="请输入密码" /> --><uni-easyinput type="password" v-model="formData.password" placeholder="请输入密码" /></uni-forms-item></uni-forms><button type="default" @click="submit">提交表单</button><button type="default" @click="reset">重置</button></view>
</template><script>export default {data() {return {formData: {username: null,password: null},rules: {username: {rules: [{required: true,errorMessage: '请输入账号'}]},password: {rules: [{required: true,errorMessage: '请输入密码'},{minLength: 6,maxLength: 8,errorMessage: '请输入6-8位的密码'}]}}};},methods: {submit() {console.log('submit');this.$refs.form.validate().then((value) => {// 表单验证成功console.log(value);}).catch((err) => {// 表单验证失败console.error(err);} )},reset() {console.log('reset');// 清除表单验证的结果this.$refs.form.clearValidate()// 重置表单的值Object.keys(this.formData).forEach((key) => {this.formData[key] = null})}}}
</script><!-- 属于局部样式 -->
<style lang="scss">// 方案一: weapp app// .uni-forms-item__label{// 	color: red !important;// 	padding-left: 10rpx;// }// 方案二: weapp  h5  app// :deep(.uni-forms-item__label){// 	color: pink !important;// }// 方案三: weapp h5 app// :global(.uni-forms-item__label){// 	color: purple !important;// }</style>
uni-app官网 (dcloud.net.cn)
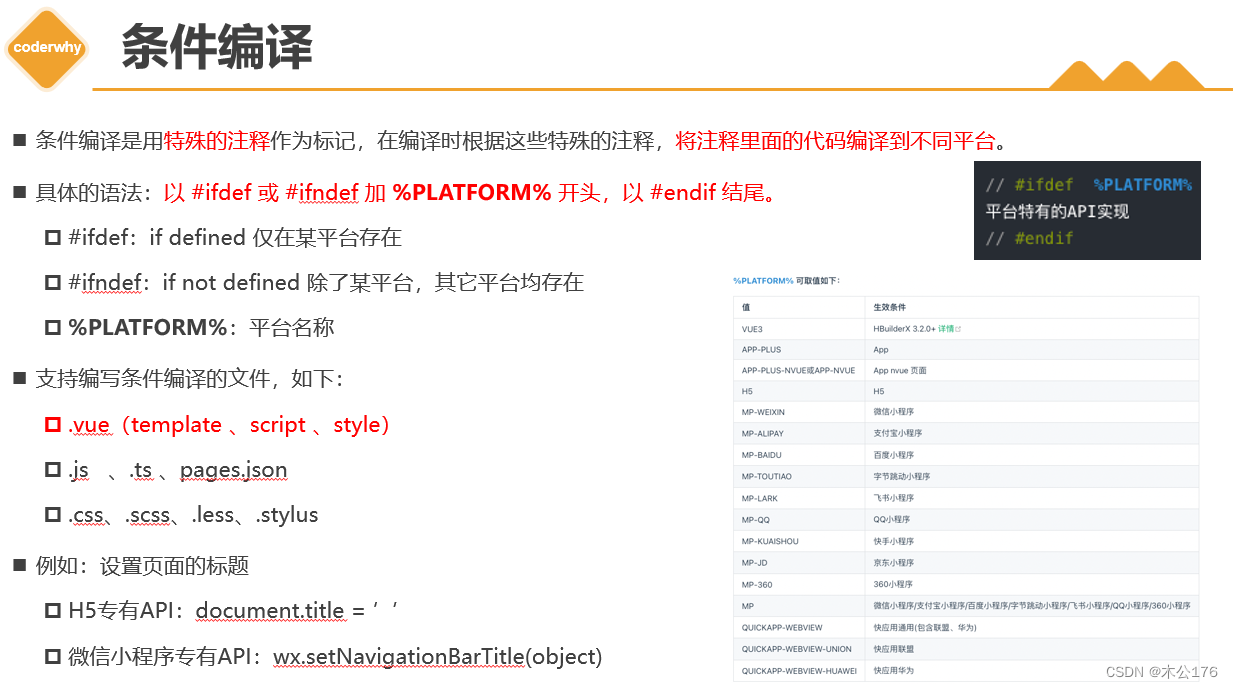
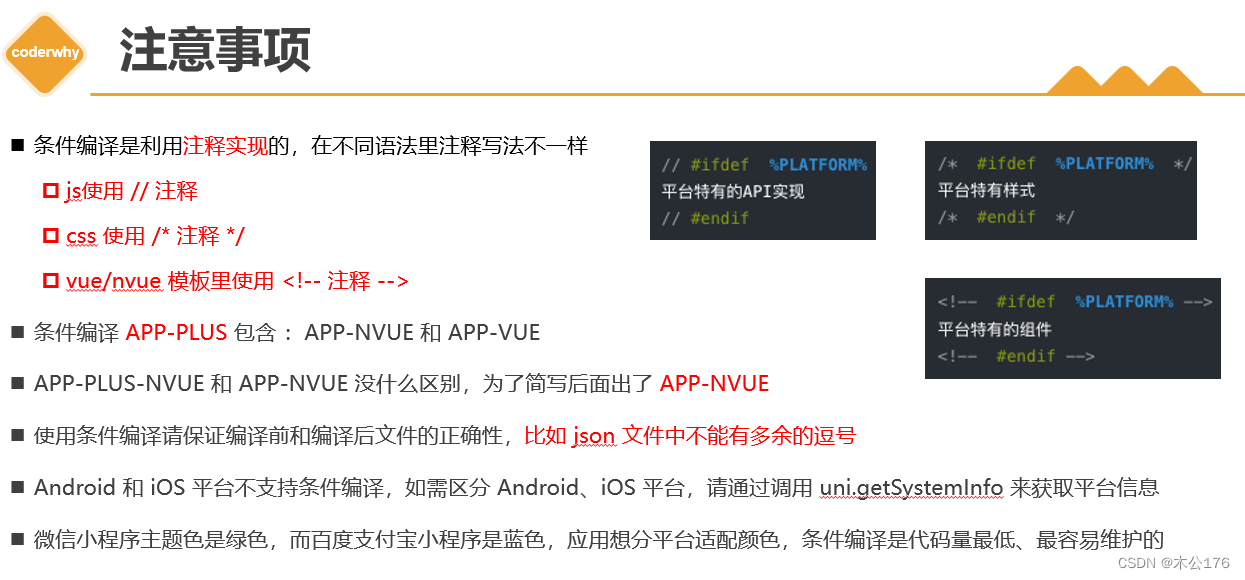
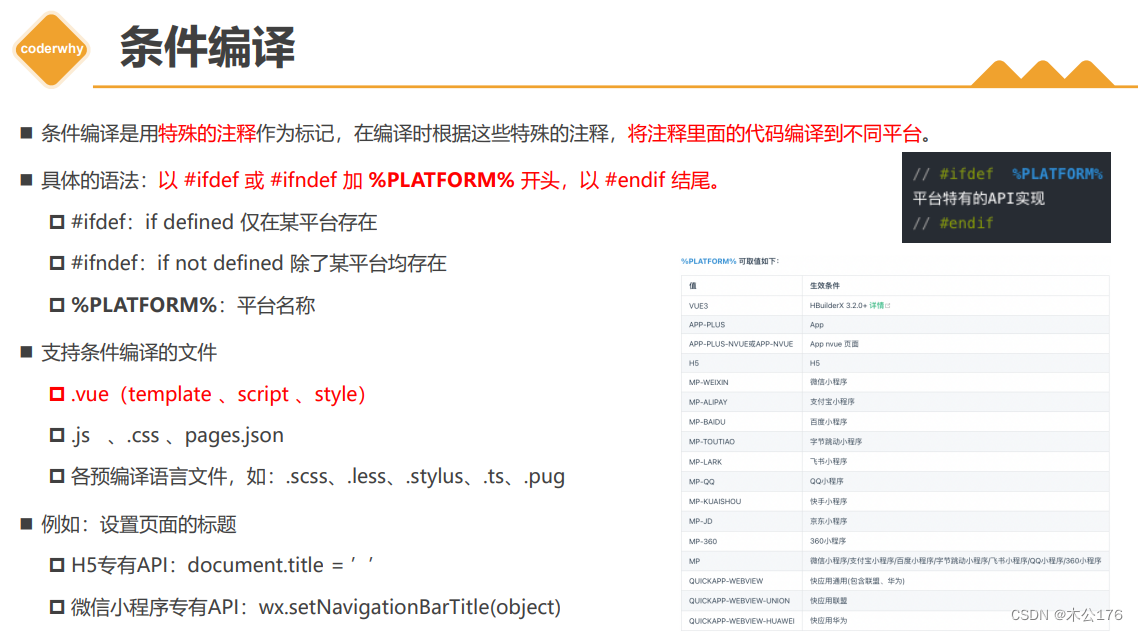
关于条件编译:
条件编译是为了做兼容的,将不同代码打包到不同的平台,需要通过条件编译来实现。不使用条件编译会使打包出来的项目出现过多不需要的兼容代码。
<template><view class="content"><!-- #ifdef H5 --><view class="h5"><view>show H5</view><img src="@/static/logo.png" alt=""></view><!-- #endif --><!-- #ifdef MP-WEIXIN || APP-PLUS --><view class="weapp"><view>show weapp</view><image src="@/static/logo.png"/></view><!-- #endif --><!-- #ifdef APP-PLUS --><view class="app"><view>show app</view><image src="@/static/logo.png"/></view><!-- #endif --><view class="box">我是一个View</view></view>
</template><script>export default {data() {return {title: 'Hello'}},onLoad() {// #ifdef H5document.title = 'H5'// window.xxx// #endif// #ifdef MP-WEIXINwx.setNavigationBarTitle({title: "WeApp"})// wx.login()// #endif},onReady() {// #ifdef APP-PLUSuni.setNavigationBarTitle({title: 'App'})uni.setNavigationBarColor({frontColor:'#ffffff',backgroundColor: '#ff8198'})console.log('App ========> ');// #endif},methods: {}}
</script><style>.box{/* #ifdef H5 */color: red;/* #endif *//* #ifdef MP-WEIXIN */color: green;/* #endif *//* #ifdef APP-PLUS */color: blue;/* #endif */}</style>
路由跳转以及参数的传递:options api版,后面还有composition api版
home页面的代码:
<template><view class="content"><view class="">1.路由(组件)</view><navigator url="/pages/detail01/detail01" open-type="navigate"><button type="default">01-detail navigate</button></navigator><navigator url="/pages/detail01/detail01" open-type="redirect"><button type="default">02-detail redirect</button></navigator><navigator url="/pages/category/category" open-type="switchTab"><button type="default">03-category</button></navigator><view class="">2.路由(API)</view><button type="default" @click="goToDetail01()">04-detail navigate</button><button type="default" @click="goToDetail02()">04-detail redirect</button><button type="default" @click="goToDetail03()">04-detail switchTab</button><view class="">3.页面传递参数(正向)</view><navigator url="/pages/detail01/detail01?name=liujun&id=100" open-type="navigate"><button type="default">01-detail navigate</button></navigator><button type="default" @click="goToDetail04()">04-detail navigate</button><view class="">4.页面传递参数(逆向)</view><button type="default" @click="goToDetail05()">01-detail02 eventchannel</button><button type="default" @click="goToDetail06()">01-detail03 事件总线</button><view class="">5.页面的生命周期</view><button type="default" @click="goToDetail07()">01-detail04 Options API</button><button type="default" @click="goToDetail08()">01-detail05 Composition API</button></view>
</template><script>export default {data() {return {title: 'Hello'}},// 1.页面的生命周期onLoad() {console.log('home onLoad');// 通过事件总线在拿到详情传递回来的数据uni.$on('acceptDataFromDetail03', this.acceptDataFromDetail03)	},onShow() {console.log('home onShow');},onReady() {console.log('home onReady');},onHide() {console.log('home onHide');},onUnload() {console.log('home onUnload');uni.$off('acceptDataFromDetail03', this.acceptDataFromDetail03)},onPullDownRefresh() {console.log('home onPullDownRefresh');},onReachBottom() {console.log('home onReachBottom');},// 2.组件的生命周期beforeCreate() {},created() {},methods: {acceptDataFromDetail03(value) {console.log('这是从detail03传递过来的数据:', value);},goToDetail01() {uni.navigateTo({url: "/pages/detail01/detail01"})},goToDetail02() {uni.redirectTo({url: "/pages/detail01/detail01"})},goToDetail03() {uni.switchTab({url: "/pages/category/category"})},goToDetail04() {uni.navigateTo({url: "/pages/detail01/detail01?name=liujun&id=200",success(res) {// 通过eventChannel向被打开页面传送数据res.eventChannel.emit('acceptDataFormHomePage', { data: '我是从Home Page 传递过来的数据' ,})}})},goToDetail05() {uni.navigateTo({url: "/pages/detail02/detail02?name=liujun&id=400",events: {acceptDataFormDetail02(data) {console.log("home page 拿到detail02传递过来的数据:", data);}}})},goToDetail06() {uni.navigateTo({url:'/pages/detail03/detail03'})},goToDetail07() {uni.navigateTo({url:'/pages/detail04/detail04'})},goToDetail08() {uni.navigateTo({url:'/pages/detail05/detail05'})}}}
</script><style></style>
1、通过url传递参数,就是在页面的url后面加 ?参数
2、通过事件发送事件EventChannel传递参数 事件通道
detail01页面的代码:
<template><view></view>
</template><script>export default {data() {return {};},onLoad(options) {console.log("接受到url的参数:", options);const eventChannel = this.getOpenerEventChannel();eventChannel.on('acceptDataFormHomePage', (data) => {console.log("接受到eventChannel的参数", data);})}}
</script><style lang="scss"></style>
detail02页面的代码:
<template><view><navigator :delta="1" open-type="navigateBack"><button type="default" >返回(组件)</button></navigator><button type="default" @click="goBackHome">返回(API)</button></view>
</template><script>export default {data() {return {};},onLoad(options) {console.log('接受url传递过来的数据:', options);},methods: {goBackHome() {uni.navigateBack({delta: 1})const eventChannel = this.getOpenerEventChannel();eventChannel.emit('acceptDataFormDetail02', {data: '将detail02页面的数据传递给Home页面'})}}}
</script><style lang="scss"></style>
3、上面两个是正向传递参数,A->B。反向传递数据A<-B的方法是 事件总线的方法(发送数据的页面发射事件到跳转到的页面,跳转到的页面在页面加载时onLoad进行监听,所以在页面卸载onUnload时候需要移除监听,监听的函数卸载methods里面。避免内存泄漏。还要注意:事件总线的方法一般都是用在方向传递参数的时候,因为需要先监听才能获得参数,如果使用正向传递参数的方法会出现跳转到的页面获得不到参数的情况,因为在此之前没有开启监听。)
detail03页面的代码:
<template><view><navigator :delta="1" open-type="navigateBack"><button type="default" >返回(组件)</button></navigator><button type="default" @click="goBackHome">返回(API)</button></view>
</template><script>export default {data() {return {};},onLoad(options) {console.log('接受url传递过来的数据:', options);},methods: {goBackHome() {uni.navigateBack({delta: 1})// 触发一个全局的事件( 在触发事件之前一定要先监听 )uni.$emit('acceptDataFromDetail03', {data: {desc: '这个在detail03传递到Home页面的数据'}})}}}
</script><style lang="scss"></style>
路由跳转以及参数的传递:composition api版
正向,反向传递参数。
主页面代码:
<template><view><view class="">1.页面传递数据(正向)</view><button type="default" @click="goToDetail01">01-detail01 navigate</button><view class="">2.页面传递数据(逆向)</view><button type="default" @click="goToDetail02">01-detail02 navigate</button><view class="">3.页面逆向传递数据(全局事件总线)</view><button type="default" @click="goToDetail03">01-detail03 navigate</button></view>
</template><script setup>import {onLoad,onUnload} from '@dcloudio/uni-app'onLoad(() => {uni.$on('acceptDataFormDetail03', acceptDataFormDetail03)})onUnload(() => {uni.$off('acceptDataFormDetail03', acceptDataFormDetail03)}) function acceptDataFormDetail03(value) {console.log('接收到detail03传递给home页面的数据:', value);}function goToDetail01() {console.log('goToDetail01');uni.navigateTo({url: '/pages/detail01/detail01?name=liujun&id=100',success(res) {res.eventChannel.emit('acceptDataFormHomePage', {data: '我是home页面传递给detail01的数据'})},})}function goToDetail02() {uni.navigateTo({url: '/pages/detail02/detail02?name=liujun&id=200',events: {acceptDataFormDetail02(value) {console.log('接收到detail02传递过来的数据', value);}}})}function goToDetail03() {uni.navigateTo({url: '/pages/detail03/detail03?name=liujun&id=300'})}</script><style lang="scss"></style>
主页面向跳转到的页面传递参数 (正向):
<template><view></view>
</template><script setup>import { ref , getCurrentInstance } from 'vue'import {onLoad} from '@dcloudio/uni-app'// 2.方式二: ?name=liujun&id=100const props = defineProps({name: String,id: String})// $instance => thisconst $instance = ref(getCurrentInstance().proxy)console.log('在props中接受home传递过来url的数据:', props.name, props.id);// 1.方式一: ?name=liujun&id=100onLoad((options) => {console.log('接受到home传递过来url的数据:', options);// const eventChannel = this.getOpenerEventChannel();const eventChannel = $instance.value.getOpenerEventChannel();eventChannel.on('acceptDataFormHomePage', (value) => {console.log('接收到home页面eventchannel传递过来的数据:', value);})})
</script><style lang="scss"></style>
从跳转到的页面返回主页面并传递参数(反向)(事件通道):
<template><view><button type="default" @click="goBack">返回</button></view>
</template><script setup>import {getCurrentInstance,ref} from 'vue'const $instance = ref(getCurrentInstance().proxy) // this function goBack() {uni.navigateBack({delta: 1})const eventChannel = $instance.value.getOpenerEventChannel()// 触发事件, 将detail02的数据传递给Home页面eventChannel.emit('acceptDataFormDetail02', {data: '这里是detail02传递给Home页面的数据'})}
</script><style lang="scss"></style>
从跳转到的页面返回主页面并传递参数(反向)(事件总线):
<template><view><button type="default" @click="goBack">返回</button></view>
</template><script setup> function goBack() {uni.navigateBack({delta: 1})// 触发事件( 通过事件总线 )uni.$emit('acceptDataFormDetail03', {data: '这里的数据是从detail03传递到home页面'})}</script><style lang="scss"></style>
页面生命中周期:
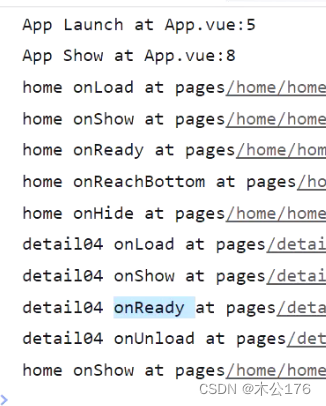
生命周期包括:
1、应用的生命周期(就3个周期):
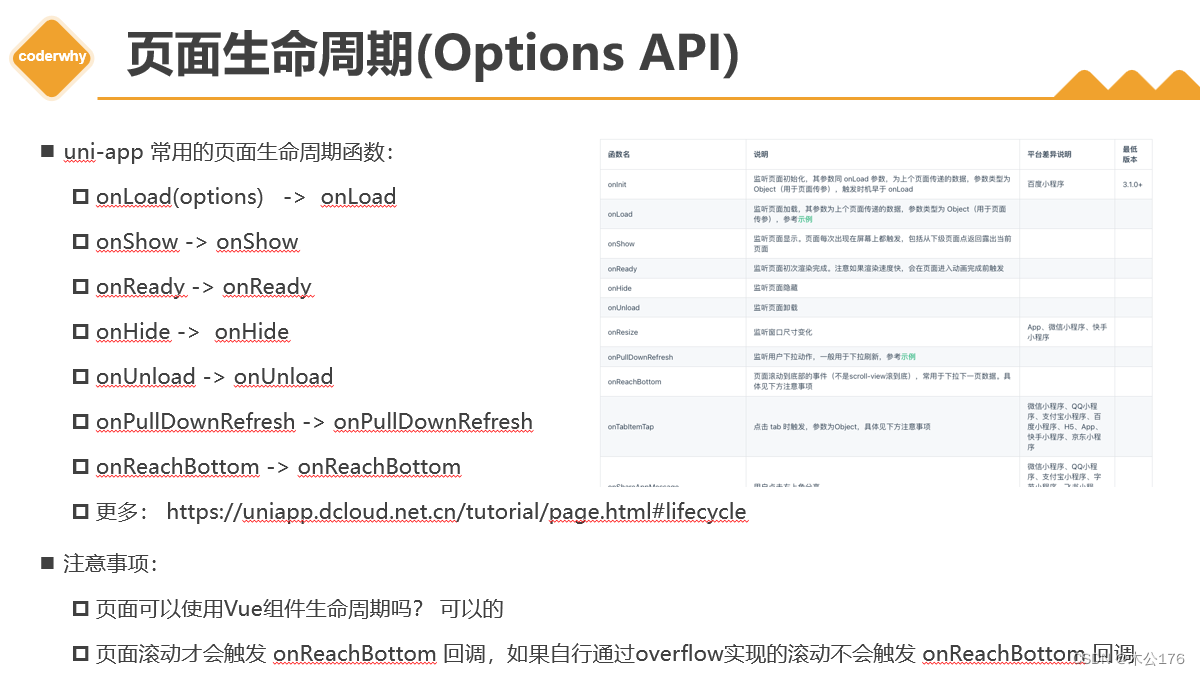
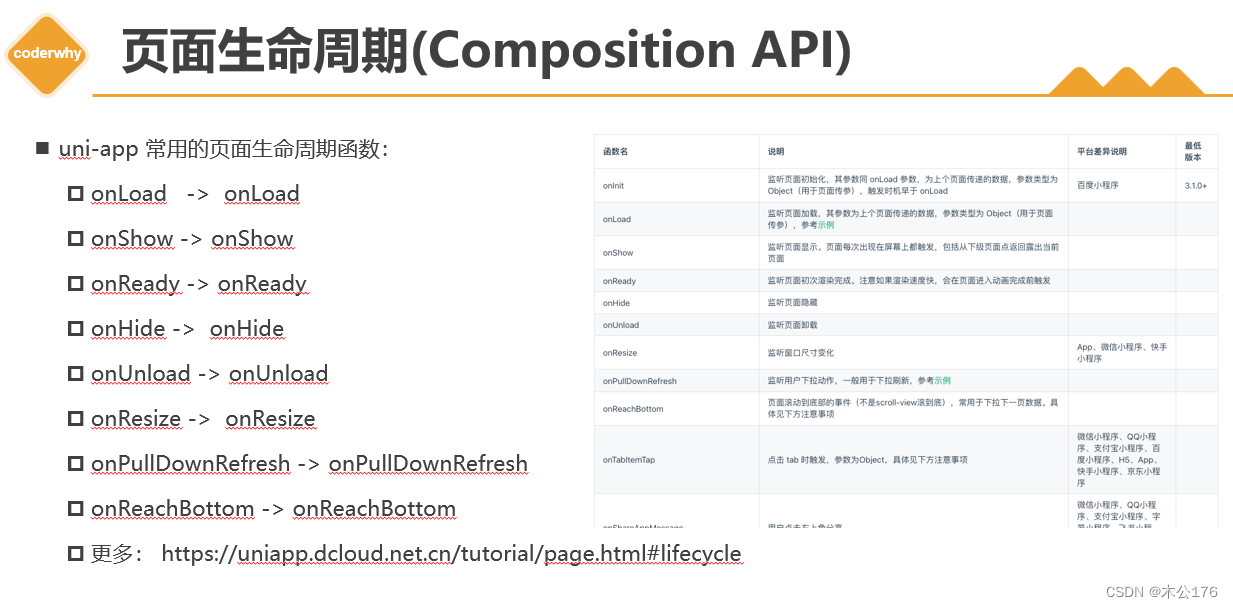
2、页面的生命周期:
在options api自定义组件中不能使用页面的生命周期,在composition api自定义组件中能使用b部分 页面的生命周期,但是在页面中可以使用页面和组件的生命周期。
onReachBottom是在页面触底的时候才触发事件,p页面滚动才会触发 onReachBottom 回调,如果自行通过overflow实现的滚动不会触发 onReachBottom 回调。
onPullDownRefresh是下拉刷新事件。想要能够触发下拉刷新事件就要去page.json里面给需要的页面的enablePullDownRefresh改为true。然后在页面的onPullDownRefresh事件中关闭下拉事件的圆圈。
tabBar的页面跳转到其他非tabBar页面或其他tabBar的页面的时候,tabBar的页面不会被销毁,而是被影藏起来了。从非tabBar页面回到tabBar的页面时,非tabBar页面会被卸载。
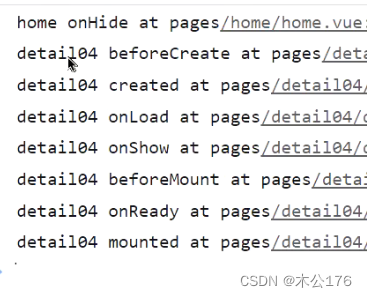
3、组件的生命周期:
可以和页面的生命周期写在通一个vue文件中
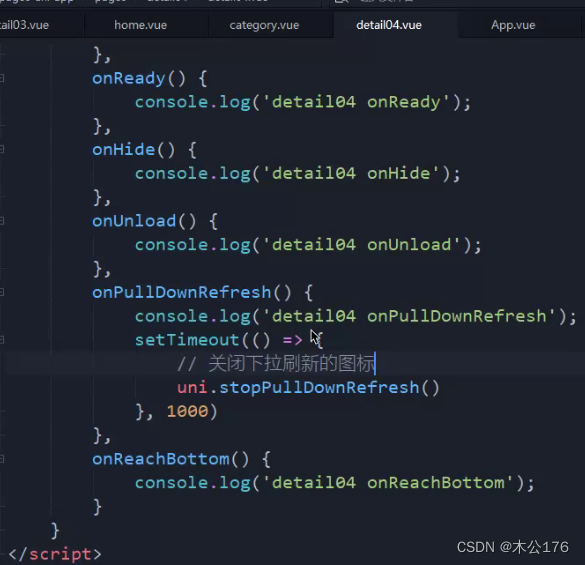
vue2版本的页面生命周期和组件生命周期:detail04页面代码
<template><view><view class="item1">item1</view><view class="item1">item1</view><view class="item1">item1</view><view class="item1">item1</view><view class="item1">item1</view><view class="item1">item1</view><view class="item1">item1</view><view class="item1">item1</view></view>
</template><script>export default {data() {return {msg: '我是data定义的数据'};},// 1.页面的生命周期onLoad(options) {console.log('detail04 onLoad');},onShow() {console.log('detail04 onShow');console.log(this);},onReady() {console.log('detail04 onReady');},onHide() {console.log('detail04 onHide');},onUnload() {console.log('detail04 onUnload');},onPullDownRefresh() {console.log('detail04 onPullDownRefresh');setTimeout(() => {// 关闭下拉刷新的图标uni.stopPullDownRefresh()}, 1000)},onReachBottom() {console.log('detail04 onReachBottom');},// 2.Vue组件的生命周期beforeCreate() {console.log('detail04 beforeCreate');},created() {console.log('detail04 created');},beforeMount() {console.log('detail04 beforeMount');},mounted() {console.log('detail04 mounted');},beforeDestroy() {console.log('detail04 beforeDestroy');},destroyed() {console.log('detail04 destroyed');}}
</script><style lang="scss">.item1{height: 200rpx;border-bottom: 2rpx solid red;
}
</style>
vue3版本的页面生命周期和组件生命周期:detail05页面代码
<template><view><view class="item1">item1</view><view class="item1">item1</view><view class="item1">item1</view><view class="item1">item1</view><view class="item1">item1</view><view class="item1">item1</view><view class="item1">item1</view><view class="item1">item1</view><view class="item1">item1</view></view>
</template><script setup>import { ref, onBeforeMount, onMounted } from 'vue'import {onLoad,onShow,onReady,onHide,onUnload,onPullDownRefresh,onReachBottom} from '@dcloudio/uni-app'// 1.页面的生命周期onLoad(() => {console.log('detail05 onLoad');})onShow(() => {console.log('detail05 onShow');})onReady(() => {console.log('detail05 onReady');})onHide(() => {console.log('detail05 onHide');})onUnload(() => {console.log('detail05 onUnload');})onPullDownRefresh(() => {console.log('detail05 onPullDownRefresh');setTimeout(() => {uni.stopPullDownRefresh()}, 1000)})onReachBottom(() => {console.log('detail05 onReachBottom');})// 2.Vue组件的生命周期onBeforeMount(() => {console.log('detail05 onBeforeMount');})onMounted(() => {console.log('detail05 onMounted');})</script><style lang="scss">.item1{height: 200rpx;border-bottom: 2rpx solid red;}
</style>
常用api的使用:
1、网络请求:
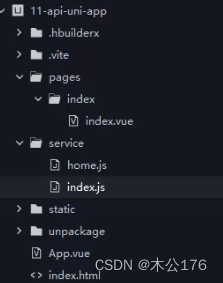
一般都不是直接在页面里面写完了请求的函数,而是新建一个叫server的文件,在里面创建一个js文件,在这个文件里面封装一个网络请求的函数供任意页面使用。
这里有3个文件,一个是封装网络请求代码的index.js和存放请求结果的home.js和使用网络请求的页面index.vue
封装网络请求代码的index.js:
const TIME_OUT = 60000
const BASE_URL = 'http://152.136.185.210:7878/api/hy66'class HYRequest{request(url, method, data) {return new Promise((resolve, reject) => {uni.request({url: BASE_URL + url,method: method || "GET",timeout: TIME_OUT,data: data,success(res) {resolve(res.data)},fail(err) {reject(err)}})})}get(url, params) {return this.request(url, "GET", params)}post(url, data) {return this.request(url, "POST", data)}
}
export default new HYRequest()
存放请求结果的home.js:
import hyRequest from './index.js'export const getHomeMutidata = () => {return hyRequest.get('/home/multidata', {})
}
使用网络请求的页面index.vue:
<template><view class="content"><view class="">1.封装网络请求</view><button type="primary" @click="fetchData()">发起一个get请求</button></view>
</template><script>import { getHomeMutidata } from '@/service/home.js'export default {data() {return {title: 'Hello',homeData: ''}}methods: {fetchData() {getHomeMutidata().then((res) => {console.log('res=>', res);this.homeData = res.data})},}}
</script><style></style>
2、数据的存储:
<template><view class="content"><view class="">2.数据的存储</view><button type="default" @click="setStorage">setStorage</button><button type="default" @click="getStorage">getStorage</button></view>
</template><script>let _this1 = nulllet _this2 = nullexport default {data() {return {title: 'Hello',homeData: ''}},methods: {setStorage() {// 将数据存到本地uni.setStorage({key: 'userinfo',data: {name: 'liujun',id: '100100',token: 'asdfxdfgjksiada'}})uni.setStorageSync('token', 'bssdsfsdfccvd')},getStorage(){uni.getStorage({key: 'userinfo',success(res) {console.log(res.data);}})const token = uni.getStorageSync('token')console.log(token);},}}
</script><style></style>
自定义组件的使用:
在options api自定义组件中不能使用页面的生命周期,在composition api自定义组件中能使用b部分 页面的生命周期,但是在页面中可以使用页面和组件的生命周期。
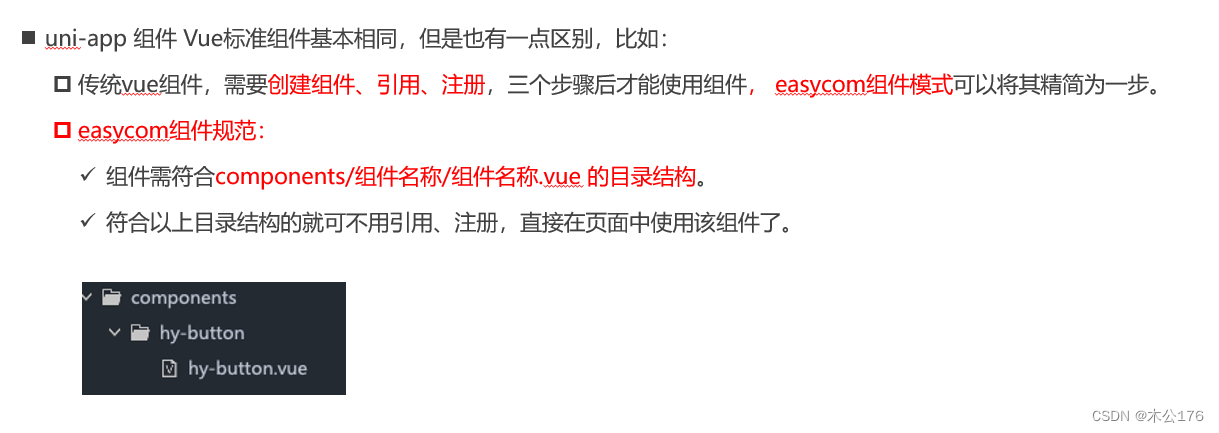
使用的时候尽量符合easycom规范,这样可以不用在页面引入或者注册自定义组件了,在任意页面可以直接使用自定义组件。
组件使用的入门教程 | uni-app官网 (dcloud.net.cn)
https://uniapp.dcloud.net.cn/component/#easycom%E7%BB%84%E4%BB%B6%E8%A7%84%E8%8C%83
自定义组件可以是options api或者composition api
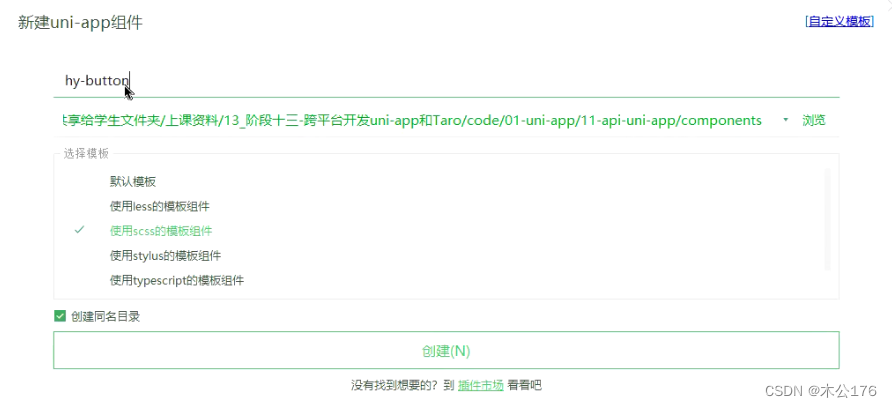
1、通过options api来创建自定义组件:
(1)新建目录名称叫component,
(2)
(3)
自定义组件使用插槽,自定义组件与页面间的通信以及生命周期:
页面代码:
<template><view class="content"><view class="">3.easycom组件规范</view><hy-button type="primary" @onBtnClick="onBtnClick">HYButon</hy-button><hy-button-setup type="info" @onBtnClick="onBtnSetupClick">HYButtonSetup	</hy-button-setup><view class="">{{homeData}}</view></view>
</template><script>let _this1 = nulllet _this2 = nullexport default {data() {return {title: 'Hello',homeData: ''}},// 1.页面的生命周期onLoad() {console.log(this);_this1 = this},// 2.组件的生命周期created() {console.log(this);_this2 = this},onReady(){console.log(_this1 === _this2); // true},methods: {fetchData() {getHomeMutidata().then((res) => {console.log('res=>', res);this.homeData = res.data})},onBtnClick() {console.log('hy-btn click');},onBtnSetupClick() {console.log('hy-btn-setup click');},}}
</script><style></style>
options api自定义组件代码:
<template><view :class="['hy-btn', type]" @click="handleBtnClick"><slot></slot></view>
</template><script>export default {name:"hy-button",props: {type: {type: String,default: 'default' // default  primary}},emits:['onBtnClick'],data() {return {};},computed: {},watch: {},// 1.组件的生命周期函数beforeCreate() {console.log('hy-btn beforeCreate');},created() {console.log('hy-btn created');console.log(this);},mounted() {console.log('hy-btn mounted');},// 2.页面的生命周期(在options api 中是不会执行)onLoad() {console.log('hy-btn onLoad');},onShow() {console.log('hy-btn onShow');},methods: {handleBtnClick() {this.$emit('onBtnClick')}}}
</script><style lang="scss">.hy-btn{padding: 20rpx 0;font-size: 40rpx;color: white;text-align: center;border-radius: 10rpx;}.default {background-color: #cdcdcd;}.primary{background-color: green;}
</style>
composition api自定义组件代码:
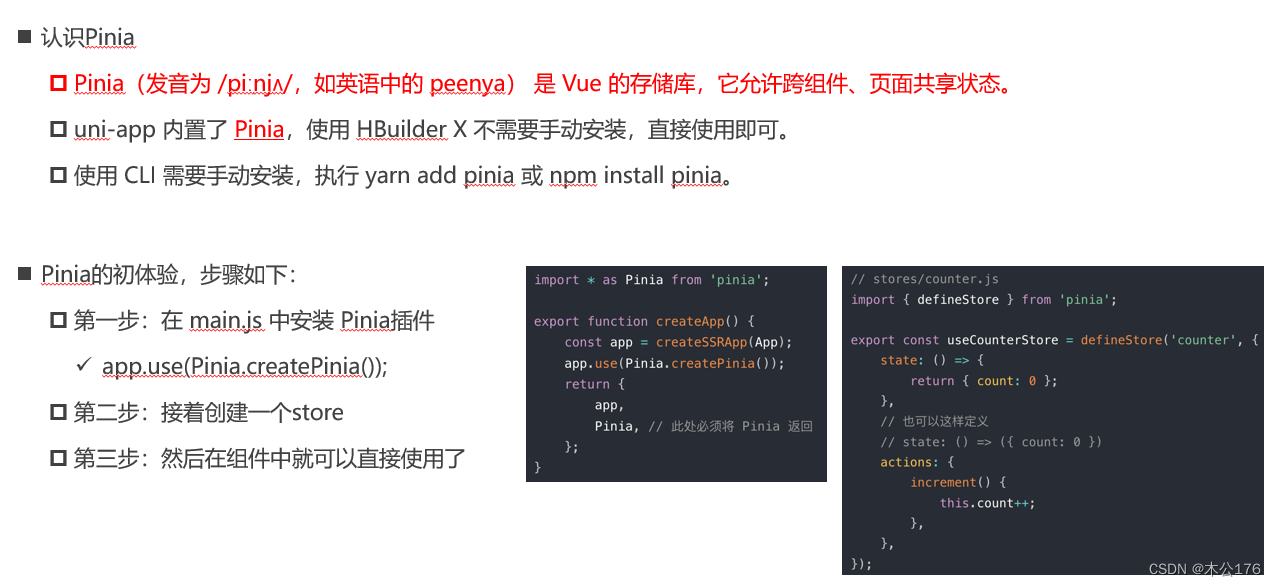
<template><view :class="['hy-btn', type]" @click="handleBtnClick"><slot></slot></view>
</template><script setup>// 是组件的生命周期import { onBeforeMount, onMounted, ref, watch, computed } from 'vue'// 页面的生命周期import {onLoad,onShow,onReady} from '@dcloudio/uni-app'const props = defineProps({type: {type: String,default: 'default'}})const emit = defineEmits(['onBtnClick'])function handleBtnClick() {emit('onBtnClick')}// 1.是组件的生命周期onBeforeMount(() => {console.log('hy-buton-setup onBeforeMount');})onMounted(() => {console.log('hy-buton-setup onMounted');})// 2.页面的生命周期// 执行onLoad(() => {console.log('hy-buton-setup onLoad');})// 执行onShow(() => {console.log('hy-buton-setup onShow');})// 这个在App H5没有执行, weapp有执行onReady(() => {console.log('hy-buton-setup onReady');})</script><style lang="scss">.hy-btn{padding: 20rpx 0;font-size: 40rpx;color: white;text-align: center;border-radius: 10rpx;}.default {background-color: #cdcdcd;}.primary{background-color: green;}.info{background-color: orange;}
</style>
状态管理pinia的使用:
状态管理 Pinia | uni-app官网 (dcloud.net.cn)
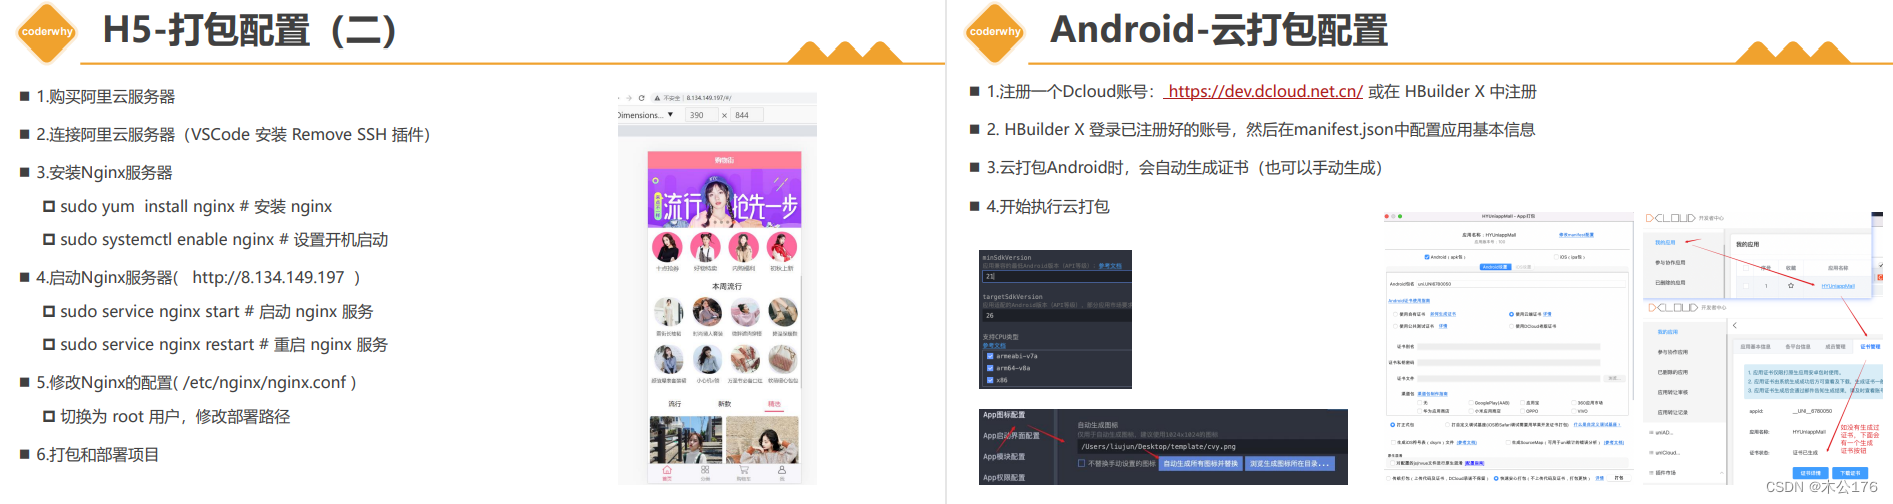
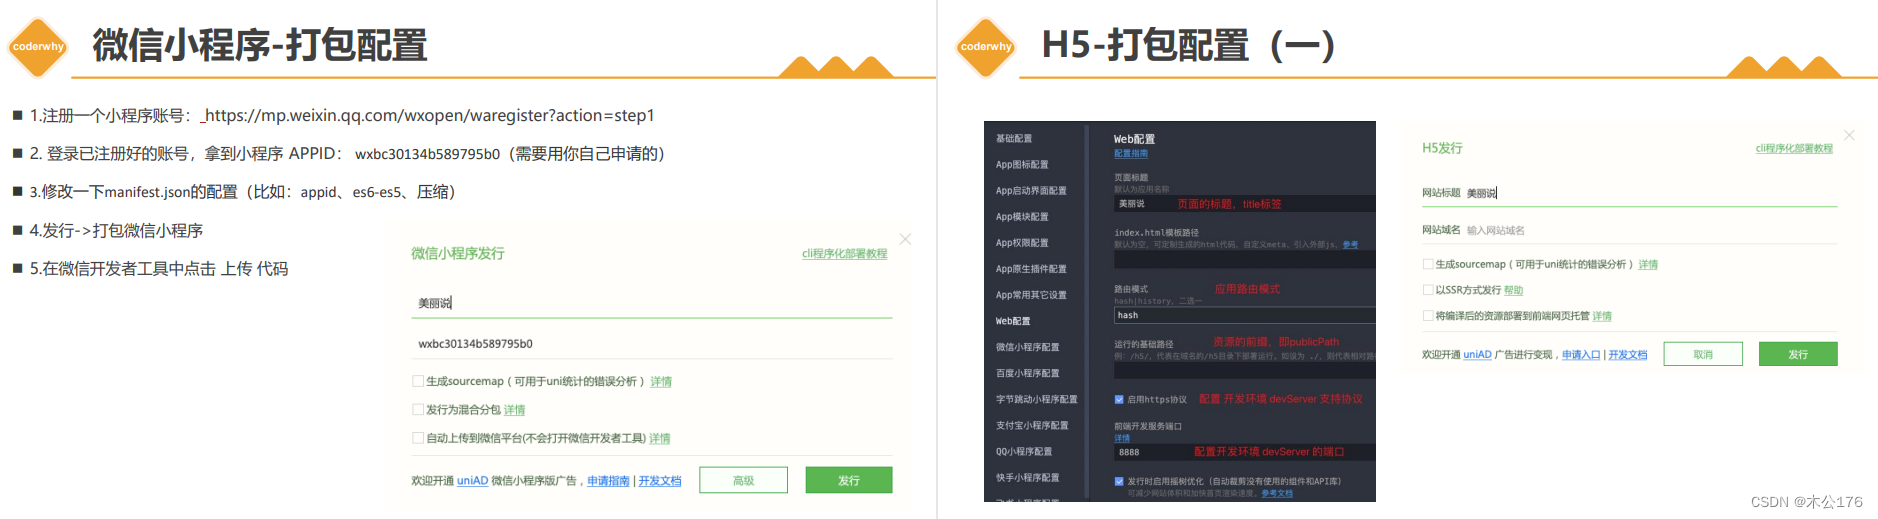
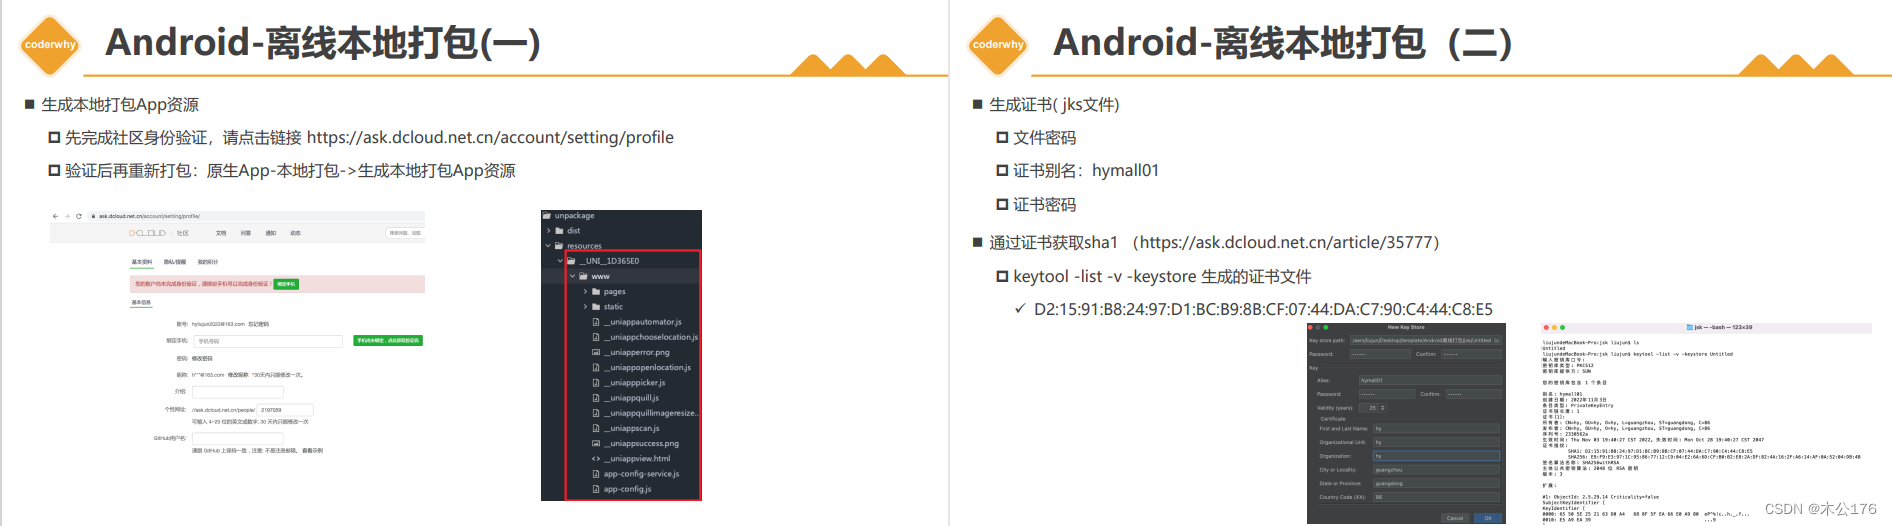
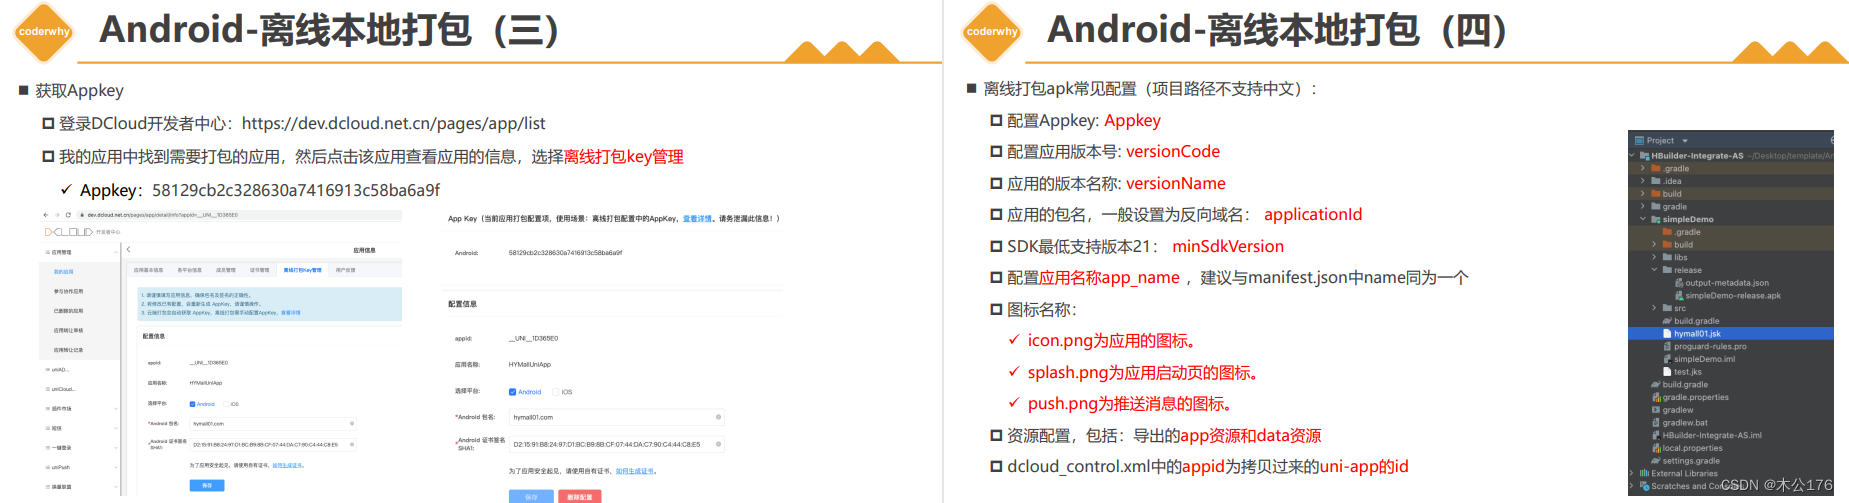
打包: