Jenkins构建结果自定义内容推送企业微信

环境:gitlab、jenkins(2.400,windows环境下)、企业微信
功能:推送构建人、构建时长、构建结果、git提交信息到企业微信并@相应提交人
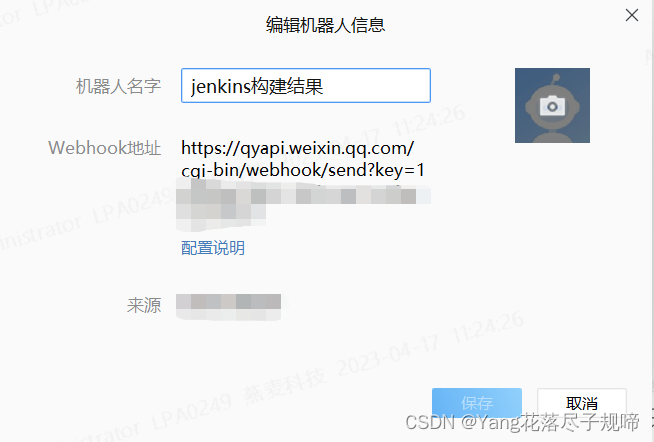
一、企业微信添加群聊机器人

在弹出的页面添加一个新的机器人,创建完成后会有一个webhook地址,复制该地址,如下图
二、编写python脚本
安装emoji模块,pip install emoji
以下脚本中需要替换自己的jenkins的url,d
#!/usr/bin/env python
# -*- coding: utf-8 -*-"""jenkins构建结果发送企业微信@Time 2023/4/12 12:10@File JenkinsWeComNotice.py
"""
import random
import sys
import requests
import json
import emoji# 这个字典存放gitlab上用户名称name(注意不是用户名username)和企业微信userId,username作为key,userId作为value,一般企业微信的userId为工号,问管理员就行
gitlab_wecom = {}# 这个字典存放jenkins上用户名称name(注意不是用户名username)和企业微信userId,username作为key,userId作为value,一般企业微信的userId为工号,问管理员就行
jenkins_wecom = {}def TimeConverter(ms):if ms <= 60000:return str(round(ms / 1000)) + '秒'else:return str(ms // 1000 // 60) + '分' + str(round(ms // 1000 % 60)) + '秒'def request_url(project_name):# 获取jenkins构建结果,job_url改为自己的即可job_url = "http://xxx.xxx.xxx.xxx:8080/job/"jenkins_url = job_url + project_name + "/lastBuild/api/json"# 管理员登录账号和密码,改为自己的即可auth = ("username", "password")jenkins_response = requests.get(url=jenkins_url, auth=auth)jenkins_data = json.loads(jenkins_response.text)job_name = project_name# print("任务名称:", job_name)build_id = jenkins_data['number']# print("构建序号:", build_id)build_result = jenkins_data['result']emoji_lst = {'success': [':winking_face:', ':beaming_face_with_smiling_eyes:', ':smiling_face:', ':victory_hand:',':OK_hand:', ':thumbs_up:', ':smiling_face_with_sunglasses:', ':nerd_face:'],'failure': [':loudly_crying_face:', ':weary_face:', ':downcast_face_with_sweat:', ':thinking_face:',':neutral_face:', ':frowning_face:', ':slightly_frowning_face:', ':pleading_face:',':face_with_steam_from_nose:'],'other': [':confounded_face:', ':pensive_face:', ':confused_face:', ':unamused_face:']}success_emoji = emoji.emojize(random.choice(emoji_lst['success']))failure_emoji = emoji.emojize(random.choice(emoji_lst['failure']))other_emoji = emoji.emojize(random.choice(emoji_lst['other']))if build_result == 'SUCCESS':result = {'成功': ['info', success_emoji]}elif build_result == 'ABORTED':result = {'被中断': ['warning', other_emoji]}else:result = {'失败': ['warning', failure_emoji]}# print("构建结果:", result)# 获取提交人commit_author = jenkins_data['actions'][0]['causes'][0]['shortDescription']# print("提交人:", commit_author)# 获取git提交更改记录if jenkins_data['changeSet']['items']:git_commit_message = jenkins_data['changeSet']['items'][0]['msg']else:git_commit_message = 'No changes'# print("提交信息:", git_commit_message)# 获取执行时长,这里是预估时长,实际时长是durationduration = jenkins_data['estimatedDuration']execution_duration = TimeConverter(duration)# print("执行时间:", execution_duration)console_url = job_url + job_name + '/' + str(build_id) + '/console'# print("控制台url:", console_url)user = ''if 'GitLab' in commit_author:key = commit_author.split(' ')[-1]if key in gitlab_wecom.keys():user = gitlab_wecom[key]else:key = jenkins_data['actions'][0]['causes'][0]['userName']if key in jenkins_wecom.keys():user = jenkins_wecom[key]return job_name, build_id, result, commit_author, git_commit_message, execution_duration, console_url, userdef post_wecom(project_name):# 发送到企业微信job_name = request_url(project_name)[0]build_id = request_url(project_name)[1]result = next(iter(request_url(project_name)[2]))result_color = request_url(project_name)[2][result][0]result_emoji = request_url(project_name)[2][result][1]commit_author = request_url(project_name)[3]git_commit_message = request_url(project_name)[4]duration = request_url(project_name)[5]console_url = request_url(project_name)[6]user_id = request_url(project_name)[7]# 上面创建的机器人的webhook地址,改为自己的即可wechat_url = "https://qyapi.weixin.qq.com/cgi-bin/webhook/send?key=xxxxxx"wechat_data = {"markdown": {"content": f"<font color=\\"info\\">【{job_name}】</font>构建<font color=\\"{result_color}\\">{result}~</font>{result_emoji}\\n "f">构建用时:<font color=\\"comment\\">{duration}</font>\\n "f">构建序号:<font color=\\"comment\\">{build_id}</font>\\n"f">构建人:<font color=\\"comment\\">{commit_author}</font>\\n"f">提交信息:<font color=\\"comment\\">{git_commit_message}</font>\\n"f">[查看控制台]({console_url})"},"msgtype": "markdown"}requests.post(wechat_url, json=wechat_data)aite = {"msgtype": "text","text": {"mentioned_list": [user_id],}}requests.post(wechat_url, json=aite)post_wecom(sys.argv[1])
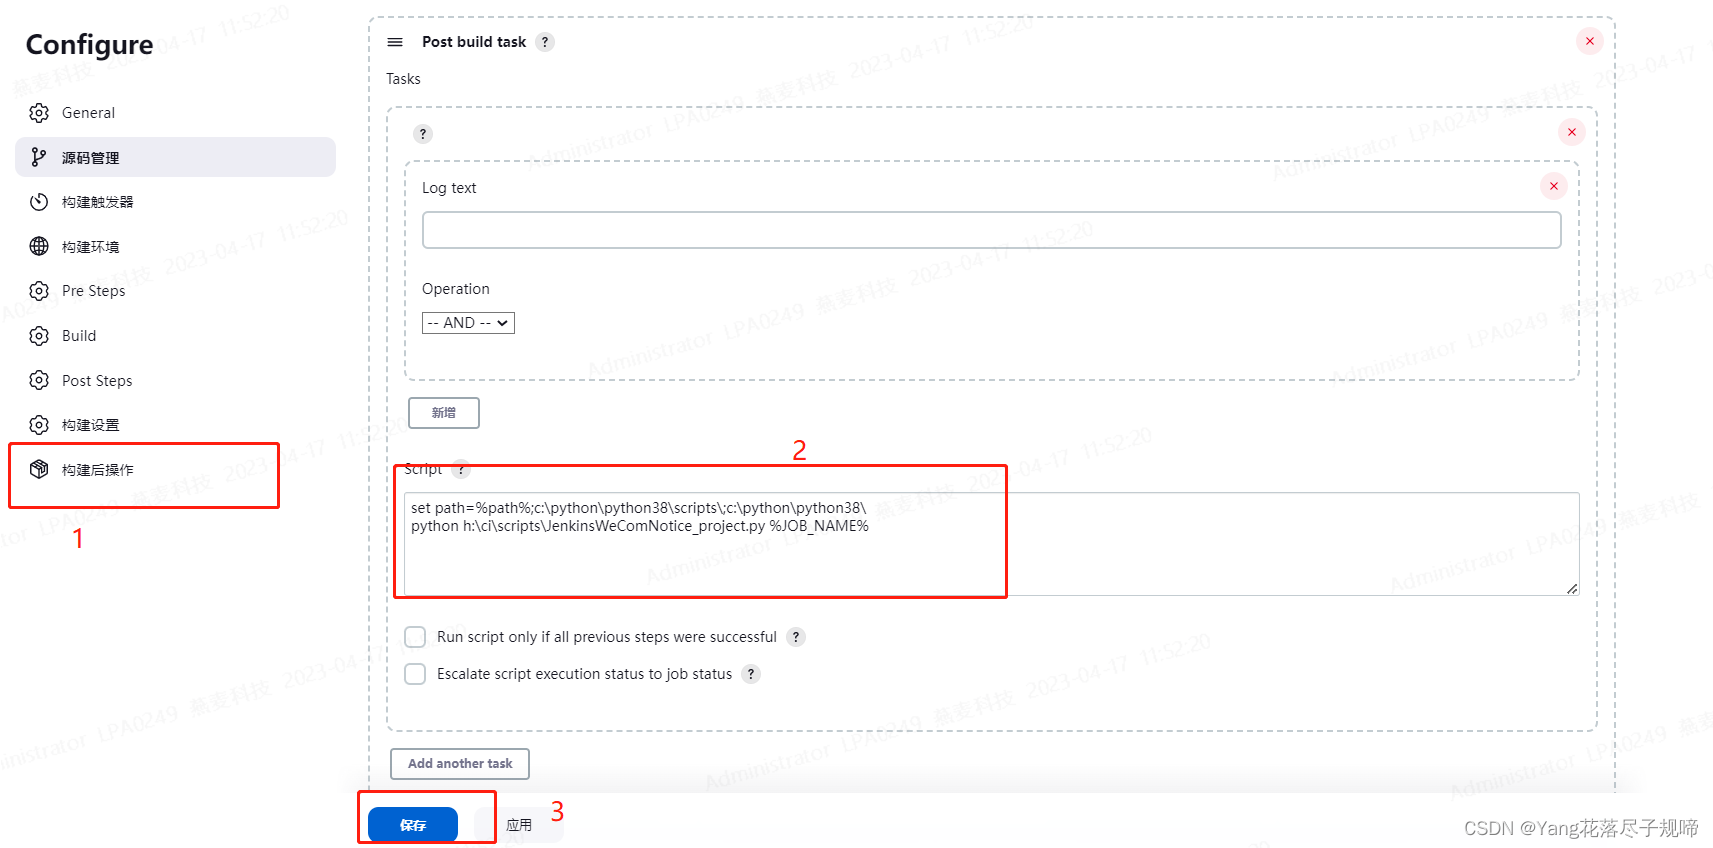
三、jenkins执行python脚本
在jenkins项目上进行配置,在最后一步【构建后操作】中增加post build task,执行上述python脚本,如下图所示:
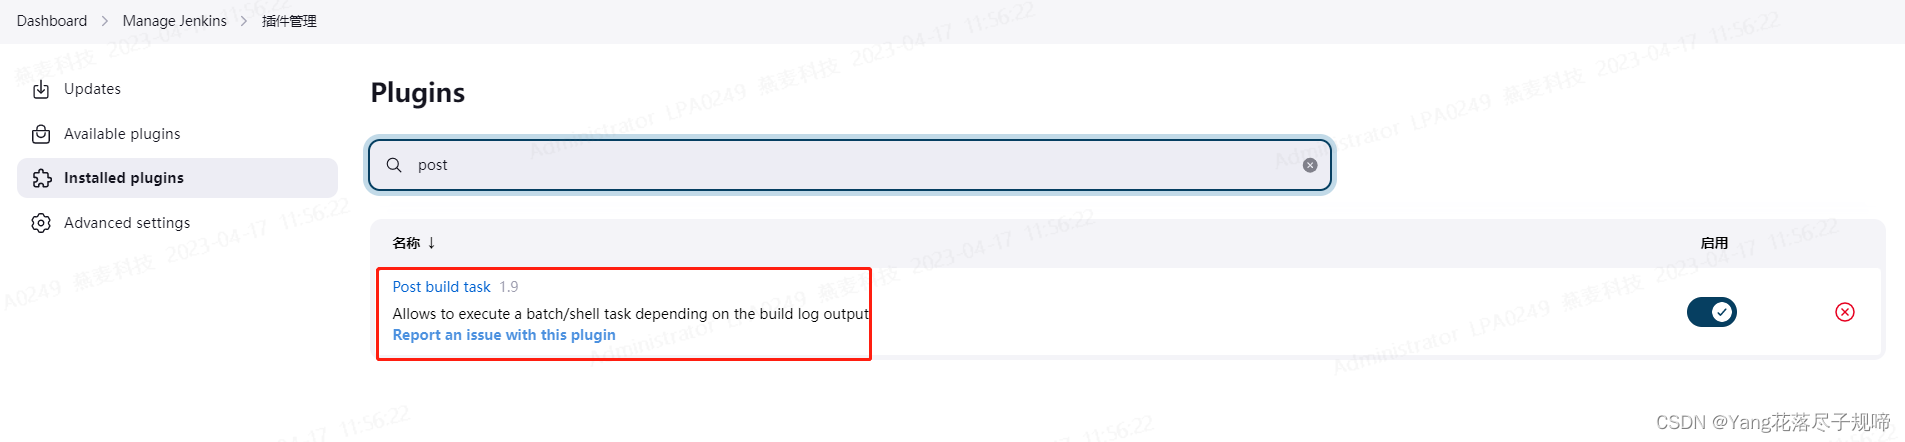
如果没有该选项就需要安装相应的插件(我已安装,没安装的话在Available plugins里面搜索安装),如下图:
四、推送结果显示
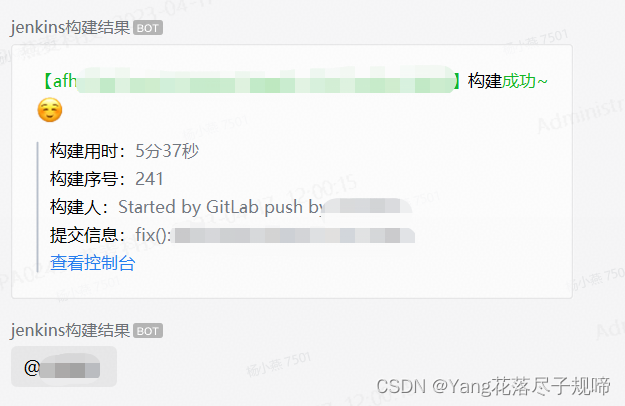
五、企业微信推送消息颜色字体
企业微信中的字体颜色目前只支持3种内置颜色。info是绿色,comment是灰色,warning是橙红色,如下图所示:
见第二节中字体颜色的设置,构建结果为成功时显示绿色,失败为橙红色,其他构建显示信息为灰色。

emoji表情官网:🎁 Emoji cheat sheet for GitHub, Basecamp, Slack & more