本地存储、自定义事件、全局事件总线、消息订阅与发布【Vue】

Vue
1.1 浏览器的本地存储
- 存储内容大小一般支持5MB左右(不同浏览器可能还不一样)
- 浏览器通过 Window.sessionStorage 和 Window.localStorage 属性来实现本地存储机制
- 相关API:
(1)xxxxStorage.setItem('key', 'value');
该方法接受一个键和值作为参数,会把键值对添加到存储中,如果键名存在,则更新其对应的值。
(2)xxxxStorage.getItem('person');
该方法接受一个键名作为参数,返回键名对应的值
(3)xxxxStorage.removeItem('key');
该方法接受一个键名作为参数,并把该键名从存储中删除。
(4)xxxxStorage.clear()
该方法清空存储中的所有数据。 - 备注:
(1)sessionStorage存储的内容会随着浏览器窗口关闭而消失。
(2)LocalStorage存储的内容,需要手动清除才会消失。
(3)xxxxStorage.getItem(xxx) 如果xxx对应的value获取不到,那么getItem的返回值是null
(4)JSON.parse(null)的结果依然是null
1.2 组件的自定义事件
- 一种组件间通信的方式,适用于:子组件 ===> 父组件
- 使用场景:A是父组件,B是子组件,B想给A传数据,那么就要在A中给B绑定自定义事件(事件的回调在A中)
- 绑定自定义事件:
(1)第一种方式,在父组件中:< Demo @zmy = "test"/ > 或 <Demo v-on:zmy = "test"/ >
(2)第二种方式,在父组件中:
<Demo ref="demo"/>
......
mounted(){this.$refs.xxx.$on('zmy', this.test)
}
(3) 若想让自定义事件只能触发一次,可以使用once修饰符,或$once方法
4. 触发自定义事件:this. $ emit('zmy', 数据)
5. 解绑自定义事件:this.$ off('zmy')
6. 组件上也可以绑定原生DOM事件,需要使用native修饰符
7. 注意:通过 this.$ refs.xxx.$ on('zmy', 回调) 绑定自定义事件时,回调要么配置在methods中,要么用箭头函数,否则this指向会出问题!
1.3 全局事件总线
1.3.1 理解
- 一种组件间通信的方式,适用于
任意组件间通信 - Vue 原型对象上包含事件处理的方法
(1)$on(eventName, listener): 绑定自定义事件监听
(2)$emit(eventName, data): 分发自定义事件
(3)$off(eventName): 解绑自定义事件监听
(4)$once(eventName, listener): 绑定事件监听, 但只能处理一次 - 所有组件实例对象的原型对象的原型对象就是 Vue 的原型对象
(1)所有组件对象都能看到 Vue 原型对象上的属性和方法
(2)Vue.prototype.$bus = new Vue(),所有的组件对象都能看到$bus 这个属性对象 - 全局事件总线
(1)包含事件处理相关方法的对象(只有一个)
(2)所有的组件都可以得到
1.3.2 指定事件总线对象
- 安装全局事件总线:
new Vue({......beforeCreate(){Vue.prototype.$bus = this//安装全局事件总线,$bus就是当前应用的vm},......
})
- 使用事件总线
(1)接收数据:A组件想接收数据,则在A组件中给$bus绑定自定义事件,事件的回调留在A组件自身。
methods(){demo(data){......}
}
......
mounted(){this,$bus.$on('xxx', this.demo)
}
(2)提供数据:this.$ bus.$ emit('xxx', 数据)
- 最好在 deforeDestroy 钩子中,用
$ off去解绑当前组件所用到的事件
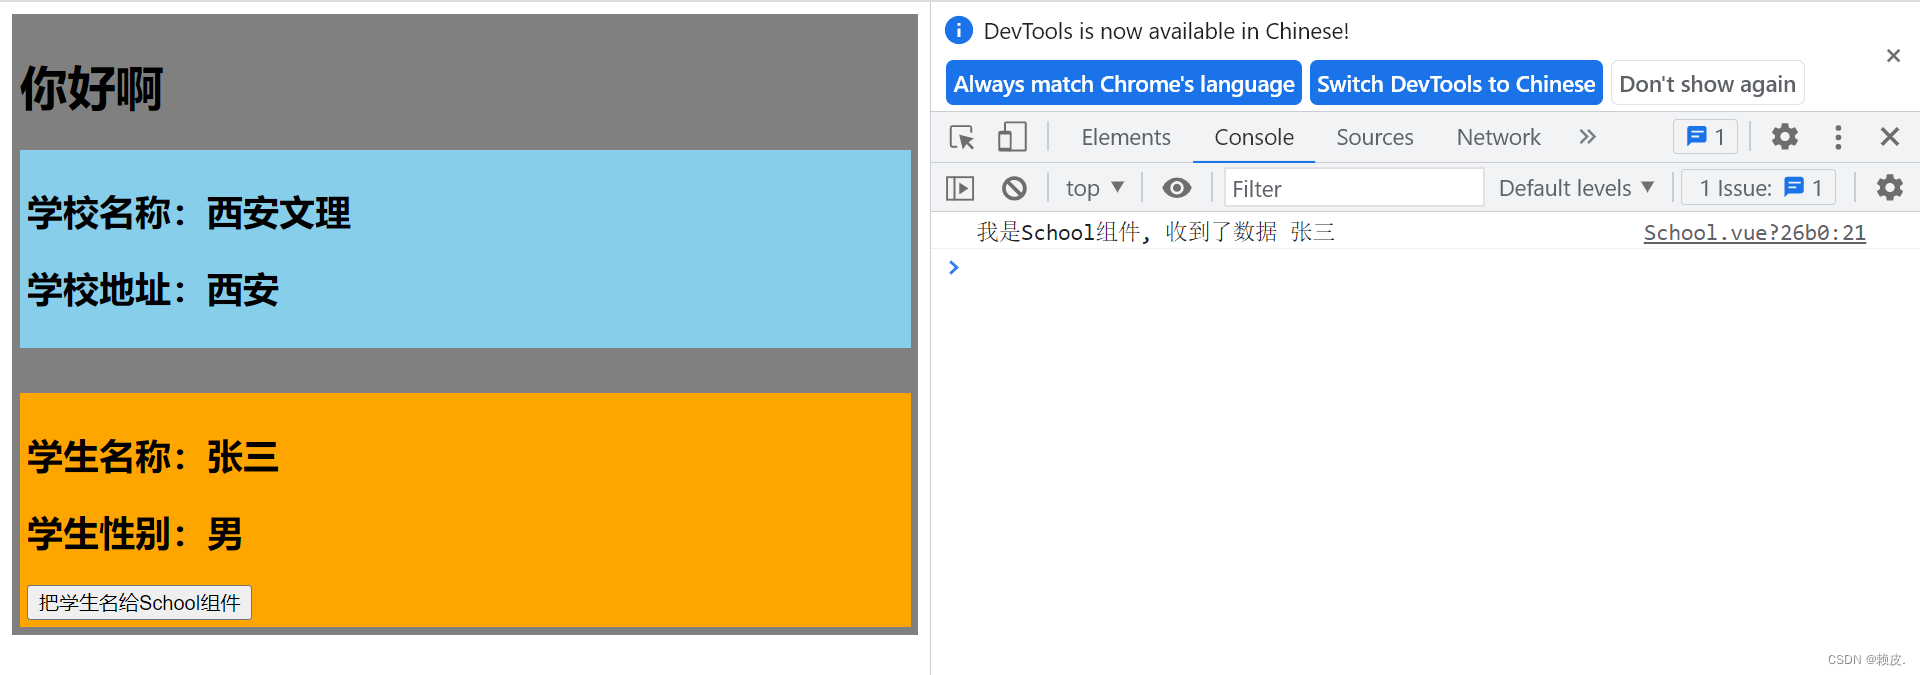
School.vue
<template><div class="school"><h2>学校名称:{{ name }}</h2><h2>学校地址:{{ address }}</h2></div></template><script>export default {name: 'School',props: ['getSchoolName'],data(){return {name: '西安文理',address: '西安',}},mounted(){// console.log('School', this);this.$bus.$on('hello',(data) => {console.log('我是School组件, 收到了数据', data);})},beforeDestroy(){this.$bus.$off('hello')}}</script><style scoped>.school {background-color: skyblue;padding: 5px;}</style>
Student.vue
<template><div class="student"><h2>学生名称:{{ name }}</h2><h2>学生性别:{{ sex }}</h2><button @click="sendStudentName">把学生名给School组件</button></div>
</template><script>export default {name: 'Student',data(){return {name: '张三',sex: '男',}},methods: {sendStudentName(){this.$bus.$emit('hello', this.name)}}}
</script>
<style lang="less" scoped>.student {background-color: orange;padding: 5px;margin-top: 30px;}
</style>
App.vue
<template><div class="app"><h1>{{ msg }}</h1><School/><Student/></div></template><script>import Student from './components/Student.vue'import School from './components/School.vue'export default {name: 'App',components: {School, Student},data(){return {msg: '你好啊',studentName:''}},}</script><style scoped>.app{background-color: gray;padding: 5px;}</style>
main.js
//引入Vue
import Vue from 'vue'
//引入App
import App from './App.vue'
//关闭Vue的生产提示
Vue.config.productionTip = false/* const demo = Vue.extend({})
const d = new demo()           */                            //创建vm
new Vue({el: '#app',render: h => h(App),beforeCreate(){Vue.prototype.$bus = this //安装全局事件总线}
})
1.4 消息的订阅与发布
- 一组组件间通信的方式,适用于
任意组件通信 - 使用步骤:
(1)安装 pubsub:npm i pubsub-js
(2)引入:import pubsub from 'pubsub-js'
(3)接收数据:A组件想接收数据,则在A组件中订阅消息,订阅回调留在A组件自身。
methods(){demo(data) {......}
}
......
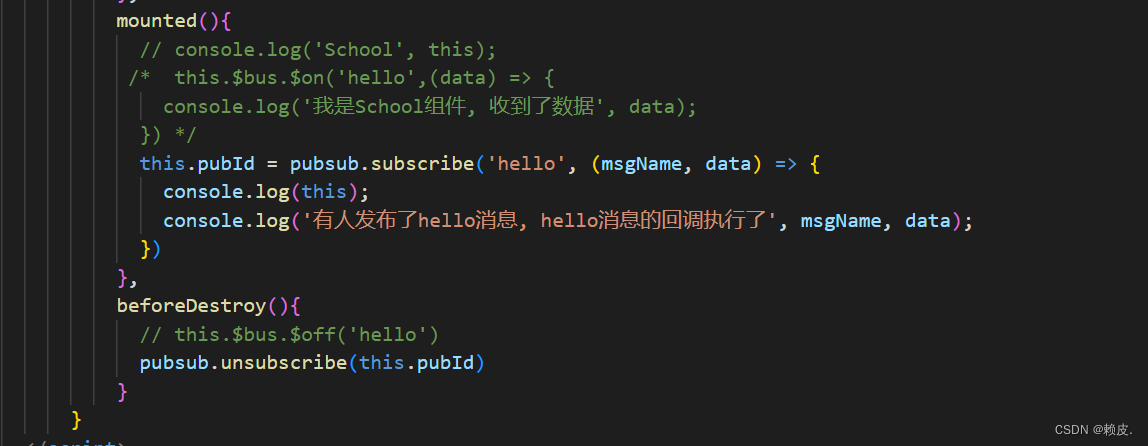
mounted() {this.pid = pubsub.subscribe('xxx', this.demo)//订阅消息
}
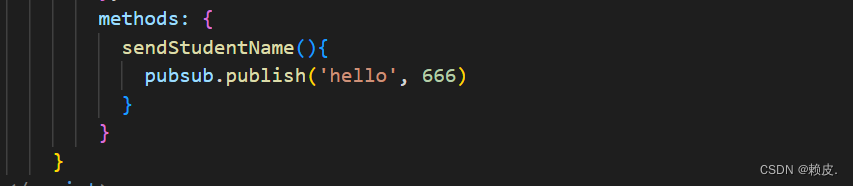
(4)提供数据:pubsub.publish('xxx', 数据)
(5)最好在beforeDestroy钩子中,用PubSub.unsubscribe(pid)去取消订阅。
1.5 使用 PubSubJS
- 在线文档: https://github.com/mroderick/PubSubJS
- 下载:
npm install -S pubsub-js - 相关语法
(1)import PubSub from 'pubsub-js'// 引入
(2)PubSub.subscribe(‘msgName’, functon(msgName, data){ })
(3)PubSub.publish(‘msgName’, data): 发布消息, 触发订阅的回调函数调用
(4)PubSub.unsubscribe(token): 取消消息的订阅
1.6 nextTick
- 语法:
this.nextTick(回调函数) - 作用:在下一次DOM更新结束后执行其指定的回调
- 什么时候用:当改变数据后,要基于更新后的新DOM进行某些操作时,要在nextTick所指定的回调函数中执行。
1.7 Vue封装的过度与动画
-
作用:在插入、更新或移除DOM元素时,在合适的时候给元素添加样式类名
-
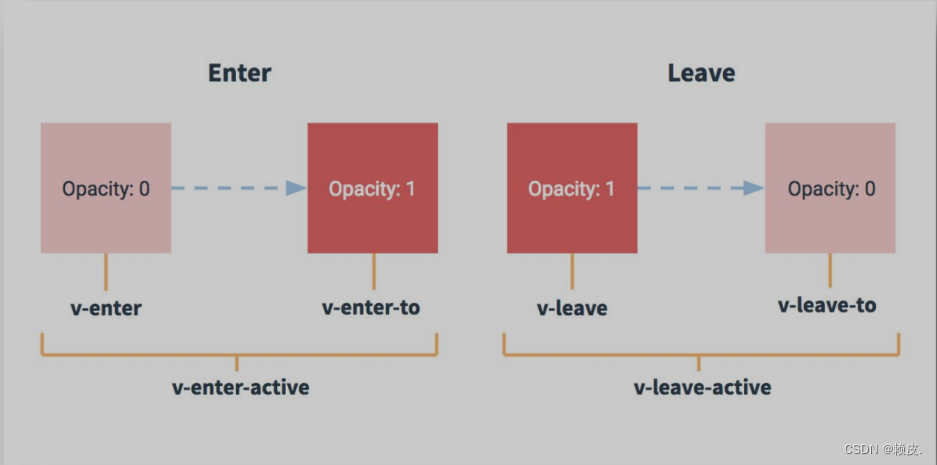
图示:
-
写法:
(1)准备好样式:
- 元素进入的样式:
- v-enter:进入的起点
- v-enter-active:进入过程中
- v-enter-to:进入的终点
- 元素离开的样式:
- v-leave:离开的起点
- v-leave-active:离开过程中
- v-leave-to:离开的终点
(2)使用 < transition >包裹要过度的元素,并配置name属性:
<transition name="hello"><h1 v-show="isShow">你好啊!</h1>
</transition>
- 备注:若有多个元素需要过度,则需要使用:
< transition-group >,且每个元素都要指定key值
Tset.vue
<template><div><button @click="isShow = !isShow">显示/隐藏</button><transition name="hello" appear><h1 v-show="isShow">你好啊</h1></transition></div>
</template><script>export default {name: 'Test',data(){return {isShow: true}},}
</script><style scoped>h1{background-color: orange;}.hello-enter-active{animation: aaa 0.5s linear;}.hello-leave-active{animation: aaa 0.5s linear reverse;}@keyframes aaa {from{transform: translateX(-100%);}to{transform: translateX(0px);}}
</style>
Tset2.vue
<template><div><button @click="isShow = !isShow">显示/隐藏</button><transition-group name="hello" appear><h1 v-show="!isShow" key="1">你好啊</h1><h1 v-show="isShow" key="2">aaa</h1></transition-group></div>
</template><script>export default {name: 'Test',data(){return {isShow: true}},}
</script><style scoped>h1{background-color: orange;}/* 进入的起点 离开的终点*/.hello-enter, .hello-leave-to{transform: translateX(-100%);}.hello-enter-active, .hello-leave-active{transition: 0.5s linear;}/* 进入的终点 离开的起点*/.hello-enter-to, .hello-leave{transform: translateX(0);}
</style>
Tset3.vue
<template><div><button @click="isShow = !isShow">显示/隐藏</button><transition-group name="animate__animated animate__bounce" appear enter-active-class="animate__swing" leave-active-class="animate__backOutUp"><h1 v-show="!isShow" key="1">你好啊</h1><h1 v-show="isShow" key="2">aaa</h1></transition-group></div>
</template><script>import 'animate.css'export default {name: 'Test',data(){return {isShow: true}},}
</script><style scoped>h1{background-color: orange;}
</style>
App.vue
<template><div><Test></Test><Test2></Test2><Test3></Test3></div>
</template><script>import Test from './components/Test.vue'import Test2 from './components/Test2.vue'import Test3 from './components/Test3.vue'export default {name: 'App',components: {Test, Test2, Test3},}</script>
main.js
//引入Vue
import Vue from 'vue'
//引入App
import App from './App.vue'
//关闭Vue的生产提示
Vue.config.productionTip = false//创建vm
new Vue({el: '#app',render: h => h(App),beforeCreate(){Vue.prototype.$bus = this}
})