为啥一个 main 方法就能启动项目

在 Spring Boot 出现之前,我们要运行一个 Java Web 应用,首先需要有一个 Web 容器(例如 Tomcat 或 Jetty),然后将我们的 Web 应用打包后放到容器的相应目录下,最后再启动容器。
在 IDE 中也需要对 Web 容器进行一些配置,才能够运行或者 Debug。而使用 Spring Boot 我们只需要像运行普通 JavaSE 程序一样,run 一下 main() 方法就可以启动一个 Web 应用了。这是怎么做到的呢?今天我们就一探究竟,分析一下 Spring Boot 的启动流程。
概览
回看我们写的第一个 Spring Boot 示例,我们发现,只需要下面几行代码我们就可以跑起一个 Web 服务器:
@SpringBootApplication
public class HelloApplication {public static void main(String[] args) {SpringApplication.run(HelloApplication.class, args);}
}
去掉类的声明和方法定义这些样板代码,核心代码就只有一个 @SpringBootApplication 注解和 SpringApplication.run(HelloApplication.class, args) 了。而我们知道注解相当于是一种配置,那么这个 run() 方法必然就是 Spring Boot 的启动入口了。
接下来,我们沿着 run() 方法来顺藤摸瓜。进入 SpringApplication 类,来看看 run() 方法的具体实现:
public class SpringApplication {......public ConfigurableApplicationContext run(String... args) {// 1 应用启动计时开始StopWatch stopWatch = new StopWatch();stopWatch.start();// 2 声明上下文DefaultBootstrapContext bootstrapContext = createBootstrapContext();ConfigurableApplicationContext context = null;// 3 设置 java.awt.headless 属性configureHeadlessProperty();// 4 启动监听器SpringApplicationRunListeners listeners = getRunListeners(args);listeners.starting(bootstrapContext, this.mainApplicationClass);try {// 5 初始化默认应用参数ApplicationArguments applicationArguments = new DefaultApplicationArguments(args);// 6 准备应用环境ConfigurableEnvironment environment = prepareEnvironment(listeners, bootstrapContext, applicationArguments);configureIgnoreBeanInfo(environment);// 7 打印 Banner(Spring Boot 的 LOGO)Banner printedBanner = printBanner(environment);// 8 创建上下文实例context = createApplicationContext();context.setApplicationStartup(this.applicationStartup);// 9 构建上下文prepareContext(bootstrapContext, context, environment, listeners, applicationArguments, printedBanner);// 10 刷新上下文refreshContext(context);// 11 刷新上下文后处理afterRefresh(context, applicationArguments);// 12 应用启动计时结束stopWatch.stop();if (this.logStartupInfo) {// 13 打印启动时间日志new StartupInfoLogger(this.mainApplicationClass).logStarted(getApplicationLog(), stopWatch);}// 14 发布上下文启动完成事件listeners.started(context);// 15 调用 runnerscallRunners(context, applicationArguments);}catch (Throwable ex) {// 16 应用启动发生异常后的处理handleRunFailure(context, ex, listeners);throw new IllegalStateException(ex);}try {// 17 发布上下文就绪事件listeners.running(context);}catch (Throwable ex) {handleRunFailure(context, ex, null);throw new IllegalStateException(ex);}return context;}......
}
Spring Boot 启动时做的所有操作都这这个方法里面,当然在调用上面这个 run() 方法之前,还创建了一个 SpringApplication 的实例对象。因为上面这个 run() 方法并不是一个静态方法,所以需要一个对象实例才能被调用。
可以看到,方法的返回值类型为 ConfigurableApplicationContext,这是一个接口,我们真正得到的是 AnnotationConfigServletWebServerApplicationContext 的实例。通过类名我们可以知道,这是一个基于注解的 Servlet Web 应用上下文(我们知道上下文(context)是 Spring 中的核心概念)。
上面对于 run() 方法中的每一个步骤都做了简单的注释,接下来我们选择几个比较有代表性的来详细分析。
应用启动计时
在 Spring Boot 应用启动完成时,我们经常会看到类似下面内容的一条日志:
Started AopApplication in 2.732 seconds (JVM running for 3.734)
应用启动后,会将本次启动所花费的时间打印出来,让我们对于启动的速度有一个大致的了解,也方便我们对其进行优化。记录启动时间的工作是 run() 方法做的第一件事,在编号 1 的位置由 stopWatch.start() 开启时间统计,具体代码如下:
public void start(String taskName) throws IllegalStateException {if (this.currentTaskName != null) {throw new IllegalStateException("Can't start StopWatch: it's already running");}// 记录启动时间this.currentTaskName = taskName;this.startTimeNanos = System.nanoTime();
}
然后到了 run() 方法的基本任务完成的时候,由 stopWatch.stop()(编号 12 的位置)对启动时间做了一个计算,源码也很简单:
public void stop() throws IllegalStateException {if (this.currentTaskName == null) {throw new IllegalStateException("Can't stop StopWatch: it's not running");}// 计算启动时间long lastTime = System.nanoTime() - this.startTimeNanos;this.totalTimeNanos += lastTime;......
}
最后,在 run() 中的编号 13 的位置将启动时间打印出来:
if (this.logStartupInfo) {// 打印启动时间new StartupInfoLogger(this.mainApplicationClass).logStarted(getApplicationLog(), stopWatch);
}
打印 Banner
Spring Boot 每次启动是还会打印一个自己的 LOGO,如图 8-6:
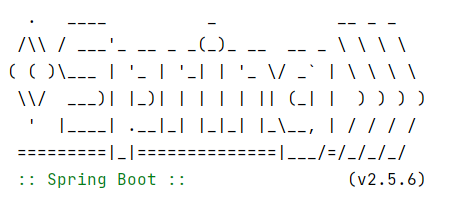
图 8-6 Spring Boot Logo
这种做法很常见,像 Redis、Docker 等都会在启动的时候将自己的 LOGO 打印出来。Spring Boot 默认情况下会打印那个标志性的“树叶”和 “Spring” 的字样,下面带着当前的版本。
在 run() 中编号 7 的位置调用打印 Banner 的逻辑,最终由 SpringBootBanner 类的 printBanner() 完成。这个图案定义在一个常量数组中,代码如下:
class SpringBootBanner implements Banner {private static final String[] BANNER = {"", " . ____ _ __ _ _"," /\\\\\\\\ / ___'_ __ _ _(_)_ __ __ _ \\\\ \\\\ \\\\ \\\\", "( ( )\\\\___ | '_ | '_| | '_ \\\\/ _` | \\\\ \\\\ \\\\ \\\\"," \\\\\\\\/ ___)| |_)| | | | | || (_| | ) ) ) )", " ' |____| .__|_| |_|_| |_\\\\__, | / / / /"," =========|_|==============|___/=/_/_/_/" };......public void printBanner(Environment environment, Class<?> sourceClass, PrintStream printStream) {for (String line : BANNER) {printStream.println(line);}......}}手工格式化了一下 BANNER 的字符串,轮廓已经清晰可见了。真正打印的逻辑就是 printBanner() 方法里面的那个 for 循环。
记录启动时间和打印 Banner 代码都非常的简单,而且都有很明显的视觉反馈,可以清晰的看到结果。拿出来咱们做个热身,配合断点去 Debug 会有更加直观的感受,尤其是打印 Banner 的时候,可以看到整个内容被一行一行打印出来,让我想起了早些年用那些配置极低的电脑(还是 CRT 显示器)运行着 Win98,经常会看到屏幕内容一行一行加载显示。
创建上下文实例
下面我们来到 run() 方法中编号 8 的位置,这里调用了一个 createApplicationContext() 方法,该方法最终会调用 ApplicationContextFactory 接口的代码:
ApplicationContextFactory DEFAULT = (webApplicationType) -> {try {switch (webApplicationType) {case SERVLET:return new AnnotationConfigServletWebServerApplicationContext();case REACTIVE:return new AnnotationConfigReactiveWebServerApplicationContext();default:return new AnnotationConfigApplicationContext();}}catch (Exception ex) {throw new IllegalStateException("Unable create a default ApplicationContext instance, "+ "you may need a custom ApplicationContextFactory", ex);}
};
这个方法就是根据 SpringBootApplication 的 webApplicationType 属性的值,利用反射来创建不同类型的应用上下文(context)。而属性 webApplicationType 的值是在前面执行构造方法的时候由 WebApplicationType.deduceFromClasspath() 获得的。通过方法名很容易看出来,就是根据 classpath 中的类来推断当前的应用类型。
我们这里是一个普通的 Web 应用,所以最终返回的类型为 SERVLET。所以会返回一个 AnnotationConfigServletWebServerApplicationContext 实例。
构建容器上下文
接着我们来到 run() 方法编号 9 的 prepareContext() 方法。通过方法名,我们也能猜到它是为 context 做上台前的准备工作的。
private void prepareContext(DefaultBootstrapContext bootstrapContext, ConfigurableApplicationContext context,ConfigurableEnvironment environment, SpringApplicationRunListeners listeners,ApplicationArguments applicationArguments, Banner printedBanner) {......// 加载资源load(context, sources.toArray(new Object[0]));listeners.contextLoaded(context);
}
在这个方法中,会做一些准备工作,包括初始化容器上下文、设置环境、加载资源等。
加载资源
上面的代码中,又调用了一个很关键的方法——load()。这个 load() 方法真正的作用是去调用 BeanDefinitionLoader 类的 load() 方法。源码如下:
class BeanDefinitionLoader {......void load() {for (Object source : this.sources) {load(source);}}private void load(Object source) {Assert.notNull(source, "Source must not be null");if (source instanceof Class<?>) {load((Class<?>) source);return;}if (source instanceof Resource) {load((Resource) source);return;}if (source instanceof Package) {load((Package) source);return;}if (source instanceof CharSequence) {load((CharSequence) source);return;}throw new IllegalArgumentException("Invalid source type " + source.getClass());}......
}
可以看到,load() 方法在加载 Spring 中各种资源。其中我们最熟悉的就是 load((Class<?>) source) 和 load((Package) source) 了。一个用来加载类,一个用来加载扫描的包。
load((Class<?>) source) 中会通过调用 isComponent() 方法来判断资源是否为 Spring 容器管理的组件。 isComponent() 方法通过资源是否包含 @Component 注解(@Controller、@Service、@Repository 等都包含在内)来区分是否为 Spring 容器管理的组件。
而 load((Package) source) 方法则是用来加载 @ComponentScan 注解定义的包路径。
刷新上下文
run() 方法编号10 的 refreshContext() 方法是整个启动过程比较核心的地方。像我们熟悉的 BeanFactory 就是在这个阶段构建的,所有非懒加载的 Spring Bean(@Controller、@Service 等)也是在这个阶段被创建的,还有 Spring Boot 内嵌的 Web 容器要是在这个时候启动的。
跟踪源码你会发现内部调用的是 ConfigurableApplicationContext.refresh(),ConfigurableApplicationContext 是一个接口,真正实现这个方法的有三个类:AbstractApplicationContext、ReactiveWebServerApplicationContext 和 ServletWebServerApplicationContext。
AbstractApplicationContext 为后面两个的父类,两个子类的实现比较简单,主要是调用父类实现,比如 ServletWebServerApplicationContext 中的实现是这样的:
public final void refresh() throws BeansException, IllegalStateException {try {super.refresh();}catch (RuntimeException ex) {WebServer webServer = this.webServer;if (webServer != null) {webServer.stop();}throw ex;}
}
主要的逻辑都在 AbstractApplicationContext 中:
@Override
public void refresh() throws BeansException, IllegalStateException {synchronized (this.startupShutdownMonitor) {StartupStep contextRefresh = this.applicationStartup.start("spring.context.refresh");// 1 准备将要刷新的上下文prepareRefresh();// 2 (告诉子类,如:ServletWebServerApplicationContext)刷新内部 bean 工厂ConfigurableListableBeanFactory beanFactory = obtainFreshBeanFactory();// 3 为上下文准备 bean 工厂prepareBeanFactory(beanFactory);try {// 4 允许在子类中对 bean 工厂进行后处理postProcessBeanFactory(beanFactory);StartupStep beanPostProcess = this.applicationStartup.start("spring.context.beans.post-process");// 5 调用注册为 bean 的工厂处理器invokeBeanFactoryPostProcessors(beanFactory);// 6 注册拦截器创建的 bean 处理器registerBeanPostProcessors(beanFactory);beanPostProcess.end();// 7 初始化国际化相关资源initMessageSource();// 8 初始化事件广播器initApplicationEventMulticaster();// 9 为具体的上下文子类初始化特定的 beanonRefresh();// 10 注册监听器registerListeners();// 11 实例化所有非懒加载的单例 beanfinishBeanFactoryInitialization(beanFactory);// 12 完成刷新发布相应的事件(Tomcat 就是在这里启动的)finishRefresh();}catch (BeansException ex) {if (logger.isWarnEnabled()) {logger.warn("Exception encountered during context initialization - " +"cancelling refresh attempt: " + ex);}// 遇到异常销毁已经创建的单例 beandestroyBeans();// 充值 active 标识cancelRefresh(ex);// 将异常向上抛出throw ex;} finally {// 重置公共缓存,结束刷新resetCommonCaches();contextRefresh.end();}}
}
简单说一下编号 9 处的 onRefresh() 方法,该方法父类未给出具体实现,需要子类自己实现,ServletWebServerApplicationContext 中的实现如下:
protected void onRefresh() {super.onRefresh();try {createWebServer();}catch (Throwable ex) {throw new ApplicationContextException("Unable to start web server", ex);}
}private void createWebServer() {......if (webServer == null && servletContext == null) {......// 根据配置获取一个 web server(Tomcat、Jetty 或 Undertow)ServletWebServerFactory factory = getWebServerFactory();this.webServer = factory.getWebServer(getSelfInitializer());......}......
}
factory.getWebServer(getSelfInitializer()) 会根据项目配置得到一个 Web Server 实例,这里跟下一篇将要谈到的自动配置有点关系。
更多独家精彩内容尽在我的新书《Spring Boot趣味实战课》中。