go-cqhttp+SpringBoot3实现QQ机器人

本QQ机器人实现的功能
1.调用青云客的API进行自动聊天
2.输入关键词自动添加为好友
技术栈
非特殊情况保持一致即可!
1.SpringBoot-3.0.5
2.JDK-17
3.go-cqhttp1.0
Github:GitHub - Mrs4s/go-cqhttp: cqhttp的golang实现,轻量、原生跨平台.
gocq api文档地址:https://docs.go-cqhttp.org/api/
源码
https://gitee.com/mumangguo/go-cqhttp
实现步骤:
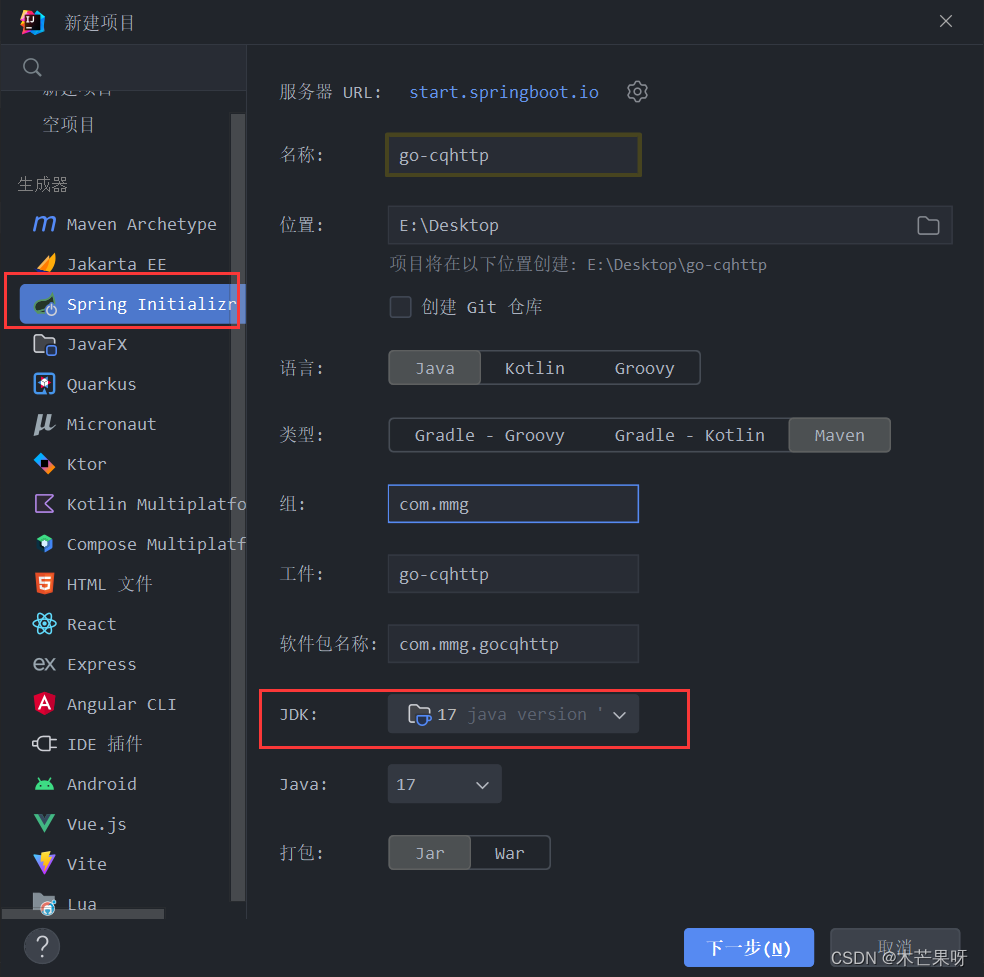
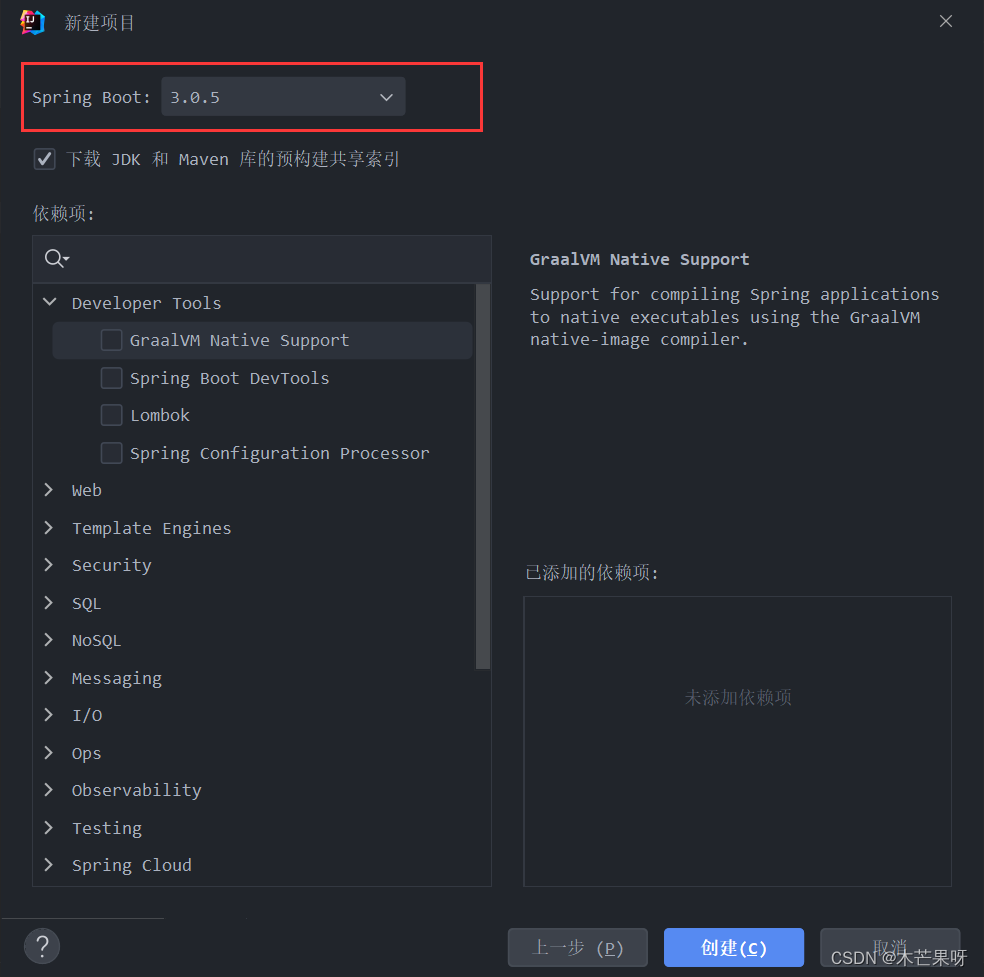
1. 新建一个springBoot项目,不选任何依赖直接创建即可
2. 引入相关依赖
<dependency><groupId>org.springframework.boot</groupId><artifactId>spring-boot-starter-websocket</artifactId></dependency><dependency><groupId>com.alibaba</groupId><artifactId>fastjson</artifactId><version>2.0.21</version></dependency><dependency><groupId>org.projectlombok</groupId><artifactId>lombok</artifactId></dependency><!-- httpclient用来请求自动回复API --><dependency><groupId>org.apache.httpcomponents</groupId><artifactId>httpclient</artifactId><version>4.5.13</version></dependency>3.编写相关实体类,处理json
Friend类
import lombok.Data;@Data
public class Friend {private String user_id;private String comment;private String flag;
}
Message类
import com.alibaba.fastjson.annotation.JSONField;
import lombok.Data;import java.io.Serializable;@Data
public class Message implements Serializable {@JSONField(name = "post_type")private String postType;@JSONField(name = "meta_event_type")private String metaEventType;@JSONField(name = "message_type")private String messageType;@JSONField(name = "notice_type")private String noticeType;// 操作人id 比如群管理员a踢了一个人,那么该值为a的qq号@JSONField(name = "operator_id")private String operatorId;private Long time;@JSONField(name = "self_id")private String selfId;@JSONField(name = "sub_type")private String subType;@JSONField(name = "user_id")private String userId;@JSONField(name = "sender_id")private String senderId;@JSONField(name = "group_id")private String groupId;@JSONField(name = "target_id")private String targetId;private String message;@JSONField(name = "raw_message")private String rawMessage;private Integer font;//private Sender sender;@JSONField(name = "message_id")private String messageId;@JSONField(name = "message_seq")private Integer messageSeq;private String anonymous;
}
Request类
import lombok.Data;@Data
public class Request<T> {private String action;private T params;private String echo;
}4.编写消息监听类(Websocket实现)
/* 消息监听*/
@ClientEndpoint
public class Client {private static final Logger logger = LoggerFactory.getLogger(Client.class);private Session session;private static Client instance;private Client(String url) {try {session = ContainerProvider.getWebSocketContainer().connectToServer(this, URI.create(url));} catch (Exception e) {e.printStackTrace();}}public synchronized static boolean connect(String url) {instance = new Client(url);return true;}@OnOpenpublic void onOpen(Session session) {logger.info("连接成功!");}@OnClosepublic void onClose(Session session) {logger.info("连接关闭!");}@OnErrorpublic void onError(Session session, Throwable throwable) {logger.info("连接错误!");}@OnMessagepublic void onMessage(String message) {if (message.contains("\\"request_type\\":\\"friend\\"")) {sendFriend(message);}if (message.contains("\\"post_type\\":\\"message\\"") && message.contains("\\"message_type\\":\\"private\\"")) {sendMsg(message);}}/* 好友请求*/private synchronized void sendFriend(String msg) {Friend parseObject = JSONObject.parseObject(msg, Friend.class);logger.info("收到好友请求:" + parseObject.getUser_id()+",验证消息:"+parseObject.getComment());Request<Object> paramsRequest = new Request<>();paramsRequest.setAction("set_friend_add_request");Map<String, Object> params = new HashMap<>();params.put("flag", parseObject.getFlag());if (parseObject.getComment().equals("木芒果")) {params.put("approve", true);logger.info("已同意好友请求:" + parseObject.getUser_id());} else {params.put("approve", false);logger.info("已拒绝好友请求:" + parseObject.getUser_id());}paramsRequest.setParams(params);instance.session.getAsyncRemote().sendText(JSONObject.toJSONString(paramsRequest));}/* 好友消息*/public synchronized static void sendMsg(String msg) {Message parseObject = JSONObject.parseObject(msg, Message.class);logger.info("收到好友" + parseObject.getUserId()+"的消息:"+parseObject.getMessage());Request<Object> paramsRequest = new Request<>();paramsRequest.setAction("send_msg");Map<String, Object> params = new HashMap<>();params.put("user_id", parseObject.getUserId());String ai = AiOne(parseObject.getMessage());if (ai == null) {ai = "宝,回复失败!重新试试把!";}params.put("message", ai);params.put("message_type", "private");params.put("auto_escape", true);paramsRequest.setParams(params);msg = JSONObject.toJSONString(paramsRequest);instance.session.getAsyncRemote().sendText(msg);}public static String AiOne(String sendMsg) {try {HttpGet httpGet = new HttpGet("http://api.qingyunke.com/api.php?key=free&appid=0&msg=" + sendMsg);String user_agent = "Mozilla/5.0 (Windows NT 10.0; Win64; x64) AppleWebKit/537.36 (KHTML, like Gecko) Chrome/108.0.0.0 Safari/537.36 Edg/108.0.1462.42";httpGet.addHeader("user-agent", user_agent);CloseableHttpClient httpClient = HttpClients.createDefault();CloseableHttpResponse response = httpClient.execute(httpGet);String body = EntityUtils.toString(response.getEntity(), StandardCharsets.UTF_8);body = body.substring(body.indexOf("content") + 10, body.length() - 2);logger.info("AiOne={}", body);return body;} catch (Exception e) {logger.error(e.toString());return null;}}
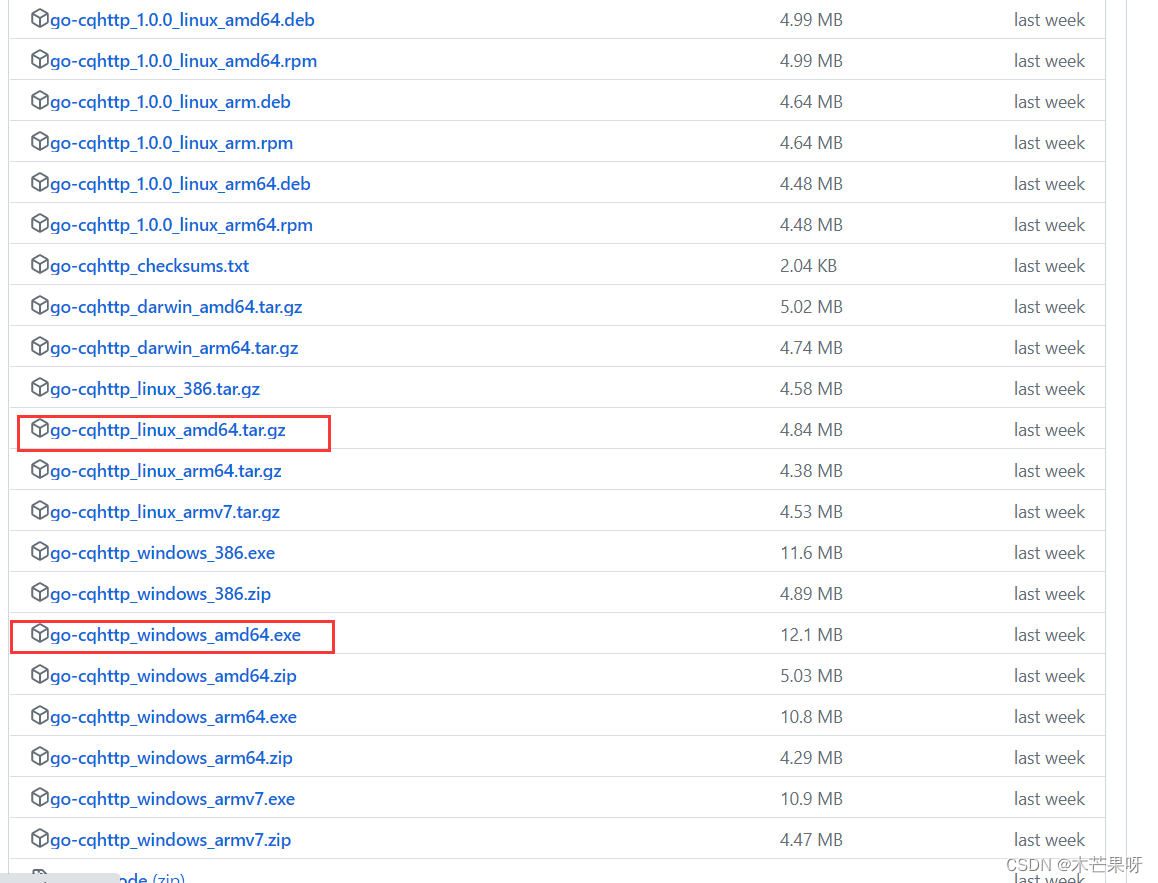
}5.代码部分完成,下载go-cqhttp
下载链接:Releases · Mrs4s/go-cqhttp · GitHub,根据自身实际情况下载对应的操作系统版本,当然我的源码中包含了Linux版本和Windows版本
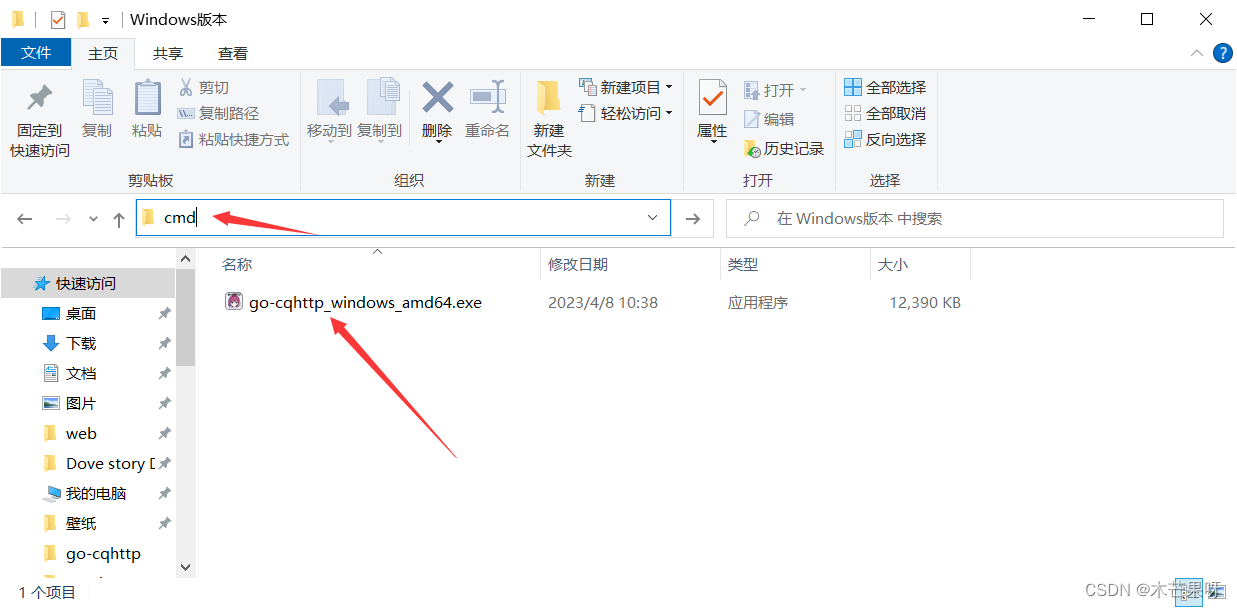
6.这边只演示windows操作系统如何启动,Linux启动可以看api文档
官方推荐使用cmd的方式启动,我们就在文件目录上输入cmd启动即可
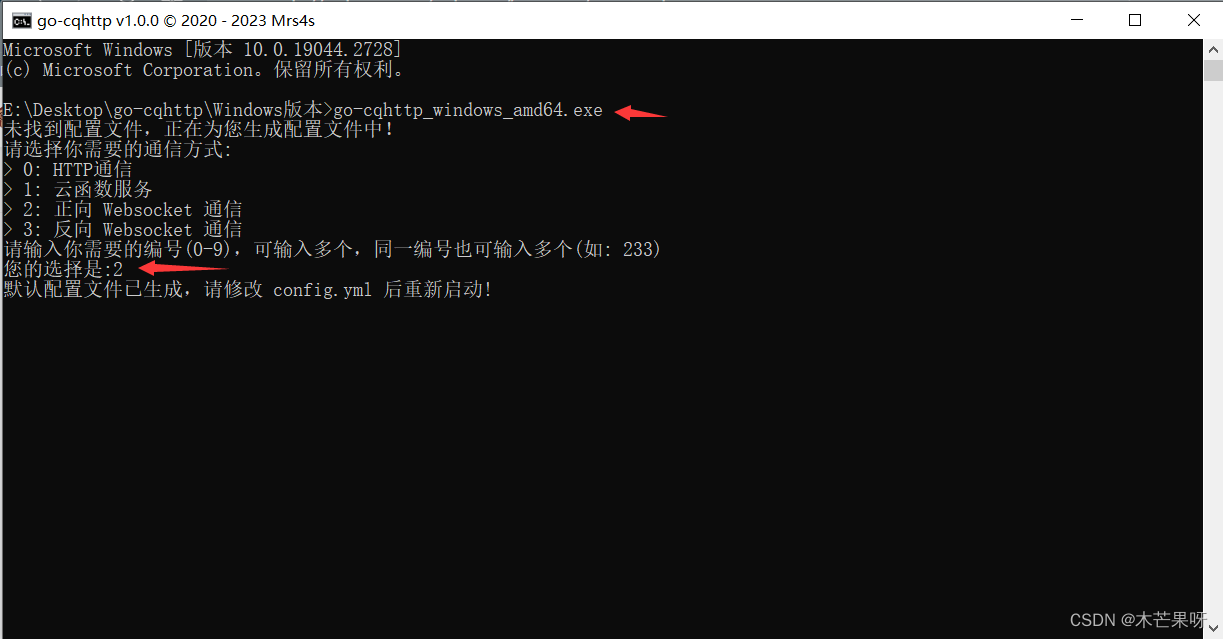
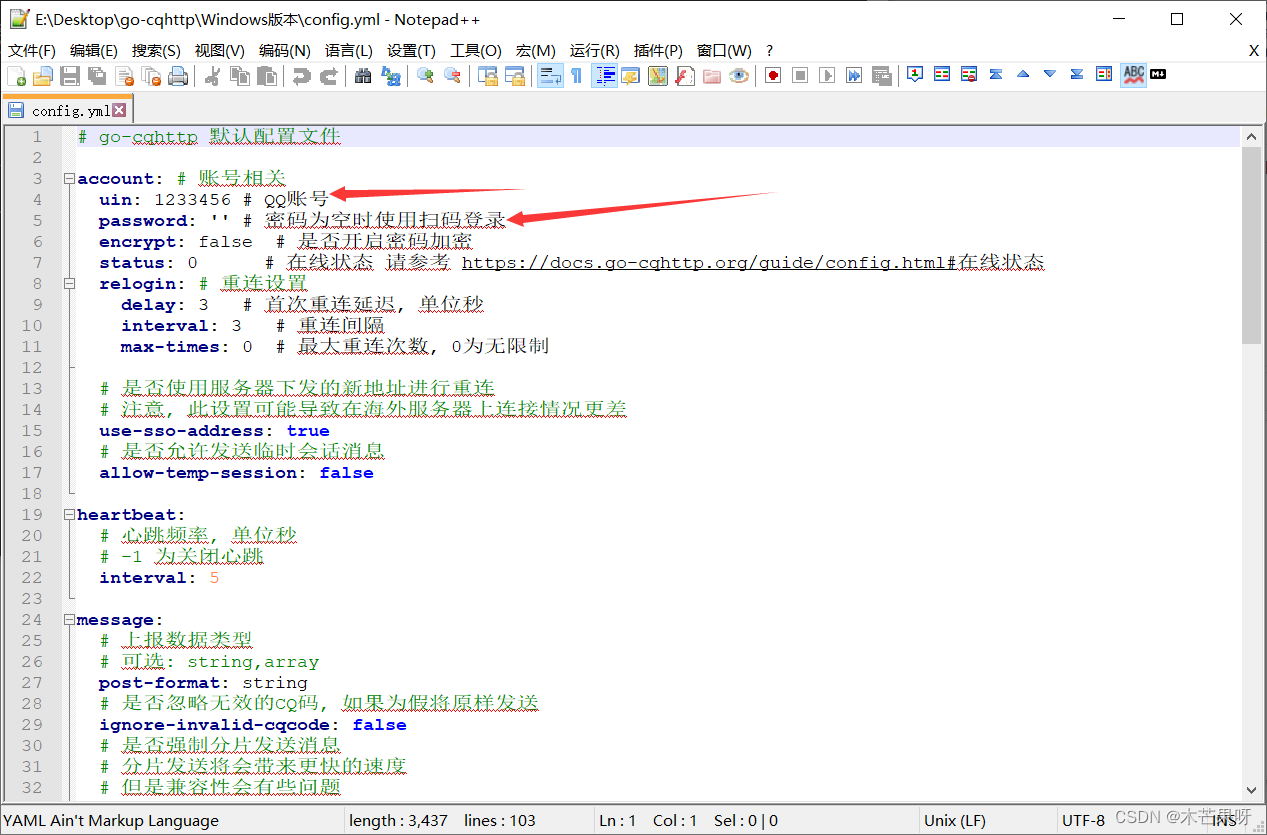
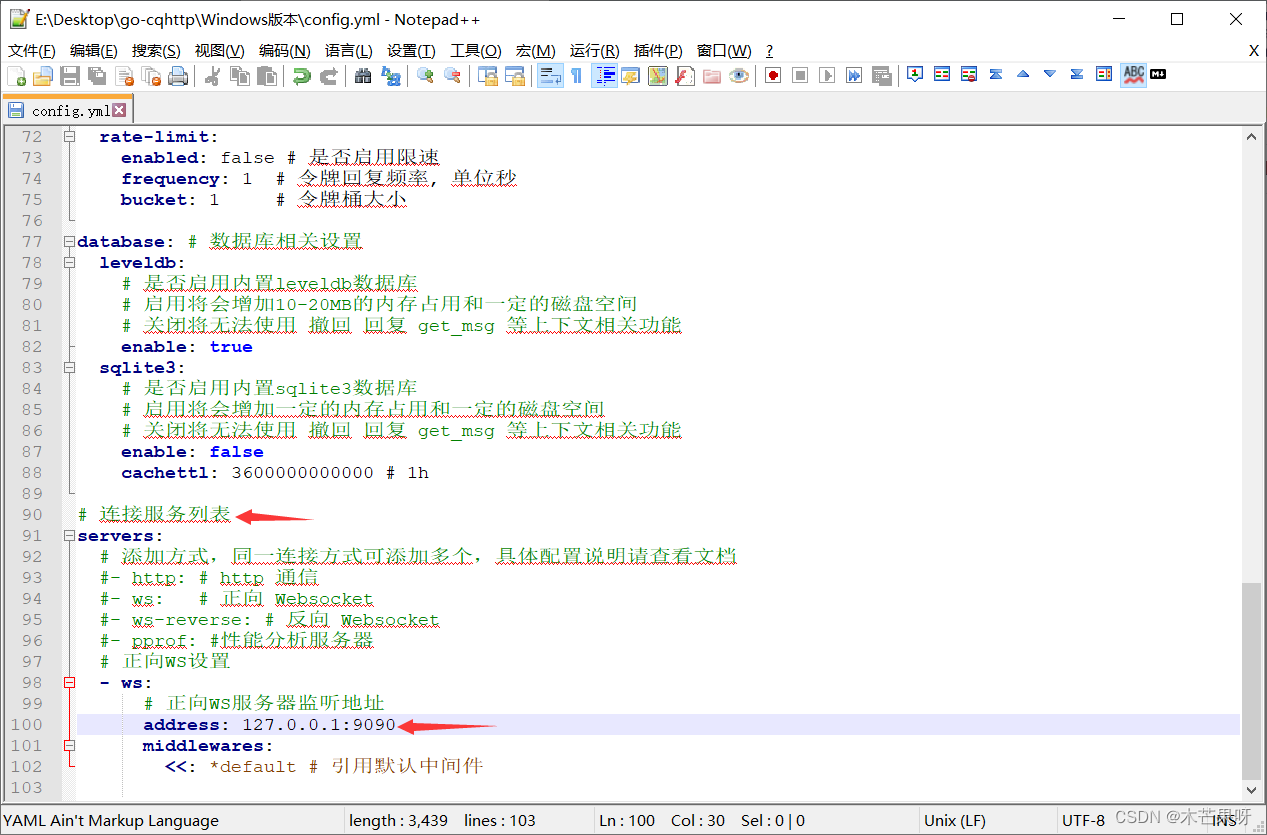
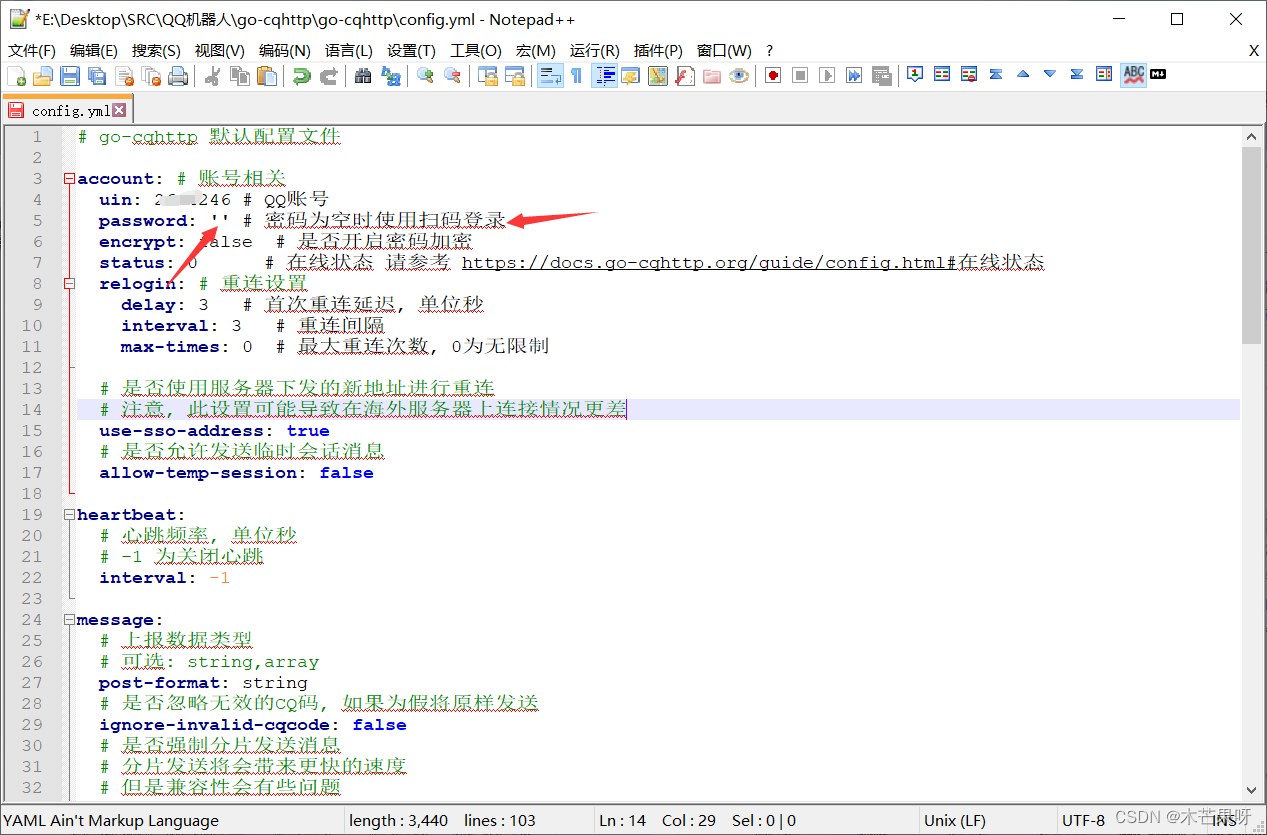
可以看到他在当前文件夹下生成了一个config.yml文件,我们打开看看,只要修改我箭头标注位置即可
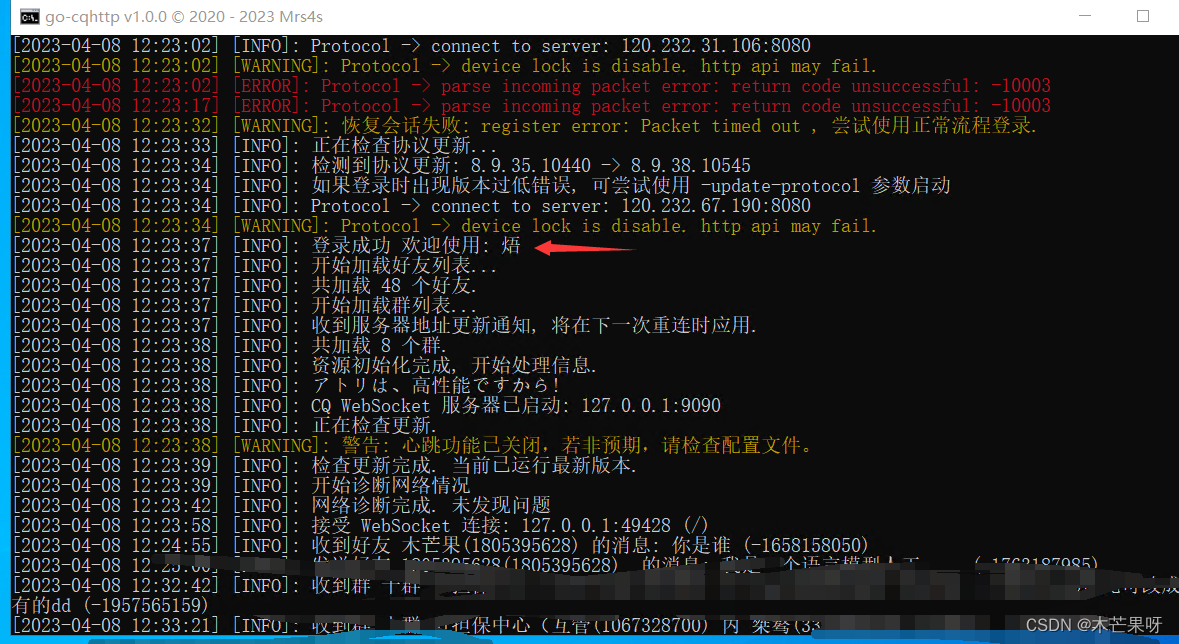
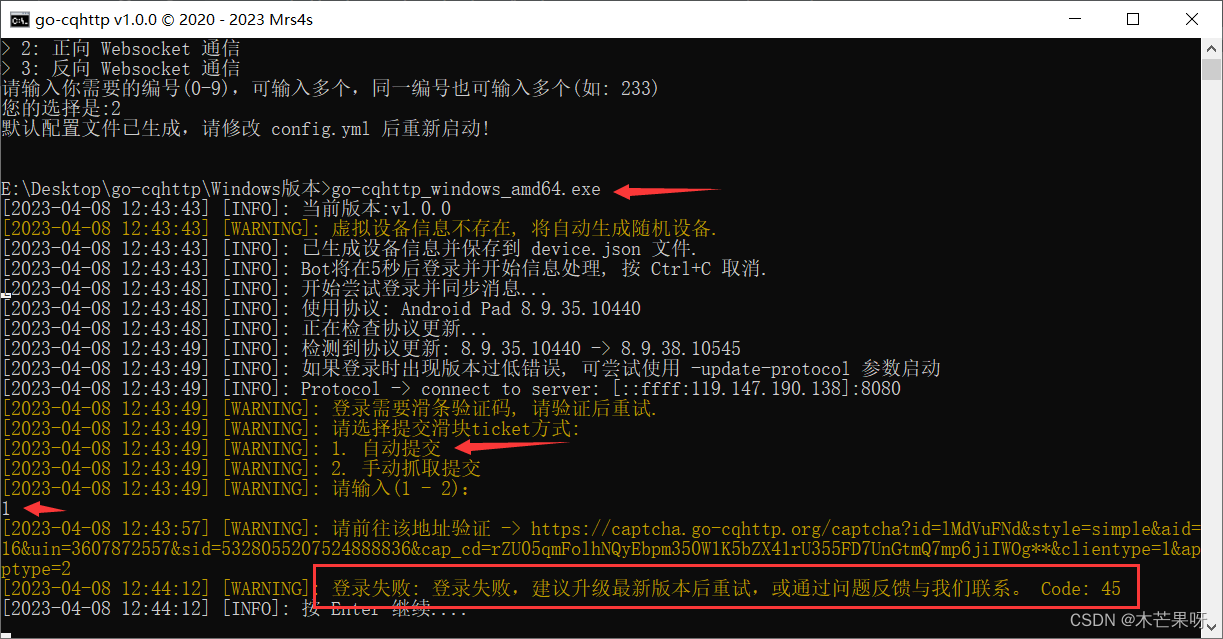
修改完后,重新启动该程序,完成qq的登录验证,正常完成验证的情况下,就会出现登录成功!
登录出现45/235错误代表着当前QQ号处于腾讯的风控,就需要修改协议(不用配置密码,把密码保持为空即可)采用扫码的方式进行登录!
一、修改config.yml,把密码置为空表示扫码登录
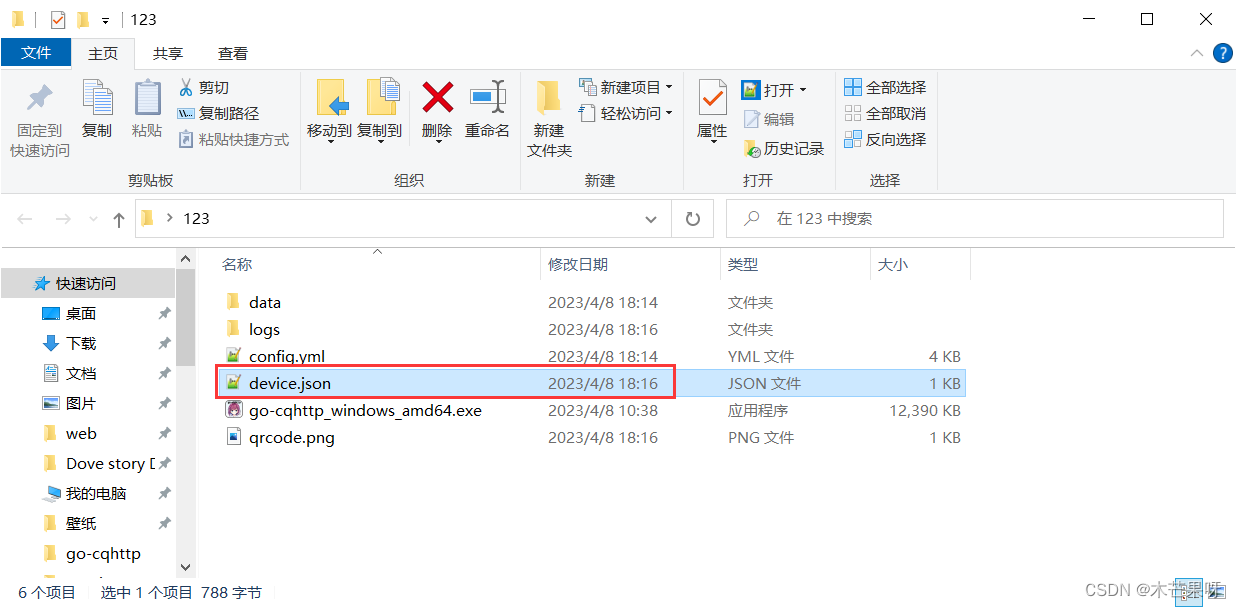
二、修改刚刚生成的device.json
三、把这个protocol修改为2或者0,保存后再继续启动,出现扫码登录即可

7.编写启动类,启动项目即可,就可以实现自动所有功能了
import com.mmg.gocqhttp.websocket.Client;
import org.springframework.boot.CommandLineRunner;
import org.springframework.boot.SpringApplication;
import org.springframework.boot.autoconfigure.SpringBootApplication;/* https://docs.go-cqhttp.org/guide/quick_start.html*/
@SpringBootApplication
public class GoCqhttpApplication implements CommandLineRunner {public static void main(String[] args) {SpringApplication.run(GoCqhttpApplication.class, args);}@Overridepublic void run(String... args) throws Exception {//这里的地址是根据config.yml里面配置的IP和端口号保持一致Client.connect("ws://127.0.0.1:9090");}
}