如何使用 Jetpack Compose 创建翻转卡片效果

如何使用 Jetpack Compose 创建翻转卡片效果
介绍
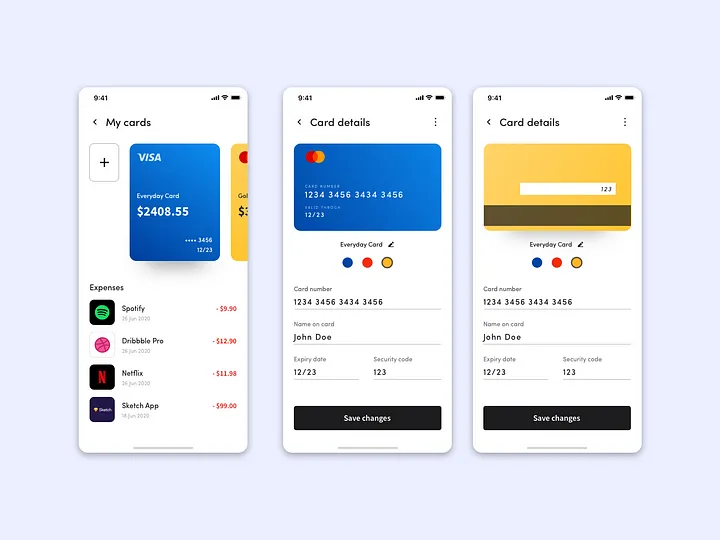
在电子商务和银行应用程序中输入卡信息是很常见的情况。我认为让用户更轻松地处理这种情况并创建更吸引眼球的 UI 将很有用。大多数应用程序/网站都喜欢它。
执行
在开发阶段,您需要做的是打开一个 Android 项目并实施 Compose 库。
如果我们继续编码,我们可以检查以下 Compose 代码。
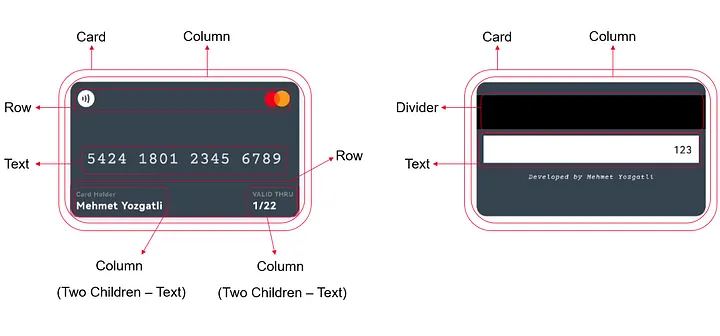
您可以根据上面的设计在屏幕上创建您的卡片。
@Composable
fun AddCreditCard(backgroundColor: Color) {var rotated by remember { mutableStateOf(false) }val cardType =when (result.value?.organization) {"MasterCard" -> painterResource(R.drawable.mc)"VISA" -> painterResource(R.drawable.visa)else -> painterResource(R.drawable.ic_launcher_background)}val rotation by animateFloatAsState(targetValue = if (rotated) 180f else 0f,animationSpec = tween(500))val animateFront by animateFloatAsState(targetValue = if (!rotated) 1f else 0f,animationSpec = tween(500))val animateBack by animateFloatAsState(targetValue = if (rotated) 1f else 0f,animationSpec = tween(500))Card(modifier = Modifier.height(220.dp).fillMaxWidth().padding(10.dp).graphicsLayer {rotationY = rotationcameraDistance = 8 * density}.clickable {rotated = !rotated},shape = RoundedCornerShape(14.dp),elevation = 4.dp,backgroundColor = backgroundColor,contentColor = Color.White) {if (!rotated) {Column(horizontalAlignment = Alignment.Start,verticalArrangement = Arrangement.SpaceBetween,modifier = Modifier.padding(start = 8.dp, end = 8.dp, bottom = 8.dp),) {Row(horizontalArrangement = Arrangement.SpaceBetween) {Icon(painter = painterResource(R.drawable.ic_contactless),contentDescription = "test",modifier = Modifier.width(50.dp).height(50.dp).padding(top = 6.dp, bottom = 6.dp, end = 20.dp).graphicsLayer {alpha = animateFront},tint = Color.White)Spacer(modifier = Modifier.weight(1f))Image(painter = cardType,contentDescription = "test",modifier = Modifier.width(50.dp).height(50.dp).graphicsLayer {alpha = animateFront})}result.value?.number?.let {Text(text = it,modifier = Modifier.padding(top = 16.dp).graphicsLayer {alpha = animateFront},fontFamily = fontName,fontWeight = FontWeight.Normal,fontSize = 25.sp)}Row(horizontalArrangement = Arrangement.SpaceBetween) {Column(horizontalAlignment = Alignment.Start) {Text(text = "Card Holder",color = Color.Gray,fontSize = 9.sp,fontWeight = FontWeight.Bold,modifier = Modifier.graphicsLayer {alpha = animateFront})Text(text = "Mehmet Yozgatli",color = Color.White,fontSize = 15.sp,fontWeight = FontWeight.Bold,modifier = Modifier.graphicsLayer {alpha = animateFront})}Spacer(modifier = Modifier.weight(1f))Column(horizontalAlignment = Alignment.Start) {Text(text = "VALID THRU",color = Color.Gray,fontSize = 9.sp,fontWeight = FontWeight.Bold,modifier = Modifier.graphicsLayer {alpha = animateFront})result.value?.expire?.let {Text(text = it,color = Color.White,fontSize = 15.sp,fontWeight = FontWeight.Bold,modifier = Modifier.graphicsLayer {alpha = animateFront})}}}}} else {Column(modifier = Modifier.padding(top = 20.dp),) {Divider(modifier = Modifier.graphicsLayer {alpha = animateBack}, color = Color.Black, thickness = 50.dp)Text(text = "123",color = Color.Black,modifier = Modifier.padding(10.dp).background(Color.White).fillMaxWidth().graphicsLayer {alpha = animateBackrotationY = rotation}.padding(10.dp),fontSize = 15.sp,textAlign = TextAlign.End)Text(text = "Developed by Mehmet Yozgatli",color = Color.White,modifier = Modifier.fillMaxWidth().graphicsLayer {alpha = animateBackrotationY = rotation}.padding(5.dp),fontFamily = fontName,fontWeight = FontWeight.Thin,fontSize = 10.sp,textAlign = TextAlign.Center)}}}
}
创建卡片后,将旋转、animateFront 和 animateBack 值作为参数传递给组件时,就完成了动画部分。
ML Kit——银行卡识别
通过使用华为机器学习服务的银行卡识别服务,您可以为用户提供极大的便利。
您可以按照官方文档中的实施步骤进行操作。
https://developer.huawei.com/consumer/en/doc/development/hiai-Guides/dev-process-0000001050038076
输出
-
卡片翻转效果

-
使用机器学习套件获取信息

结论
重要的是我们的应用程序要易于使用并让事情变得简单。