Centos7安装hive3.1.2

0、前提
0.1、首先安装hadoop,参考:https://blog.csdn.net/fen_fen/article/details/129971027
1.2、安装MySQL,例如:MySQL8,参考:https://blog.csdn.net/fen_fen/article/details/129971214
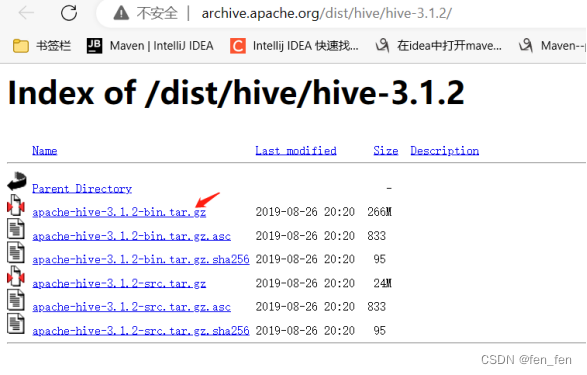
1、下载hive
$wget http://archive.apache.org/dist/hive/hive-3.1.2/apache-hive-3.1.2-bin.tar.gz
下载地址:Index of /dist/hive/hive-3.1.2
2、安装hive
域名已设置:/etc/hosts
10.1.1.196 hadoop001
2.1、解压和重命名
$tar -zxvf apache-hive-3.1.2-bin.tar.gz
$mv apache-hive-3.1.2-bin hive-3.1.2
2.2、修改 /etc/profile配置文件并生效
输入vim /etc/profile
|
export JAVA_HOME=/home/hmf_app/java64/jdk1.8.0_221 export HIVE_HOME=/home/hadoop/hive-3.1.2 export HIVE_CONF_DIR=${HIVE_HOME}/conf export PATH=$PATH:${HIVE_HOME}/bin |
执行source /etc/profile
举例:
|
export JAVA_HOME=/home/hmf_app/java64/jdk1.8.0_221 export CLASSPATH=.:$JAVA_HOME/lib:$JRE_HOME/lib:$CLASSPATH export PATH=$JAVA_HOME/bin:$PATH
export HADOOP_HOME=/home/hadoop/hadoop-3.3.1 export PATH=$PATH:${HADOOP_HOME}/bin:${HADOOP_HOME}/sbin
export HIVE_HOME=/home/hadoop/hive-3.1.2 export HIVE_CONF_DIR=${HIVE_HOME}/conf export PATH=$PATH:${HIVE_HOME}/bin
|
2.3、修改配置文件
#重命名配置文件
|
cp hive-env.sh.template hive-env.sh cp hive-default.xml.template hive-site.xml cp hive-log4j.properties.template hive-log4j.properties |
#修改hive-env.sh
添加JAVA_HOME和HADOOP_HOME,HIVE_CONF_DIR(即hive的conf目录地址)
|
export JAVA_HOME=/home/hmf_app/java64/jdk1.8.0_221 export HADOOP_HOME=/home/hadoop/hadoop-3.3.1 export HIVE_CONF_DIR=/home/hadoop/hive-3.1.2/conf export HIVE_AUX_JARS_PATH=/home/hadoop/hive-3.1.2/lib |
#配置hive-site.xml
<?xml version="1.0" encoding="UTF-8" standalone="no"?>
<?xml-stylesheet type="text/xsl" href="configuration.xsl"?><!--Licensed to the Apache Software Foundation (ASF) under one or morecontributor license agreements. See the NOTICE file distributed withthis work for additional information regarding copyright ownership.The ASF licenses this file to You under the Apache License, Version 2.0(the "License"); you may not use this file except in compliance withthe License. You may obtain a copy of the License athttp://www.apache.org/licenses/LICENSE-2.0Unless required by applicable law or agreed to in writing, softwaredistributed under the License is distributed on an "AS IS" BASIS,WITHOUT WARRANTIES OR CONDITIONS OF ANY KIND, either express or implied.See the License for the specific language governing permissions andlimitations under the License.
--><configuration>
<!-- 指定mysql的连接 --><property><name>javax.jdo.option.ConnectionURL</name><value>jdbc:mysql://hadoop001:3306/hive?createDatabaseIfNotExist=true&useUnicode=true&characterEncoding=UTF-8</value></property>
<!-- 指定驱动类 --><property><name>javax.jdo.option.ConnectionDriverName</name><value>com.mysql.cj.jdbc.Driver</value></property><!-- 指定用户名 --><property><name>javax.jdo.option.ConnectionUserName</name><value>hive</value></property><!-- 指定密码 --><property><name>javax.jdo.option.ConnectionPassword</name><value>123456</value></property><property><name>hive.metastore.schema.verification</name><value>false</value><description></description></property>
<property><name>hive.server2.authentication</name><value>NONE</value>
</property>
<property><name>hive.server2.thrift.bind.host</name><value>hadoop001</value>
</property>
<property><name>hive.server2.thrift.port</name><value>10000</value><description>TCP port number to listen on, default 10000</description></property><property><name>hive.server2.thrift.http.port</name><value>10001</value>
</property><property><name>hive.server2.thrift.client.user</name><value>hive</value><description>Username to use against thrift client</description>
</property>
<property><name>hive.server2.thrift.client.password</name><value>hive</value><description>Password to use against thrift client</description>
</property>
</configuration>2.4、hive-log4j2.properties配置
|
创建目录:logs 例如:/home/hadoop/hive-3.1.2/logs property.hive.log.dir = /home/hadoop/hive-3.1.2/logs |
2.5、拷贝MySQL驱动到lib目录
#1、复制 mysql 驱动包到 lib 目录
mv mysql-connector-java-8.0.27.jar $HIVE_HOME/lib/
3、启动hive
3.1、初始化与启动
# 初始化 Hive 元数据库$HIVE_HOME/bin/schematool -initSchema -dbType mysql -verbose

3.2、检测运行是否正常
# 进入 Hive
$HIVE_HOME/bin/hive
# 创建任意库,检测是否正常。
$create database if not exists test;

可以看到运行正常,这样我们的 Hive 就已经搭建完成啦!
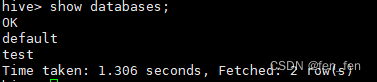
或者:
$show databases;
4、扩展-配置HiveServer2
说明:
1、为hive提供了一种允许客户端远程访问的服务。
2、基于thrift协议,支持跨平台,跨编程语言对hive访问;
3、允许远程访问hive;
4、依赖于元数据,所以在使用之前要先启动元数据,再启动hiveserver2;
① jdbc访问mysql的配置(hive-site.xml)指定连接地址与端口。
参考:#配置hive-site.xml
②客户端通过jdbc访问hiveserver2的配置(hive-site.xml的相关配置)
在 hive 的配置文件 hive-site.xml 中添加如下两项参数
|
<property> <name>hive.server2.authentication</name> <value>NONE</value> </property> <property> <name>hive.server2.thrift.bind.host</name> <value>hadoop001</value> </property> <property> <name>hive.server2.thrift.port</name> <value>10000</value> <description>TCP port number to listen on, default 10000</description> </property>
<property> <name>hive.server2.thrift.http.port</name> <value>10001</value> </property>
<property> <name>hive.server2.thrift.client.user</name> <value>hive</value> <description>Username to use against thrift client</description> </property> <property> <name>hive.server2.thrift.client.password</name> <value>hive</value> <description>Password to use against thrift client</description> </property>
|
3、在 hadoop 的核心配置文件 core-site.xml 中添加如下两项参数:
|
指定集群可以连接的用户,我这里设置为 root 用户。 假如我想指定用户名为 master,则配置项中的 root 必须改为 master,如:hadoop.proxyuser.master.hosts。
<!-- 设置集群的连接用户 --> <property> <name>hadoop.proxyuser.root.hosts</name> <value>*</value> </property>
<property> <name>hadoop.proxyuser.root.groups</name> <value>*</value> </property> |
4、Hadoop 重启完成后,启动 hive 元数据服务与 hiveserver2 服务:
|
nohup hive --service metastore & nohup hive --service hiveserver2 &
查看端口
|
5、连接服务测试:
$ bin/beeline
beeline> !connect jdbc:hive2://hadoop001:10000

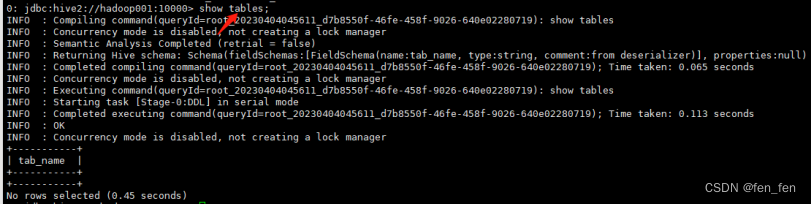
!connect jdbc:hive2://hadoop001:10000/default hive hive

参考:
https://blog.csdn.net/m0_47605847/article/details/122106283
https://www.jianshu.com/p/feae761ddef3
https://blog.csdn.net/m0_47605847/article/details/122106283
https://blog.csdn.net/weixin_46389691/article/details/127507591
6、hive问题列表
问题1:Exception): User: root is not allowed to impersonate anonymous (state=08S01,code=0)
bin/beeline连接:!connect jdbc:hive2://hadoop001:10000/default
|
beeline> !connect jdbc:hive2://hadoop001:10000/default Connecting to jdbc:hive2://hadoop001:10000/default Enter username for jdbc:hive2://hadoop001:10000/default: hive Enter password for jdbc:hive2://hadoop001:10000/default: 23/04/04 03:53:04 [main]: WARN jdbc.HiveConnection: Failed to connect to hadoop001:10000 Error: Could not open client transport with JDBC Uri: jdbc:hive2://hadoop001:10000/default: Failed to open new session: java.lang.RuntimeException: org.apache.hadoop.ipc.RemoteException(org.apache.hadoop.security.authorize.AuthorizationException): User: root is not allowed to impersonate hive (state=08S01,code=0) |
解决办法:修改hadoop的vim core-site.xml
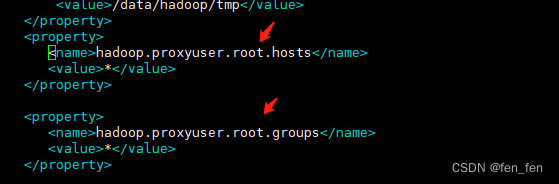
其中xxx修改为出现问题的用户名,修改后重启stop-dfs.sh start-dfs.sh。