【Ruby 2D】【unity learn】控制敌人随机运动以及动画控制

前两天考完蓝桥杯稍微休息了一下,昨天做了一个动画控制,但是想到写出来可能会字很多,我就搁置到今天来写了,unity learn是一个官方教程平台,里面有unity assert store的配套教程,全是文档,比看视频高效太多了,想学习unity的可以去这里学习
网址
unity learn:Unity3d 教程 | Unity 中文课堂 (u3d.cn)
unity assert store:Unity 资源商店 - 优质3D 2D游戏制作资源平台
人物的移动已经做过了,大概就是修改transform组件的position属性,即坐标,enemy

我们场景中现有一个敌人对象
现在我们给它添加自由移动的脚本
然后它就会到处乱跑了
using System.Collections;
using System.Collections.Generic;
using UnityEngine;public class MyEnemyController : MonoBehaviour
{public float Speed = 0.1f;public bool vertical;//是否垂直方向public float changeTime = 3.0f;//剩余改变时间Rigidbody2D Rd;float timer;int direction = 1;private float _timer = 0f;// Start is called before the first frame updatevoid Start(){Rd = GetComponent<Rigidbody2D>();//获取刚体组件timer = changeTime;//改变方向的剩余时间}// Update is called once per frameprivate void Update(){timer -= Time.deltaTime;//deltaTime为Updata每一帧的时间if(timer < 0){direction = -direction;//方向取反方向timer = changeTime;//再次开始计时}}void FixedUpdate(){float dt = Time.fixedDeltaTime;//跟上面的deltaTime同理_timer -= dt;//if (_timer < 0){_timer = Random.Range(0.3f, 2.0f);vertical = !vertical;//垂直与水平相互换}Vector2 position = Rd.position;if (vertical){position.y = position.y + Time.deltaTime * Speed * direction;//垂直修改y}else{position.x = position.x + Time.deltaTime * Speed * direction;//水平修改x}Rd.MovePosition(position);//MovePosition:导入一个vector向量来修改当前position位置}
}
Ruby
然后就是动画部分,不得不说,这一部分东西有点多。
首先,我们要把四个机器人移动的动画做出来,使用的是unity window窗口的animation工具
路径是 window->Animation->Animation
然后我们选中我们的enemy预制件
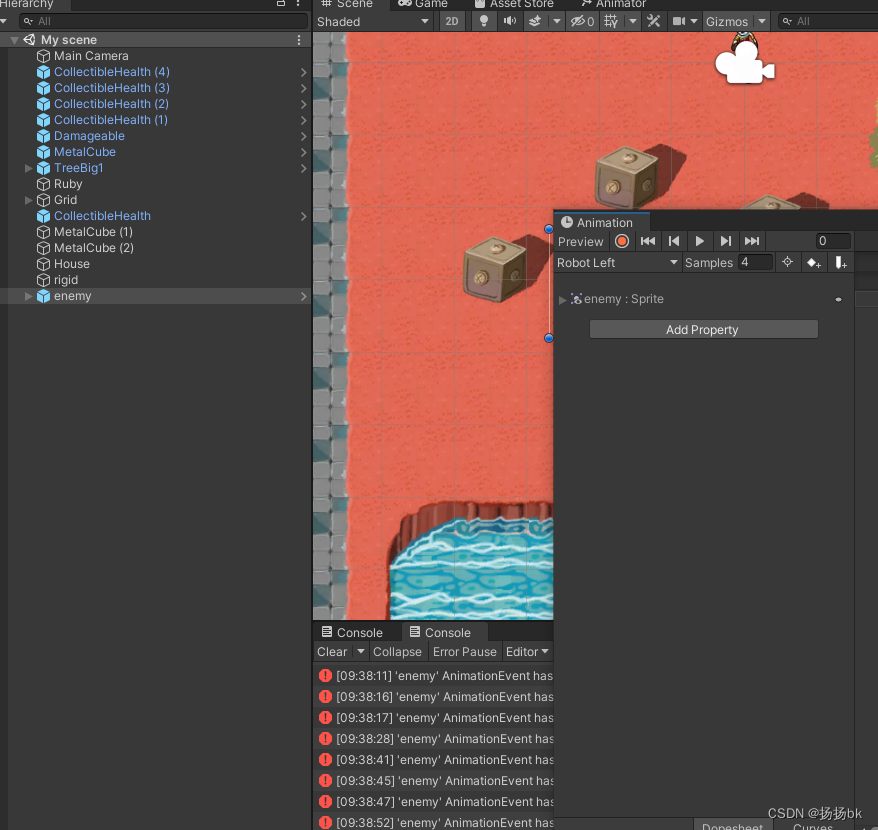

这个窗口会出现create按钮
点击create然后保存,建议建一个单独的文件夹
然后按住shift选中动画中需要插入的图片(这里的是assert提供的已经画好了的,所以直接用就行了)
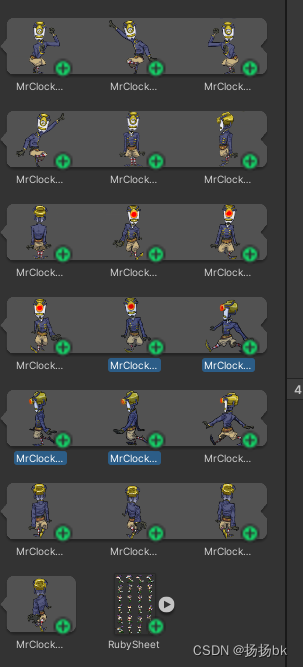
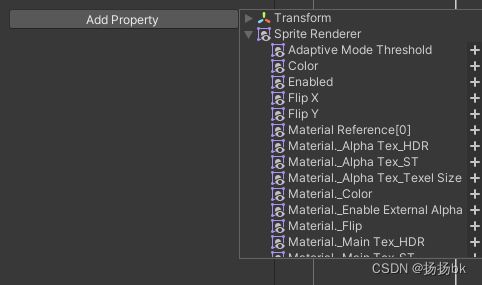
然后拖到Add Property按钮这里,unity会自动为你排列好动画
点击预览可查看,注意这里Samples要调低一点,没有Samples的要在右边的三个点这里点击 show Samples

然后上走下走如法炮制即可,右走可以通过左走镜像得到
方法是点击Add Property按钮展开点击 Flip X,反转X轴
动画制作好后我们要制作动作树,这个机器人的比较简单,只要一个树就行了,涉及到主角的时候会有一堆动作的衔接,还挺多的
给你们个图自己体会一下
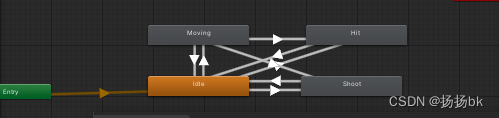
机器人的就没这么麻烦
我们一开始会看到四个动作
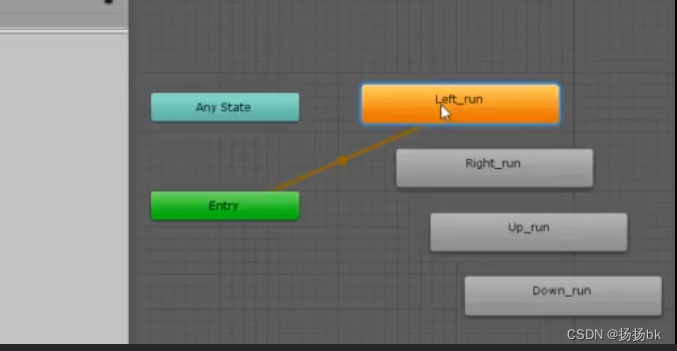
全部删掉
然后右键,Create State->from new Blend Tree
建好以后,我们点击Inspector的Motion下面的加号

把做好的动作拖入这里
再对角色进行控制,就是检测到坐标的变化,然后播放相应的动画,向X轴左移动就x-1,其他以此类推即可
同时我们Parameter栏这里我们要确定好两个参数名,可以用MoveX和MoveY

点击加号添加,然后右边的Parameter调用就行
东西都准备好了
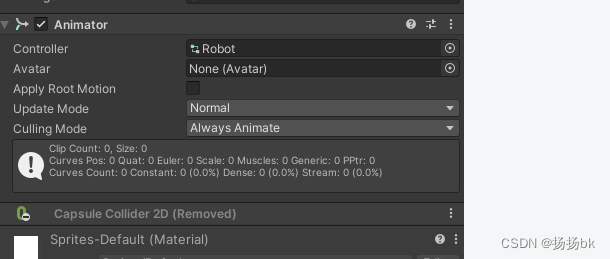
我们为enemy对象来添加Animator 组件然后再写代码控制动画播放即可
在此之前我们要在文件夹建立一个Animation controller文件,并命名为Robot
再添加到enemy对象中的Animator组件中

再之后就是代码环节了
代码环节就是通过Animator.SetFloat方法来改变刚才Parmeters中的两个属性来改变动画的播放
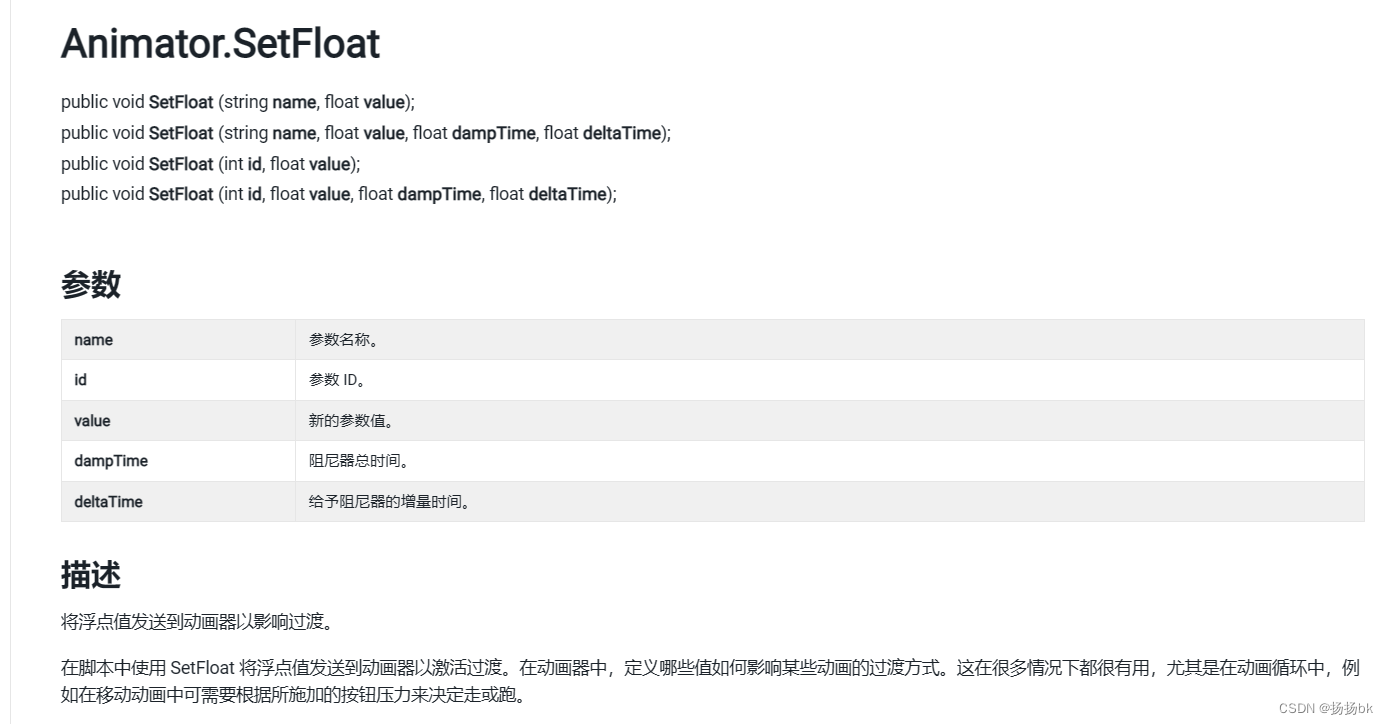
核心就这么几行代码
private Animator animator;//定义Animator对象
animator.SetFloat("MoveX", 0);//上两行垂直移动,下两行水平移动,原理是修改参数来控制动画
animator.SetFloat("MoveY", direction);
animator.SetFloat("MoveX",direction );
animator.SetFloat("MoveY",0 );
using System.Collections;
using System.Collections.Generic;
using UnityEngine;public class MyEnemyController : MonoBehaviour
{public float Speed = 0.1f;public bool vertical;public float changeTime = 3.0f;Rigidbody2D Rd;float timer;int direction = 1;private float _timer = 0f;private Animator animator;// Start is called before the first frame updatevoid Start(){Rd = GetComponent<Rigidbody2D>();timer = changeTime;animator = this.GetComponent<Animator>();}// Update is called once per frameprivate void Update(){timer -= Time.deltaTime;if(timer < 0){direction = -direction;timer = changeTime;}}void FixedUpdate(){float dt = Time.fixedDeltaTime;_timer -= dt;if (_timer < 0){_timer = Random.Range(0.3f, 2.0f);vertical = !vertical;}Vector2 position = Rd.position;if (vertical){position.y = position.y + Time.deltaTime * Speed * direction;animator.SetFloat("MoveX", 0);animator.SetFloat("MoveY", direction);}else{position.x = position.x + Time.deltaTime * Speed * direction;animator.SetFloat("MoveX",direction );animator.SetFloat("MoveY",0 );}Rd.MovePosition(position);//MovePosition:导入一个vector向量来修改当前position位置}void OnCollisionEnter2D(Collision2D other){MyRubyController player = other.gameObject.GetComponent<MyRubyController>();if (player != null){player.ChangeHealth(-1);}}
}
敌人的就这么多了,主角的比较复杂,有左待机右待机等一系列动作,再然后就是左受击右受击,左发射右发射等等,方向也是跟用户输入挂钩,工作量有点大不过跟敌人大体差不多,这里就不一一赘述了
最后成果如下