SpringAOP入门及纯注解开发

一、概述
AOP:全称是Aspect Oriented Programing 即:面向切面编程。
面向切面编程:通过预编译方式和运行期动态代理实现程序功能的统一维护的一种技术;简单来说就是使用代理技术,在不修改代码的基础上,对已有方法进行增强。
优点
- 在程序运行期间,在不修改源码的情况下对方法进行功能增强
- 逻辑清晰,开发核心业务的时候,不必关注增强业务的代码
- 减少重复代码,提高开发效率,便于后期维护
二、底层分析
-
AOP的底层采用动态代理方式
-
接口+实现类方案,采用JDK 动态代理。
-
仅实现类方案,采用cglib代理,生成实现类的子类,从而对实现类进行增强操作。
三、AOP专业术语
Aspect(切面): Aspect 声明类似于 Java 中的类声明,在 Aspect 中会包含着一些 Pointcut 以及相应的 Advice。
Pointcut(切点):表示一组 joint point,这些 joint point通过逻辑关系或者通配、正则表达式等方式组合成表达式,它定义了相应的 Advice 将要发生在哪些业务组件中具体的哪些方法。
Advice(具体逻辑):Advice 定义了在 Pointcut 里面定义的程序点具体要做的操作,它通过 before、after 和 around 来区别是在每个 joint point 之前、之后还是代替执行的代码。
Weaving(织入):将 Aspect 和其他对象连接起来, 并创建 Adviced object 的过程
Target(目标对象):织入 Advice 的目标对象.。
Jointpoint(连接点):表示在程序中明确定义的点,典型的包括方法调用,对类成员的访问以及异常处理程序块的执行等等,它自身还可以嵌套其它 joint point。
四、AOP动态代理
JDK动态代理
Java提供的动态代理技术,可以在运行时创建接口的代理实例。所谓代理,就是对某个对象生成一个代理对象来代替它,调用时调用代理对象,不调原始对象,织入代码会织入到代理对象中去。Spring通过容器调用目标对象时,若发现目标对象上有AOP的作用,就会调用代理对象。
Spring AOP默认采用此种方式,在接口的代理实例中织入代码。
五、AOP代码实现示例
通知类型
通知的配置语法:@通知注解(“切点表达式")

【@Aspect创建一个切面类,并注入到容器中】
import org.aspectj.lang.ProceedingJoinPoint;import org.aspectj.lang.annotation.*;import org.springframework.stereotype.Component;@Component@Aspectpublic class AlphaAspect {}注:以下方法均写在上述AlphaAspect类中。
六、AOP 入门案例
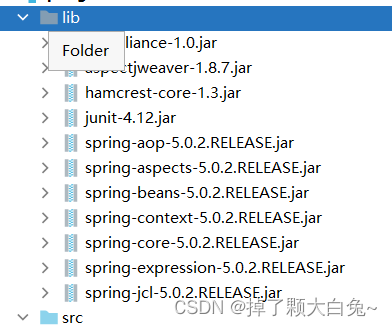
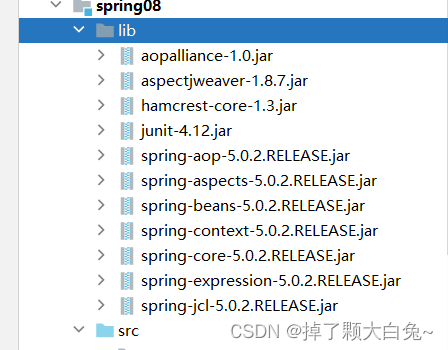
- 首先导入IOC和AOP所需要的jar包
2.1创建BookService接口。

package com.su.service;public interface BookService {int save(int n);int del();int update();void find();
}
2.2创建 BookServiceImpl类,这个类完成核心功能操作。
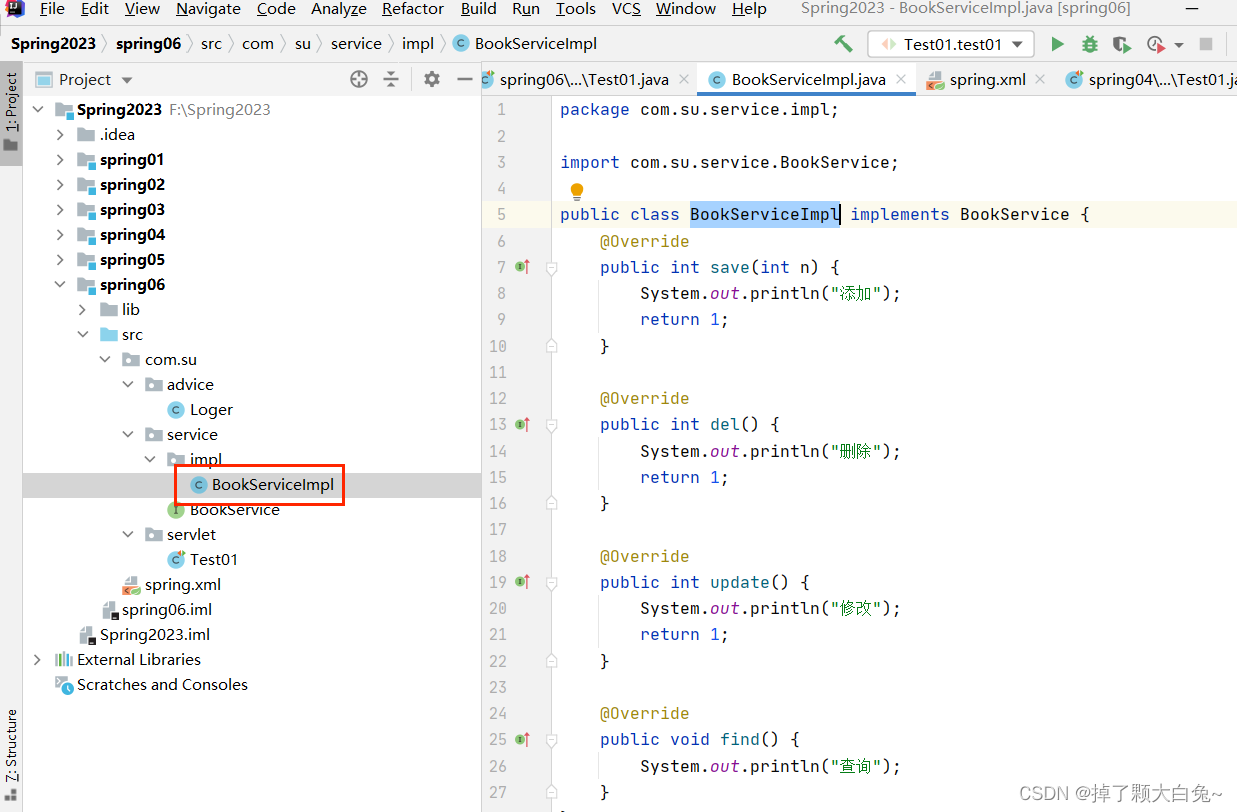
package com.su.service.impl;import com.su.service.BookService;public class BookServiceImpl implements BookService {@Overridepublic int save(int n) {System.out.println("添加");return 1;}@Overridepublic int del() {System.out.println("删除");return 1;}@Overridepublic int update() {System.out.println("修改");return 1;}@Overridepublic void find() {System.out.println("查询");}
}
3.创建Loger类,这个类是用来做功能的增强。
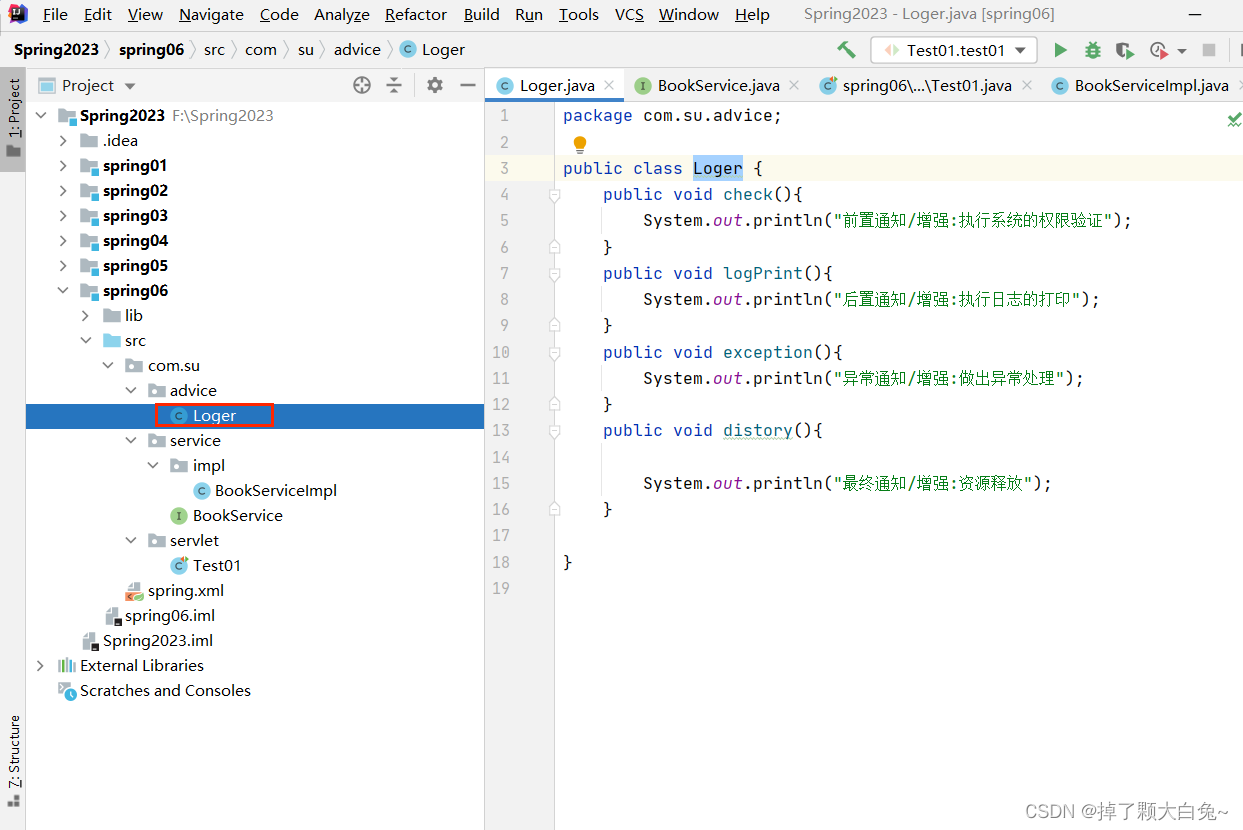
package com.su.advice;public class Loger {public void check(){System.out.println("前置通知/增强:执行系统的权限验证");}public void logPrint(){System.out.println("后置通知/增强:执行日志的打印");}public void exception(){System.out.println("异常通知/增强:做出异常处理");}public void distory(){System.out.println("最终通知/增强:资源释放");}}
4.在spring的beans.xml中开始进行AOP的配置:
1首先把核心类和增强类的bean配置到IOC的容器中
2.使用<aop:config>标签在进行AOP的配置,先通过aop:aspect标签标明谁是增强类。然后在标2.中进行aop:before(前置)、aop:after-returning(后置)、aop:after-throwing(异常)、aop:after(最终)的配置,让增强类的某个方法对核心功能类的某一类方法进行功能增强。
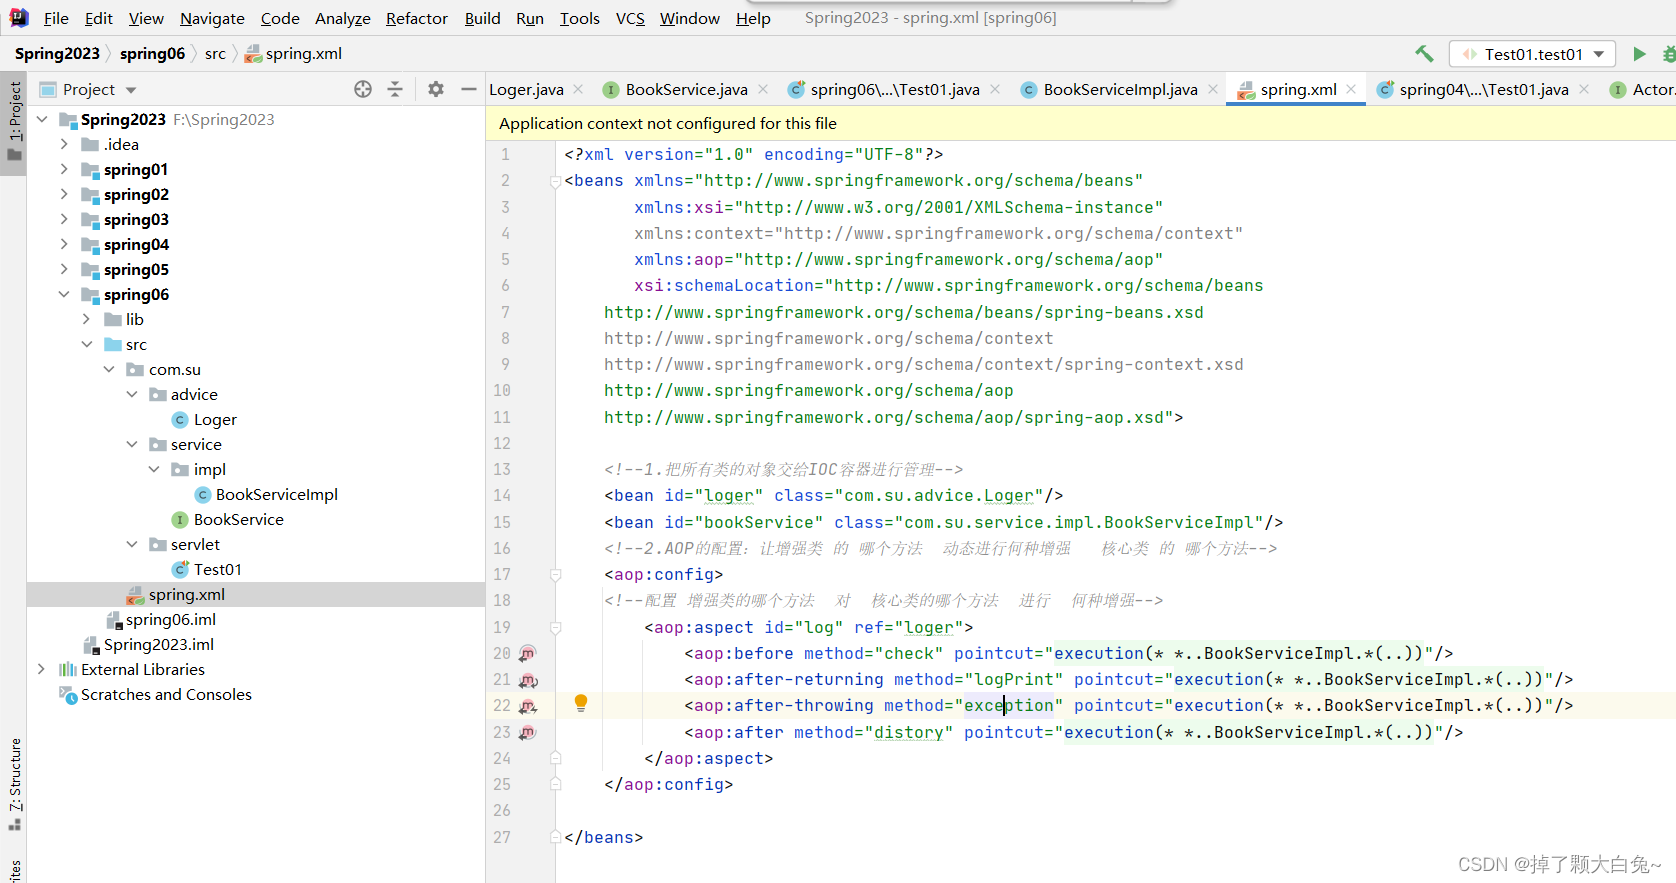
<?xml version="1.0" encoding="UTF-8"?>
<beans xmlns="http://www.springframework.org/schema/beans"xmlns:xsi="http://www.w3.org/2001/XMLSchema-instance"xmlns:context="http://www.springframework.org/schema/context"xmlns:aop="http://www.springframework.org/schema/aop"xsi:schemaLocation="http://www.springframework.org/schema/beanshttp://www.springframework.org/schema/beans/spring-beans.xsdhttp://www.springframework.org/schema/contexthttp://www.springframework.org/schema/context/spring-context.xsdhttp://www.springframework.org/schema/aophttp://www.springframework.org/schema/aop/spring-aop.xsd"><!--1.把所有类的对象交给IOC容器进行管理--><bean id="loger" class="com.su.advice.Loger"/><bean id="bookService" class="com.su.service.impl.BookServiceImpl"/><!--2.AOP的配置:让增强类 的 哪个方法  动态进行何种增强   核心类 的 哪个方法--><aop:config><!--配置 增强类的哪个方法  对  核心类的哪个方法  进行  何种增强--><aop:aspect id="log" ref="loger"><aop:before method="check" pointcut="execution(* *..BookServiceImpl.*(..))"/><aop:after-returning method="logPrint" pointcut="execution(* *..BookServiceImpl.*(..))"/><aop:after-throwing method="exception" pointcut="execution(* *..BookServiceImpl.*(..))"/><aop:after method="distory" pointcut="execution(* *..BookServiceImpl.*(..))"/></aop:aspect></aop:config></beans>
5.在测试类中测试UserService的方法是否被增强。
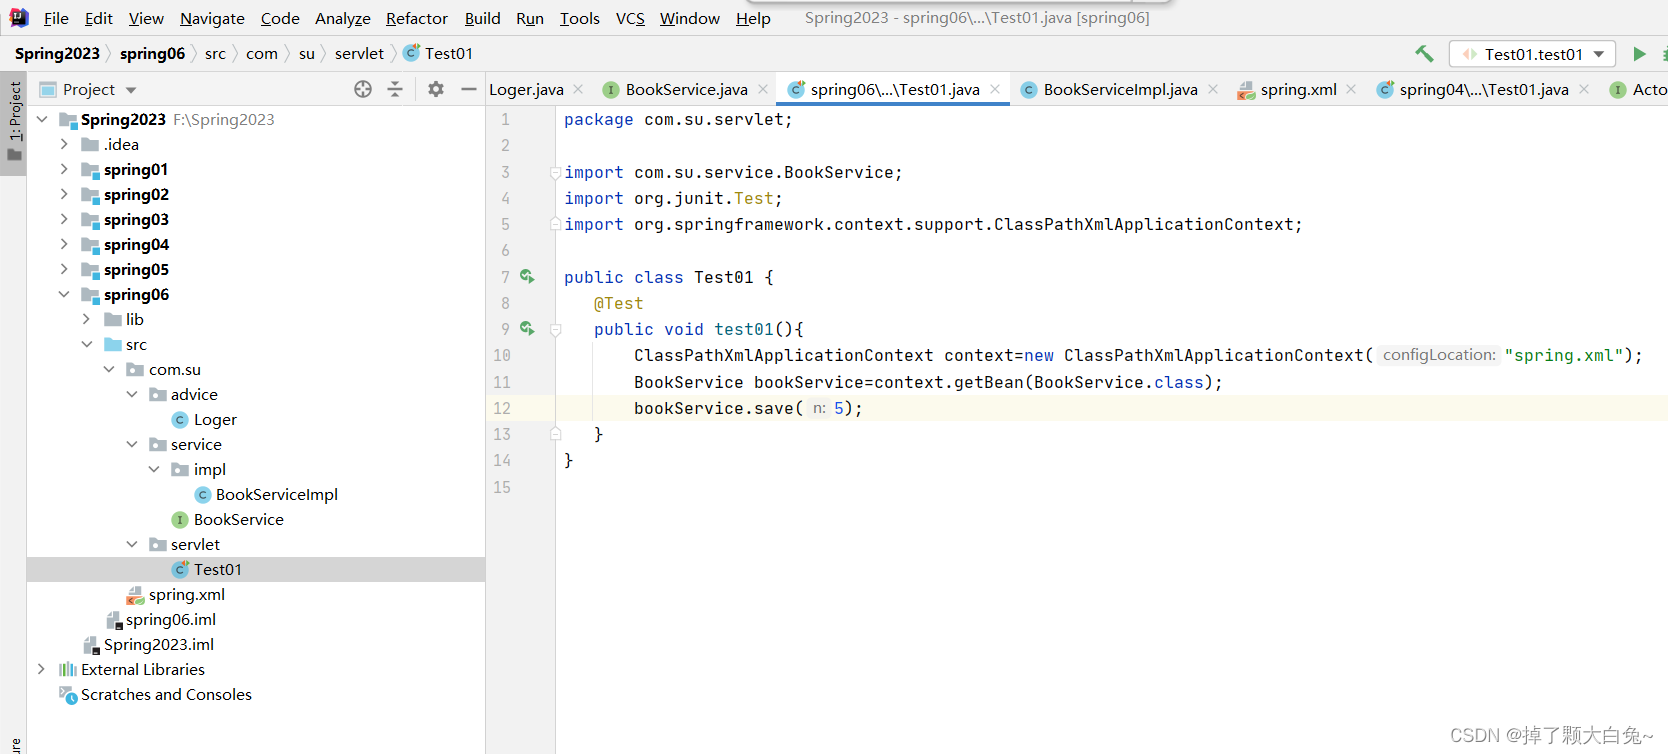
package com.su.servlet;import com.su.service.BookService;
import org.junit.Test;
import org.springframework.context.support.ClassPathXmlApplicationContext;public class Test01 {@Testpublic void test01(){ClassPathXmlApplicationContext context=new ClassPathXmlApplicationContext("spring.xml");BookService bookService=context.getBean(BookService.class);bookService.save(5);}
}
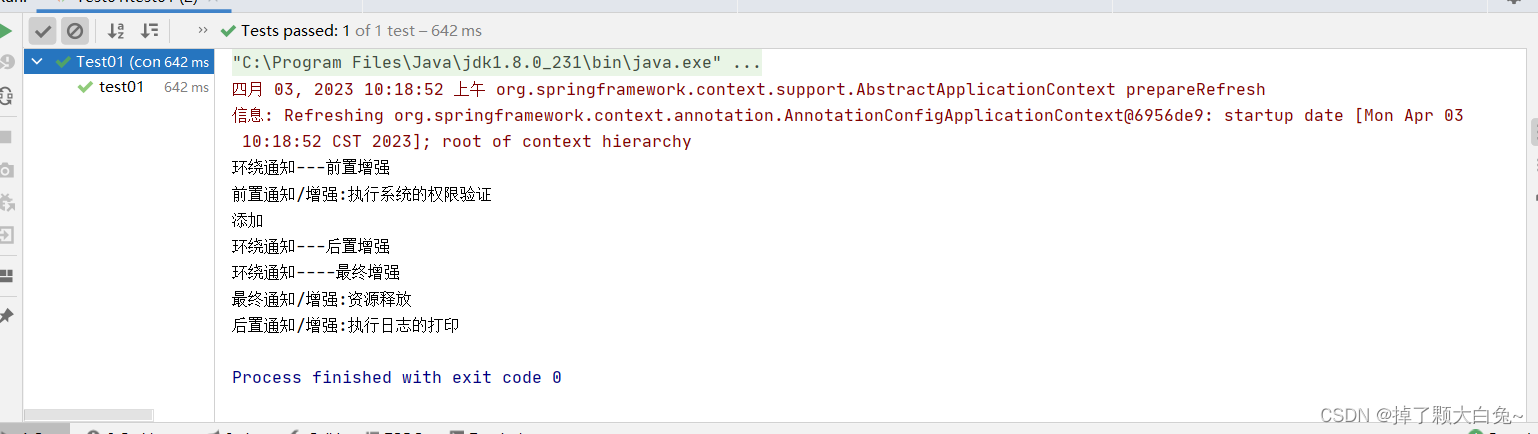
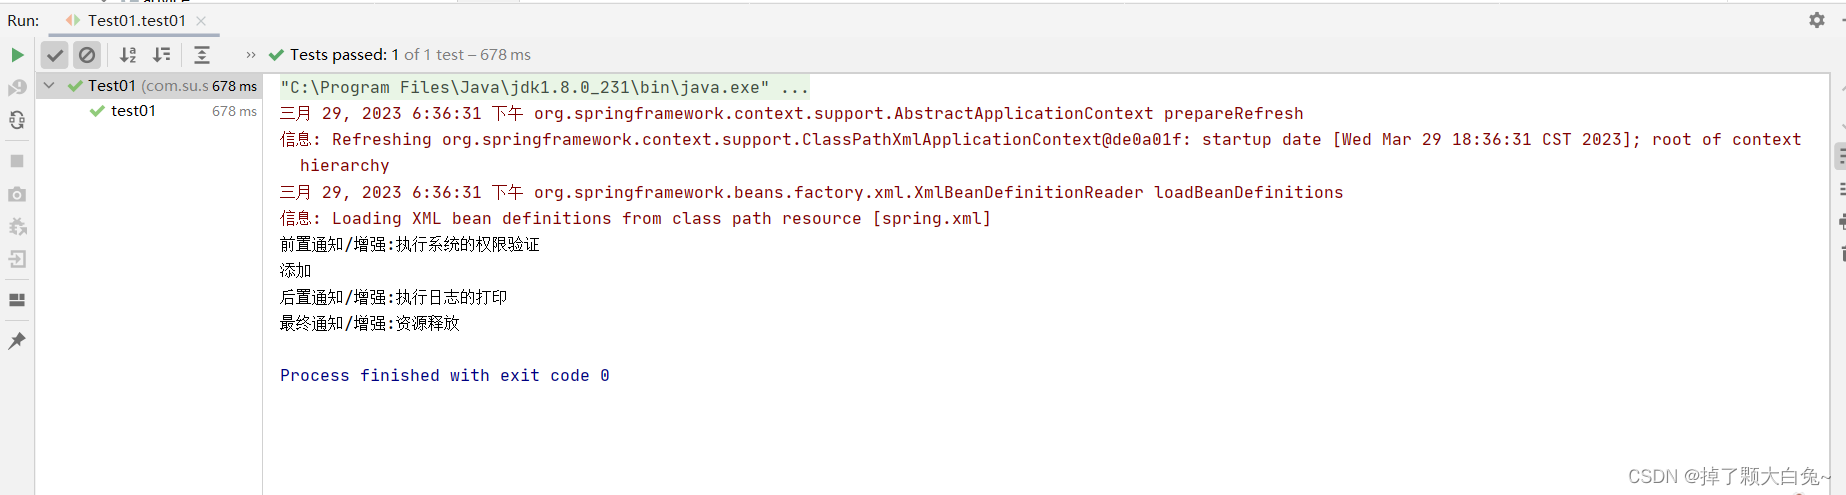
实现效果:
2.Spring纯注解开发
2.1.1纯注解开发的配置细节
2.1.2读取java配置类对象

2.2和xml配置文件开发相比:
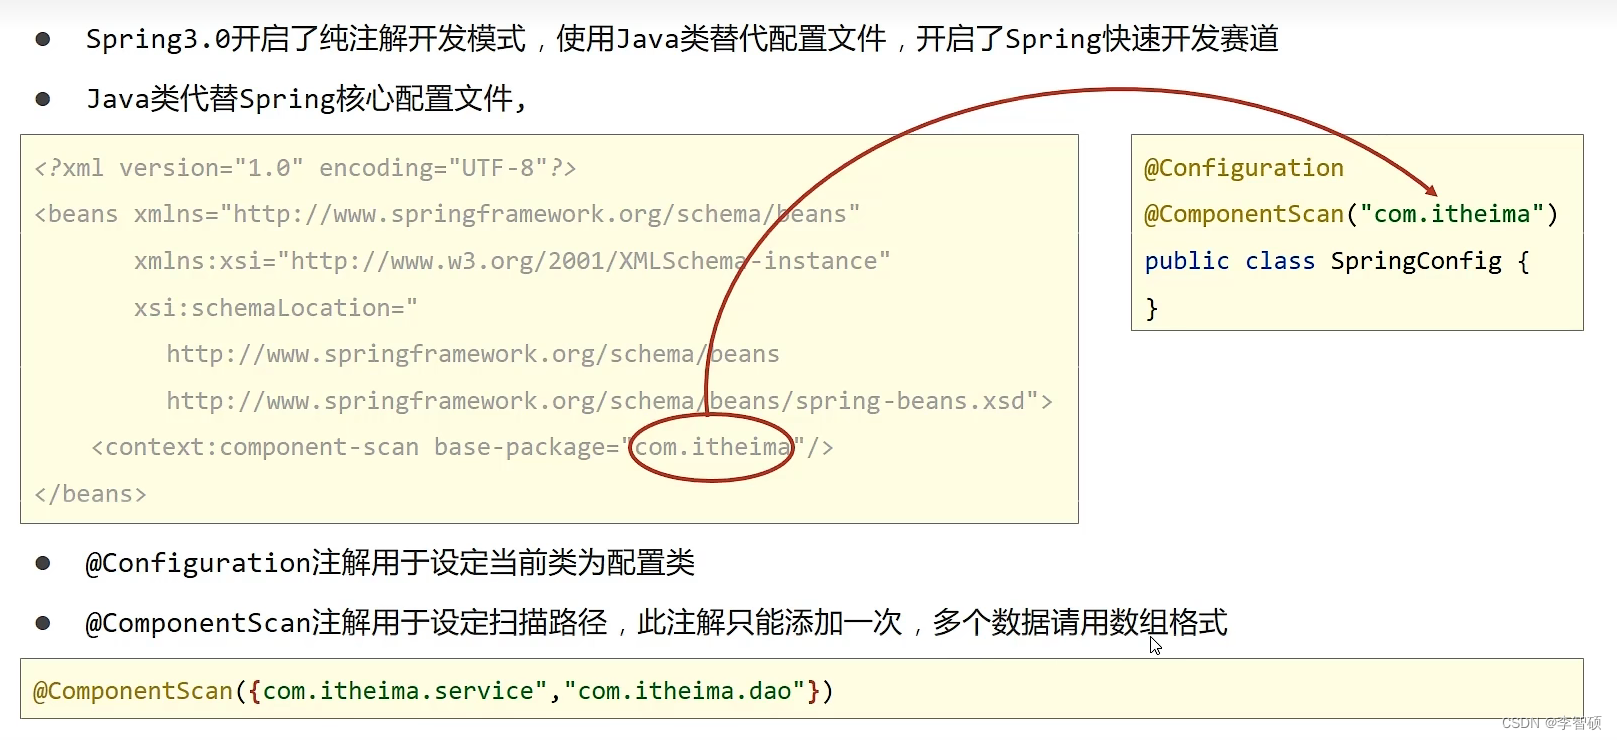
2.2.1、使用Java类替换了xml配置文件
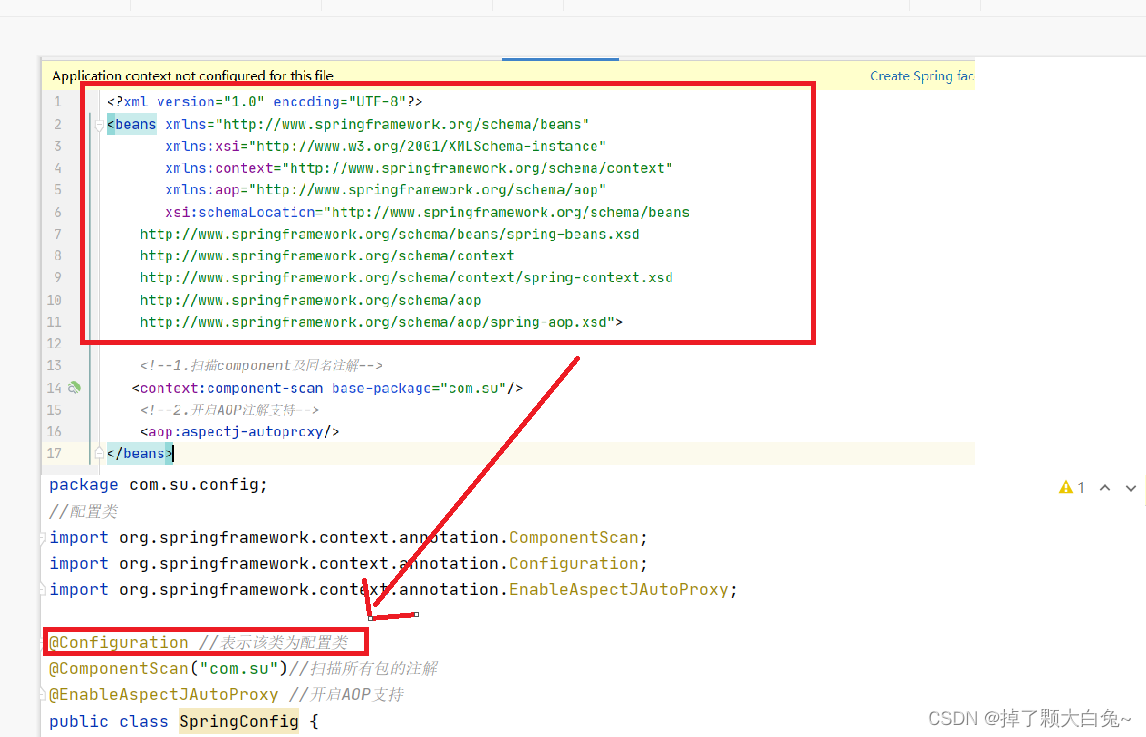
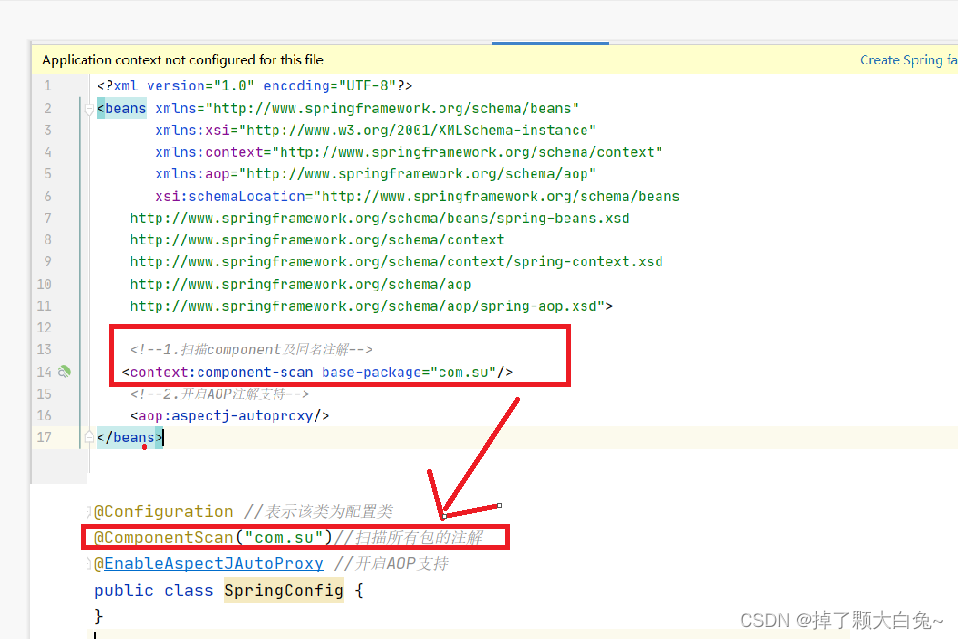
package com.su.config;
//配置类
import org.springframework.context.annotation.ComponentScan;
import org.springframework.context.annotation.Configuration;
import org.springframework.context.annotation.EnableAspectJAutoProxy;@Configuration //表示该类为配置类
@ComponentScan("com.su")//扫描所有包的注解
@EnableAspectJAutoProxy //开启AOP支持
public class SpringConfig {
}
2.2.2@Configuration注解替换了配置文件的结构
2.2.3@ComponentScan()替换了包扫描:
@Configuration注解用于设定当前类为配置类
@ComponentScan注解用于设定扫描路径,此注解只能添加一次,多个数据请用数组格式
2.2.4、核心配置文件初始化容器对象切换为读取Java配置类初始化容器对象
2.2.5代码实现
1.导入jar包
2.创建核心类接口和实现类
接口
package com.su.service;public interface BookService {
//    添加int save(int n);
//    删除int del();
//    修改int update();
//    查询void find();
}
实现类
package com.su.service.impl;import com.su.service.BookService;
import org.springframework.stereotype.Service;@Service
public class BookServiceImpl implements BookService {@Overridepublic int save(int n) {System.out.println("添加");return 1;}@Overridepublic int del() {System.out.println("删除");return 1;}@Overridepublic int update() {System.out.println("修改");return 1;}@Overridepublic void find() {System.out.println("查询");}
}
3.创建增强类
package com.su.advice;import org.aspectj.lang.ProceedingJoinPoint;
import org.aspectj.lang.annotation.*;
import org.springframework.stereotype.Component;/* 注解*/
@Component
//告诉系统loger是增强类
@Aspect
public class Loger {//@Before:前置通知@Before("execution(* *..BookServiceImpl.*(..))")public void check(){System.out.println("前置通知/增强:执行系统的权限验证");}//@AfterReturning:后置通知@AfterReturning("execution(* *..BookServiceImpl.*(..))")public void logPrint(){ System.out.println("后置通知/增强:执行日志的打印"); }//@AfterThrowing:异常通知@AfterThrowing("execution(* *..BookServiceImpl.*(..))")public void exception(){ System.out.println("异常通知/增强:做出异常处理"); }//@After:最终通知@After("execution(* *..BookServiceImpl.*(..))")public void distory(){ System.out.println("最终通知/增强:资源释放"); }//@Around:环绕通知@Around("execution(* *..BookServiceImpl.*(..))")public Object around(ProceedingJoinPoint pjp) {try {//前置增强System.out.println("环绕通知---前置增强");//通过ProceedingJoinPoint 完成代理对象的方法调用Object result = null;//定义返回值变量Object[] args = pjp.getArgs();//获取参数列表result = pjp.proceed(args);//后置增强System.out.println("环绕通知---后置增强");return result;} catch (Throwable e) {//异常通知System.out.println("环绕通知----异常增强");throw new RuntimeException(e);} finally {//最终增强System.out.println("环绕通知----最终增强");}}
}
4.创建配置类
package com.su.config;
//配置类
import org.springframework.context.annotation.ComponentScan;
import org.springframework.context.annotation.Configuration;
import org.springframework.context.annotation.EnableAspectJAutoProxy;@Configuration //表示该类为配置类
@ComponentScan("com.su")//扫描所有包的注解
@EnableAspectJAutoProxy //开启AOP支持
public class SpringConfig {
}
5.创建测试类
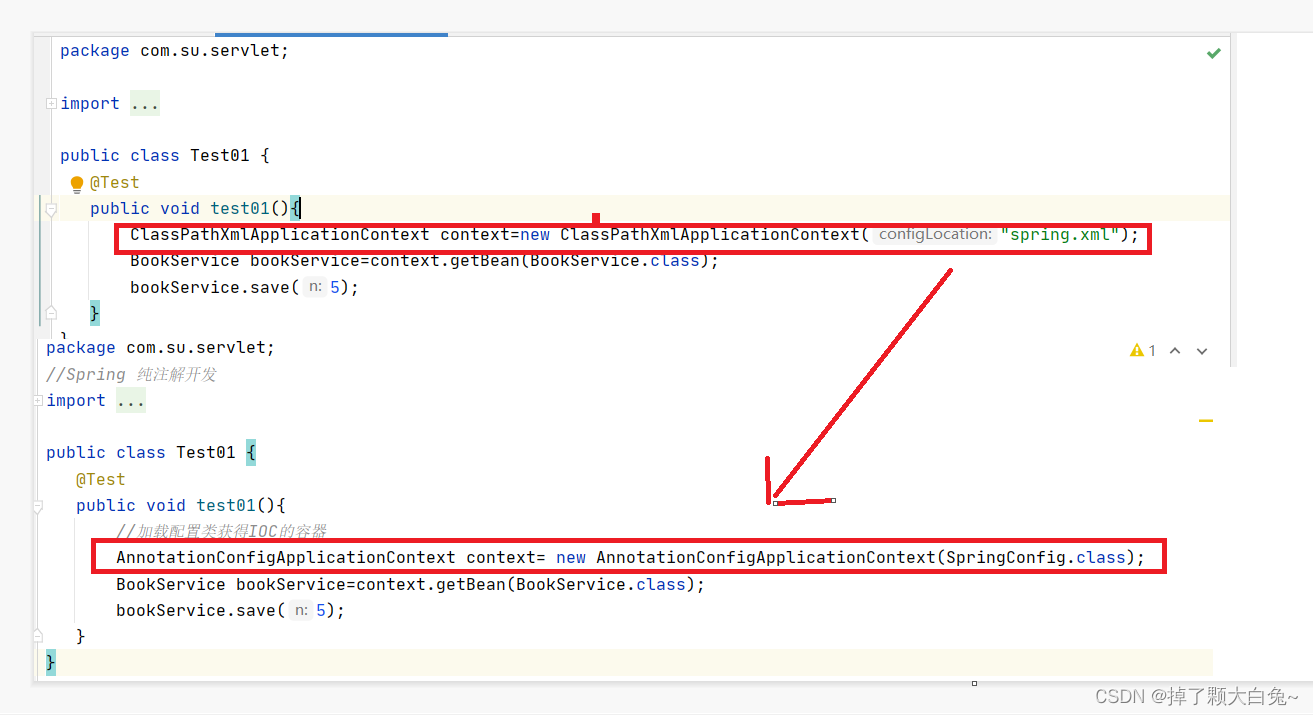
package com.su.servlet;
//Spring 纯注解开发
import com.su.config.SpringConfig;
import com.su.service.BookService;
import org.junit.Test;
import org.springframework.context.annotation.AnnotationConfigApplicationContext;
import org.springframework.context.support.ClassPathXmlApplicationContext;public class Test01 {@Testpublic void test01(){//加载配置类获得IOC的容器AnnotationConfigApplicationContext context= new AnnotationConfigApplicationContext(SpringConfig.class);BookService bookService=context.getBean(BookService.class);bookService.save(5);}
}
6.实现效果