【springboot】读写分离:

文章目录
-
-
-
- 一、mysql主从复制(从库可以有多个):
-
-
- 【1】提前准备好两台服务器,分别安装Mysql并启动成功
- 【2】配置---主库Master
- 【3】配置---从库Slave
- 【4】克隆的虚拟机导致mysql主从UUID一致怎么修改:
- 【5】测试
-
- 二、读写分离案例(以mysql主从复制为基础):
-
-
- 【1】pom.xml
- 【2】application.yml
- 【3】遇到问题:
-
-
-
一、mysql主从复制(从库可以有多个):
【1】提前准备好两台服务器,分别安装Mysql并启动成功
克隆一份虚拟机,克隆的设置SSl

主库:192.168.139.128
从库:192.168.139.129
【2】配置—主库Master
#vim /etc/my.cnf配置[mysqld]
log-bin=mysql-bin  #[必须]启用二进制日志
server-id=100   #【必须】服务器唯一ID
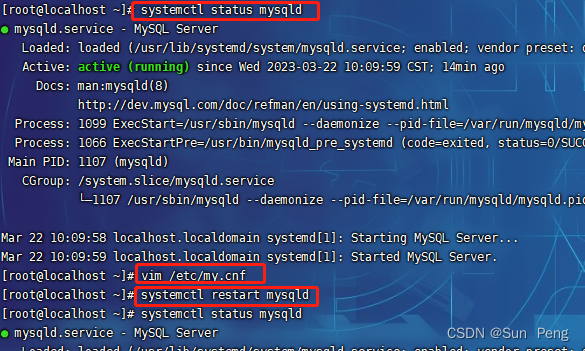
systemctl status mysqld
vim /etc/my.cnf
systemctl restart mysqldmysql -uroot -proot #-p密码
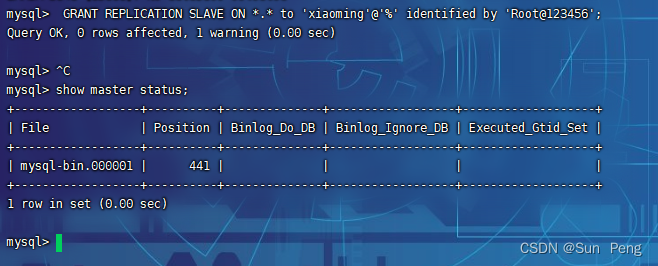
GRANT REPLICATION SLAVE ON *.* to 'xiaoming'@'%' identified by 'Root@123456';#创建用户xiaoming,密码Root@123456通过该用户建立复制
show master status;#执行完不要再动了,文件位置和Position会变
【3】配置—从库Slave
vim /etc/my.cnf#vim /etc/my.cnf配置
[mysqld]
server-id=101   #【必须】服务器唯一ID

systemctl restart mysqldmysql -uroot -prootchange master to master_host='192.168.139.128',master_user='xiaoming',master_password='Root@123456',master_log_file='mysql-bin.000001',master_log_pos=441;
#报错ERROR 3021 (HY000):...已经启动了=》stop slave;start slave;
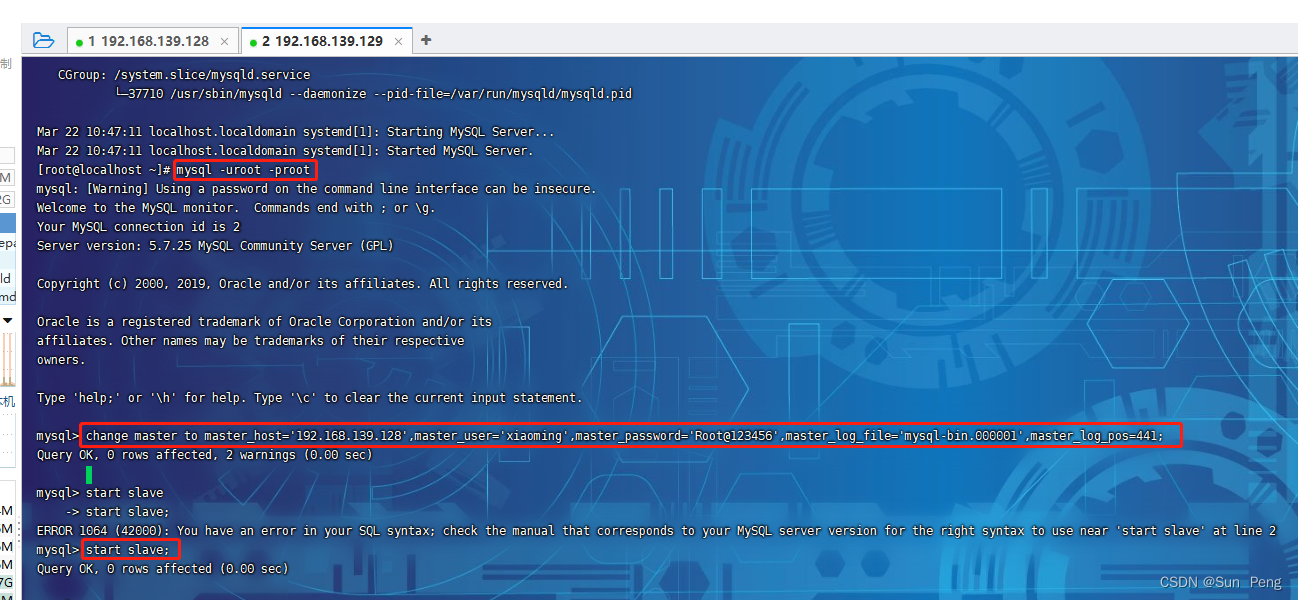
show slave status;


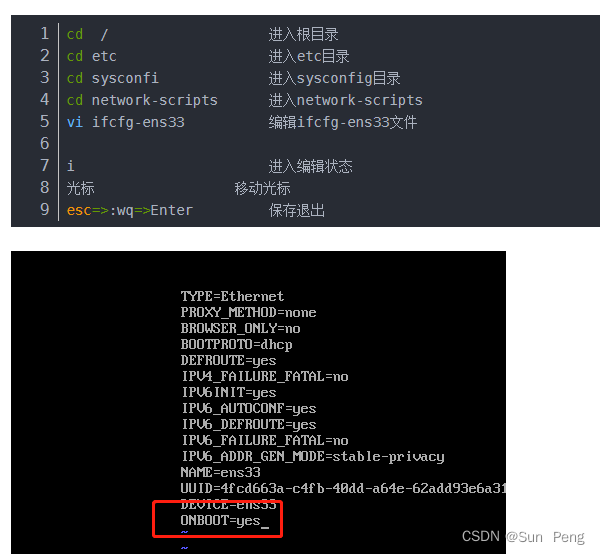
【4】克隆的虚拟机导致mysql主从UUID一致怎么修改:
由于虚拟机克隆,克隆完之后所有的文件都是一样的,包括IP地址、mac地址、uuid等。导致mysql的uuid一样,在搭建主从复制的时候,如果uuid是一样的,那么就不能搭建成功。出现了Slave_IO_Running: No的情况。
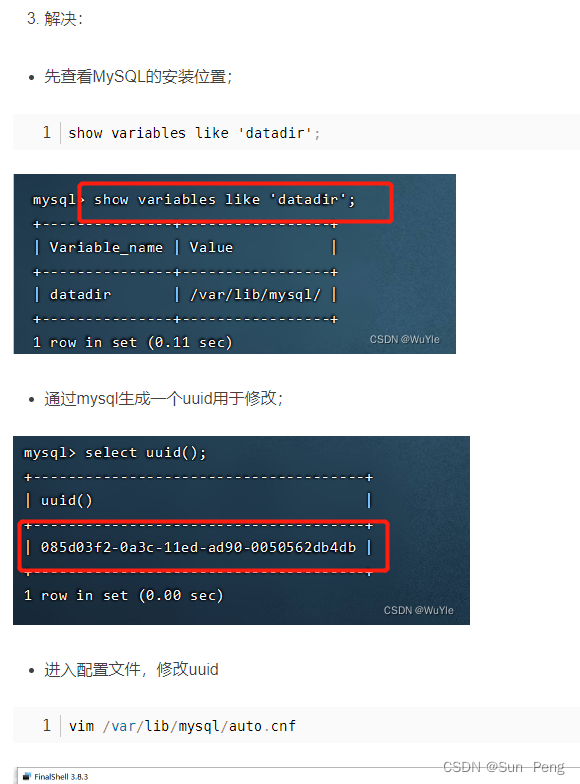

show variables like 'datadir';
select uuid();
exit;vi auto.cnf
systemctl restart mysqld
mysql -uroot -prootshow slave status\\G;
【5】测试
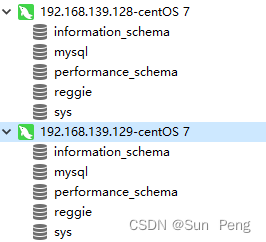
主库新建数据库或表或插入数据,从库刷新也会有
二、读写分离案例(以mysql主从复制为基础):
【1】pom.xml
<dependency><groupId>org.apache.shardingsphere</groupId><artifactId>sharding-jdbc-spring-boot-starter</artifactId><version>4.0.0-RC1</version>
</dependency>
【2】application.yml
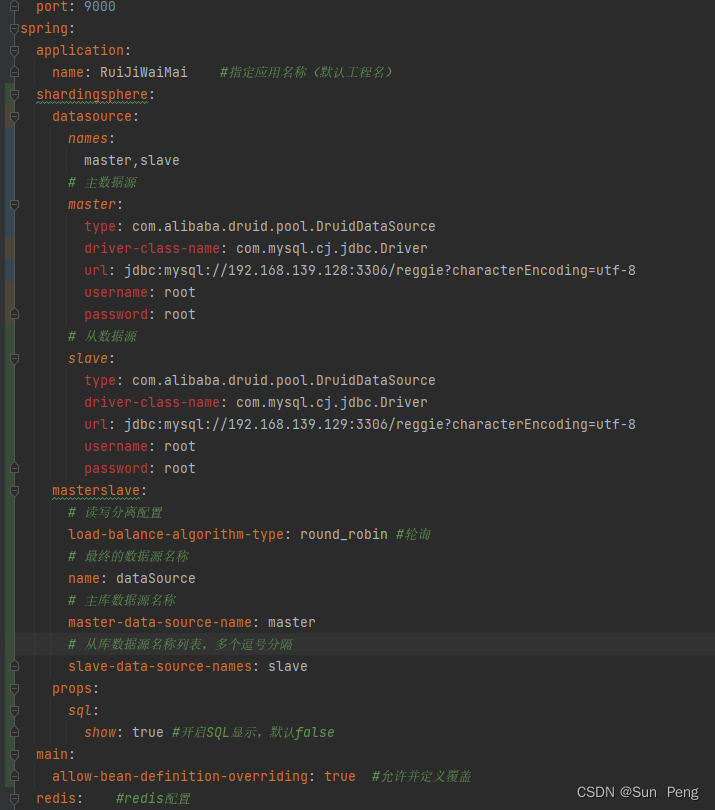
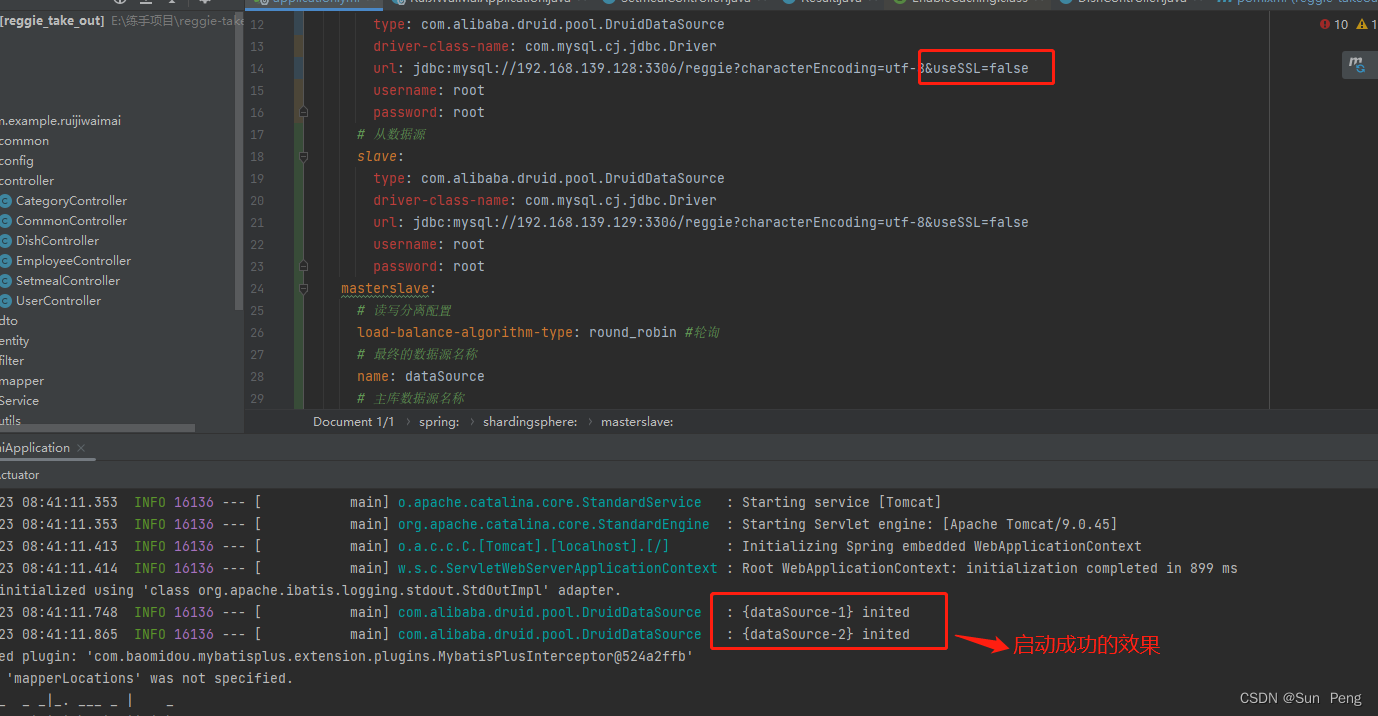
spring:application:name: RuiJiWaiMai #指定应用名称(默认工程名)shardingsphere:datasource:names:master,slave# 主数据源master:type: com.alibaba.druid.pool.DruidDataSourcedriver-class-name: com.mysql.cj.jdbc.Driverurl: jdbc:mysql://192.168.139.128:3306/reggie?characterEncoding=utf-8username: rootpassword: root# 从数据源slave:type: com.alibaba.druid.pool.DruidDataSourcedriver-class-name: com.mysql.cj.jdbc.Driverurl: jdbc:mysql://192.168.139.129:3306/reggie?characterEncoding=utf-8username: rootpassword: rootmasterslave:# 读写分离配置load-balance-algorithm-type: round_robin #轮询# 最终的数据源名称name: dataSource# 主库数据源名称master-data-source-name: master# 从库数据源名称列表,多个逗号分隔slave-data-source-names: slaveprops:sql:show: true #开启SQL显示,默认falsemain:allow-bean-definition-overriding: true #允许并定义覆盖
【3】遇到问题:
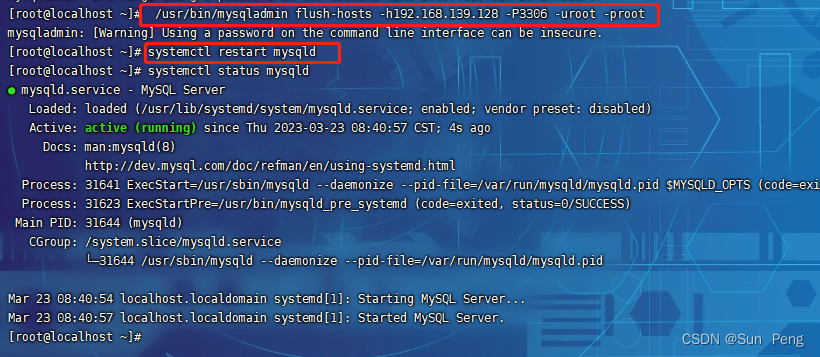
Host '' is blocked because of many connection errors; unblock with 'mysqladmin flush-hosts'
【解决】
/usr/bin/mysqladmin flush-hosts -h192.168.139.128 -P3306 -uroot -proot
systemctl restart mysqld
【扩展】
show variables like ‘%max_connect_errors%’; set global max_connect_errors = 1000;
阿里数据库连接池Druid 连接MySQL失败:javax.net.ssl.SSLHandshakeException: No appropriate protocol
【解决】&useSSL=false