Spring5学习总结(五)Spring5的新特性Log4j2@Nullable注解支持函数式风格支持JUnit5

Spring5学习总结(五)Spring5的新特性/Log4j2/@Nullable注解/支持函数式风格/支持JUnit5
整个 Spring5 框架的代码基于 Java8,运行时兼容 JDK9,许多不建议使用的类和方法在代码库中删除
一、支持整合Log4j2
Spring 5.0 框架自带了通用的日志封装,Spring5 已经移除 Log4jConfigListener,官方建议使用 Log4j2
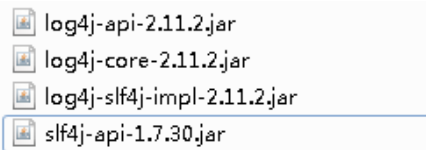
- 引入 jar 包
- 创建 log4j2.xml 配置文件
<?xml version="1.0" encoding="UTF-8"?>
<!--日志级别以及优先级排序: OFF < FATAL < ERROR < WARN < INFO < DEBUG < TRACE <ALL 越右边越详细-->
<!--Configuration 后面的 status 用于设置 log4j2 自身内部的信息输出,可以不设置,当设置成 TRACE 时,可以看到 log4j2 内部各种详细输出-->
<configuration status="INFO"><!--先定义所有的 appender--><appenders><!--输出日志信息到控制台--><console name="Console" target="SYSTEM_OUT"><!--控制日志输出的格式--><PatternLayout pattern="%d{yyyy-MM-dd HH:mm:ss.SSS} [%t] %-5level %logger{36} - %msg%n"/></console></appenders><!--然后定义 logger,只有定义 logger 并引入的 appender,appender 才会生效--><!--root:用于指定项目的根日志,如果没有单独指定 Logger,则会使用 root 作为默认的日志输出--><loggers><root level="info"><appender-ref ref="Console"/></root></loggers>
</configuration>
运行上一篇博客的测试类:

我们也可以创建一个日志类,手写日志输出:
import org.slf4j.Logger;
import org.slf4j.LoggerFactory;public class UserLog {private static final Logger log = LoggerFactory.getLogger(UserLog.class);public static void main(String[] args) {log.info("hello log4j2");log.warn("hello log4j2");//log.error("hello log4j2");}
}
二、支持 @Nullable 注解
@Nullable 注解可以使用在方法上面、属性上面、参数前面,分别表示方法返回可以为空,属性值可以为空,参数值可以为空
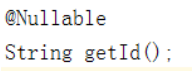
- @Nullable注解用在方法上面,方法返回值可以为空
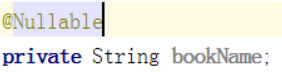
- @Nullable注解使用在属性上面,属性值可以为空
- @Nullable注解使用在方法参数前面,方法参数可以为空

三、支持函数式风格 GenericApplicationContext
import com.fox.service.UserService;
import org.junit.Test;
import org.springframework.context.support.GenericApplicationContext;public class MyTest {//函数式风格创建对象,交给 spring 进行管理@Testpublic void testGenericApplicationContext() {//1 创建 GenericApplicationContext 对象GenericApplicationContext context = new GenericApplicationContext();//2 调用 context 的方法进行对象注册context.refresh();context.registerBean("userService",UserService.class,() -> new UserService());//public <T> void registerBean(@Nullable String beanName, Class<T> beanClass, @Nullable Supplier<T> supplier, BeanDefinitionCustomizer... customizers)//Supplier<T>是一个函数式接口,因此调用时可以使用lambda表达式//3 获取在 spring 注册的对象//如果registerBean方法的beanName参数省略了:// User user = (User)context.getBean("com.fox.service.UserService");//如果没省略:UserService userService = (UserService)context.getBean("userService");System.out.println(userService);}
}

四、支持整合 JUnit5
Spring5不仅支持JUnit4,也支持JUnit5
(一)整合 JUnit4
- 引入 Spring 相关针对测试依赖:

- 创建测试类,使用注解方式完成
以上一篇博客案例为例:
import com.fox.service.UserService;
import org.junit.Test;
import org.junit.runner.RunWith;
import org.springframework.beans.factory.annotation.Autowired;
import org.springframework.test.context.ContextConfiguration;
import org.springframework.test.context.junit4.SpringJUnit4ClassRunner;@RunWith(SpringJUnit4ClassRunner.class)//单元测试框架JUnit4
@ContextConfiguration("classpath:bean1.xml")//加载配置文件
public class JTest4 {@Autowiredprivate UserService userService;@Testpublic void test(){userService.transfer();}
}
相比之前的测试类简单了很多
(二)整合 JUnit5
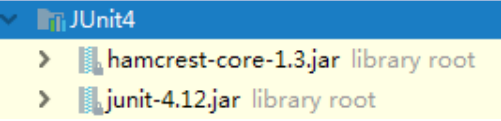
- 引入 JUnit5 的 jar 包
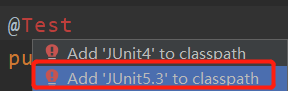
- 创建测试类,使用注解完成
import com.fox.service.UserService;
import org.junit.jupiter.api.Test;
import org.junit.jupiter.api.extension.ExtendWith;
import org.springframework.beans.factory.annotation.Autowired;
import org.springframework.test.context.ContextConfiguration;
import org.springframework.test.context.junit.jupiter.SpringExtension;@ExtendWith(SpringExtension.class)
@ContextConfiguration("classpath:bean1.xml")
public class JTest5 {@Autowiredprivate UserService userService;@Testpublic void test(){userService.transfer();}
}
我们也使用一个复合注解替代上面两个注解完成整合:
import com.fox.service.UserService;
import org.junit.jupiter.api.Test;
import org.springframework.beans.factory.annotation.Autowired;
import org.springframework.test.context.junit.jupiter.SpringJUnitConfig;@SpringJUnitConfig(locations = "classpath:bean1.xml")
public class JTest5 {@Autowiredprivate UserService userService;@Testpublic void test(){userService.transfer();}
}
五、SpringWebflux
先挖一个坑,日后再来填。。。。。。