vite中使用html2canvas 将img、svg和div转canvas

目录
div转canvas
svg转canvas
img转canvas
div转canvas
使用 html2canvas 插件,其官网:html2canvas - Screenshots with JavaScript![]() http://html2canvas.hertzen.com/
http://html2canvas.hertzen.com/
安装html2canvas:
npm i -S html2canvas引入:
import html2canvas from "html2canvas";
测试:
<template><div><divref="ref_capture"style="padding: 10px; background: #f5da55; width: 150px"><h4 style="color: #000">Hello world!</h4></div></div>
</template>
<script lang="ts" setup>
import { nextTick, ref } from "vue";
import html2canvas from "html2canvas";const ref_capture = ref();nextTick(() => {html2canvas(ref_capture.value).then((canvas) => {console.log("canvas:", canvas);let url = canvas.toDataURL();console.log("url:", url);});
});
</script>
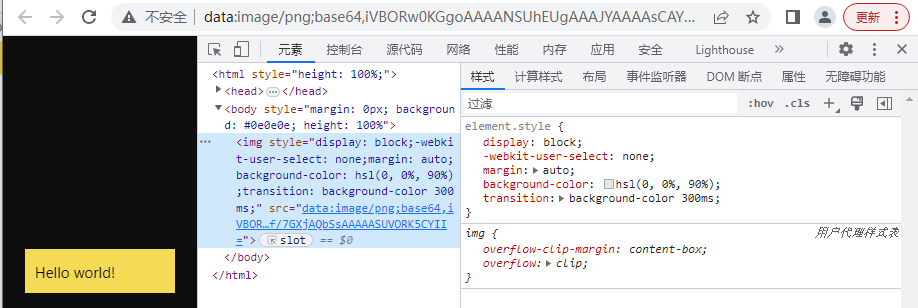
效果图: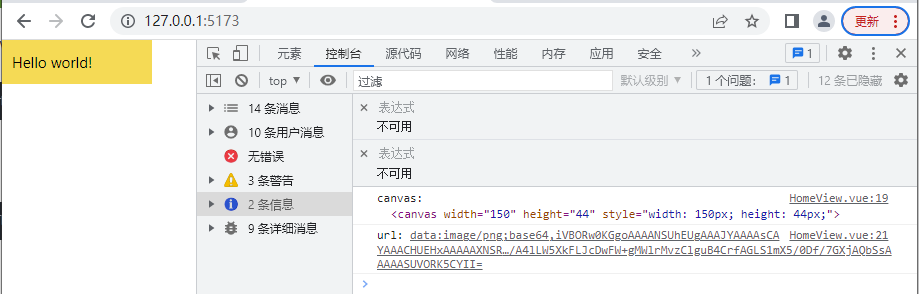
svg转canvas


注意:svg外面要再包一层div,才能获取到svg的dom,不能直接在svg上用ref
<template><div><div ref="ref_svg" style="width: 50px"><svgxmlns="http://www.w3.org/2000/svg"viewBox="0 0 261.76 226.69"xmlns:v="https://vecta.io/nano"width="50px"height="50px"style="display: block"><pathd="M161.096.001l-30.225 52.351L100.647.001H-.005l130.877 226.688L261.749.001z"fill="#41b883"/><pathd="M161.096.001l-30.225 52.351L100.647.001H52.346l78.526 136.01L209.398.001z"fill="#34495e"/></svg></div></div>
</template>
<script lang="ts" setup>
import { nextTick, ref } from "vue";
import html2canvas from "html2canvas";const ref_svg = ref();nextTick(() => {html2canvas(ref_svg.value).then((canvas) => {console.log("canvas:", canvas);let url = canvas.toDataURL();console.log("url:", url);});
});
</script>
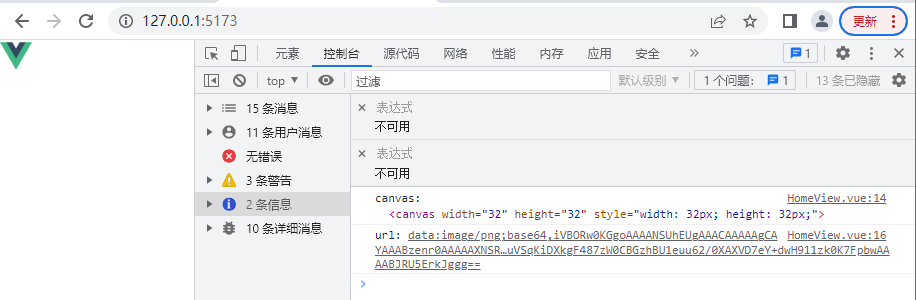
img转canvas
方式1:


<template><div><img src="/favicon.ico" height="32" width="32" /></div>
</template>
<script lang="ts" setup>
import { nextTick, ref } from "vue";const imageToCanvas = (image) => {var canvas = document.createElement("canvas");canvas.width = image.width;canvas.height = image.height;canvas.getContext("2d").drawImage(image, 0, 0);return canvas;
};
nextTick(() => {let img = new Image();img.src = "/favicon.ico";img.height = 32;img.width = 32;img.onload = () => {console.log("img:", img);let canvas = imageToCanvas(img);console.log("canvas:", canvas);let url = canvas.toDataURL();console.log("url:", url);};
});
</script>
提示:图片资源必须加载完成后才能绘制在画布上! 因此要用onload
方式2:
使用 html2canvas 插件
<template><div><img ref="ref_img" src="/favicon.ico" /></div>
</template>
<script lang="ts" setup>
import { nextTick, ref } from "vue";
import html2canvas from "html2canvas";const ref_img = ref();nextTick(() => {html2canvas(ref_img.value).then((canvas) => {console.log("canvas:", canvas);let url = canvas.toDataURL();console.log("url:", url);});
});
</script>