vue3配置router路由并实现页面跳转

1、安装vue-router
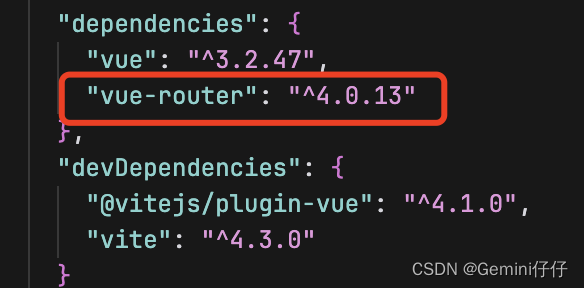
用vue3需要安装版本4.0以上的vue-router,安装命令:
npm install vue-router@next --save
vue2尽量安装4.0以下版本,安装命令:
npm i vue-router@3.1.3
在package.json中可以查看vue-router版本号:
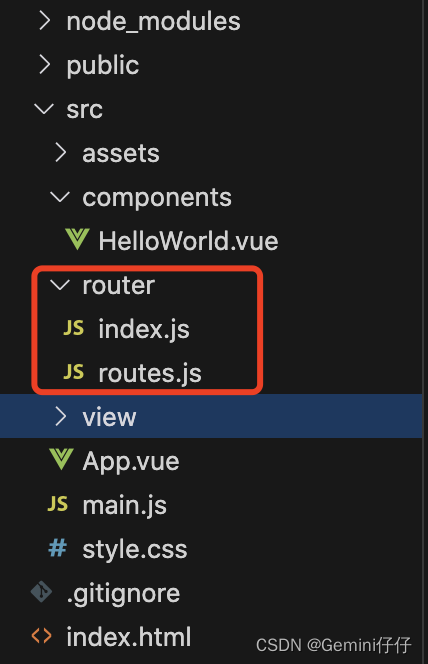
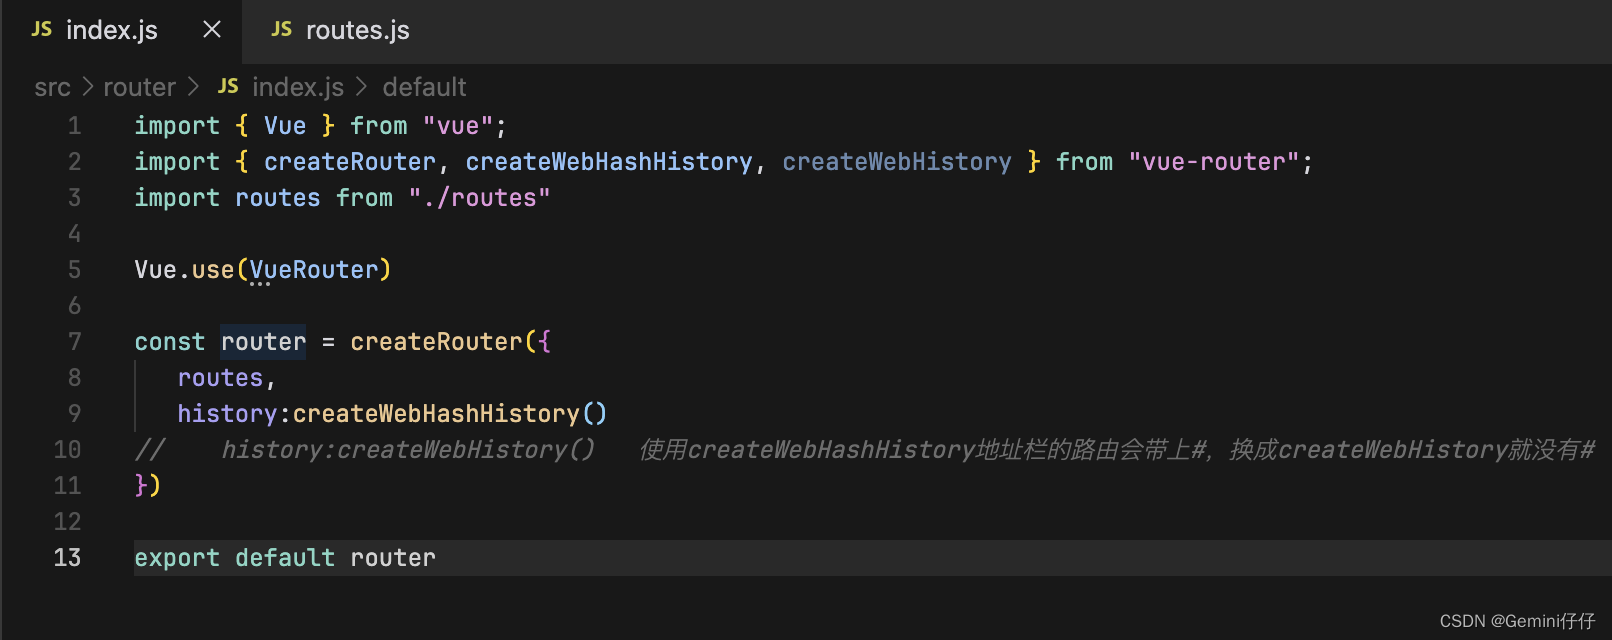
2、根目录下新建router文件夹,下面新建index.js文件和routes.js
2.1文件中引入vue方法、配置页面具体路径
vue2和vue3代码区别如下:
【vue3】
ps:引入文件时记得新建view文件夹以及里面的A、B.vue两个页面
【vue2】
3、main.js文件中引入路由
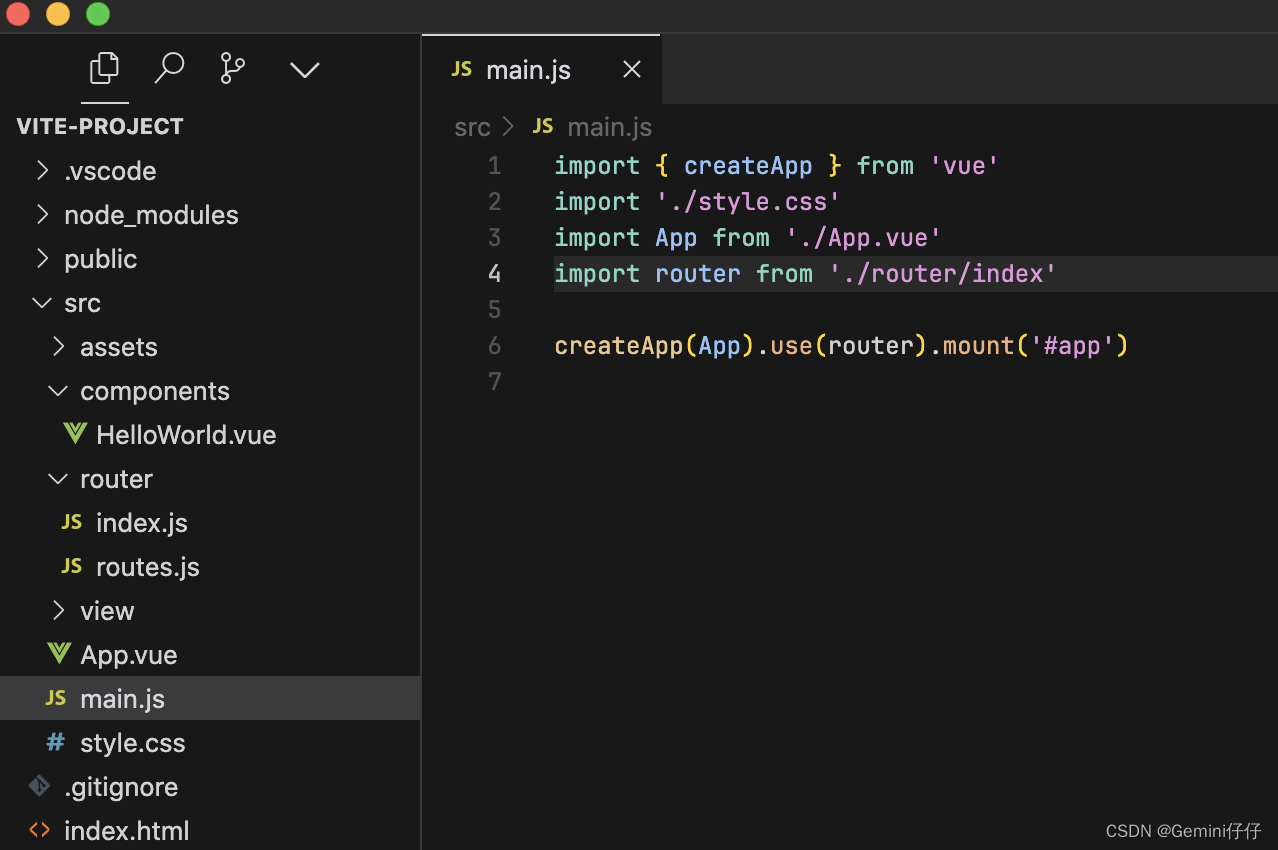
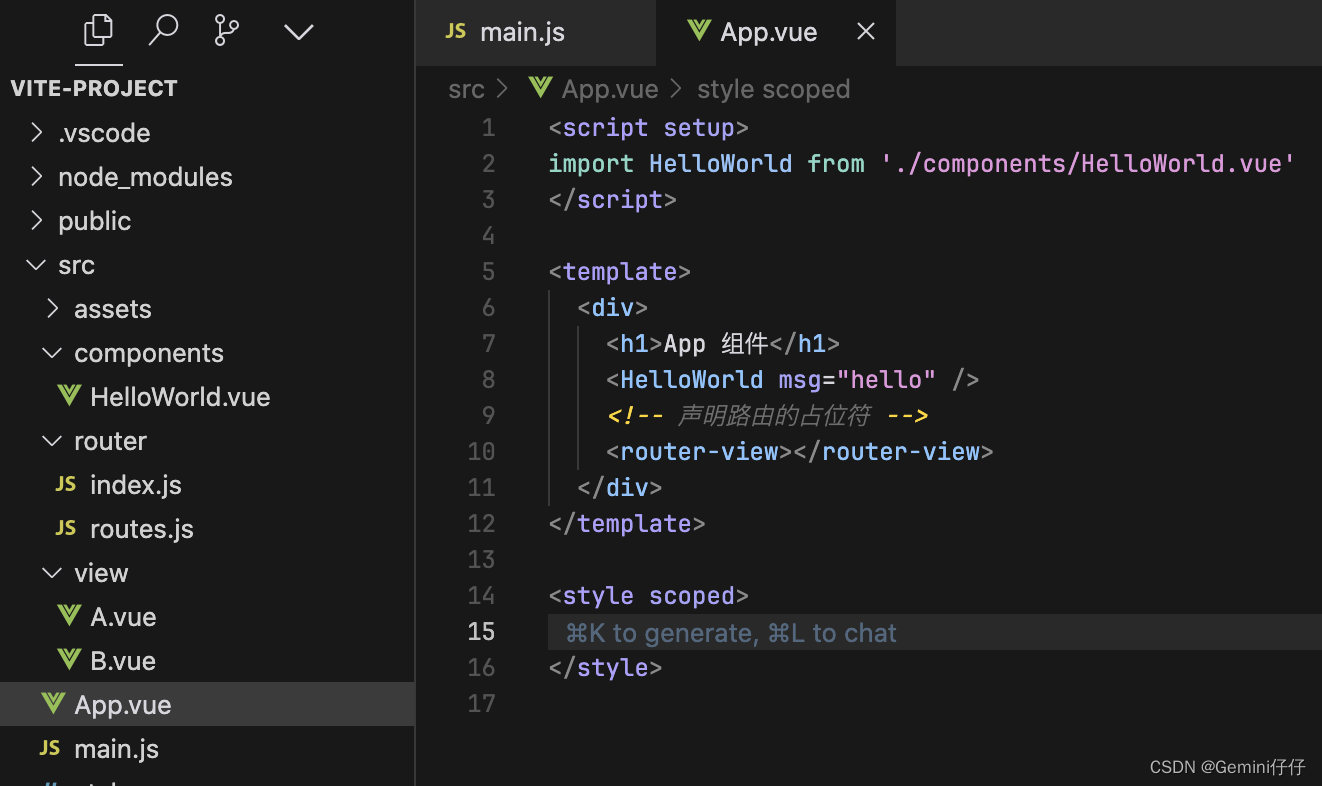
4、APP.vue里声明路由的占位符<router-view></router-view>
5、测试

6、文件代码
HelloWorld.vue
<template><!-- <h1>{{ msg }}</h1> --><div class="card"><router-link to="/A">A</router-link> <router-link to="/B">B</router-link> <!-- 第二种方法 router.push--><!-- <button @click="show('a')">A页面</button><button @click="show('b')">B页面</button> --></div>
</template><script setup>
import {useRouter,useRoute} from 'vue-router'
//const router = useRouter()
//const route = useRoute()// defineProps({
// msg: String,
// })// 第二种跳转方法
// const show=(index)=> {
// if(index == 'a') {
// router.push('/a')
// }
// if(index == 'b') {
// router.push('/b')
// }
// }
</script><style scoped></style>index.js
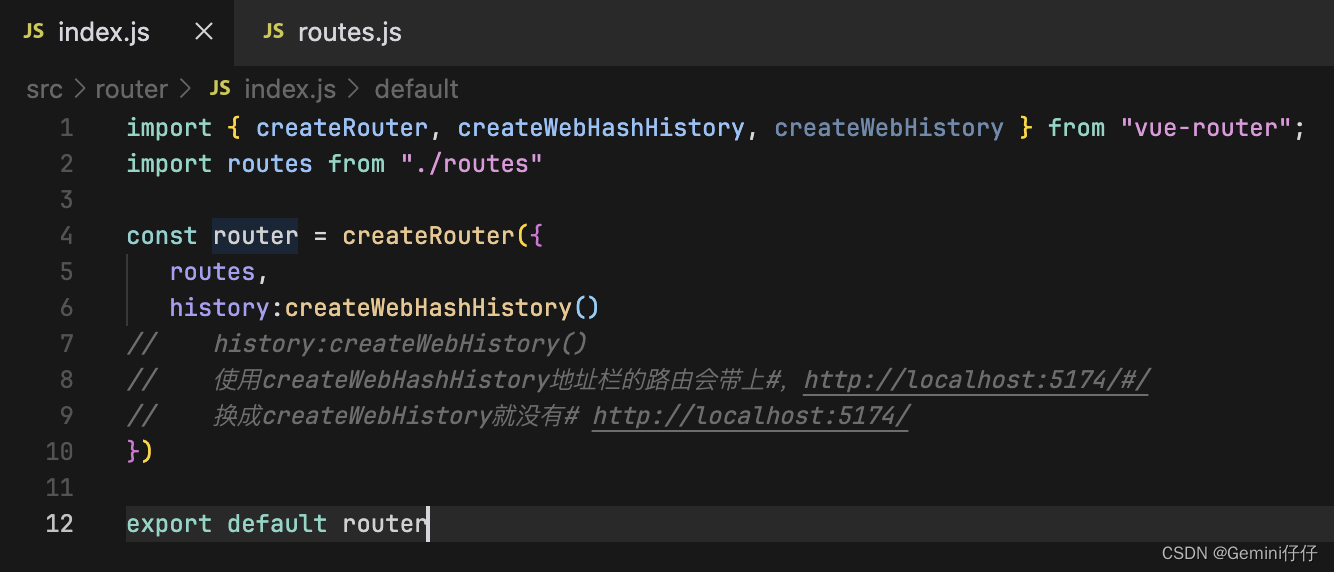
import {createRouter, createWebHashHistory,createWebHistory} from 'vue-router'
import routes from './routes'const router = createRouter({routes,history: createWebHashHistory()
})export default router
routes.js
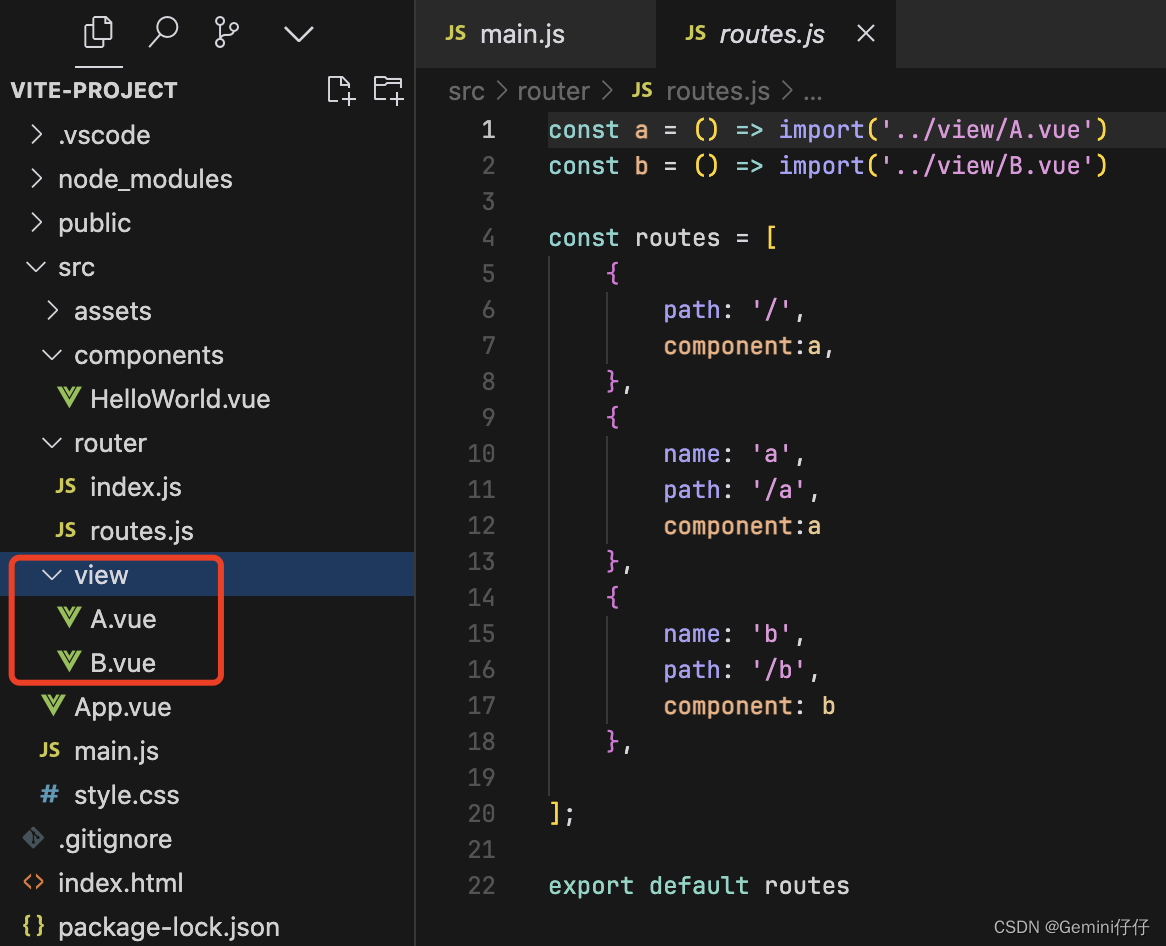
const a = () => import('../view/A.vue')
const b = () => import('../view/B.vue')const routes = [//实现路由重定向,当进入网页时,路由自动跳转到/a路由//{   //	path:'/',//    redirect:'/a'    // },{path: '/',component:a,},{name: 'a',path: '/a',component:a},{name: 'b',path: '/b',component: b},];export default routes
APP.vue
<script setup>
import HelloWorld from './components/HelloWorld.vue'
</script><template><div><h1>App 组件</h1><HelloWorld msg="hello" /><!-- 声明路由的占位符 --><router-view></router-view></div>
</template><style scoped></style>
补充:
编程式导航
通过调用 API 实现导航的方式,叫做编程式导航。
与之对应的,通过点击链接实现导航的方式,叫做声明式导航。例如:
1. 普通网页中点击 链接、vue 项目中点击 都属于声明式导航
2. 普通网页中调用 location.href 跳转到新页面的方式,属于编程式导航
vue-router 中的编程式导航 API
vue-router 提供了许多编程式导航的 API,其中最常用的两个 API 分别是:
this.$router.push('hash 地址')  跳转到指定 Hash 地址,从而展示对应的组件
this.$router.go(数值 n)  实现导航历史的前进、后退
history.go(-2);//后退两次
history.go(2);//前进两次
history.back(); //后退
hsitory.forward(); //前进
但是history也是有缺点的,不怕前进后退跳转,就怕刷新(如果后端没有准备的话),因为刷新是实实在在地去请求服务器了。