Ajax超详解(新手入门指南)

文章目录
- 1. AJAX简介
- 2. 前后端交互
- 3. XHR
-
- 3.1 XMLHttpRequest对象
- 3.2 获取模拟的后端数据
- 3.3 获取网络数据
- 3.4 使用json-server模拟服务器
-
- 3.4.1 安装node.js
- 3.4.2 安装并使用json-server
- 3.5 常见的请求方式
-
- 3.5.1 GET请求
- 3.5.2 POST请求
- 3.5.3 PUT请求
- 3.5.4 PATCH请求
- 3.5.5 DELETE请求
- 4. Fetch
-
- 4.1 Fetch API
- 4.2 使用Fetch完成请求
-
- 4.2.1 GET请求
- 4.2.2 POST请求
- 4.2.3 PUT请求
- 4.2.4 PATCH请求
- 4.2.5 DELETE请求
- 5. Axios
-
- 5.1 Axios API
- 5.2 使用Axios完成请求
1. AJAX简介
AJAX:全称是Asynchronous JavaScript And XML,即异步的JavaScript和XML。AJAX是用于前后端交互的工具,也就是说通过AJAX作为桥梁,客户端可以给服务端发送消息,也可以接收服务端的响应消息。
AJAX的两种实现方式:
XHR:使用XMLHttpRequest对象来实现AJAXFetch:使用Fetch API来实现AJAX
XHR 和 Fetch 的区别:
| 功能点 | XHR | Fetch |
|---|---|---|
| 基本的请求能力 | ✅ | ✅ |
| 基本的获取响应能力 | ✅ | ✅ |
| 监控请求进度 | ✅ | ❌ |
| 监控响应进度 | ✅ | ✅ |
| Service Worker中是否可用 | ❌ | ✅ |
| 控制cookie的携带 | ❌ | ✅ |
| 控制重定向 | ❌ | ✅ |
| 请求取消 | ✅ | ✅ |
| 自定义referrer | ❌ | ✅ |
| 流 | ❌ | ✅ |
| API风格 | Event |
Promise |
| 活跃度 | 停止更新 | 不断更新 |
2. 前后端交互
由于AJAX是用于前后端交互的工具,为了更方便并深入的理解AJAX以及后续对它的实现,需要补充一下前后端交互的相关知识。
前后端交互使用的协议是HTTP协议,该协议规定了两个方面的内容:
- 传递消息的模式
- 传递消息的格式
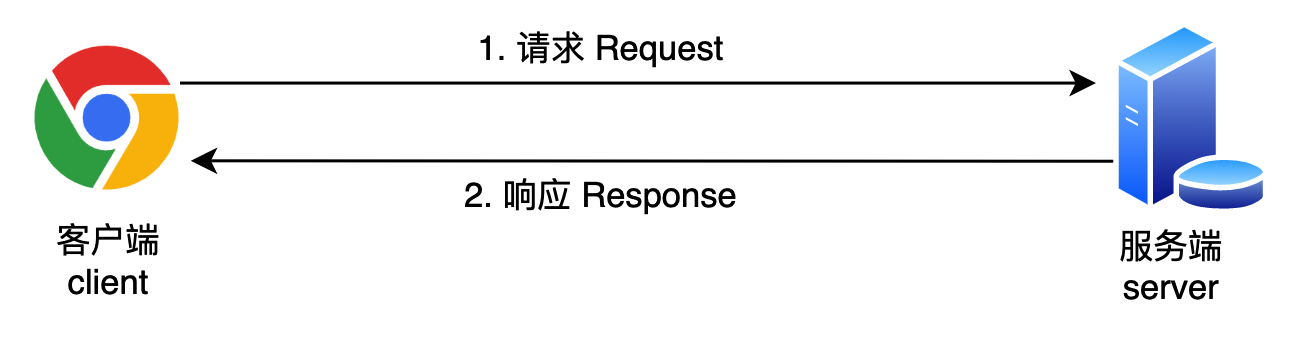
1.传递消息的模式为「请求-响应」模式
- 发起请求的称之为客户端,接收请求并完成响应的称之为服务器。
- 「请求-响应」完成后,一次交互结束。
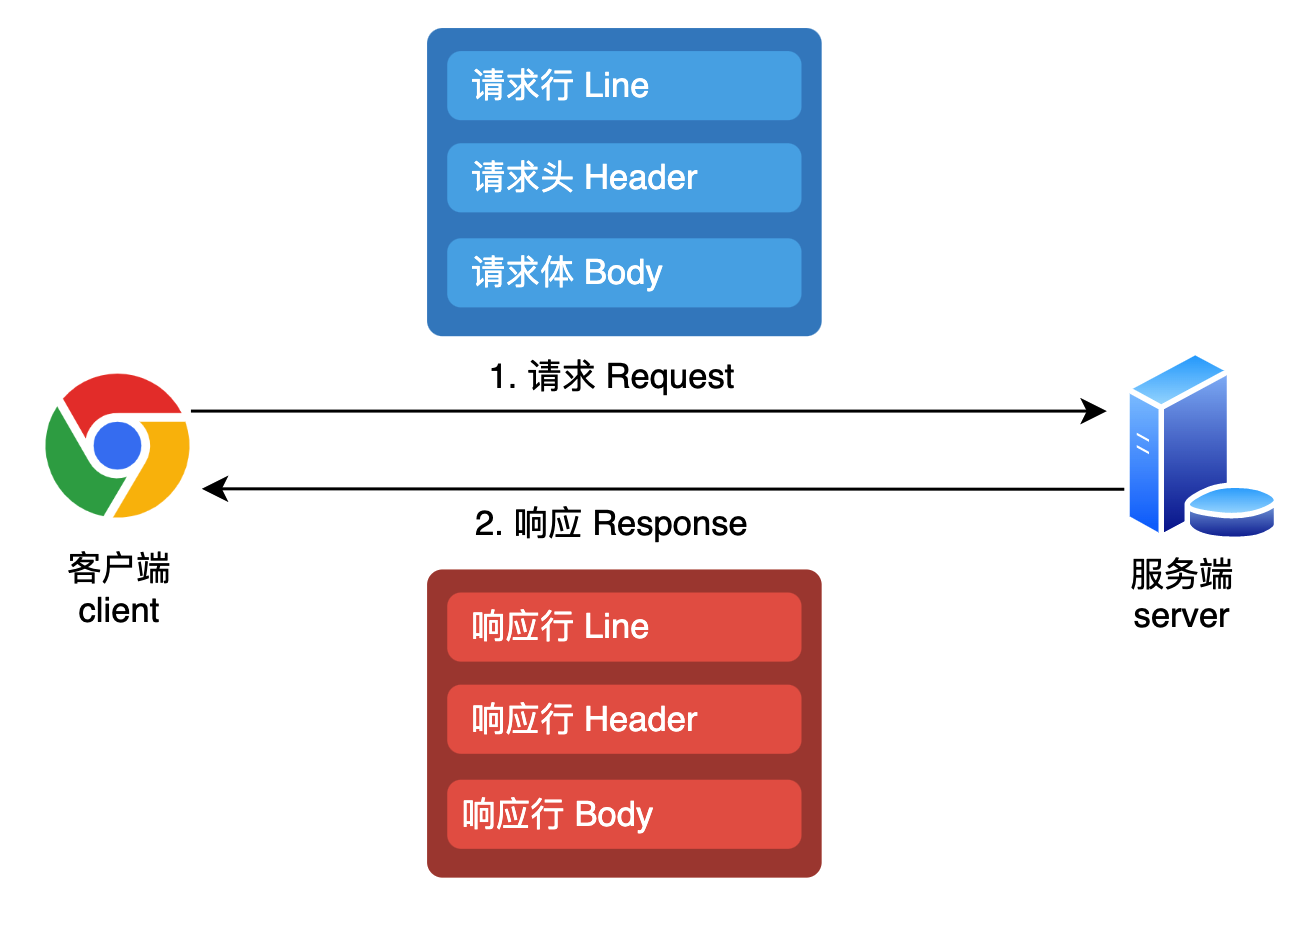
2.传递消息的格式是纯文本格式,分为以下三部分
请求行
请求头请求体
3. XHR
为了节省学习的成本,本文专注于讲解前端的内容,对于后端的部分,使用模拟的数据以及现有的工具来完成对后端的实现。
通过以下三种方式,来模拟后端,由浅入深的展开Ajax:
- 使用JSON文件模拟后端返回的数据
- 调用网络接口来获取后端返回的数据
- 使用json-server模拟服务器来实现各种请求方式
3.1 XMLHttpRequest对象
1.XMLHttpRequest 对象的方法
| 方法 | 描述 |
|---|---|
abort() |
中止当前请求 |
getAllResponseHeaders() |
返回所有的响应头 |
getResponseHeader() |
返回特定的响应头 |
open() |
规定请求的方式 |
send() |
发送请求到服务器 |
setRequestHeader() |
设置请求头 |
2.XMLHttpRequest 对象的属性
| 属性 | 描述 |
|---|---|
onreadystatechange |
定义当 readyState 属性发生变化时被调用的函数 |
readyState |
保存 XMLHttpRequest 的状态 |
responseText |
以字符串返回响应数据 |
responseXML |
以 XML 数据返回响应数据 |
status |
返回请求的状态号 |
statusText |
返回状态文本 |
3.2 获取模拟的后端数据
现在前后端交互的文本数据,常用的是json格式的文本数据,因此这里使用json文件,来模拟后端返回的数据。
在当前页面同级目录下,新建一个test.json,模拟后端返回的数据,内容如下
{"name": "Bill","age": 18
}
1.向服务器发送请求
open(method, url, async):初始化一个新创建的请求,或重新初始化一个请求
method:请求的方式,如 GET、POST等url:服务器文件的位置async:是否异步执行操作,异步为true
var xhr = new XMLHttpRequest();
xhr.open("GET", "test.json", true); // 创建请求,以GET请求的方式,请求服务器的test.json
xhr.send(); // 发送请求
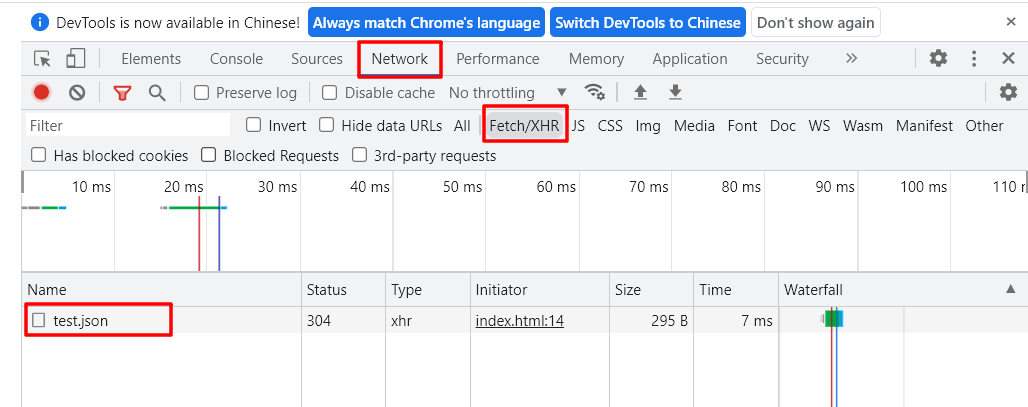
按F12,再刷新页面,点击Network,再选中Fetch/XHR,可以看到有一个test.json文件
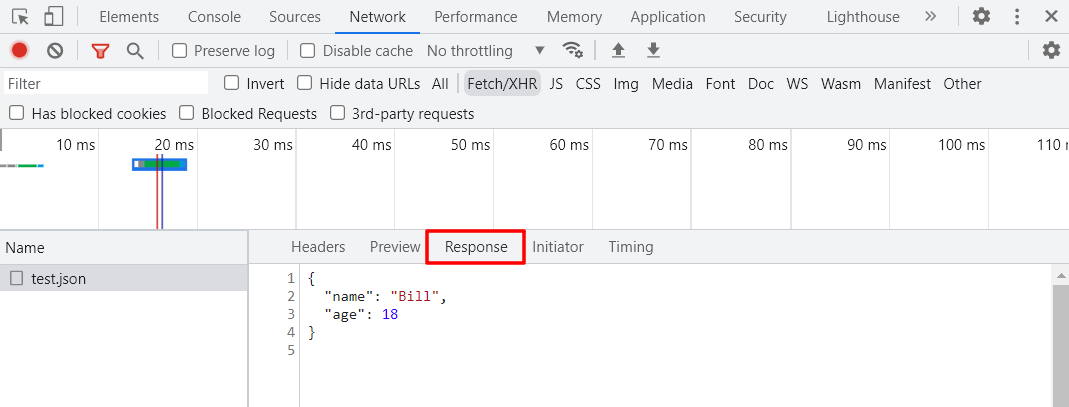
双击test.json,再选中Response,可以看到响应的数据内容就是test.json中的内容
2.根据 XMLHttpRequest 和 HTTP 的状态,判断请求是否成功,并获取响应数据
onreadystatechange:定义当 readyState 属性发生变化时被调用的函数(触发readystatechange事件)readyState:XMLHttpRequest 的状态0:请求未初始化1:服务器连接已建立2:请求已接收3:正在处理请求4:请求已完成且响应已就绪
status:HTTP的状态码,200-299表示请求成功,具体状态码含义可参考 常见的HTTP状态码汇总200:OK403:Forbidden404:Not Found
responseText:以字符串形式返回的响应数据
注:通过以上可以得出,当
readyState === 4且status范围在[200,300)时,表示本次请求正常完成。
var xhr = new XMLHttpRequest();
xhr.open("GET", "test.json", true);
xhr.send();// readyState属性发生变化时调用的函数
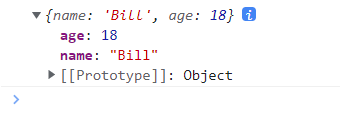
xhr.onreadystatechange = function () {if (xhr.readyState === 4) { // 请求已完成且响应已就绪if (xhr.status === 200) { // 请求成功console.log(JSON.parse(xhr.responseText)); // 打印服务器的响应文本} else {console.log(xhr.status, xhr.statusText); // 打印响应状态码和响应状态文本console.log(xhr.responseText);}}
};刷新页面,运行结果如下:
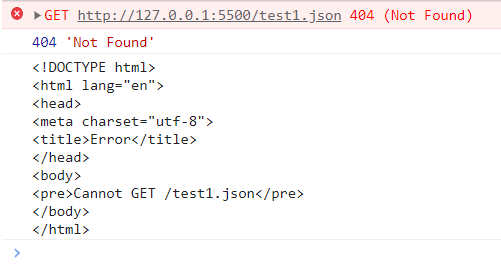
通过修改以上代码中的test.json为test1.json,构造请求服务器中不存在的文件,运行结果如下:
3.可以使用onload属性代替onreadystatechange且readyState === 4的情况
注:onload属性表示当一个XMLHttpRequest请求完成的时候会触发load事件
var xhr = new XMLHttpRequest();
xhr.open("GET", "test.json", true);
xhr.send();// XMLHttpRequest请求完成的时候会触发load事件
xhr.onload = function () {// 使用正则表达式,判断xhr.status范围是否在[200,300)if (/^2\\d{2}$/.test(xhr.status)) {console.log(JSON.parse(xhr.responseText));} else {console.log(xhr.status, xhr.statusText);console.log(xhr.responseText);}
};
3.3 获取网络数据
调用网络接口,将模拟的数据,改为网络的真实数据。
将上面代码中的test.json改为以下网络地址即可:
http://www.xiongmaoyouxuan.com/api/tabs
1.向网络服务器请求
var xhr = new XMLHttpRequest();
xhr.open("GET", "http://www.xiongmaoyouxuan.com/api/tabs", true);
xhr.send();// XMLHttpRequest请求完成的时候会触发load事件
xhr.onload = function () {if (/^2\\d{2}$/.test(xhr.status)) {console.log(JSON.parse(xhr.responseText));} else {console.log(xhr.status, xhr.statusText);console.log(xhr.responseText);}
};
运行结果如下:
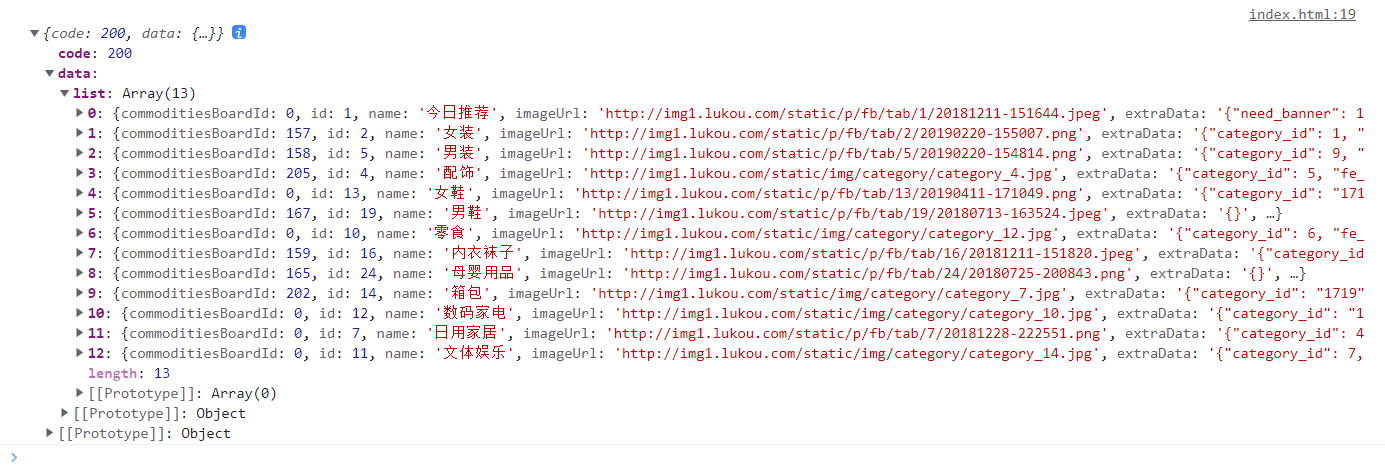
由于json数据过长,在此处贴出部分数据作为参照:
{"code": 200,"data": {"list": [{"commoditiesBoardId": 0,"id": 1,"name": "今日推荐","imageUrl": "http://img1.lukou.com/static/p/fb/tab/1/20181211-151644.jpeg","extraData": "{\\"need_banner\\": 1, \\"category_id\\": 13, \\"need_grid\\": 1}","flowBoardId": 89,"note": "小编精选,全场特惠 (ง •̀_•́)ง","gridsBoardId": 3,"bannerBoardId": 2,"feedsBoardId": 0,"categoryId": 0},{"commoditiesBoardId": 157,"id": 2,"name": "女装","imageUrl": "http://img1.lukou.com/static/p/fb/tab/2/20190220-155007.png","extraData": "{\\"category_id\\": 1, \\"fe_category_id\\": 1689}","flowBoardId": 75,"note": "","gridsBoardId": 4,"bannerBoardId": 0,"feedsBoardId": 5,"categoryId": 1689}]}
}
2.对服务器返回的数据进行处理,并渲染到页面上
<!DOCTYPE html>
<html lang="en"><head><meta charset="UTF-8" /><meta http-equiv="X-UA-Compatible" content="IE=edge" /><meta name="viewport" content="width=device-width, initial-scale=1.0" /><title>Document</title></head><body><button>点击查询商品</button><ul><li><p>今日推荐</p><img src="http://img1.lukou.com/static/p/fb/tab/1/20181211-151644.jpeg" /></li></ul><script>var btn = document.querySelector("button");var ul = document.querySelector("ul");// 注册点击事件btn.onclick = function () {var xhr = new XMLHttpRequest();xhr.open("GET", "http://www.xiongmaoyouxuan.com/api/tabs", true);xhr.send();// XMLHttpRequest请求完成的时候会触发load事件xhr.onload = function () {if (/^2\\d{2}$/.test(xhr.status)) {var responseData = JSON.parse(xhr.responseText); // 响应数据console.log(responseData);render(responseData); // 渲染数据} else {console.log(xhr.status, xhr.statusText);console.log(xhr.responseText);}};};// 处理获取的响应数据,并将其渲染到页面上function render(responseData) {var commodityList = responseData.data.list.map(function (commodity) {return `<li><p>${commodity.name}</p><img src="${commodity.imageUrl}" /></li>`;});console.log(commodityList);ul.innerHTML = commodityList.join("");}</script></body>
</html>
点击按钮,运行结果如下:

3.4 使用json-server模拟服务器
json-server可以模拟服务器:下载node.js,并安装json-server,再新建一个json文件,通过json-server来运行这个json文件,此时该json文件就具备了基本的后端服务器的能力,可以完成一些基本的增删改查。
3.4.1 安装node.js
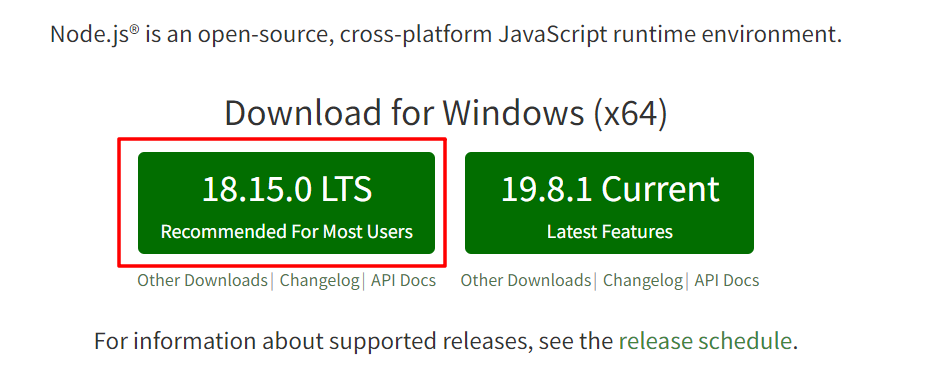
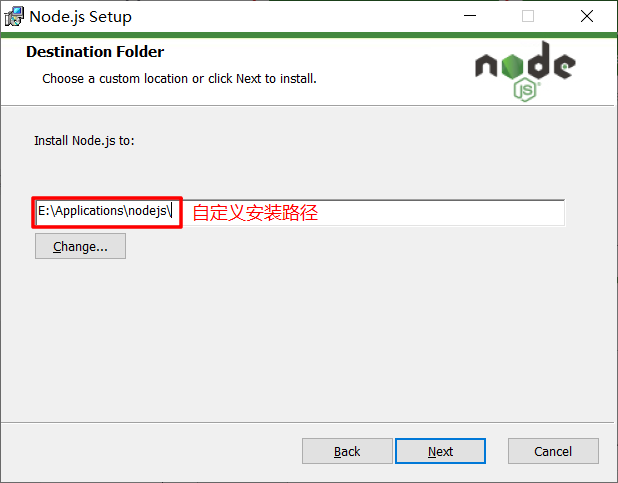
1.下载并安装node.js,进入node官网,选择LTS版本点击下载安装包
node官网地址:https://nodejs.org/en
2.双击安装包,一直点击Next,完成安装
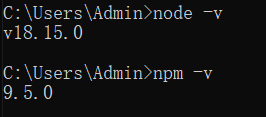
3.打开cmd,输入node -v 和 npm -v,出现版本号则表示安装成功
4.切换镜像源至国内淘宝镜像源,提高npm下载速度
# 设置镜像源
npm config set registry https://registry.npm.taobao.org
# 查看镜像源
npm config get registry

3.4.2 安装并使用json-server
1.输入以下命令,安装json-server
npm install -g json-server

2.安装完成json-server以后,再新建一个test.json文件,内容如下
{"users": [{"id": 1,"name": "Bill"},{"id": 2,"name": "Jackson"}],"shopcar": ["女装", "男装", "配饰", "零食", "母婴用品", "箱包"]
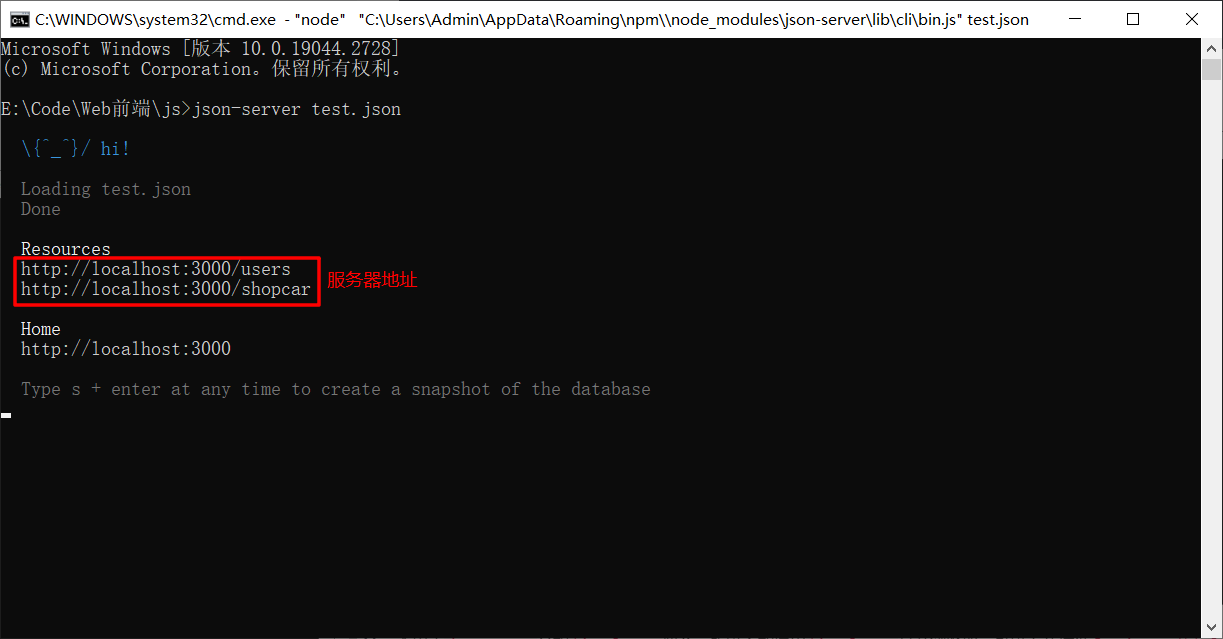
}3.打开cmd,切换路径到test.json所在路径,输入命令 json-server test.json运行服务器,得到服务器地址如下
http://localhost:3000/users
http://localhost:3000/shopcar
4.当前页面index.html,输入以下内容
var xhr = new XMLHttpRequest();
xhr.open("GET", "http://localhost:3000/users", true); // 向json-server服务器发送请求
xhr.send();xhr.onload = function () {if (/^2\\d{2}$/.test(xhr.status)) {console.log(JSON.parse(xhr.responseText));} else {console.log(xhr.status, xhr.statusText);console.log(xhr.responseText);}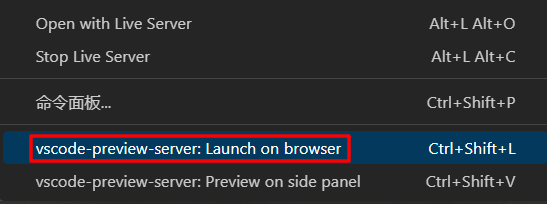
};5.由于json-server会和Live Server冲突,所以不能使用Live Server打开浏览器,可以下载插件Preview on Web Server,使用该插件打开浏览器。
右键点击vscode-preview-server:Launch on browser,打开页面。
打开控制台,运行结果如下,说明获取到了服务器返回的数据:
3.5 常见的请求方式
| 请求方式 | 描述 |
|---|---|
GET |
获取数据 |
POST |
提交数据 |
PUT |
更新全部数据 |
PATCH |
更新部分数据 |
DELETE |
删除数据 |
HEAD |
获取服务器头信息 |
OPTIONS |
获取服务器设备信息 |
CONNECT |
保留请求方式 |
在3.4节使用json-server模拟服务器的基础之上,来模拟如下5种常见的请求方式。
test.json的内容为3.4.2节中的内容,在test.json所在路径下,输入以下命令启动json-server:
json-server test.json --watch
3.5.1 GET请求
GET请求:用于获取服务器的数据。
GET请求的方式有两种:
- 不带参数的
GET请求,获取服务器地址的全部数据 - 带参数的
GET请求,获取服务器地址的特定数据
1.不带参数的GET请求,获取服务器全部数据
<!DOCTYPE html>
<html lang="en"><head><meta charset="UTF-8" /><meta http-equiv="X-UA-Compatible" content="IE=edge" /><meta name="viewport" content="width=device-width, initial-scale=1.0" /><title>Document</title></head><body><button>GET</button><script>var btn = document.querySelector("button");btn.onclick = function () {var xhr = new XMLHttpRequest();xhr.open("GET", "http://localhost:3000/users", true); // 创建一个GET请求xhr.send();xhr.onload = function () {if (/^2\\d{2}$/.test(xhr.status)) {console.log(JSON.parse(xhr.responseText));} else {console.log(xhr.status, xhr.statusText);console.log(xhr.responseText);}};};</script></body>
</html>右键点击vscode-preview-server:Launch on browser,打开页面并点击GET按钮,运行结果如下:

2.带参数的GET请求,获取服务器地址的特定数据
如需获取特定数据,在原地址上加上key=value格式的数据即可。
key=value:获取单个特定数据key=value&key=value:获取多个特定数据
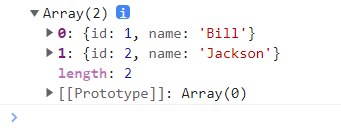
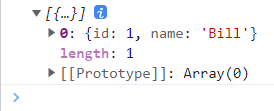
key=value:比如向服务器请求获取id=1的数据,可以修改http://localhost:3000/users为http://localhost:3000/users?id=1,运行结果如下:
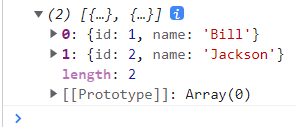
key=value&key=value:比如向服务器请求获取id=1以及id=2的数据,可以修改http://localhost:3000/users为http://localhost:3000/users?id=1&id=2,运行结果如下:
3.5.2 POST请求
POST请求:用于向服务器提交数据。
POST提交文本数据有两种格式:
- form格式:也就是
key=value格式的字符串,设置content-type为application/x-www-form-urlencoded - json格式:也就是
json格式的字符串,设置content-type为application/json
1.使用form编码格式的字符串,向服务器提交数据
<!DOCTYPE html>
<html lang="en"><head><meta charset="UTF-8" /><meta http-equiv="X-UA-Compatible" content="IE=edge" /><meta name="viewport" content="width=device-width, initial-scale=1.0" /><title>Document</title></head><body><button>POST</button><script>var btn = document.querySelector("button");btn.onclick = function () {var xhr = new XMLHttpRequest();xhr.open("POST", "http://localhost:3000/users", true); // 创建一个POST请求xhr.setRequestHeader("content-type", "application/x-www-form-urlencoded"); // 设置请求头的content-type属性值为form编码data = "name=Michael&age=18"; // form编码格式的数据xhr.send(data); // 发送数据xhr.onload = function () {if (/^2\\d{2}$/.test(xhr.status)) {console.log(JSON.parse(xhr.responseText)); } else {console.log(xhr.status, xhr.statusText);console.log(xhr.responseText);}};};</script></body>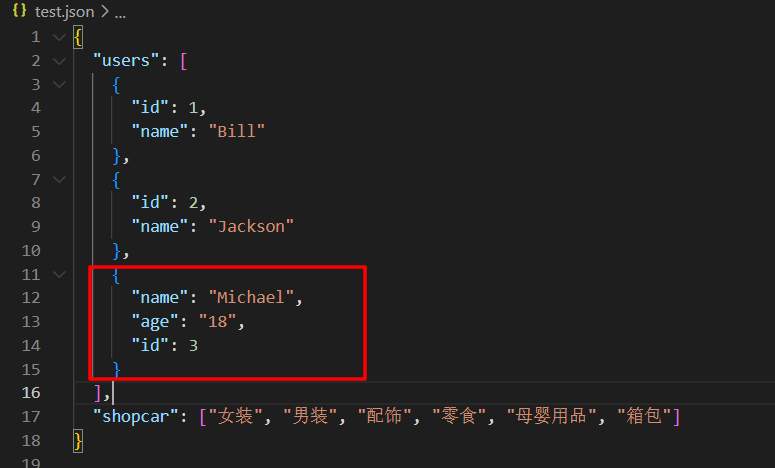
</html>打开页面并点击POST按钮,运行结束后,发现test.json文件新增了刚刚提交的数据
2.使用json格式的字符串,向服务器提交数据
<!DOCTYPE html>
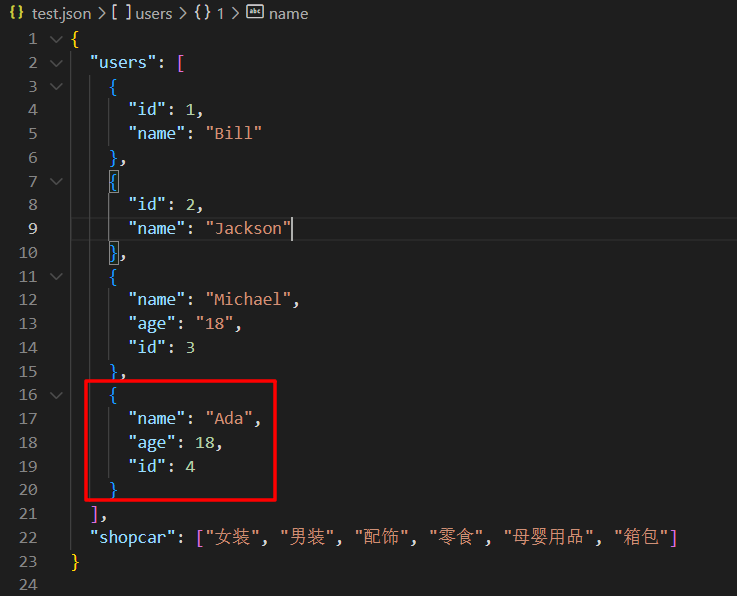
<html lang="en"><head><meta charset="UTF-8" /><meta http-equiv="X-UA-Compatible" content="IE=edge" /><meta name="viewport" content="width=device-width, initial-scale=1.0" /><title>Document</title></head><body><button>POST</button><script>var btn = document.querySelector("button");btn.onclick = function () {var xhr = new XMLHttpRequest();xhr.open("POST", "http://localhost:3000/users", true); // 创建一个POST请求xhr.setRequestHeader("content-type", "application/json"); // 设置请求头的content-type属性值为json格式data = JSON.stringify({ name: "Ada", age: 18 }); // json格式的字符串xhr.send(data); // 发送数据xhr.onload = function () {if (/^2\\d{2}$/.test(xhr.status)) {console.log(JSON.parse(xhr.responseText));} else {console.log(xhr.status, xhr.statusText);console.log(xhr.responseText);}};};</script></body>
</html>打开页面并点击POST按钮,运行结束后,发现test.json文件新增了刚刚提交的数据
3.5.3 PUT请求
PUT请求:用于更新服务器的数据,覆盖式地更新数据,也就是更新全部数据。
<!DOCTYPE html>
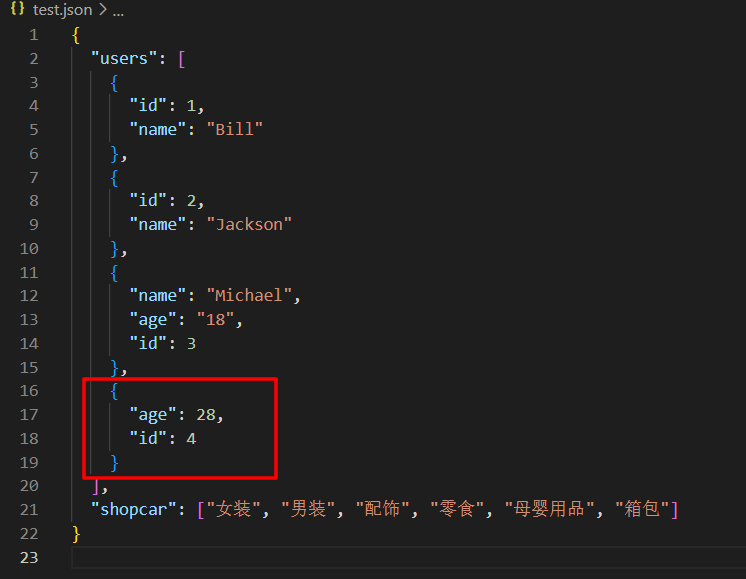
<html lang="en"><head><meta charset="UTF-8" /><meta http-equiv="X-UA-Compatible" content="IE=edge" /><meta name="viewport" content="width=device-width, initial-scale=1.0" /><title>Document</title></head><body><button>PUT</button><script>var btn = document.querySelector("button");btn.onclick = function () {var xhr = new XMLHttpRequest();xhr.open("PUT", "http://localhost:3000/users/4", true); // 创建一个PUT请求,请求更新id为4的数据xhr.setRequestHeader("content-type", "application/json"); // 设置请求头的content-type属性值为json格式data = JSON.stringify({ age: 28 }); // 更新agexhr.send(data); // 发送数据xhr.onload = function () {if (/^2\\d{2}$/.test(xhr.status)) {console.log(JSON.parse(xhr.responseText));} else {console.log(xhr.status, xhr.statusText);console.log(xhr.responseText);}};};</script></body>
</html>注:更新的路径要写准确指定,
http://localhost:3000/users/4中的/4表示id为4的数据
打开页面并点击PUT按钮,运行结束后,发现test.json文件更新了刚刚发送的age数据,而且是覆盖式更新,以前的name属性数据被覆盖不见了。
3.5.4 PATCH请求
PATCH请求:用于更新服务器的数据,补丁式地更新数据,也就是更新部分数据。
<!DOCTYPE html>
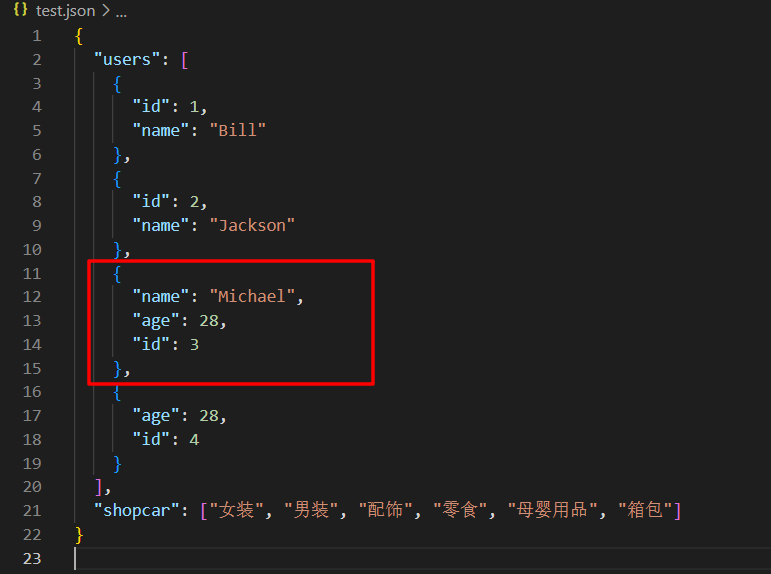
<html lang="en"><head><meta charset="UTF-8" /><meta http-equiv="X-UA-Compatible" content="IE=edge" /><meta name="viewport" content="width=device-width, initial-scale=1.0" /><title>Document</title></head><body><button>PATCH</button><script>var btn = document.querySelector("button");btn.onclick = function () {var xhr = new XMLHttpRequest();xhr.open("PATCH", "http://localhost:3000/users/3", true); // 创建一个PATCH请求,请求更新id为3的数据xhr.setRequestHeader("content-type", "application/json"); // 设置请求头的content-type属性值为json格式data = JSON.stringify({ age: 28 }); // 更新agexhr.send(data); // 发送数据xhr.onload = function () {if (/^2\\d{2}$/.test(xhr.status)) {console.log(JSON.parse(xhr.responseText));} else {console.log(xhr.status, xhr.statusText);console.log(xhr.responseText);}};};</script></body>
</html>打开页面并点击PATCH按钮,运行结束后,发现test.json文件更新了刚刚发送的age数据,而且是补丁式更新,以前的name属性数据不会被覆盖,依然保持原样。
3.5.5 DELETE请求
DELETE请求:用于删除服务器的数据。
<!DOCTYPE html>
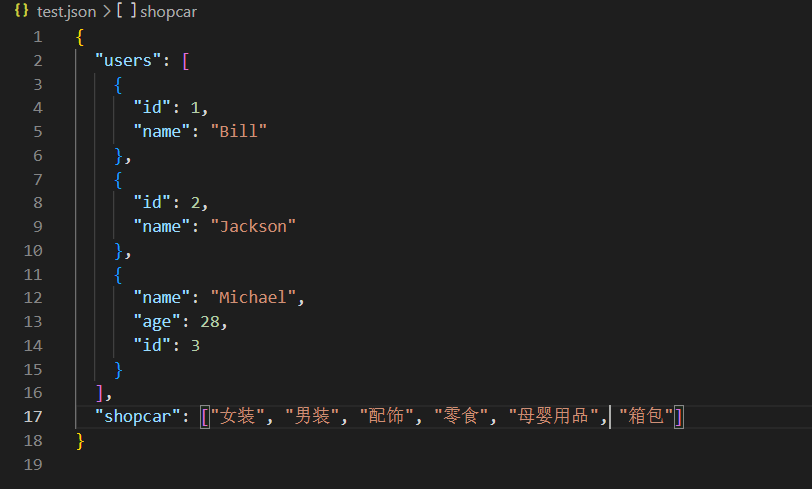
<html lang="en"><head><meta charset="UTF-8" /><meta http-equiv="X-UA-Compatible" content="IE=edge" /><meta name="viewport" content="width=device-width, initial-scale=1.0" /><title>Document</title></head><body><button>DELETE</button><script>var btn = document.querySelector("button");btn.onclick = function () {var xhr = new XMLHttpRequest();xhr.open("DELETE", "http://localhost:3000/users/4", true); // 创建一个DELETE请求,请求删除id为4的数据xhr.send(); // 发送请求xhr.onload = function () {if (/^2\\d{2}$/.test(xhr.status)) {console.log(JSON.parse(xhr.responseText));} else {console.log(xhr.status, xhr.statusText);console.log(xhr.responseText);}};};</script></body>
</html>打开页面并点击DELETE按钮,运行结束后,发现test.json文件中id为4的数据已被删除。
4. Fetch
注:要学习Fetch,需要先学习ES6中的Promise以及async和await.
使用Fetch进行前后端交互,是通过fetch() 方法发起获取资源的请求,它返回一个 promise,这个 promise 会在请求响应后被 resolve,并传回 Response 对象。
4.1 Fetch API
Fetch API包括以下部分:
Headers接口:表示请求头或响应头的信息,允许对 HTTP 请求和响应头执行各种操作。Request接口:表示资源请求Response接口:表示请求的响应数据fetch()方法:用于发起获取资源的请求
Headers对象的方法:
| 方法 | 描述 |
|---|---|
Headers.append() |
给现有的header添加一个值 |
Headers.set() |
替换现有的header的值 |
Headers.get() |
获取指定header的全部值 |
Headers.delete() |
删除指定header |
Request对象的属性:
| 属性 | 描述 |
|---|---|
Request.method |
请求方式 |
Request.url |
请求的 URL |
Request.headers |
请求相关的Headers对象 |
Request.credentials |
请求的证书 |
Request.mode |
请求的模式 |
Request.cache |
请求的缓存模式 |
Response对象的属性:
| 属性 | 描述 |
|---|---|
Response.headers |
Response所关联的Headers对象 |
Response.status |
Response的状态码 |
Response.statusText |
与该Response状态码一致的状态信息 |
Response.url |
Response的URL |
Response对象实例的方法:
| 方法 | 描述 |
|---|---|
Response.json() |
将响应体解析为json对象 |
Response.text() |
将响应体解析为字符串 |
Response.formData() |
将响应体解析为fromData表单对象 |
Response.blob() |
将响应体解析为二进制blob对象 |
Response.arrayBuffer() |
将响应体解析为二进制arrayBuffer对象 |
fetch()方法:
Promise<Response> fetch(input[, init]);
input:定义要获取的资源,这可能是:- 一个字符串,包含要获取资源的 URL
- 一个request对象
init:一个配置项对象,包括所有对请求的设置。可选的参数有:method: 请求方式headers: 请求头信息body: 请求体信息mode: 请求的模式credentials: 请求的证书cache: 请求的缓存模式redirect: 如何处理重定向模式
4.2 使用Fetch完成请求
依然是使用json-server模拟服务器的情况下,来模拟GET、POST、PUT、PATCH、DELETE,这5种常见的请求方式。
test.json的内容为3.4.2节中的内容,在test.json所在路径下,打开cmd输入以下命令启动json-server:
json-server test.json --watch

4.2.1 GET请求
由于请求是异步的,所以此处使用async和await。
<!DOCTYPE html>
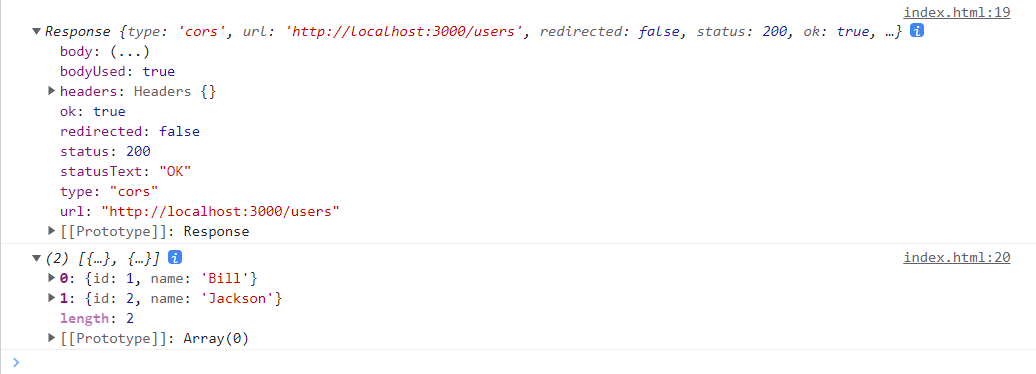
<html lang="en"><head><meta charset="UTF-8" /><meta http-equiv="X-UA-Compatible" content="IE=edge" /><meta name="viewport" content="width=device-width, initial-scale=1.0" /><title>Document</title></head><body><button>GET</button><script>const btn = document.querySelector("button");btn.onclick = async function () {const resp = await fetch("http://localhost:3000/users"); // 等待拿到响应头,拿到响应头promise就完成了const data = await resp.json(); // 等待解析响应体,使用json格式解析响应体console.log(resp); // 响应头console.log(data); // 响应体};</script></body>
</html>右键点击vscode-preview-server:Launch on browser,打开页面并点击GET按钮,运行结果如下:
以下两行代码,还可以精简为一行:
const resp = await fetch("http://localhost:3000/users"); // 等待拿到响应头,拿到响应头promise就完成了
const data = await resp.json(); // 等待解析响应体,使用json格式解析响应体
精简后:
const data = await fetch("http://localhost:3000/users").then(resp => resp.json());
4.2.2 POST请求
<!DOCTYPE html>
<html lang="en"><head><meta charset="UTF-8" /><meta http-equiv="X-UA-Compatible" content="IE=edge" /><meta name="viewport" content="width=device-width, initial-scale=1.0" /><title>Document</title></head><body><button>POST</button><script>const btn = document.querySelector("button");btn.onclick = async function () {// 请求的信息init = {method: "POST",headers: { "content-type": "application/json" },body: JSON.stringify({ name: "Ada", age: 18 })};// 发送请求const data = await fetch("http://localhost:3000/users", init).then(resp => resp.json());console.log(data);};</script></body>
</html>
打开页面并点击POST按钮,运行结果如下:

4.2.3 PUT请求
<!DOCTYPE html>
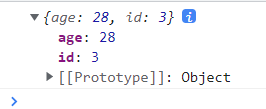
<html lang="en"><head><meta charset="UTF-8" /><meta http-equiv="X-UA-Compatible" content="IE=edge" /><meta name="viewport" content="width=device-width, initial-scale=1.0" /><title>Document</title></head><body><button>PUT</button><script>const btn = document.querySelector("button");btn.onclick = async function () {// 请求的信息init = {method: "PUT",headers: { "content-type": "application/json" },body: JSON.stringify({ age: 28 })};// 发送请求const data = await fetch("http://localhost:3000/users/3", init).then(resp => resp.json());console.log(data);};</script></body>
</html>打开页面并点击PUT按钮,运行结果如下:
4.2.4 PATCH请求
<!DOCTYPE html>
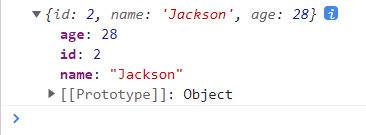
<html lang="en"><head><meta charset="UTF-8" /><meta http-equiv="X-UA-Compatible" content="IE=edge" /><meta name="viewport" content="width=device-width, initial-scale=1.0" /><title>Document</title></head><body><button>PATCH</button><script>const btn = document.querySelector("button");btn.onclick = async function () {// 请求的信息init = {method: "PATCH",headers: { "content-type": "application/json" },body: JSON.stringify({ age: 28 })};// 发送请求const data = await fetch("http://localhost:3000/users/2", init).then(resp => resp.json());console.log(data);};</script></body>
</html>打开页面并点击PATCH按钮,运行结果如下:
4.2.5 DELETE请求
<!DOCTYPE html>
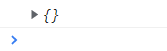
<html lang="en"><head><meta charset="UTF-8" /><meta http-equiv="X-UA-Compatible" content="IE=edge" /><meta name="viewport" content="width=device-width, initial-scale=1.0" /><title>Document</title></head><body><button>DELETE</button><script>const btn = document.querySelector("button");btn.onclick = async function () {// 请求的信息init = { method: "DELETE" };// 发送请求const data = await fetch("http://localhost:3000/users/3", init).then(resp => resp.json());console.log(data);};</script></body>
</html>打开页面并点击DELETE按钮,运行结果如下:
5. Axios
Axios:是一个基于promise封装的第三方HTTP库,可以用在浏览器和node.js中。
5.1 Axios API
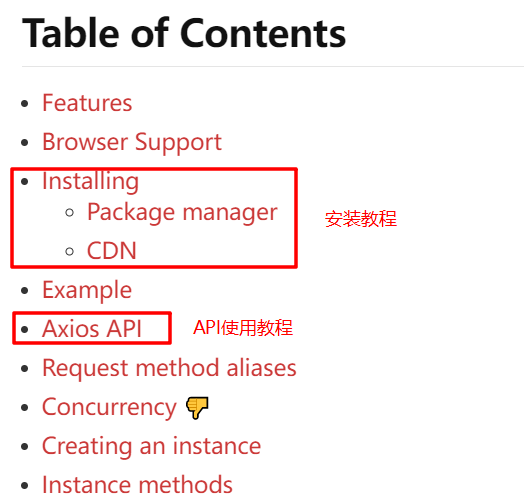
Axios网址:https://www.npmjs.com/package/axios
打开Axios网址,可以看到有一个目录,目录中包含了Axios的安装教程、API使用教程以及例子等等。
1.安装:安装方法有很多种,这里我们通过引用外部js文件的方式,引入axios库。
<script src="https://cdn.jsdelivr.net/npm/axios@1.1.2/dist/axios.min.js"></script>
2.API使用方法
axios.request(config)
axios.get(url[, config])
axios.delete(url[, config])
axios.head(url[, config])
axios.options(url[, config])
axios.post(url[, data[, config]])
axios.put(url[, data[, config]])
axios.patch(url[, data[, config]])
其中config配置可参考以下内容:
// Send a POST request
axios({method: 'post',url: '/user/12345',data: {firstName: 'Fred',lastName: 'Flintstone'}
});
5.2 使用Axios完成请求
依然是使用json-server模拟服务器的情况下,来模拟GET、POST、PUT、PATCH、DELETE,这5种常见的请求方式。
test.json的内容为3.4.2节中的内容,在test.json所在路径下,打开cmd输入以下命令启动json-server:
json-server test.json --watch
1.GET请求
<!DOCTYPE html>
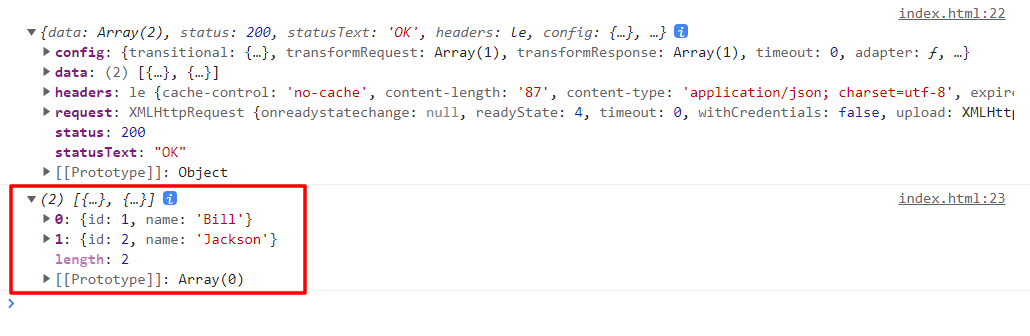
<html lang="en"><head><meta charset="UTF-8" /><meta http-equiv="X-UA-Compatible" content="IE=edge" /><meta name="viewport" content="width=device-width, initial-scale=1.0" /><title>Document</title><!-- 引入axios库 --><script src="https://cdn.jsdelivr.net/npm/axios@1.1.2/dist/axios.min.js"></script></head><body><button>GET</button><script>const btn = document.querySelector("button");btn.onclick = async function () {await axios.get("http://localhost:3000/users") // 发送GET请求.then(res => {console.log(res); // 响应的全部内容console.log(res.data); // 响应的数据内容}).catch(err => {console.log(err);});};</script></body>
</html>右键点击vscode-preview-server:Launch on browser,打开页面并点击GET按钮,运行结果如下:
如果要发送带参数的GET请求,可以修改axios.get()为以下内容:
// 获取id=1的数据
axios.get("http://localhost:3000/users", {params: {id: 1 }
});
2.POST请求
<!DOCTYPE html>
<html lang="en"><head><meta charset="UTF-8" /><meta http-equiv="X-UA-Compatible" content="IE=edge" /><meta name="viewport" content="width=device-width, initial-scale=1.0" /><title>Document</title><!-- 引入axios库 --><script src="https://cdn.jsdelivr.net/npm/axios@1.1.2/dist/axios.min.js"></script></head><body><button>POST</button><script>const btn = document.querySelector("button");btn.onclick = async function () {await axios.post("http://localhost:3000/users", { name: "Ada", age: 18 }) // 发送POST请求.then(res => {console.log(res.data);}).catch(err => {console.log(err);});};</script></body>
</html>如果要使用form编码的格式,可以修改axios.post()为以下内容:
axios.post("http://localhost:3000/users", "name=Michael&age=18")
3.PUT请求
<!DOCTYPE html>
<html lang="en"><head><meta charset="UTF-8" /><meta http-equiv="X-UA-Compatible" content="IE=edge" /><meta name="viewport" content="width=device-width, initial-scale=1.0" /><title>Document</title><!-- 引入axios库 --><script src="https://cdn.jsdelivr.net/npm/axios@1.1.2/dist/axios.min.js"></script></head><body><button>PUT</button><script>const btn = document.querySelector("button");btn.onclick = async function () {await axios.put("http://localhost:3000/users/3", { age: 28 }) // 发送PUT请求.then(res => {console.log(res.data);}).catch(err => {console.log(err);});};</script></body>
</html>
4.PATCH请求
<!DOCTYPE html>
<html lang="en"><head><meta charset="UTF-8" /><meta http-equiv="X-UA-Compatible" content="IE=edge" /><meta name="viewport" content="width=device-width, initial-scale=1.0" /><title>Document</title><!-- 引入axios库 --><script src="https://cdn.jsdelivr.net/npm/axios@1.1.2/dist/axios.min.js"></script></head><body><button>PATCH</button><script>const btn = document.querySelector("button");btn.onclick = async function () {await axios.patch("http://localhost:3000/users/2", { age: 28 }) // 发送PATCH请求.then(res => {console.log(res.data);}).catch(err => {console.log(err);});};</script></body>
</html>
5.DELETE请求
<!DOCTYPE html>
<html lang="en"><head><meta charset="UTF-8" /><meta http-equiv="X-UA-Compatible" content="IE=edge" /><meta name="viewport" content="width=device-width, initial-scale=1.0" /><title>Document</title><!-- 引入axios库 --><script src="https://cdn.jsdelivr.net/npm/axios@1.1.2/dist/axios.min.js"></script></head><body><button>DELETE</button><script>const btn = document.querySelector("button");btn.onclick = async function () {await axios.delete("http://localhost:3000/users/3") // 发送DELETE请求.then(res => {console.log(res.data);}).catch(err => {console.log(err);});};</script></body>
</html>