Python人工智能之混合高斯模型运动目标检测详解分析

搬运工项目,换个平台纪录,之前的广告太多
运动目标检测是计算机视觉领域中的一个重要内容,其检测效果将会对目标跟踪与识别造成一定的影响,本文将介绍用Python来进行混合高斯模型运动目标检测,感兴趣的朋友快来看看吧
【人工智能项目】混合高斯模型运动目标检测
本次工作主要对视频中运动中的人或物的边缘背景进行检测。
那么走起来瓷!!!
原视频
在这里插入图片描述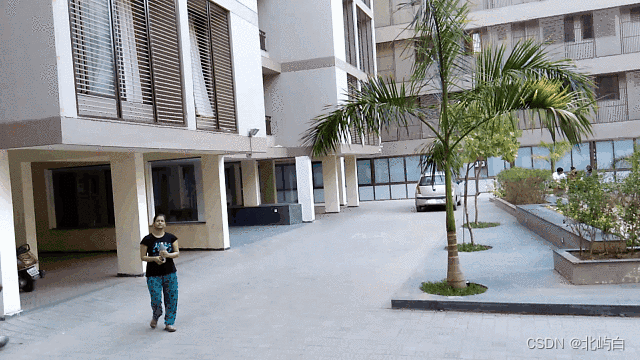
高斯算法提取工作
import cv2
import numpy as np# 高斯算法
class gaussian:def __init__(self):self.mean = np.zeros((1, 3))self.covariance = 0self.weight = 0;self.Next = Noneself.Previous = Noneclass Node:def __init__(self):self.pixel_s = Noneself.pixel_r = Noneself.no_of_components = 0self.Next = Noneclass Node1:def __init__(self):self.gauss = Noneself.no_of_comp = 0self.Next = Nonecovariance0 = 11.0
def Create_gaussian(info1, info2, info3):ptr = gaussian()if (ptr is not None):ptr.mean[1, 1] = info1ptr.mean[1, 2] = info2ptr.mean[1, 3] = info3ptr.covariance = covariance0ptr.weight = 0.002ptr.Next = Noneptr.Previous = Nonereturn ptrdef Create_Node(info1, info2, info3):N_ptr = Node()if (N_ptr is not None):N_ptr.Next = NoneN_ptr.no_of_components = 1N_ptr.pixel_s = N_ptr.pixel_r = Create_gaussian(info1, info2, info3)return N_ptrList_node = []
def Insert_End_Node(n):List_node.append(n)List_gaussian = []
def Insert_End_gaussian(n):List_gaussian.append(n)def Delete_gaussian(n):List_gaussian.remove(n);class Process:def __init__(self, alpha, firstFrame):self.alpha = alphaself.background = firstFramedef get_value(self, frame):self.background = frame * self.alpha + self.background * (1 - self.alpha)return cv2.absdiff(self.background.astype(np.uint8), frame)def denoise(frame):frame = cv2.medianBlur(frame, 5)frame = cv2.GaussianBlur(frame, (5, 5), 0)return framecapture = cv2.VideoCapture('1.mp4')
ret, orig_frame = capture.read( )
if ret is True:value1 = Process(0.1, denoise(orig_frame))run = True
else:run = Falsewhile (run):ret, frame = capture.read()value = False;if ret is True:cv2.imshow('input', denoise(frame))grayscale = value1.get_value(denoise(frame))ret, mask = cv2.threshold(grayscale, 15, 255, cv2.THRESH_BINARY)cv2.imshow('mask', mask)key = cv2.waitKey(10) & 0xFFelse:breakif key == 27:breakif value == True:orig_frame = cv2.resize(orig_frame, (340, 260), interpolation=cv2.INTER_CUBIC)orig_frame = cv2.cvtColor(orig_frame, cv2.COLOR_BGR2GRAY)orig_image_row = len(orig_frame)orig_image_col = orig_frame[0]bin_frame = np.zeros((orig_image_row, orig_image_col))value = []for i in range(0, orig_image_row):for j in range(0, orig_image_col):N_ptr = Create_Node(orig_frame[i][0], orig_frame[i][1], orig_frame[i][2])if N_ptr is not None:N_ptr.pixel_s.weight = 1.0Insert_End_Node(N_ptr)else:print("error")exit(0)nL = orig_image_rownC = orig_image_coldell = np.array((1, 3));mal_dist = 0.0;temp_cov = 0.0;alpha = 0.002;cT = 0.05;cf = 0.1;cfbar = 1.0 - cf;alpha_bar = 1.0 - alpha;prune = -alpha * cT;cthr = 0.00001;var = 0.0muG = 0.0;muR = 0.0;muB = 0.0;dR = 0.0;dB = 0.0;dG = 0.0;rval = 0.0;gval = 0.0;bval = 0.0;while (1):duration3 = 0.0;count = 0;count1 = 0;List_node1 = List_node;counter = 0;duration = cv2.getTickCount( );for i in range(0, nL):r_ptr = orig_frame[i]b_ptr = bin_frame[i]for j in range(0, nC):sum = 0.0;sum1 = 0.0;close = False;background = 0;rval = r_ptr[0][0];gval = r_ptr[0][0];bval = r_ptr[0][0];start = List_node1[counter].pixel_s;rear = List_node1[counter].pixel_r;ptr = start;temp_ptr = None;if (List_node1[counter].no_of_component > 4):Delete_gaussian(rear);List_node1[counter].no_of_component = List_node1[counter].no_of_component - 1;for k in range(0, List_node1[counter].no_of_component):weight = List_node1[counter].weight;mult = alpha / weight;weight = weight * alpha_bar + prune;if (close == False):muR = ptr.mean[0];muG = ptr.mean[1];muB = ptr.mean[2];dR = rval - muR;dG = gval - muG;dB = bval - muB;var = ptr.covariance;mal_dist = (dR * dR + dG * dG + dB * dB);if ((sum < cfbar) and (mal_dist < 16.0 * var * var)):background = 255;if (mal_dist < (9.0 * var * var)):weight = weight + alpha;if mult < 20.0 * alpha:mult = mult;else:mult = 20.0 * alpha;close = True;ptr.mean[0] = muR + mult * dR;ptr.mean[1] = muG + mult * dG;ptr.mean[2] = muB + mult * dB;temp_cov = var + mult * (mal_dist - var);if temp_cov < 5.0:ptr.covariance = 5.0else:if (temp_cov > 20.0):ptr.covariance = 20.0else:ptr.covariance = temp_cov;temp_ptr = ptr;if (weight < -prune):ptr = Delete_gaussian(ptr);weight = 0;List_node1[counter].no_of_component = List_node1[counter].no_of_component - 1;else:sum += weight;ptr.weight = weight;ptr = ptr.Next;if (close == False):ptr = gaussian( );ptr.weight = alpha;ptr.mean[0] = rval;ptr.mean[1] = gval;ptr.mean[2] = bval;ptr.covariance = covariance0;ptr.Next = None;ptr.Previous = None;Insert_End_gaussian(ptr);List_gaussian.append(ptr);temp_ptr = ptr;List_node1[counter].no_of_components = List_node1[counter].no_of_components + 1;ptr = start;while (ptr != None):ptr.weight = ptr.weight / sum;ptr = ptr.Next;while (temp_ptr != None and temp_ptr.Previous != None):if (temp_ptr.weight <= temp_ptr.Previous.weight):break;else:next = temp_ptr.Next;previous = temp_ptr.Previous;if (start == previous):start = temp_ptr;previous.Next = next;temp_ptr.Previous = previous.Previous;temp_ptr.Next = previous;if (previous.Previous != None):previous.Previous.Next = temp_ptr;if (next != None):next.Previous = previous;else:rear = previous;previous.Previous = temp_ptr;temp_ptr = temp_ptr.Previous;List_node1[counter].pixel_s = start;List_node1[counter].pixel_r = rear;counter = counter + 1;capture.release()
cv2.destroyAllWindows()
createBackgroundSubtractorMOG2
背景减法 (BS) 是一种常用且广泛使用的技术,用于通过使用静态相机生成前景蒙版(即,包含属于场景中运动物体的像素的二值图像)。
顾名思义,BS 计算前景蒙版,在当前帧和背景模型之间执行减法运算,其中包含场景的静态部分,或者更一般地说,根据观察到的场景的特征,可以将所有内容视为背景。
在这里插入图片描述
背景建模包括两个主要步骤:
后台初始化;
背景更新。
在第一步中,计算背景的初始模型,而在第二步中,更新该模型以适应场景中可能的变化。
import cv2#构造VideoCapture对象
cap = cv2.VideoCapture('1.mp4')# 创建一个背景分割器
# createBackgroundSubtractorMOG2()函数里,可以指定detectShadows的值
# detectShadows=True,表示检测阴影,反之不检测阴影。默认是true
fgbg  = cv2.createBackgroundSubtractorMOG2()
while True :ret, frame = cap.read() # 读取视频fgmask = fgbg.apply(frame) # 背景分割cv2.imshow('frame', fgmask) # 显示分割结果if cv2.waitKey(100) & 0xff == ord('q'):break
cap.release()
cv2.destroyAllWindows()