Vue全家桶

作为后端对vue学习完的快速总结
目录
1.vue-cli
2 vuex
3 axios
4 router
vue-cli
- vue-cli 3 是基于webpack 4 打造的
- vue-cli 2 还是 webpack 3
- webpack是基于node.js的,所以我们在安装脚手架前必须安装node
安装node.js(应用商店或者官网)

1.安装vue脚手架
npm install -g @vue/cli
如果很慢可以安装淘宝镜像npm install -g cnpm --registry=http://registry.npm.taobao.org
2.验证安装成功
vue -V
3.创建工程
vue ui //ui界面方式创建
vue create 项目名//命令行初始化创建
接下来会跳出选项
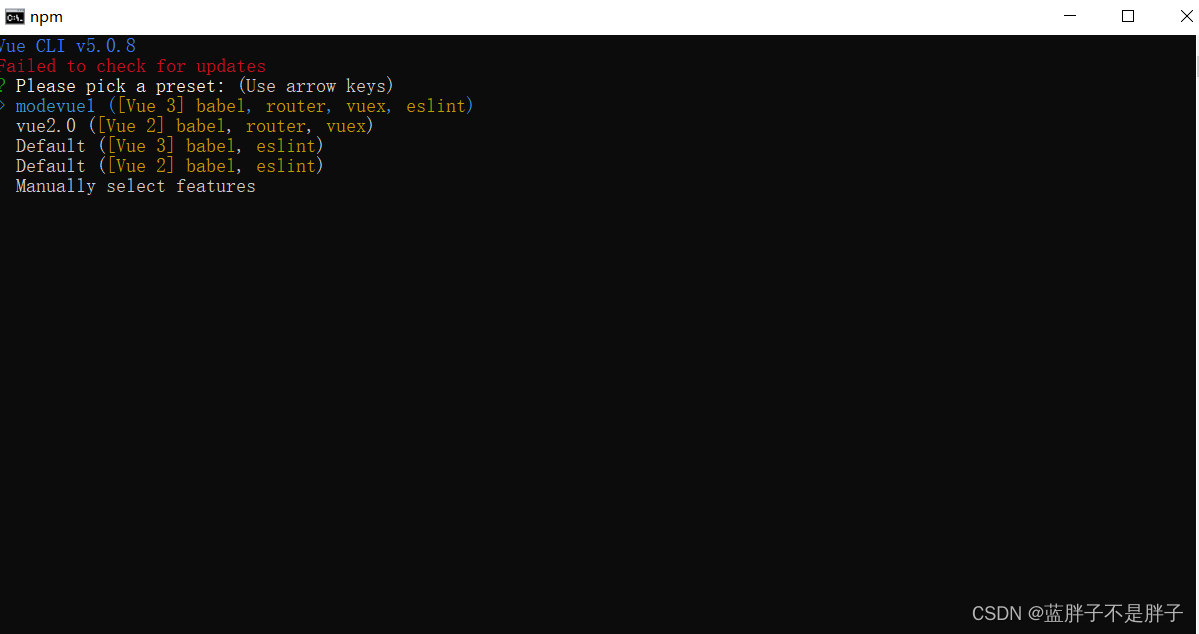
选择默认的几个就好,router,vuex,babel
Vuex实现全局组件的数据通信
Vue是一个将主组件挂载到容器,然后通过主组件管理其他组件的结构工程
父组件app向注册的子组件通信是通过
:参数名='参数' 发送 (可以v-bind或者:发送解析的参数)
子组件通过props配置项接受
父组件
<template><div class="container">
<search :name='name' />
<!--<list/>--><router-view></router-view></div></template>
<script>
// 这样引入会有检查 如果css中出现找不到的样式(第三方)会报错
// import './assets/bootstrap.css'
// 组件化开发中一般app主要容器存放容器组件
import countdemo1 from "@/components/count/countdemo1";
import search from "@/components/search";
import list from "@/components/list";
import person from "@/components/count/person";
export default {name:"App",components: {search,list,countdemo1,person},
data(){
return:{
name:'组件'
}
}}
</script>
子组件search
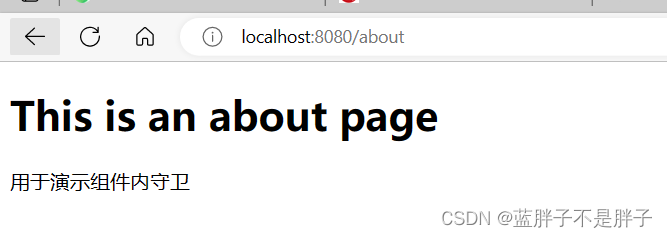
<template><div class="about"><h1>This is an about page</h1><p>用于演示组件内守卫</p></div>
</template>
<script>
export default {name:'About',
props:[
name:{
type:string,
required:false, //不是必须的
default:'没有接受到参数的默认值'
}
],
或者简写
props:{
name:String}},</script>
这种方式传递的参数只可读不可改,需要数据来接受而同级组件和儿父组件通信需要用到自定义事件和事件总线 较为麻烦,为此建议使用vuex实现数据通信
之前使用全局时间总线通信
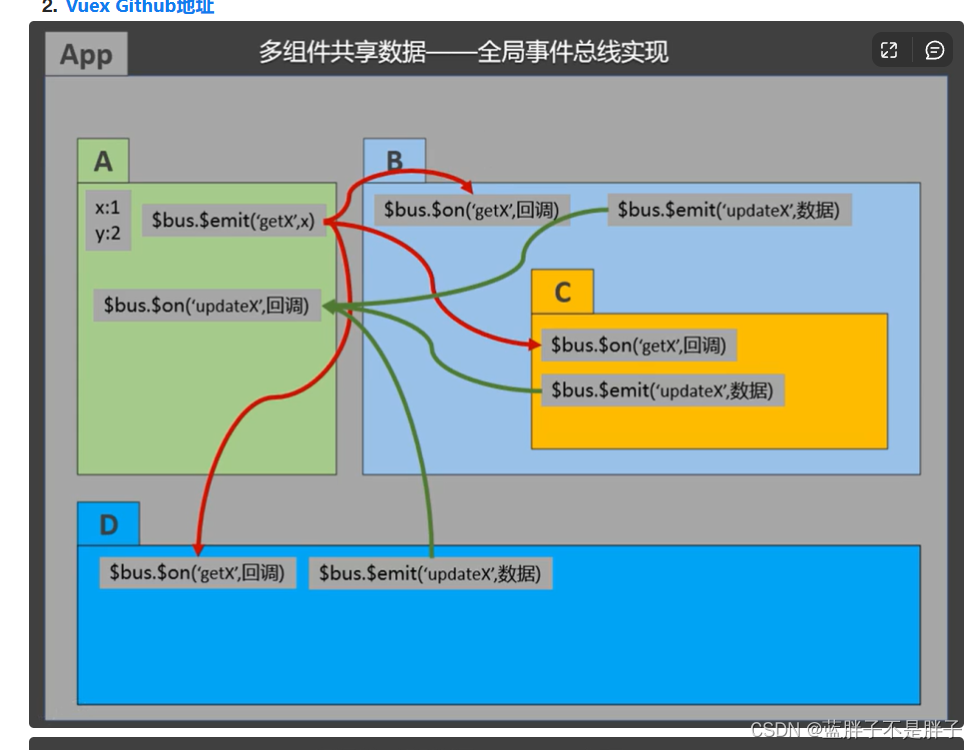
这样各个组件的数据线互相影响很冗杂 所以独立出一个共享数据区,由vuex管理,实现各个组件的通信
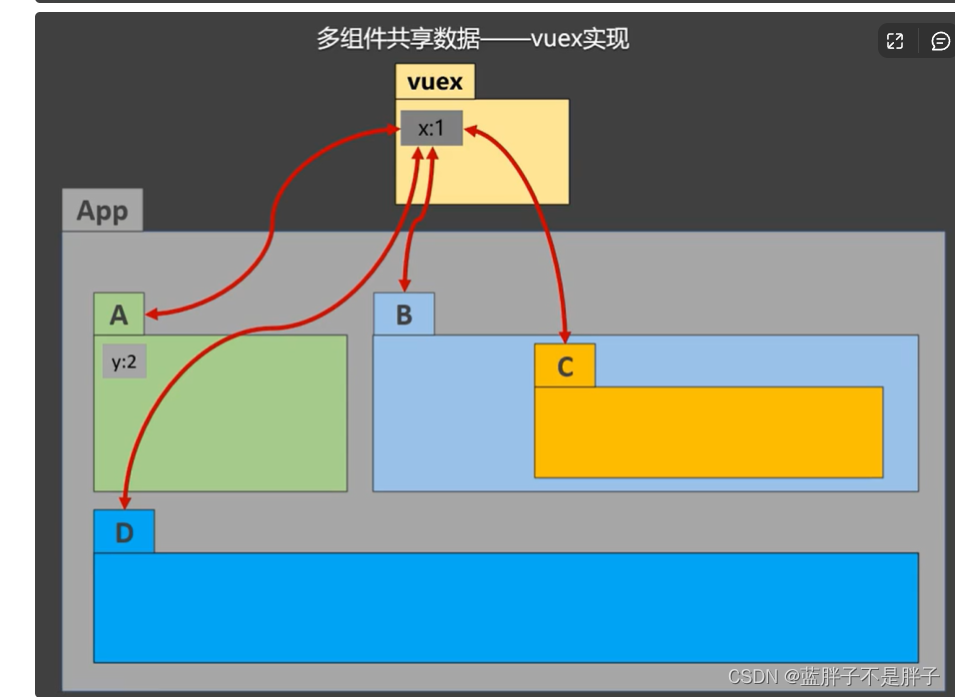
适用于多个组件需要依赖一个数据,根据数据转改更改显示
vuex工作流程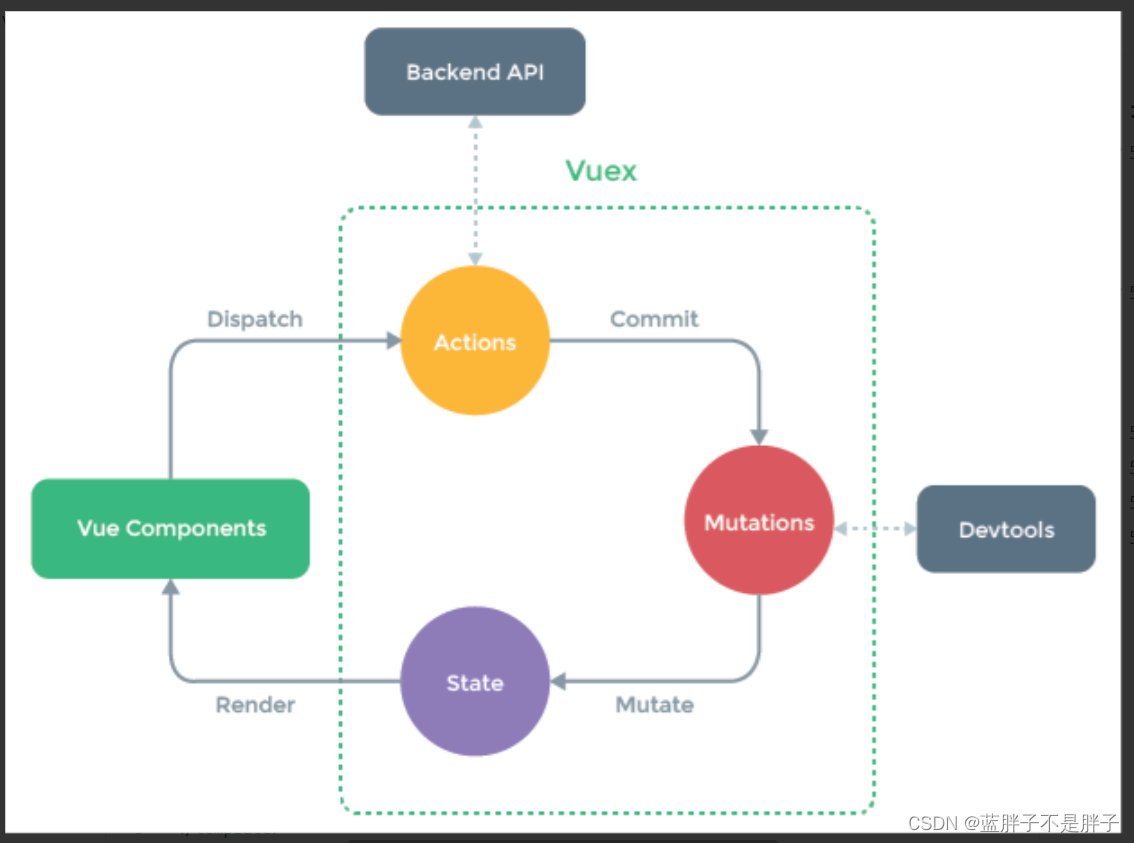
类似mvc思想 从组件收到api请求,交给action(类似controller),action调用mutation(类似service
数据更改),state(类似模型层存放数据)
解析vue cli 创建的vuex文件(位于store目录下index.js,vuex的实现是由store实现)
import Vue from 'vue'
import Vuex from 'vuex'Vue.use(Vuex)export default new Vuex.Store({state: {},getters: {//类似vm配置项的computed计算属性 ,将用于state中的属性进行加工},mutations: {//类似后端的service层进行数据更改},actions: {//类似controller层,用来处理各种各样的逻辑,选择不同的mutation},modules: {//后期用于分类}
})
比如同级多个组件交互求和,其中的一个组件提供按钮 操作另外的组件的数据
根据vuex的操作流程,首先在组件绑定事件dispatch给actions,在由actions commit提交给mutation完成对state中数据的操作,而以上的操作项都是被Vuex封装在store目录下的index.js页面的
首先在index.js中定义state
state:{sum:5}
展示组件获取数据
<template>
{{sum}}
</template><script>computed:{sum(){return this.$store.state.sum},}</script>
需要注意的是,state的数据使用定义在computed的数据项来接受,不能使用data配置项接受,data数据项在页面初始化定义参数,一旦定义不会二次初始化,vuex的数据发生改变无法第一时间获取,只能刷新
数据有了,需要定义action(类似controller),然后组件通过dispatch来进行action
匹配,查看dispatch的源码

type:值得是传递的哪个action
payload:payload是一种以JSON格式进行数据传输的一种方式
所以定义一个action ,组件传递一个参数
按键组件
<template><button @click="addvalue">点击加</button>
</template><script>
export default {name: "demo1",methods:{addvalue(){this.$store.dispatch('add',1)}}
}
</script>
定义action
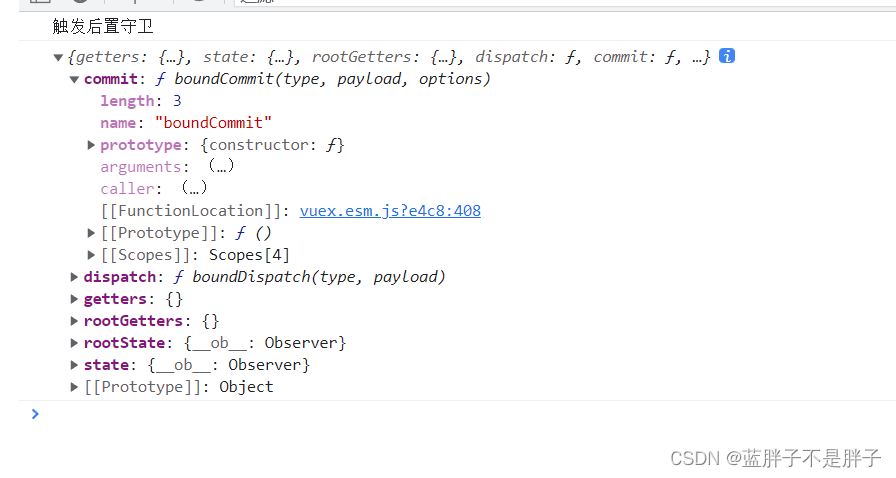
actions: {// 用于响应组件中的动作 类似controlleradd:function (context,n){// 第一个参数肯定是context对象,传递的参数定是第二个参数console.log(context)console.log(n)将数据操作提交给mutation mutation 进行数据操作// context.commit("addvalue",n)},
所以conntext参数是一个建议化的vuex对象其中包含了store包含的各个部分方便进行复用
接下来流程到了下一步,action提交给了mutation 进行数据操作
context.commit("addvalue",n)
那么在mutation就应该配置对应方法回调
mutations:{addvalue(state,n1){执行数据操作
console.log(state)state.sum+=n1}},
有俩个参数,由于mutation是对数据进行操作的,第一个参数就是state,第二个参数是从action接受到的参数
输出state
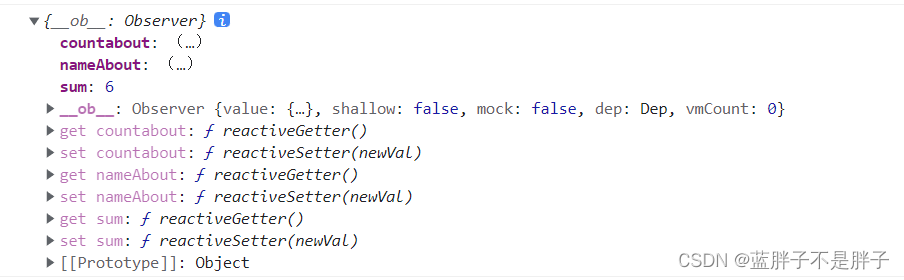
包含了定义的数据和数据对应的设置器访问器
getters配置项
当vuex的一些数据是根据组件操作的数据或者传递的数据进行加工(时间搓,枚举等),getter配置项的功能和conputed类似
定义getters 配置项
getters:{computedsum(state){return state.sum*10}},
显示数据的组件获取getters中的数据
computed:{sum(){return this.$store.state.sum},bigsum(){return this.$store.getters.computedsum},}
此时组件之前的交互已经完成
但是如果操作的数据很多,就要定义很多的mutations,actions,state,getters,并且相当冗杂,所以vuex还有一个配置项用于对各自数据的配置进行分类操作
modules
首先,index.js同目录定义一份通用数据js文件
定义并且导出俩个vuex数据源
export  const  name={namespaced:true,state: { persons:['张三','李四','炎龙','地虎']},actions: {},mutations: {namesadd(s,name){// 放最后一位console.log('已经被调用')s.persons.push(name)// 放第一位// s.persons.unshift(name)},}
}
export const countabout={namespaced:true,state:{sum:0,school:"工商学院",subject:"前端",},getters: {bigsum(state){return state.sum*10},bigschool(state){return state.school+"处理过"}},actions: {add:function (context,n){// 第一个参数肯定是context对象,传递的参数一定是第二,第三部分console.log(context)context.commit("addvalue",n)},dec(ct,value){ct.commit('decriment',value)},oddofadd(ct,va){if(ct.state.sum%2!=0){ct.commit('addvalue',va)console.log(ct)console.log(this)}else{alert('当前为偶数不能加')}},},mutations:{addvalue(stateobj,n){stateobj.sum+=n},decriment(s,value){// alert(s)s.sum-=value}}}
其中
namespaced:true //开启命名空间,让组件可以通过命名空间指定该数据的各个配置项
index.js中进行导入,此时删除其他配置项,只进行模块化配置
import Vue from 'vue'
import Vuex from 'vuex'
//定义的数据源文件
import {countabout,nameAbout} from "@/store/datasource";
// 在使用store的时时候就已经使用
Vue.use(Vuex)
// Vuex最主要的是定义store 实列化
// 配置向内容都是kv形式export default new Vuex.Store({// 用于配置分类,当每一淘数据相关的业务繁杂以后就可以进行分类modules: {countabout:countabout,nameAbout:nameAbout},})
在使用vuex的组件
使用
mapgetters,mapstates,mapactions(map后跟配置项名)等进行批量导入
<template>
<div>
<!--这样数据只能初始化一次 如果数据发生改变页面只有二次刷新才能发现-->
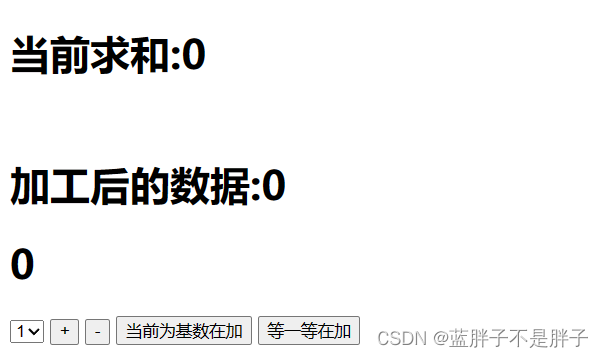
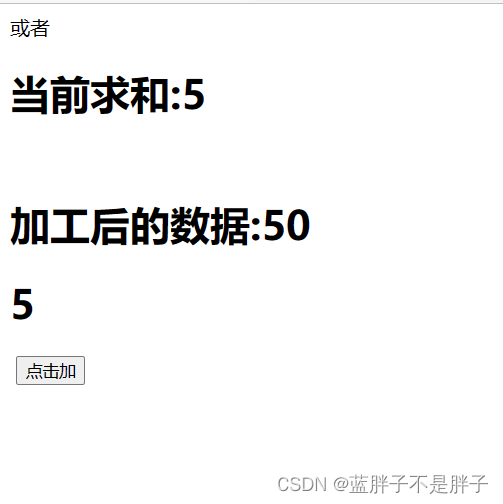
<!-- <h1>当前求和:{{sum}}</h1>-->或者<h1>当前求和:{{sum}}</h1><br><h1>加工后的数据:{{bigsum}}</h1>
<!-- <h1>我在{{school}},学习{{subject}}</h1>-->
<h1 >{{sum}}</h1>
<h1 >{{bigschool}}</h1><select v-model.number="n"><option :value="1">1</option><option :value="2">2</option><option :value="3">3</option><option :value="4">4</option></select><button @click="add(n)">+</button><button @click="incre(n)">-</button><button @click="oddofadd(n)">当前为基数在加</button><button @click="wait">等一等在加</button>
<h1>当前学生总人数{{ps.length}}</h1><demo1></demo1>
</div>
</template><script>
import demo1 from "@/views/demo1";
import {mapState,mapGetters,mapMutations,mapActions} from "vuex";export default {name: "countdemo1",data(){return{// 其实配置项的的数据都是key value形式,只是可以简写'n':1,}},components:{demo1},methods:{// 添加的对象解析为成员 mutation 生成实现方法... mapMutations('countabout',{add:'addvalue'}),...mapActions('countabout',{incre:'dec',oddofadd:'oddofadd'}),wait(){}},computed:{// 在对象写对象 就是 对象的数据打开装入该对象... mapState('countabout',['sum','school','subject']),... mapState('nameAbout',{ps:'persons'}),... mapGetters('countabout',['bigschool','bigsum'])},watch:{sum(newv,oldv){if (newv>oldv)alert("添加成功")if(oldv>newv)alert("减去成功")}}
}
</script><style scoped>
button{margin-left:5px ;
}
</style>
对其中进行解析
... 表示将批量引入的的方法,数据以对象的形式注入配置项(compoted)
map系列方法俩个参数,第一个参数指定命名空间,modules中申明的变量空间,第二个参数可以跟对象,也可以跟数组... mapState('countabout',['sum','school','subject']//数组形式statte的数据名就是computed变量名如果是对象形式如要自己定义映射),
此时就可以直接通过组件的计算属性访问vuex对应得变量,
同理
mapMutations,mapActtions也是同理
俩个参数,第一个指定命名空间,第二个参数指定对应配置的方法名,这里采用对象形式通过定义的映射名找到对应的配置项方法... mapMutations('countabout',{add:'addvalue'}),...mapActions('countabout',{incre:'dec',oddofadd:'oddofadd'}),
action中进行了逻辑处理,在调用mutations中进行数据操作,如果只是简单的数据操作事件,这里就直接引入mutastions操作了,
此时的传递参数,在调用时候手动传递
<button @click="add(n)">+</button><button @click="incre(n)">-</button>
此时vuex 就可以完成多个组件的数据通信

axios完成前后端的数据交互
axios是对ajax的二次封装,用于完成二次交互,和后端对应的get,post,put,delete相对应
main.js中引入
import axios from 'axios'
Vue.prototype.$axios = axios
发送get请求
 //请求格式类似于 http://url?id=1
this.$axios.get('/url',{params: {id:1}}).then(res=>{console.log(res.data);},err=>{console.log(err);})或者
his.$axios.get('/url'+"?id="+1).then(res=>{console.log(res.data);},err=>{console.log(err);})
发送post请求
后端用@requestbody解析json
this.$axios.post('/url',{id:1,name:"测试"}).then(res=>{console.log(res.data);},err=>{console.log(err);})
如果是表单数据可以直接写
let formdata = new FormData();
for(let key in data){formdata.append(key,data[key]);
}this.$axios.post('/url',formdata).then(res=>{console.log(res.data);
},err=>{console.log(err);
})
发送put请求
put 和post一样
this.$axios.put('/url',{id:1}).then(res=>{console.log(res.data);})
发送 delete请求
this.$axios.delete('/url',{params: {id:1//也可以采用拼接的形式}}).then(res=>{console.log(res.data);})
前后端跨域问题
在vue.config.js设置动态代理
const { defineConfig } = require('@vue/cli-service')
module.exports = defineConfig({transpileDependencies: true,devServer:{proxy:{"/api": {target: "https://api.github.com/search", // 地址1   //表示/api替换成该地址changeOrigin: true,//设置改变源,游览器查看后端地址就会被被改为前端地址pathRewrite: {"^/api": " ",    //重写api为空},}}}})
此时可以通过 完成跨域
this.$axios.get("/api/接口")
也可以在main.js中设置axios的基础url
axios.defaults.baseURL="/api"
此时直接省略接口ip
this.$axios.get("/接口")
封装工具axios类
import axios from 'axios'
//没用这理
const request = axios.create({baseURL: '/api',  // 注意!! 这里是全局统一加上了 '/api' 前缀,也就是说所有接口都会加上'/api'前缀在,页面里面写接口的时候就不要加 '/api'了,否则会出现2个'/api',类似 '/api/api/user'这样的报错,切记!!!timeout: 60000 //三分终
})// request 拦截器
//使用方式 request.   和原生axios.没区别
// 可以自请求发送前对请求做一些处理
// 比如统一加token,对请求参数统一加密
request.interceptors.request.use(config => {config.headers['Content-Type'] = 'application/json;charset=utf-8';/* 设置权限验真用于后期登录*/// config.headers['token'] = user.token;  // 设置请求头return config
}, error => {return Promise.reject(error)
});// response 拦截器
// 可以在接口响应后统一处理结果
request.interceptors.response.use(response => {let res = response.data; //这里数据进行了处理 res就单指数据// 如果是返回的文件if (response.config.responseType === 'blob') {return res}// 兼容服务端返回的字符串数据if (typeof res === 'string') {res = res ? JSON.parse(res) : res  //解析json}return res;},error => {console.log('err' + error) // for debugreturn Promise.reject(error)}
)export default request
在main.js中添加源生属性
Vue.prototype.request=request
此时就可以通过
this.request.请求方式发送请求
好处是,aixos的回调res包含了很多信息	,
后端返回的
{
code:""
data:""
message:""
}
需要会被封装在res.data部分 才能读取数据
this.$axios.post('/url',formdata).then(res=>{console.log(res.data.code);console.log(res.data.data);
}
而封装的this.request.post("/manage/uploadExcelOfImg",formData).then(res => {if (res.code == 200)this.$message.success("上传成功")})可以直接获取
router 路由视图页面的管理
路由是vuecli默认添加的组件,vue-router是Vue.js官方的路由插件,它和vue.js是深度集成的,适合用于构建单页面应用。vue本身就是单页web应用 vue-cli选择默认带有路由无序在main.js中引入
<router-view></router-view>
就是视图的展示位置,视图展示位置根据router目录下得index.js页面
import Vue from 'vue'
import VueRouter from 'vue-router'
import HomeView from '../views/HomeView.vue'Vue.use(VueRouter)const routes = [{path: '/',name: 'home',component: HomeView},{path: '/about',name: 'about',// route level code-splitting// this generates a separate chunk (about.[hash].js) for this route// which is lazy-loaded when the route is visited.component: () => import(/* webpackChunkName: "about" */ '../views/AboutView.vue')}
]const router = new VueRouter({mode: 'history',base: process.env.BASE_URL,routes
})export default router
其中path是路径名,name路由的名字,导出的router中mode分为hash,和history
路由实在一个页面的区域部分异步展示(不会刷新整个页面,只会局部刷新),那么在这个区域再次展示路由就是涉及二级路由
在对应路由下,children属性实现多级路由
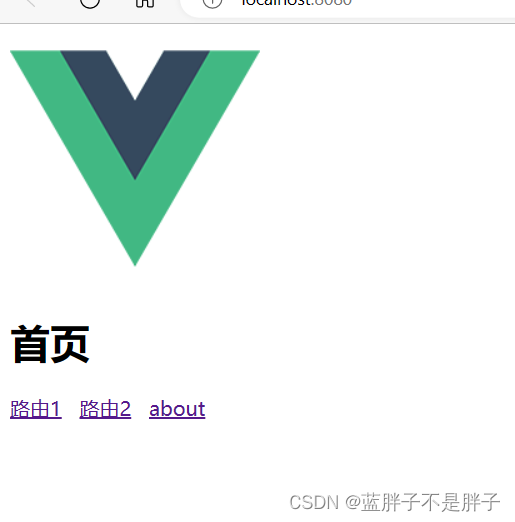
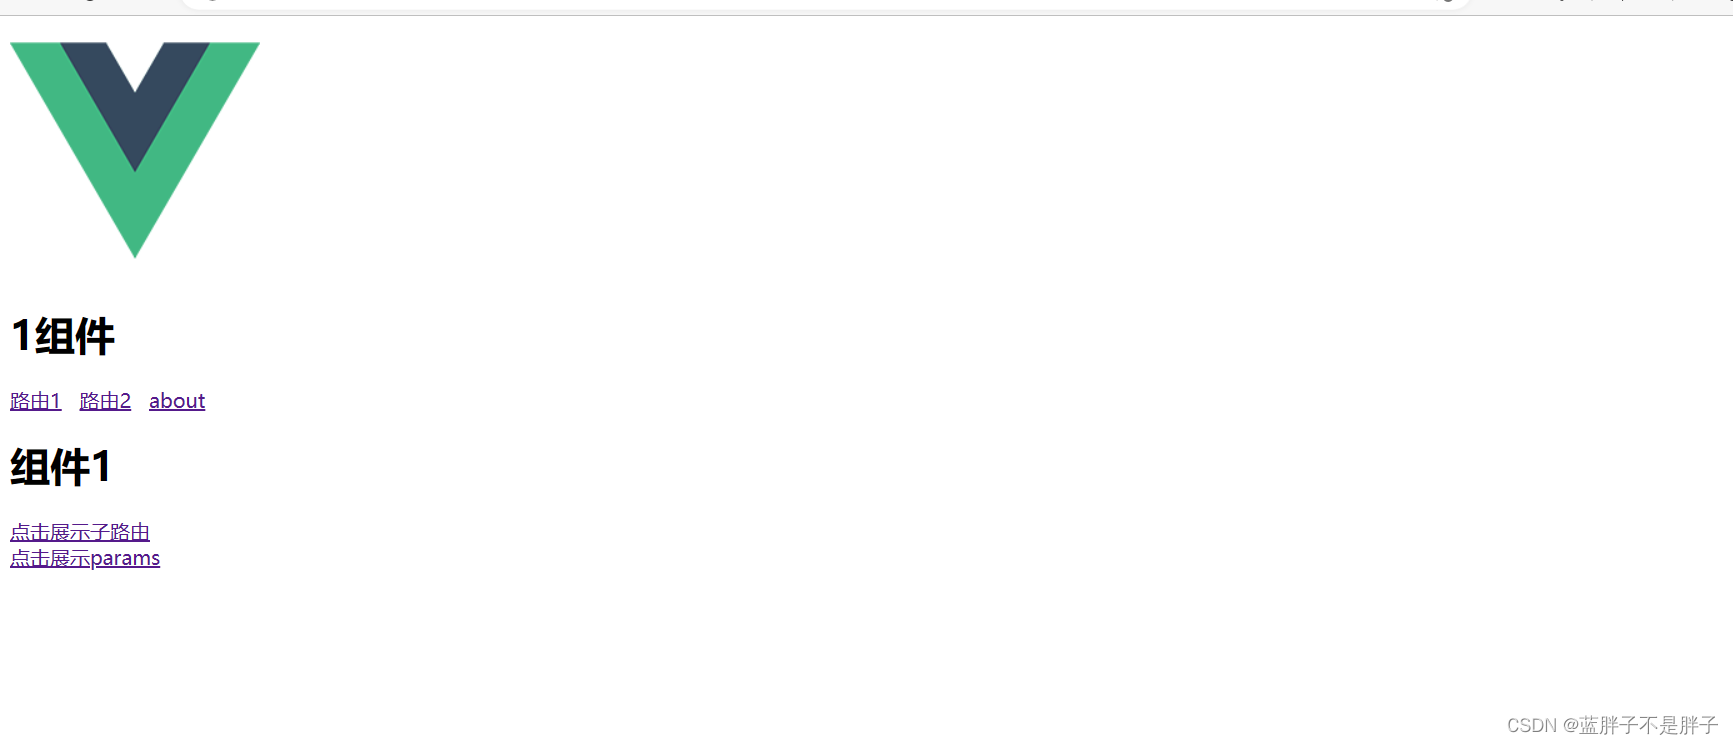
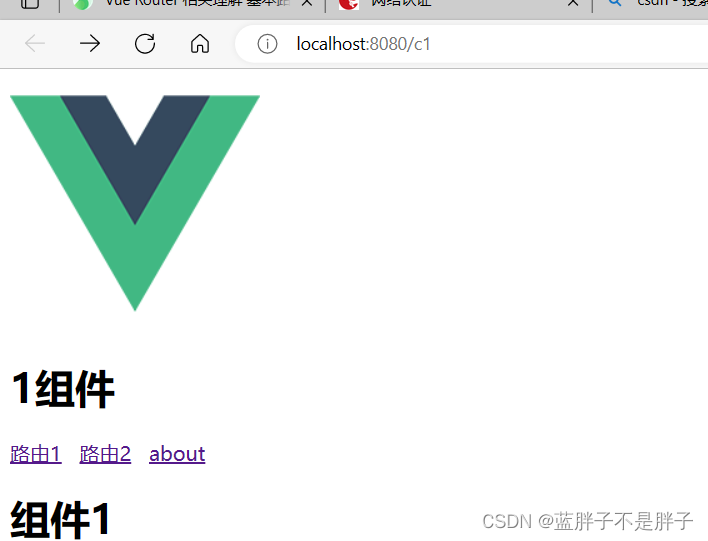
path: '/',name: 'home',meta:{auth:true,title:'首页'},component: HomeView,children:[{path:"/c1",name:'组件1',component:()=>import('../views/c1'),meta:{auth:true,title:'1组件'},]
其中meta 是可以在路由中自定义参数,我这里定义路由的授权为true,以及路由名字
在组件中可以显示
设置当页面丢失时重新定位路由,如果在路由随意输入,导致无法正确到达界面,此时我们需要设置路由转发
{name: 'notfound',path: '/notfound',component: () => import('../views/404.vue')},{/* 进行我们的路由匹配,通俗来讲就是比如我们是http://localhost:8080* 匹配我们/后面的如果你乱写的话就会重定向我们的404路由* 举个例子* { path: '/user-:afterUser(.*)', redirect: '/notfound},* 匹配我们/user后面的内容,如果你乱写的话就会进入404*/path: '/:pathMatch(.*)*',redirect: '/interuser'}
路由跳转 router-link
改标签的左右是代替a标签实现路由跳转
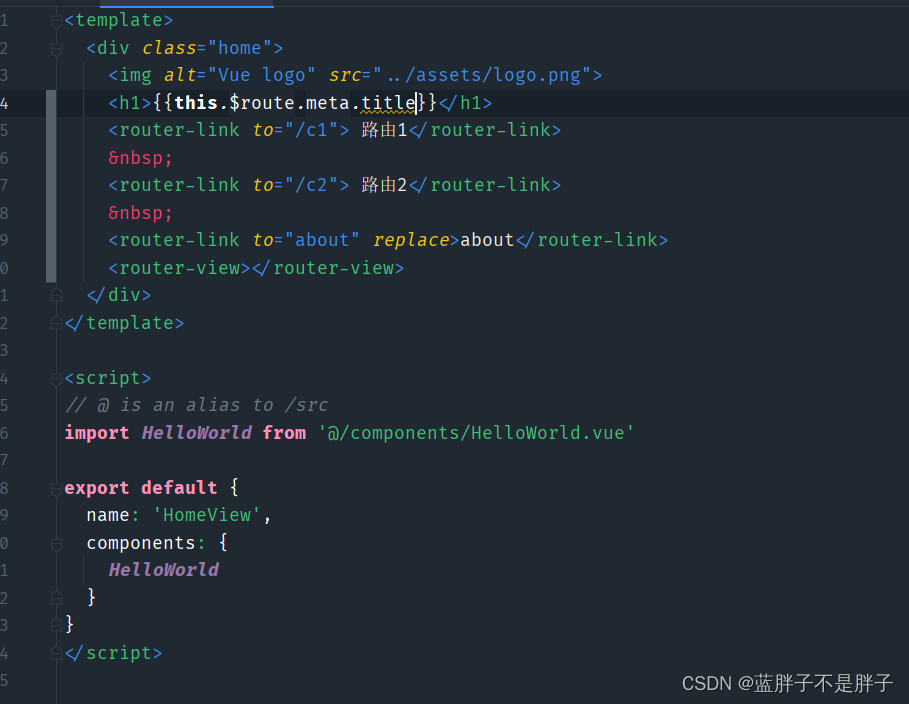
<div class="home"><img alt="Vue logo" src="../assets/logo.png"><h1>{{this.$route.meta.title}}</h1><router-link to="/c1"> 路由1</router-link> <router-link to="/c2"> 路由2</router-link> <router-link to="about" replace>about</router-link><router-view></router-view></div>
标签中的to属性为跳转路由path
路由跳转为俩种模式
- push栈模式
默认就是栈模式,跳转路由后可以通过游览器返回上一次操作
- replace替代模式
使用该属性后无法调回
<router-link to="/c1" replace> 路由2</router-link>
除了连接跳转路由外还可以使用函数跳转路由
指定跳转路由
this.$router.push('/c2')
返回上一路由this.$router.back()
go根据正数为前进路由,负数为回退路由this.$router.go(-1)
路由传参
路由传参分为俩种,query传参和param传参
query传参
1.通过字符串拼接的方式传
<router-link to="/c1/cc?name=666&ttile=路由传参和http一样">点击展示子路由</router-link>
2.(推荐)设置query对象
//使用v-bind解析数据<router-link :to="{path:'/cc',query:{ttile:'query传参这样方式写 更为简便',id:id}}">点击展示子路由</router-link>
接受路由发送的参数
mounted() {console.log (this.$route.query)this.id=this.$route.query.idthis.title=this.$route.query.ttile},
其中,路由跳转,和传参可以根据组件的名字来跳转

对象式传参也是同理
<router-link :to="{name:'组件1的子组件',query:{title:'query传参这样方式写 更为简便',id:id}}">点击展示子路由</router-link>
params方式传递参数
注意 query方式可以使用name,和path跳转,
而蚕食是params只能是name跳转
<router-link :to="{// path:'/cc',//name也同样name:'组件1的子组件',params:{ttile:'paramsquery传参',id:'232323'}}">点击展示params</router-link>
参数的接受:
this.$route.params.定义的数据
这种方式的好处是可以使用rest风格的传参
在index文件中申明参数

此时跳转路由
<router-link to="/home/detail/1/这是标题">点击展示子路由</router-link>
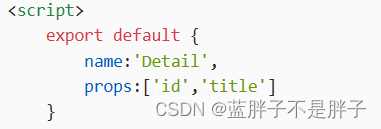
路由配置props属性
props属性出现在接受组件的参数,而路由也可以定义props属性接受路由的传参
路由index文件
props($route){return {id:$route.params.id,name:$route.query.name,score:$route.query.score,}
该路由可以直接取数据使用
路由守卫
如果根据用户权限决定用户展示的路由这种限制路由展示的功能如何实现呢
全局路由
在路由index.js文件中进行配置,全局路由分为前置和后置,进入路由前,进入路由后
和java后端的拦截器类似,通过放行与否确定是否展示
前置路由
router.beforeEach 方法实现
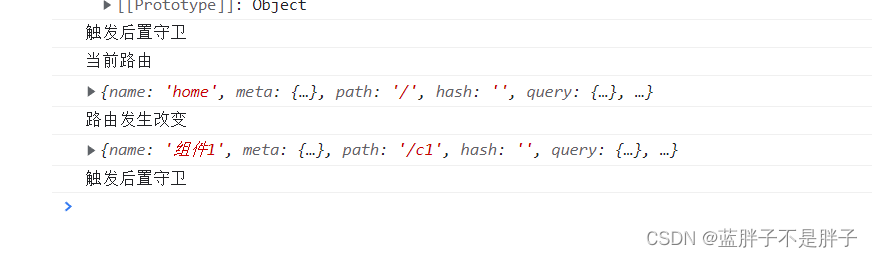
router.beforeEach((to, from, next)=>{// 全局前置路由守卫console.log('路由发生改变')// to 表示路由跳转切换的路线,from当前页面console.log(to,from)//类似后端拦截器  配合meta可以在路由中定义数据if (to.meta.auth===true){// document.title=document.title=to.meta.title||'测试首页'next()}elsealert("未授权无法查看")
})
from来自那个路由,to跳转路由,to方法决定是否放行
当初始路由输出
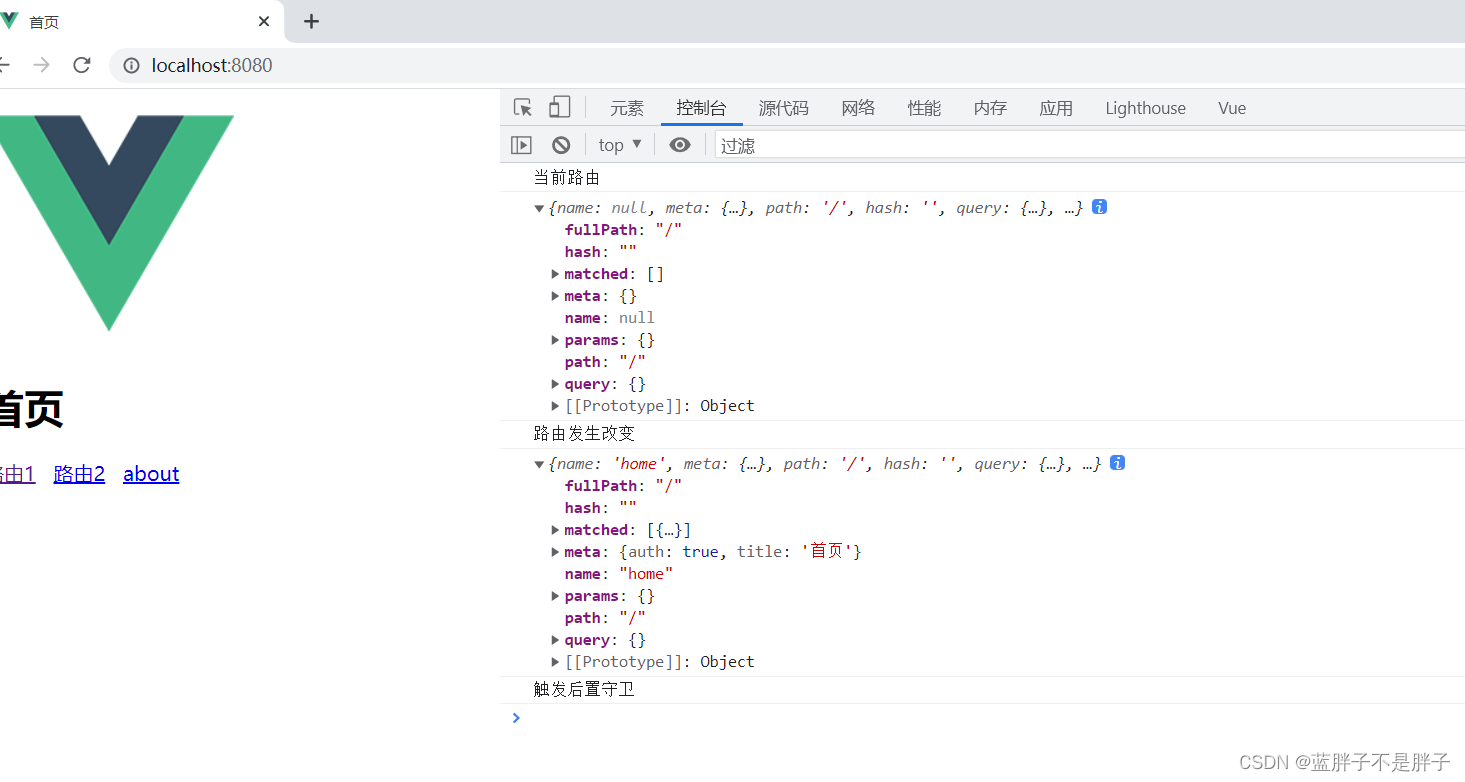
发现是统一path, 只不过源路由没有name和meta属性,初始路由的源路由未初始化
从首页路由跳转其他路由,确实如此,to表示跳转的目标路由
后置路由
router.afterEach实现
路由跳转后执行的操作,因为此时已经进入to 路由,所以后卫的操作执行得是路由跳转后的操作,多事赋值处理
// 后置守卫
router.afterEach((to, from,next)=>{console.log("触发后置守卫")document.title=document.title=to.meta.title||'测试首页'
// 路由都进行跳转了next方向 所以没有next方法回调})
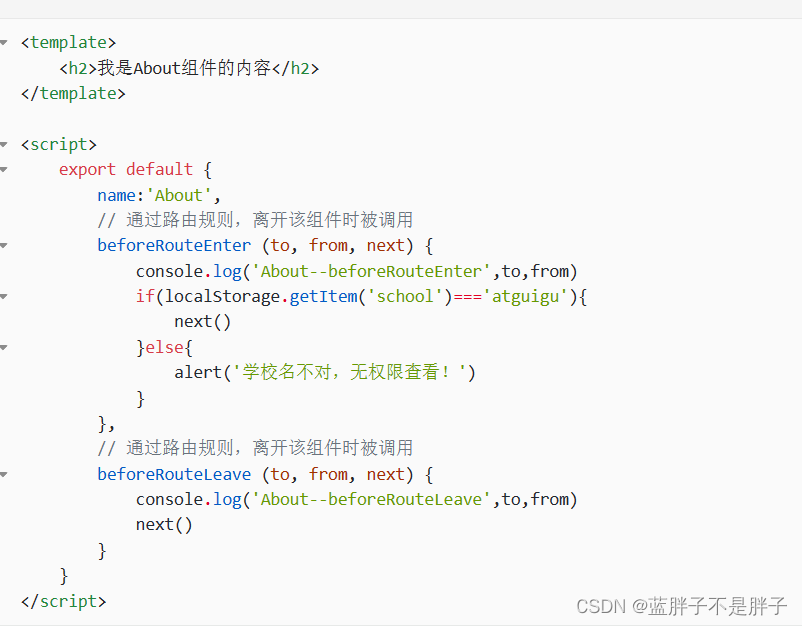
组件内守卫
// 通过路由守卫后 进入组件调用beforeRouteEnter(to,from,next){alert('马上进入abouot路由')next()},// 通过路由守卫后 离开路由beforeRouteLeave(to,from,next){alert('马上离开该组件')// 切走的时候自己本身就是fromnext()}
作用和全局守卫类似但是必须进过守卫过滤才会触发这俩个方法
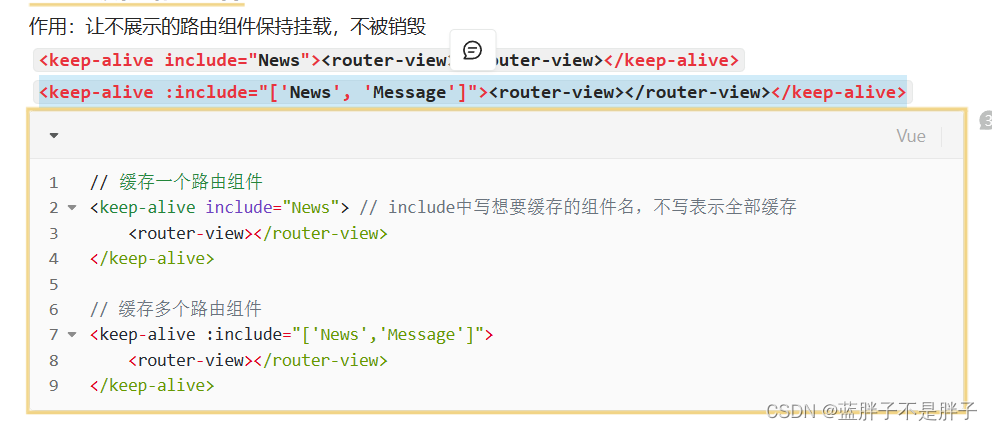
路由缓存
当路由切换时候,保持路由缓存,使其不被销毁保持二次快速游览
<keep-alive > 路由视图</keep-alive >