Netty使用Google Protobuf进行编解码

文章目录
一、概述
1、编解码基础
编写网络应用程序时,因为数据在网络中传输的都是二进制字节码数据,在发送数据时就需要编码,接收数据0时就需要解码。
通常来说,codec(编解码器)的组成部分有两个: decoder(解码器)和 encoder(编码器)。encoder 负责把业务数据转换成字节2)码数据,decoder 负责把字节码数据转换成业务数据。

2、Netty编解码器
Netty自身也携带了一些codec(编解码器):
StringDecoder // 对字符串数据进行解码
StringEncoder // 对字符串数据进行编码
ObjectDecoder // 对Java对象进行解码
ObjectEncoder // 对Java对象进行编码
...
其中,Netty自带的ObjectDecoder 和ObjectEncoder 可以实现对POJO对象或各种业务对象的编码和解码,但是底层使用的仍是Java序列化技术,而Java序列化技术效率不高并且无法跨语言,所以Google的Protobuf是当今最火热的编解码器。
3、Protobuf概述
Protobuf 是 Google 发布的开源项目,全称 Google Protocol Buffers,是一种轻便高效的结构化数据存储格式,可以用于结构化数据串行化,或者说序列化。它很适合做数据存储或 RPC[远程过程调用 remote procedurecall] 数据交换格式。
参考文档:https://developers.google.com/protocol-buffers/docs/proto
Protobug是以message的方式来管理数据的,支持跨平台、跨语言,即 [ 客户端和服务器端可以是不同语言编写的 ] (支持目前绝大多数语言,例如C++、C#、Java、Python、Go等),性能高,可靠性 高。
二、Protobuf基本使用
1、引入jar包
<dependency><groupId>com.google.protobuf</groupId><artifactId>protobuf-java</artifactId><version>3.6.1</version>
</dependency>
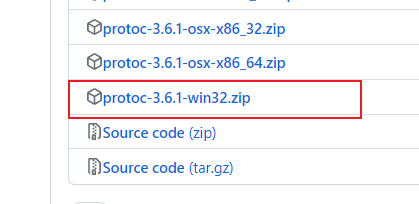
2、下载Protobuf
https://github.com/protocolbuffers/protobuf/releases
我这里使用的是3.6.1版本,要找到对应的版本:https://github.com/protocolbuffers/protobuf/releases?page=11
3、编写Student.proto
syntax = "proto3"; //版本
option java_outer_classname = "StudentPOJO";//生成的外部类名,同时也是文件名
//protobuf 使用message 管理数据
message Student { //会在 StudentPOJO 外部类生成一个内部类 Student, 他是真正发送的POJO对象int32 id = 1; // Student 类中有 一个属性 名字为 id 类型为int32(protobuf类型) 1表示属性序号,不是值string name = 2;string msg = 3;
}
4、生成StudentPOJO类
(1)将Student.proto文件拷贝到protoc.exe同级目录并执行命令:
protoc-3.6.1-win32\\bin>protoc.exe --java_out=. Student.proto
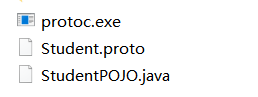
会生成一个StudentPOJO.java文件,该文件可以放在项目中使用了,一定不要修改该文件。
5、服务器端
import io.netty.bootstrap.ServerBootstrap;
import io.netty.channel.*;
import io.netty.channel.nio.NioEventLoopGroup;
import io.netty.channel.socket.SocketChannel;
import io.netty.channel.socket.nio.NioServerSocketChannel;
import io.netty.handler.codec.protobuf.ProtobufDecoder;public class NettyServer {public static void main(String[] args) throws Exception {//创建BossGroup 和 WorkerGroup//说明//1. 创建两个线程组 bossGroup 和 workerGroup//2. bossGroup 只是处理连接请求 , 真正的和客户端业务处理,会交给 workerGroup完成//3. 两个都是无限循环//4. bossGroup 和 workerGroup 含有的子线程(NioEventLoop)的个数//   默认实际 cpu核数 * 2EventLoopGroup bossGroup = new NioEventLoopGroup(1);EventLoopGroup workerGroup = new NioEventLoopGroup(); //8try {//创建服务器端的启动对象,配置参数ServerBootstrap bootstrap = new ServerBootstrap();//使用链式编程来进行设置bootstrap.group(bossGroup, workerGroup) //设置两个线程组.channel(NioServerSocketChannel.class) //使用NioSocketChannel 作为服务器的通道实现.option(ChannelOption.SO_BACKLOG, 128) // 设置线程队列得到连接个数.childOption(ChannelOption.SO_KEEPALIVE, true) //设置保持活动连接状态
//                    .handler(null) // 该 handler对应 bossGroup , childHandler 对应 workerGroup.childHandler(new ChannelInitializer<SocketChannel>() {//创建一个通道初始化对象(匿名对象)//给pipeline 设置处理器@Overrideprotected void initChannel(SocketChannel ch) throws Exception {ChannelPipeline pipeline = ch.pipeline();//在pipeline加入ProtoBufDecoder//指定对哪种对象进行解码pipeline.addLast("decoder", new ProtobufDecoder(StudentPOJO.Student.getDefaultInstance()));pipeline.addLast(new NettyServerHandler());}}); // 给我们的workerGroup 的 EventLoop 对应的管道设置处理器System.out.println(".....服务器 is ready...");//绑定一个端口并且同步, 生成了一个 ChannelFuture 对象//启动服务器(并绑定端口)ChannelFuture cf = bootstrap.bind(6668).sync();//给cf 注册监听器,监控我们关心的事件cf.addListener(new ChannelFutureListener() {@Overridepublic void operationComplete(ChannelFuture future) throws Exception {if (cf.isSuccess()) {System.out.println("监听端口 6668 成功");} else {System.out.println("监听端口 6668 失败");}}});//对关闭通道进行监听cf.channel().closeFuture().sync();}finally {bossGroup.shutdownGracefully();workerGroup.shutdownGracefully();}}}
import io.netty.buffer.ByteBuf;
import io.netty.buffer.Unpooled;
import io.netty.channel.*;
import io.netty.util.CharsetUtil;/*
说明
1. 我们自定义一个Handler 需要继续netty 规定好的某个HandlerAdapter(规范)
2. 这时我们自定义一个Handler , 才能称为一个handler*/
//public class NettyServerHandler extends ChannelInboundHandlerAdapter {
public class NettyServerHandler extends SimpleChannelInboundHandler<StudentPOJO.Student> {//读取数据实际(这里我们可以读取客户端发送的消息)/*1. ChannelHandlerContext ctx:上下文对象, 含有 管道pipeline , 通道channel, 地址2. Object msg: 就是客户端发送的数据 默认Object*/@Overridepublic void channelRead0(ChannelHandlerContext ctx, StudentPOJO.Student msg) throws Exception {//读取从客户端发送的StudentPojo.StudentSystem.out.println("客户端发送的数据 id=" + msg.getId() + " 名字=" + msg.getName() + "msg" + msg.getMsg());}//    //读取数据实际(这里我们可以读取客户端发送的消息)
//    /*
//    1. ChannelHandlerContext ctx:上下文对象, 含有 管道pipeline , 通道channel, 地址
//    2. Object msg: 就是客户端发送的数据 默认Object
//     */
//    @Override
//    public void channelRead(ChannelHandlerContext ctx, Object msg) throws Exception {
//
//        //读取从客户端发送的StudentPojo.Student
//
//        StudentPOJO.Student student = (StudentPOJO.Student) msg;
//
//        System.out.println("客户端发送的数据 id=" + student.getId() + " 名字=" + student.getName());
//    }//数据读取完毕@Overridepublic void channelReadComplete(ChannelHandlerContext ctx) throws Exception {//writeAndFlush 是 write + flush//将数据写入到缓存,并刷新//一般讲,我们对这个发送的数据进行编码ctx.writeAndFlush(Unpooled.copiedBuffer("hello, 客户端", CharsetUtil.UTF_8));}//处理异常, 一般是需要关闭通道@Overridepublic void exceptionCaught(ChannelHandlerContext ctx, Throwable cause) throws Exception {ctx.close();}
}
6、客户端
import io.netty.bootstrap.Bootstrap;
import io.netty.channel.ChannelFuture;
import io.netty.channel.ChannelInitializer;
import io.netty.channel.ChannelPipeline;
import io.netty.channel.EventLoopGroup;
import io.netty.channel.nio.NioEventLoopGroup;
import io.netty.channel.socket.SocketChannel;
import io.netty.channel.socket.nio.NioSocketChannel;
import io.netty.handler.codec.protobuf.ProtobufEncoder;public class NettyClient {public static void main(String[] args) throws Exception {//客户端需要一个事件循环组EventLoopGroup group = new NioEventLoopGroup();try {//创建客户端启动对象//注意客户端使用的不是 ServerBootstrap 而是 BootstrapBootstrap bootstrap = new Bootstrap();//设置相关参数bootstrap.group(group) //设置线程组.channel(NioSocketChannel.class) // 设置客户端通道的实现类(反射).handler(new ChannelInitializer<SocketChannel>() {@Overrideprotected void initChannel(SocketChannel ch) throws Exception {ChannelPipeline pipeline = ch.pipeline();//在pipeline中加入 ProtoBufEncoderpipeline.addLast("encoder", new ProtobufEncoder());pipeline.addLast(new NettyClientHandler()); //加入自己的处理器}});System.out.println("客户端 ok..");//启动客户端去连接服务器端//关于 ChannelFuture 要分析,涉及到netty的异步模型ChannelFuture channelFuture = bootstrap.connect("127.0.0.1", 6668).sync();//给关闭通道进行监听channelFuture.channel().closeFuture().sync();}finally {group.shutdownGracefully();}}
}
import io.netty.buffer.ByteBuf;
import io.netty.buffer.Unpooled;
import io.netty.channel.ChannelHandlerContext;
import io.netty.channel.ChannelInboundHandlerAdapter;
import io.netty.util.CharsetUtil;public class NettyClientHandler extends ChannelInboundHandlerAdapter {//当通道就绪就会触发该方法@Overridepublic void channelActive(ChannelHandlerContext ctx) throws Exception {//发生一个Student 对象到服务器StudentPOJO.Student student = StudentPOJO.Student.newBuilder().setId(4).setName("张三").setMsg("我会武功,是个饭桶").build();//Teacher , Member ,Messagectx.writeAndFlush(student);}//当通道有读取事件时,会触发@Overridepublic void channelRead(ChannelHandlerContext ctx, Object msg) throws Exception {ByteBuf buf = (ByteBuf) msg;System.out.println("服务器回复的消息:" + buf.toString(CharsetUtil.UTF_8));System.out.println("服务器的地址: "+ ctx.channel().remoteAddress());}@Overridepublic void exceptionCaught(ChannelHandlerContext ctx, Throwable cause) throws Exception {cause.printStackTrace();ctx.close();}
}
7、验证一下吧
.....服务器 is ready...
监听端口 6668 成功
客户端发送的数据 id=4 名字=张三msg我会武功,是个饭桶
客户端 ok..
服务器回复的消息:hello, 客户端
服务器的地址: /127.0.0.1:6668
三、Netty使用Protobuf发送多类型对象
1、编写Student.proto
syntax = "proto3";
option optimize_for = SPEED; // 加快解析
// option java_package="com.demo.netty.codec";   //指定生成到哪个包下
option java_outer_classname="MyDataInfo"; // 外部类名, 文件名//protobuf 可以使用message 管理其他的message
message MyMessage {//定义一个枚举类型enum DataType {StudentType = 0; //在proto3 要求enum的编号从0开始WorkerType = 1;}//用data_type 来标识传的是哪一个枚举类型DataType data_type = 1; // 编号//表示每次枚举类型最多只能出现其中的一个, 节省空间 ,dataBody可以自己命名oneof dataBody {Student student = 2; // 编号Worker worker = 3; // 编号}}message Student {int32 id = 1;//Student类的属性string name = 2; //
}
message Worker {string name=1;int32 age=2;
}
2、生成MyDataInfo.java
(1)将Student.proto文件拷贝到protoc.exe同级目录并执行命令:
protoc-3.6.1-win32\\bin>protoc.exe --java_out=. Student.proto
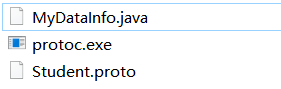
生成的MyDataInfo.java可以拷贝到项目中使用了。
3、服务端
import io.netty.bootstrap.ServerBootstrap;
import io.netty.channel.*;
import io.netty.channel.nio.NioEventLoopGroup;
import io.netty.channel.socket.SocketChannel;
import io.netty.channel.socket.nio.NioServerSocketChannel;
import io.netty.handler.codec.protobuf.ProtobufDecoder;public class NettyServer {public static void main(String[] args) throws Exception {//创建BossGroup 和 WorkerGroup//说明//1. 创建两个线程组 bossGroup 和 workerGroup//2. bossGroup 只是处理连接请求 , 真正的和客户端业务处理,会交给 workerGroup完成//3. 两个都是无限循环//4. bossGroup 和 workerGroup 含有的子线程(NioEventLoop)的个数//   默认实际 cpu核数 * 2EventLoopGroup bossGroup = new NioEventLoopGroup(1);EventLoopGroup workerGroup = new NioEventLoopGroup(); //8try {//创建服务器端的启动对象,配置参数ServerBootstrap bootstrap = new ServerBootstrap();//使用链式编程来进行设置bootstrap.group(bossGroup, workerGroup) //设置两个线程组.channel(NioServerSocketChannel.class) //使用NioSocketChannel 作为服务器的通道实现.option(ChannelOption.SO_BACKLOG, 128) // 设置线程队列得到连接个数.childOption(ChannelOption.SO_KEEPALIVE, true) //设置保持活动连接状态
//                    .handler(null) // 该 handler对应 bossGroup , childHandler 对应 workerGroup.childHandler(new ChannelInitializer<SocketChannel>() {//创建一个通道初始化对象(匿名对象)//给pipeline 设置处理器@Overrideprotected void initChannel(SocketChannel ch) throws Exception {ChannelPipeline pipeline = ch.pipeline();//在pipeline加入ProtoBufDecoder//指定对哪种对象进行解码pipeline.addLast("decoder", new ProtobufDecoder(MyDataInfo.MyMessage.getDefaultInstance()));pipeline.addLast(new NettyServerHandler());}}); // 给我们的workerGroup 的 EventLoop 对应的管道设置处理器System.out.println(".....服务器 is ready...");//绑定一个端口并且同步, 生成了一个 ChannelFuture 对象//启动服务器(并绑定端口)ChannelFuture cf = bootstrap.bind(6668).sync();//给cf 注册监听器,监控我们关心的事件cf.addListener(new ChannelFutureListener() {@Overridepublic void operationComplete(ChannelFuture future) throws Exception {if (cf.isSuccess()) {System.out.println("监听端口 6668 成功");} else {System.out.println("监听端口 6668 失败");}}});//对关闭通道进行监听cf.channel().closeFuture().sync();}finally {bossGroup.shutdownGracefully();workerGroup.shutdownGracefully();}}}
import io.netty.buffer.Unpooled;
import io.netty.channel.ChannelHandlerContext;
import io.netty.channel.SimpleChannelInboundHandler;
import io.netty.util.CharsetUtil;/*
说明
1. 我们自定义一个Handler 需要继续netty 规定好的某个HandlerAdapter(规范)
2. 这时我们自定义一个Handler , 才能称为一个handler*/
//public class NettyServerHandler extends ChannelInboundHandlerAdapter {
public class NettyServerHandler extends SimpleChannelInboundHandler<MyDataInfo.MyMessage> {//读取数据实际(这里我们可以读取客户端发送的消息)/*1. ChannelHandlerContext ctx:上下文对象, 含有 管道pipeline , 通道channel, 地址2. Object msg: 就是客户端发送的数据 默认Object*/@Overridepublic void channelRead0(ChannelHandlerContext ctx, MyDataInfo.MyMessage msg) throws Exception {//根据dataType 来显示不同的信息MyDataInfo.MyMessage.DataType dataType = msg.getDataType();if(dataType == MyDataInfo.MyMessage.DataType.StudentType) {MyDataInfo.Student student = msg.getStudent();System.out.println("学生id=" + student.getId() + " 学生名字=" + student.getName());} else if(dataType == MyDataInfo.MyMessage.DataType.WorkerType) {MyDataInfo.Worker worker = msg.getWorker();System.out.println("工人的名字=" + worker.getName() + " 年龄=" + worker.getAge());} else {System.out.println("传输的类型不正确");}}//    //读取数据实际(这里我们可以读取客户端发送的消息)
//    /*
//    1. ChannelHandlerContext ctx:上下文对象, 含有 管道pipeline , 通道channel, 地址
//    2. Object msg: 就是客户端发送的数据 默认Object
//     */
//    @Override
//    public void channelRead(ChannelHandlerContext ctx, Object msg) throws Exception {
//
//        //读取从客户端发送的StudentPojo.Student
//
//        StudentPOJO.Student student = (StudentPOJO.Student) msg;
//
//        System.out.println("客户端发送的数据 id=" + student.getId() + " 名字=" + student.getName());
//    }//数据读取完毕@Overridepublic void channelReadComplete(ChannelHandlerContext ctx) throws Exception {//writeAndFlush 是 write + flush//将数据写入到缓存,并刷新//一般讲,我们对这个发送的数据进行编码ctx.writeAndFlush(Unpooled.copiedBuffer("hello, 客户端~", CharsetUtil.UTF_8));}//处理异常, 一般是需要关闭通道@Overridepublic void exceptionCaught(ChannelHandlerContext ctx, Throwable cause) throws Exception {ctx.close();}
}
4、客户端
import io.netty.bootstrap.Bootstrap;
import io.netty.channel.ChannelFuture;
import io.netty.channel.ChannelInitializer;
import io.netty.channel.ChannelPipeline;
import io.netty.channel.EventLoopGroup;
import io.netty.channel.nio.NioEventLoopGroup;
import io.netty.channel.socket.SocketChannel;
import io.netty.channel.socket.nio.NioSocketChannel;
import io.netty.handler.codec.protobuf.ProtobufEncoder;public class NettyClient {public static void main(String[] args) throws Exception {//客户端需要一个事件循环组EventLoopGroup group = new NioEventLoopGroup();try {//创建客户端启动对象//注意客户端使用的不是 ServerBootstrap 而是 BootstrapBootstrap bootstrap = new Bootstrap();//设置相关参数bootstrap.group(group) //设置线程组.channel(NioSocketChannel.class) // 设置客户端通道的实现类(反射).handler(new ChannelInitializer<SocketChannel>() {@Overrideprotected void initChannel(SocketChannel ch) throws Exception {ChannelPipeline pipeline = ch.pipeline();//在pipeline中加入 ProtoBufEncoderpipeline.addLast("encoder", new ProtobufEncoder());pipeline.addLast(new NettyClientHandler()); //加入自己的处理器}});System.out.println("客户端 ok..");//启动客户端去连接服务器端//关于 ChannelFuture 要分析,涉及到netty的异步模型ChannelFuture channelFuture = bootstrap.connect("127.0.0.1", 6668).sync();//给关闭通道进行监听channelFuture.channel().closeFuture().sync();}finally {group.shutdownGracefully();}}
}
import io.netty.buffer.ByteBuf;
import io.netty.channel.ChannelHandlerContext;
import io.netty.channel.ChannelInboundHandlerAdapter;
import io.netty.util.CharsetUtil;import java.util.Random;public class NettyClientHandler extends ChannelInboundHandlerAdapter {//当通道就绪就会触发该方法@Overridepublic void channelActive(ChannelHandlerContext ctx) throws Exception {//随机的发送Student 或者 Workder 对象int random = new Random().nextInt(3);MyDataInfo.MyMessage myMessage = null;if(0 == random) { //发送Student 对象myMessage = MyDataInfo.MyMessage.newBuilder().setDataType(MyDataInfo.MyMessage.DataType.StudentType).setStudent(MyDataInfo.Student.newBuilder().setId(5).setName("张三").build()).build();} else { // 发送一个Worker 对象myMessage = MyDataInfo.MyMessage.newBuilder().setDataType(MyDataInfo.MyMessage.DataType.WorkerType).setWorker(MyDataInfo.Worker.newBuilder().setAge(20).setName("李四").build()).build();}ctx.writeAndFlush(myMessage);}//当通道有读取事件时,会触发@Overridepublic void channelRead(ChannelHandlerContext ctx, Object msg) throws Exception {ByteBuf buf = (ByteBuf) msg;System.out.println("服务器回复的消息:" + buf.toString(CharsetUtil.UTF_8));System.out.println("服务器的地址: "+ ctx.channel().remoteAddress());}@Overridepublic void exceptionCaught(ChannelHandlerContext ctx, Throwable cause) throws Exception {cause.printStackTrace();ctx.close();}
}
5、测试一下吧
.....服务器 is ready...
监听端口 6668 成功
工人的名字=李四 年龄=20
学生id=5 学生名字=张三
工人的名字=李四 年龄=20