Forest-声明式HTTP客户端框架-集成到SpringBoot实现调用第三方restful api并实现接口数据转换

场景
Forest
声明式HTTP客户端API框架,让Java发送HTTP/HTTPS请求不再难。它比OkHttp和HttpClient更高层,
是封装调用第三方restful api client接口的好帮手,是retrofit和feign之外另一个选择。
通过在接口上声明注解的方式配置HTTP请求接口。
官网:
Forest
代码地址:
forest: 声明式HTTP客户端API框架,让Java发送HTTP/HTTPS请求不再难。它比OkHttp和HttpClient更高层,是封装调用第三方restful api client接口的好帮手,是retrofit和feign之外另一个选择。通过在接口上声明注解的方式配置HTTP请求接口
Forest的功能较多,下面记录一个比较常用的功能,就是调用第三方api获取数据,并将json数据解析成对象。
注:
博客:
霸道流氓气质的博客_CSDN博客-C#,架构之路,SpringBoot领域博主
实现
1、需要事先模拟一个第三方api的接口,各种方式均可,除了代码编写、nginx代理等还可以使用如下方式
HTTP JSON接口模拟工具interfake的使用(模拟接口返回json数据):
HTTP JSON接口模拟工具interfake的使用(模拟接口返回json数据)_霸道流氓气质的博客-CSDN博客
按照上面的过程并修改模拟数据的js文件内容为
var Interfake = require('interfake');
var interfake = new Interfake();
interfake.get('/badao').status(200)
.body({ "id": 123,"name": "霸道的程序猿","age": 100,"address":"青岛","banji":"一班"}
);
interfake.get('/badaoStu').status(200)
.body({ "id": 123,"name": "霸道的程序猿","age": 100,"address":"青岛","banji":"一班"}
);
确保该接口可以用

2、搭建SpringBoot项目
若依前后端分离版手把手教你本地搭建环境并运行项目:
https://blog.csdn.net/BADAO_LIUMANG_QIZHI/article/details/108465662
在上面的基础搭建之后,开始集成Forest。
3、SpringBoot项目中添加依赖
<dependency><groupId>com.dtflys.forest</groupId><artifactId>forest-spring-boot-starter</artifactId><version>1.5.30</version></dependency>当前版本为1.5.30。
若依框架已经自带json数据的解析依赖。
然后修改配置文件yml,添加forest的相关配置
#Forest 全局配置
forest:backend: okhttp3             # 后端HTTP框架(默认为 okhttp3)max-connections: 1000        # 连接池最大连接数(默认为 500)max-route-connections: 500   # 每个路由的最大连接数(默认为 500)max-request-queue-size: 100  # [自v1.5.22版本起可用] 最大请求等待队列大小max-async-thread-size: 300   # [自v1.5.21版本起可用] 最大异步线程数max-async-queue-size: 16     # [自v1.5.22版本起可用] 最大异步线程池队列大小timeout: 3000                # [已不推荐使用] 请求超时时间,单位为毫秒(默认为 3000)connect-timeout: 3000        # 连接超时时间,单位为毫秒(默认为 timeout)read-timeout: 3000           # 数据读取超时时间,单位为毫秒(默认为 timeout)max-retry-count: 0           # 请求失败后重试次数(默认为 0 次不重试)ssl-protocol: TLS            # 单向验证的HTTPS的默认TLS协议(默认为 TLS)log-enabled: true            # 打开或关闭日志(默认为 true)log-request: true            # 打开/关闭Forest请求日志(默认为 true)log-response-status: true    # 打开/关闭Forest响应状态日志(默认为 true)log-response-content: true   # 打开/关闭Forest响应内容日志(默认为 false)async-mode: platform         # [自v1.5.27版本起可用] 异步模式(默认为 platform)
更多详细配置参考官方文档
👜 Springboot环境配置项 | Forest
Forest 可以在forest.variables属性下自定义全局变量。
其中 key 为变量名,value 为变量值。
全局变量可以在任何模板表达式中进行数据绑定。
比如这里把第三方的api的ip和端口以及基础地址等配置在yml中
#Forest 全局配置
forest:backend: okhttp3 # 后端HTTP框架(默认为 okhttp3)max-connections: 1000 # 连接池最大连接数(默认为 500)max-route-connections: 500 # 每个路由的最大连接数(默认为 500)max-request-queue-size: 100 # [自v1.5.22版本起可用] 最大请求等待队列大小max-async-thread-size: 300 # [自v1.5.21版本起可用] 最大异步线程数max-async-queue-size: 16 # [自v1.5.22版本起可用] 最大异步线程池队列大小timeout: 3000 # [已不推荐使用] 请求超时时间,单位为毫秒(默认为 3000)connect-timeout: 3000 # 连接超时时间,单位为毫秒(默认为 timeout)read-timeout: 3000 # 数据读取超时时间,单位为毫秒(默认为 timeout)max-retry-count: 0 # 请求失败后重试次数(默认为 0 次不重试)ssl-protocol: TLS # 单向验证的HTTPS的默认TLS协议(默认为 TLS)log-enabled: true # 打开或关闭日志(默认为 true)log-request: true # 打开/关闭Forest请求日志(默认为 true)log-response-status: true # 打开/关闭Forest响应状态日志(默认为 true)log-response-content: true # 打开/关闭Forest响应内容日志(默认为 false)async-mode: platform # [自v1.5.27版本起可用] 异步模式(默认为 platform)#全局变量定义variables:thirdApi:baseUrl: http://127.0.0.1:6664、创建一个Interface,比如这里叫IBusThirdApiService
import com.dtflys.forest.annotation.BaseRequest;
import com.dtflys.forest.annotation.Get;
import com.ruoyi.system.domain.BusStudent;
import org.springframework.stereotype.Service;@BaseRequest(baseURL = "${thirdApi.baseUrl}")
@Service
public interface IBusThirdApiService {@Get("/badao")String getData();@Get("/badaoStu")BusStudent getStudentData();
}
注意这里的
@BaseRequest(baseURL = "${thirdApi.baseUrl}")
就是设置该接口的基础地址,这里是引用上面yml中配置的全局变量。
@Service
注入spring容器,可在需要的其他地方自动注入。
通过@Get注解,将上面方法绑定了一个 HTTP 请求, 并默认使用GET方式,并创建两个接口方法,
其中一个是返回字符串,一个是将json数据转换成对象。
这里需要新建对象BusStudent
public class BusStudent extends BaseEntity
{private static final long serialVersionUID = 1L;/ id */private Integer id;/ 姓名 */@Excel(name = "姓名")private String name;/ 年龄 */@Excel(name = "年龄")private Integer age;/ 地址 */@Excel(name = "地址")private String address;/ 班级 */@Excel(name = "班级")private String banji;public void setId(Integer id){this.id = id;}public Integer getId(){return id;}public void setName(String name){this.name = name;}public String getName(){return name;}public void setAge(Integer age){this.age = age;}public Integer getAge(){return age;}public void setAddress(String address){this.address = address;}public String getAddress(){return address;}public void setBanji(String banji){this.banji = banji;}public String getBanji(){return banji;}@Overridepublic String toString() {return new ToStringBuilder(this,ToStringStyle.MULTI_LINE_STYLE).append("id", getId()).append("name", getName()).append("age", getAge()).append("address", getAddress()).append("banji", getBanji()).toString();}
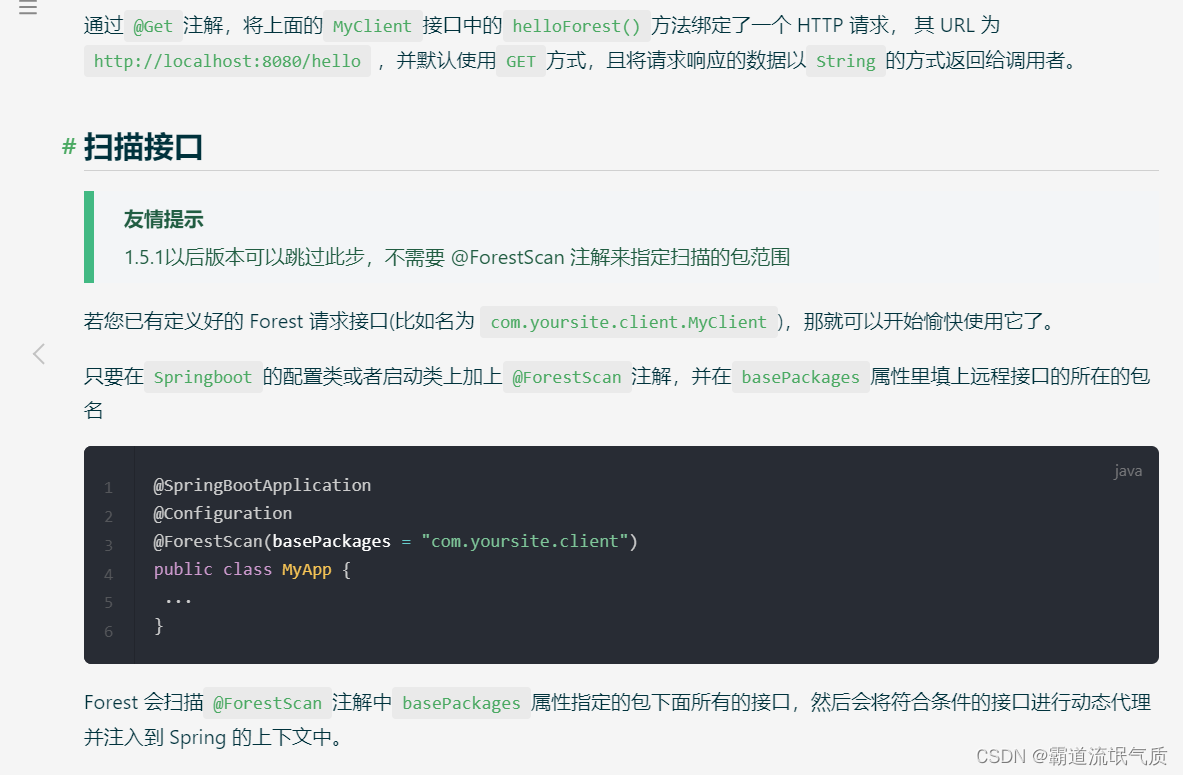
}5、至此方法调用接口就完成了,注意这里版本是1.5.30,所以不用进行扫描接口的配置,不用再修改启动类
然后便能在其他代码中从 Spring 上下文注入接口实例,然后如调用普通接口那样调用即可。
6、发送请求,这里模拟在定时任务中定时发起请求调用接口
import com.ruoyi.system.domain.BusStudent;
import com.ruoyi.system.service.IBusThirdApiService;
import org.springframework.beans.factory.annotation.Autowired;
import org.springframework.scheduling.annotation.EnableScheduling;
import org.springframework.scheduling.annotation.Scheduled;
import org.springframework.stereotype.Component;@Component
@EnableScheduling
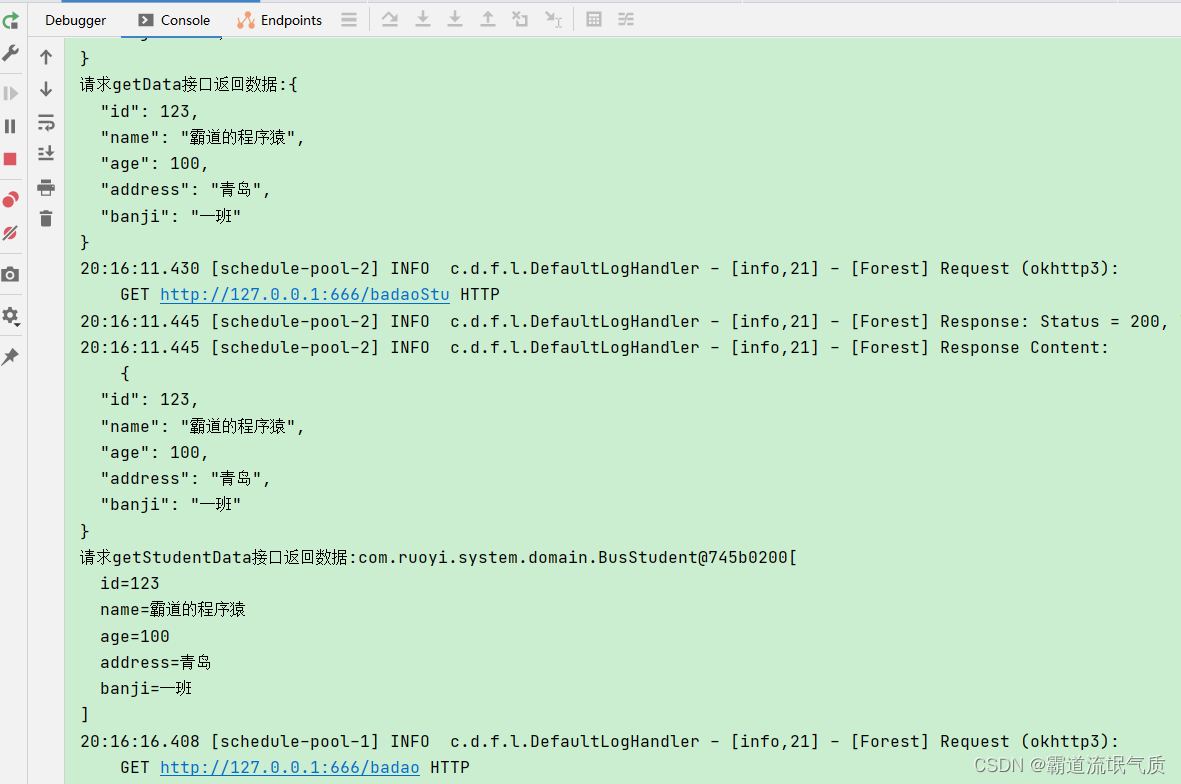
public class FurestTestTask {@Autowiredprivate IBusThirdApiService iBusThirdApiService;@Scheduled(fixedRateString = "5000")public void taskGetData() {String data = iBusThirdApiService.getData();System.out.println("请求getData接口返回数据:"+data);BusStudent busStudent = iBusThirdApiService.getStudentData();System.out.println("请求getStudentData接口返回数据:"+busStudent);}
}运行结果