Show, Attend, and Tell | a PyTorch Tutorial to Image Captioning代码调试(跑通)

Show, Attend, and Tell | a PyTorch Tutorial to Image Captioning代码调试(跑通)
文章目录
- Show, Attend, and Tell | a PyTorch Tutorial to Image Captioning代码调试(跑通)
- 前言
- 1. 创建、安装所用的包
-
- 1.1 创建环境,安装pytorch包
- 1.2 安装其他必要的包
- 2. 准备数据
- 3. create_input_files.py调试
- 4. train.py调试
- 5. caption.py调试
- 6. eval.py调试
- 总结
前言
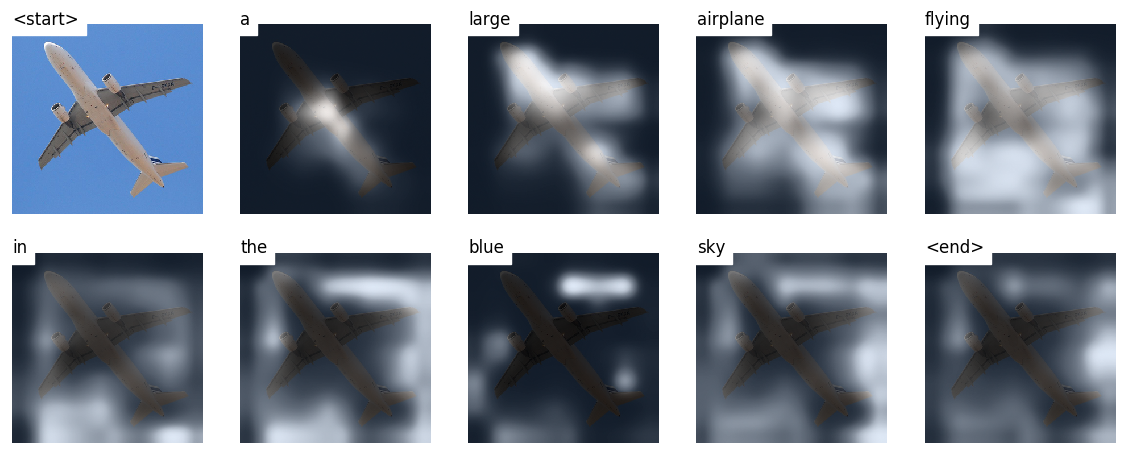
Show, Attend, and Tell是一个使用图像生成描述性字幕的模型。该模型通过注意力机制,学习如何在生成字幕时,关注与当前要生成的单词最相关的图像部分。在生成字幕过程中,我们可以看到模型的视线在图像上移动。
代码:sgrvinod/a-PyTorch-Tutorial-to-Image-Captioning: Show, Attend, and Tell | a PyTorch Tutorial to Image Captioning (github.com)
论文:Show, Attend and Tell: Neural Image CaptionGeneration with Visual Attention (arxiv.org)
1. 创建、安装所用的包
在本节中,我们主要介绍如何创建用于运行Show, Attend, and Tell代码的环境。
1.1 创建环境,安装pytorch包
- 创建
show_attend_tell环境
conda create -n show_attend_tell python=3.6
- 进入所创建环境
show_attend_tell
conda activate show_attend_tell
- 为了在具有 CUDA 9.0 的服务器上安装 PyTorch 包,您可以按照官网的指南进行操作。安装命令如下(注意,后来发现我的服务器CUDA与pytorch不匹配,我又切换为CUDA=9.2版本,重新安装了Pytorch=1.5):
conda install pytorch==1.1.0 torchvision==0.3.0 cudatoolkit=9.0 -c pytorch
- 下图可以说明GPU是可以正常运行的。

1.2 安装其他必要的包
-
scipy是一个Python科学计算库,包含了许多常用的数学、科学和工程计算功能,例如信号处理、优化器、图像处理等。详细描述,请参照 第三章(2):深入理解NTLK库基本使用方法_安静到无声的博客-CSDN博客 -
nltk是自然语言处理(NLP)领域的Python库,提供了许多实用的工具和数据集,例如分词、词性标注、语言模型等。详细描述,请参照 第三章(3):深入理解Spacy库基本使用方法_安静到无声的博客-CSDN博客 -
h5py是一种用于读写HDF5文件的Python库,HDF5文件是一种用于存储和交换科学数据的文件格式。在深度学习中,很多模型都使用HDF5格式来保存和加载权重参数。 -
tqdm是一个Python进度条库,可以在循环过程中显示进度条和估计的剩余时间,方便用户追踪长时间运行的程序的进度。
conda install scipy
conda install nltk
conda install h5py
conda install tqdm
2. 准备数据
本实验是在Flickr8k数据上进行的,可以前往以下链接:[ Flickr 8k Dataset]下载官方数据。
数据集中文本文件类型如下:
-
Flickr_8k.trainImages.txt、Flickr_8k.testImages.txt和Flickr_8k.devImages.txt:包含了训练、测试和验证集中图片的文件名。 -
Flickr8k.token.txt和Flickr8k.lemma.token.txt:包含了每张图片的标题。 -
ExpertAnnotations.txt和CrowdFlowerAnnotations.txt:包含了每张图片的人工评注数据。

之后需要对Flickr8k数据集的文件进行预处理,生成符合COCO JSON格式的输入数据,以用于后续的图像标题生成实验,具体教程请参照成功实现:将Flickr8k.token.txt转换为JSON格式(其他数据集可仿照迁移)_安静到无声的博客-CSDN博客。读者也可以访问该此网站自行下载。
3. create_input_files.py调试
在准备好数据之后, 我们运行create_input_files.py。
入口函数参数值的含义如下:
dataset:数据集名称,可选值为coco、flickr8k和flickr30k。
karpathy_json_path:Karpathy JSON 文件的路径,其中包含了数据集的划分和图像描述。
image_folder:包含下载的图像的文件夹路径。captions_per_image:每张图像抽样的图像描述数。
min_word_freq:单词频率的阈值,小于此阈值的单词将被替换成 标记。
output_folder:保存文件的文件夹路径。max_len:允许抽样的图像描述最大长度,超过此长度的描述将被过滤掉。
最后基于flickr8k数据集,我们修改了参数配置,具体如下:
create_input_files(dataset='flickr8k', karpathy_json_path='/home/lihuanyu/Data/flickr8k/dataset_flickr8k.json', image_folder='/home/lihuanyu/Data/flickr8k/Flickr8k_Dataset/Flicker8k_Dataset/', captions_per_image=5, min_word_freq=5, output_folder='/home/lihuanyu/code/09show_attend_tell/result/', max_len=50)
不出意外当然还是报错呢~,具体错误如下:

我们安装pip install imageio,再将from scipy.misc import imread, imresize改为
from imageio import imread
from scipy.misc import imresize
但是仍然会报出如下错误:

参考解决方法cannot import name ‘imresize‘ from ‘scipy.misc‘ - 腾讯云开发者社区-腾讯云 (tencent.com)
我们将img = imresize(img, (256, 256))改为
img = np.array(Image.fromarray(img).resize((256, 256)))
程序最终可以正常运行:
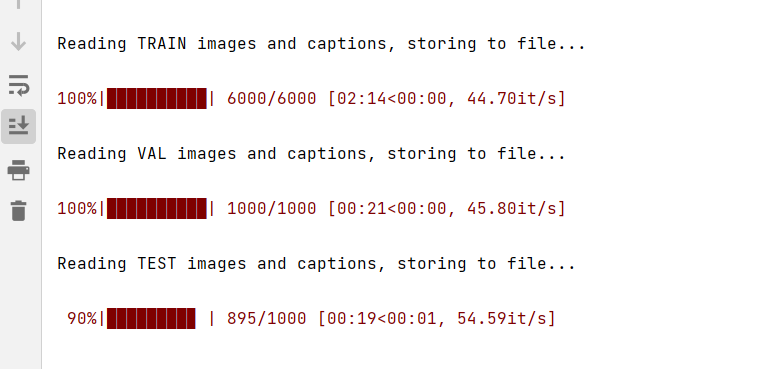
由图可知,一共6000张用于训练、1000张用于测试、1000张用于验证。
最终在result文件夹中生成了如下文件:
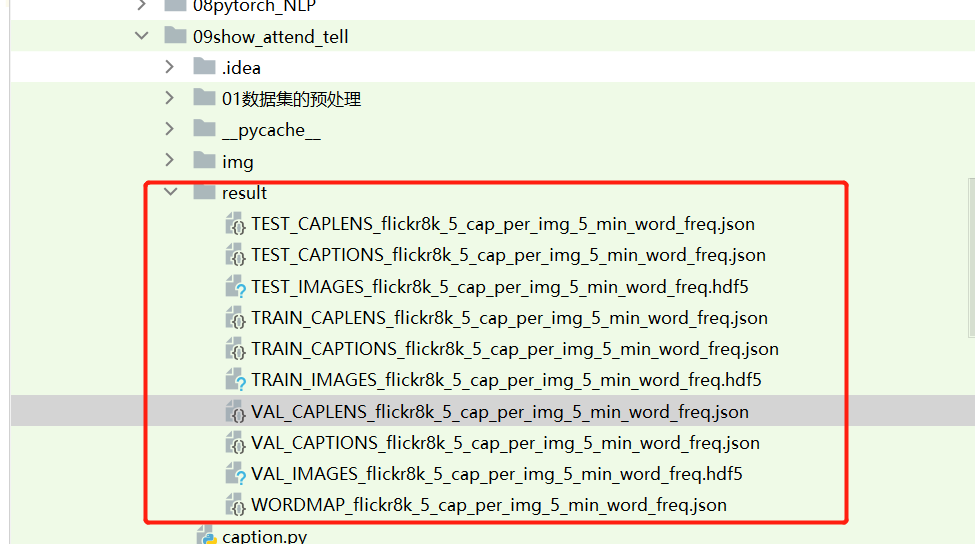
至此create_input_files.py调试完成,数据的准备阶段也已经完成。
4. train.py调试
打开train.py我们可以看到需要配置以下参数:
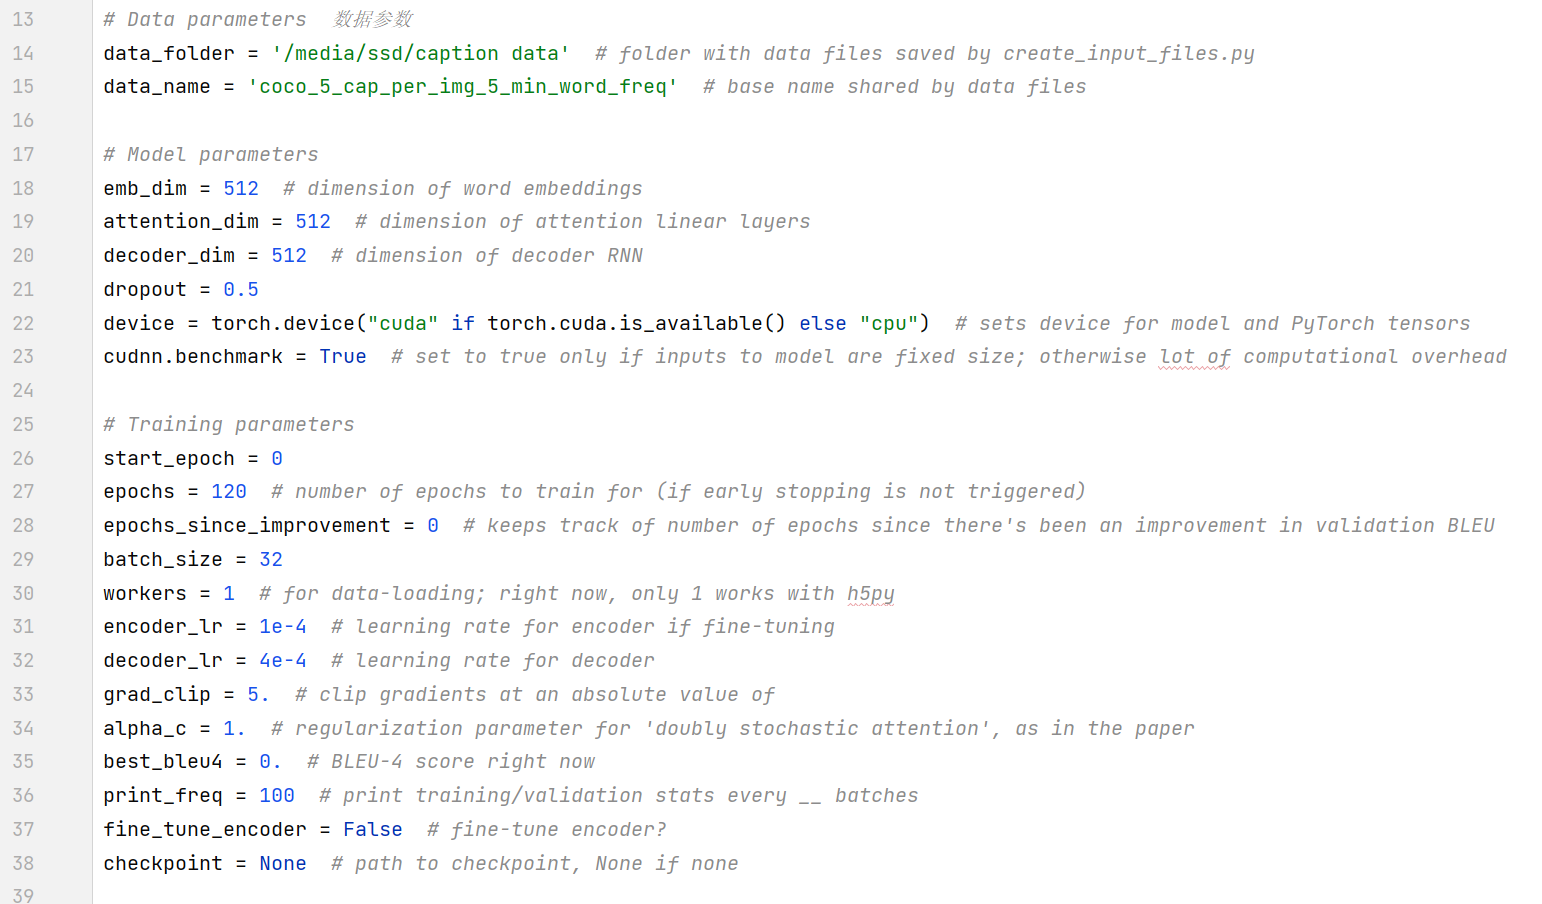
初始阶段,我们只修改与数据路径有关的参数配置,不改变其余参数,能够保证可以正常训练即可。
路径的修改如下图所示:
data_folder = '/home/lihuanyu/code/09show_attend_tell/result'  # folder with data files saved by create_input_files.py 由create_input_files.py创建的包含数据文件的文件夹”
data_name = 'flickr8k_5_cap_per_img_5_min_word_freq'  # base name shared by data files 数据文件共享的基础名称
然后开始运行train.py程序,可以看到成功下载卷积神经网络权重数据。

但是还是报出了如下错误~

这个错误比较简单,修改为如下程序即可:

继续运行train.py函数,我们可以发现程序可以直接运行:

但是在执行完第一个epoch之后,模型报错,如下所示:

这是因为只更改了train函数函数中的错误,没有更新validate函数错误。

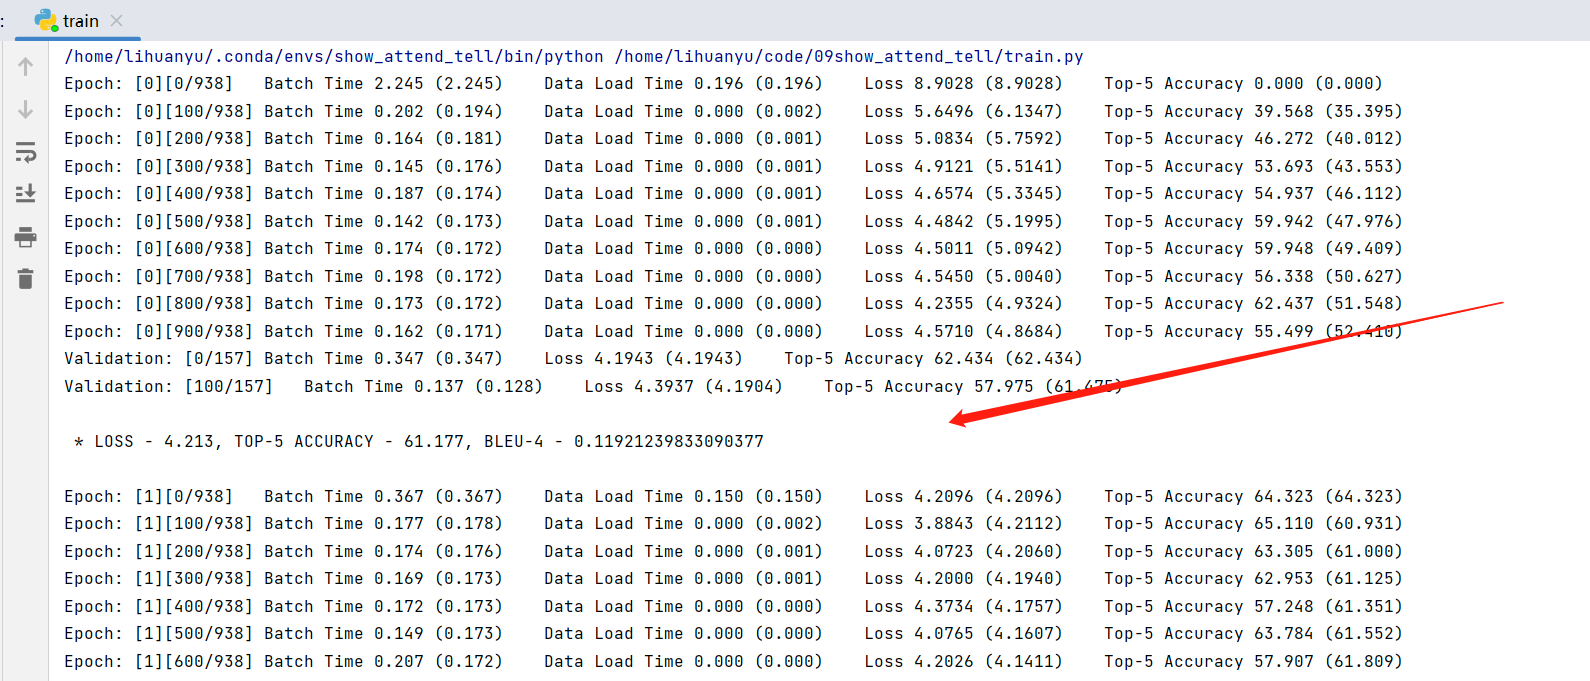
修改后的代码,终于可以正常运行。
5. caption.py调试
- 直接运行caption.py程序,会显示如下错误:

我们安装matplotlib包即可,如果想了解matplotlib的基本使用方法,请访问:第二章(1):Python入门:语法基础、面向对象编程和常用库介绍_安静到无声的博客-CSDN博客
- 运行后,又报出如下错误:

我们接着安装skimage即可,参考解决方案如下:ModuleNotFoundError: No module named ‘skimage‘modulenotfounderror: no module named 'skimage==cjw==的博客-CSDN博客
- 继续运行,出现如下错误。

这与调试create_input_files.py时出现的错误一样,我们做相同的修改即可。
- 继续运行,出现如下错误。

这是由于没有加载模型,图片和字典,我们修改如下:
parser.add_argument('--img', '-i', default= '/home/lihuanyu/code/09show_attend_tell/img/1007129816_e794419615.jpg', help='path to image')  # 图片的路径
parser.add_argument('--model', '-m', default= '/home/lihuanyu/code/09show_attend_tell/BEST_checkpoint_flickr8k_5_cap_per_img_5_min_word_freq.pth.tar', help='path to model')  # 模型的路径
parser.add_argument('--word_map', '-wm',default='/home/lihuanyu/code/09show_attend_tell/result/WORDMAP_flickr8k_5_cap_per_img_5_min_word_freq.json', help='path to word map JSON') # json的路径
- 继续运行,报出如下错误。

错误修改方法,同第3点。

- 继续运行,报出如下错误。

这是由于版本不一致造成的,我们又在CUDA=9.2版本,重新安装了Pytorch=1.5的版本。
命令如下:
pip install torch==1.5.1+cu92 torchvision==0.6.1+cu92 -f https://download.pytorch.org/whl/torch_stable.html
- 继续运行
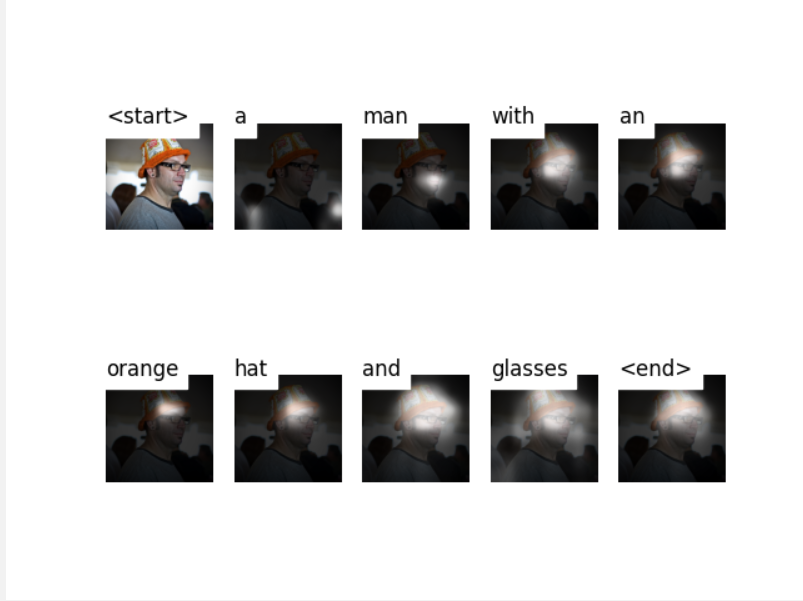
可以输出如下结果:
6. eval.py调试
该程序的配置参数不多,具体如下所示:

我们按照train.py的配置方式,对eval.py代码进行修改。
# Parameters
data_folder = '/home/lihuanyu/code/09show_attend_tell/result'  # folder with data files saved by create_input_files.py
data_name =  'flickr8k_5_cap_per_img_5_min_word_freq'   # base name shared by data files
checkpoint = '/home/lihuanyu/code/09show_attend_tell/BEST_checkpoint_flickr8k_5_cap_per_img_5_min_word_freq.pth.tar'  # model checkpoint
word_map_file = '/home/lihuanyu/code/09show_attend_tell/result/WORDMAP_flickr8k_5_cap_per_img_5_min_word_freq.json'  # word map, ensure it's the same the data was encoded with and the model was trained with
运行程序,出现了以下错误:

我们参照了ValueError: max() arg is an empty sequence · Issue #191 · sgrvinod/a-PyTorch-Tutorial-to-Image-Captioning (github.com)的方法进行解决。
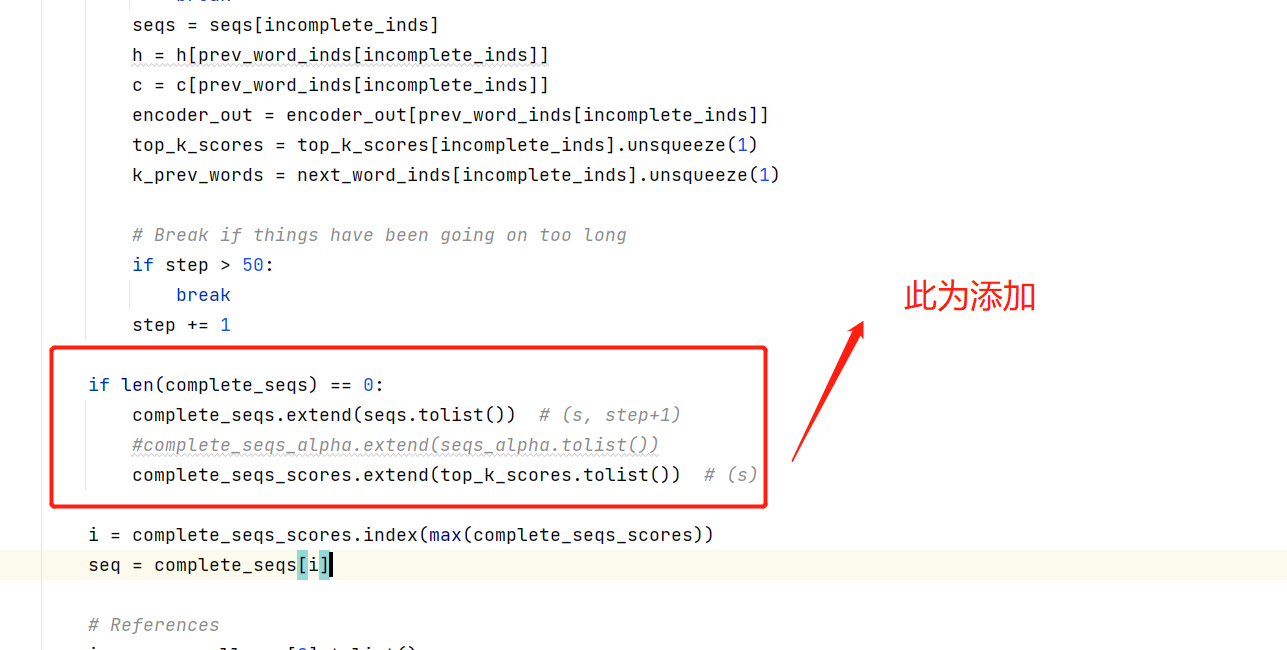
再次运行,可以得到如下结果。

总结
至此我们完成了Show, Attend and Tell: Neural Image CaptionGeneration with Visual Attention的代码复现,后续将对每个py文件进行详细注解,感谢关注。
参考
Previous PyTorch Versions | PyTorch
show attend and tell代码实现(绝对详细)_show attend and tell pytorch代码_饿了就干饭的博客-CSDN博客


