vue2引入Element UI的详细步骤

目录
一、Element UI介绍
Element UI的特点:
vue3引入Element plus的文章:
二、操作步骤
三、快速上手测试(可做可不做)
一、Element UI介绍
Element UI是一个基于Vue.js的组件库,提供了一套丰富、美观、易用的UI组件,包括表单、弹窗、导航、布局、数据展示等各种常用组件。Element UI旨在帮助开发者快速构建高质量的Web应用程序,使得前端开发更加高效和便捷。
Element UI的特点:
1.丰富的组件库:Element UI提供了大量的UI组件,覆盖了常用的各种组件需求,包括表单、按钮、菜单、对话框、表格、分页、图片等。
2.简洁美观的设计:Element UI的设计风格简洁、现代、美观,使得应用程序的界面更加美观、易用和专业。
3.易于使用:Element UI的组件易于使用,文档详细,提供了示例和在线演示,使得开发者可以更快地上手和使用。
4.可定制性:Element UI的组件支持自定义主题和样式,可以根据应用程序的需要自定义风格和样式。
5.国际化支持:Element UI支持多种语言,包括中文、英文、日文、韩文等,方便全球化应用程序的开发。
总的来说,Element UI是一个非常优秀的Vue.js组件库,可以帮助开发者快速构建高质量的Web应用程序,提高前端开发的效率和质量。
vue3引入Element plus的文章:
vue3引入Element plus的详细步骤_云边的快乐猫的博客-CSDN博客
二、操作步骤
1.项目终端命令下载Element UI的命令
npm i element-ui -S --legacy-peer-deps2.Element UI官网快速上手引用原生组件和样式到main.js文件中
import ElementUI from 'element-ui';
import 'element-ui/lib/theme-chalk/index.css';
Vue.use(ElementUI);引用完成后的main.js文件
import Vue from 'vue'
import App from './App.vue'
import router from './router'
import store from './store'/*这三行是引入的*/
import ElementUI from 'element-ui';
import 'element-ui/lib/theme-chalk/index.css';
Vue.use(ElementUI);Vue.config.productionTip = falsenew Vue({router,store,render: h => h(App)
}).$mount('#app')
这样就完成了
三、快速上手测试(可做可不做)
1.把HomeView.vue的代码全部删除替换成这个代码
<template><div><el-container style="height: 500px; border: 1px solid #eee"><el-aside width="200px" style="background-color: rgb(238, 241, 246)"><el-menu :default-openeds="['1', '3']"><el-submenu index="1"><template slot="title"><i class="el-icon-message"></i>导航一</template><el-menu-item-group><template slot="title">分组一</template><el-menu-item index="1-1">选项1</el-menu-item><el-menu-item index="1-2">选项2</el-menu-item></el-menu-item-group><el-menu-item-group title="分组2"><el-menu-item index="1-3">选项3</el-menu-item></el-menu-item-group><el-submenu index="1-4"><template slot="title">选项4</template><el-menu-item index="1-4-1">选项4-1</el-menu-item></el-submenu></el-submenu><el-submenu index="2"><template slot="title"><i class="el-icon-menu"></i>导航二</template><el-menu-item-group><template slot="title">分组一</template><el-menu-item index="2-1">选项1</el-menu-item><el-menu-item index="2-2">选项2</el-menu-item></el-menu-item-group><el-menu-item-group title="分组2"><el-menu-item index="2-3">选项3</el-menu-item></el-menu-item-group><el-submenu index="2-4"><template slot="title">选项4</template><el-menu-item index="2-4-1">选项4-1</el-menu-item></el-submenu></el-submenu><el-submenu index="3"><template slot="title"><i class="el-icon-setting"></i>导航三</template><el-menu-item-group><template slot="title">分组一</template><el-menu-item index="3-1">选项1</el-menu-item><el-menu-item index="3-2">选项2</el-menu-item></el-menu-item-group><el-menu-item-group title="分组2"><el-menu-item index="3-3">选项3</el-menu-item></el-menu-item-group><el-submenu index="3-4"><template slot="title">选项4</template><el-menu-item index="3-4-1">选项4-1</el-menu-item></el-submenu></el-submenu></el-menu></el-aside><el-container><el-header style="text-align: right; font-size: 12px"><el-dropdown><i class="el-icon-setting" style="margin-right: 15px"></i><el-dropdown-menu slot="dropdown"><el-dropdown-item>查看</el-dropdown-item><el-dropdown-item>新增</el-dropdown-item><el-dropdown-item>删除</el-dropdown-item></el-dropdown-menu></el-dropdown><span>王小虎</span></el-header><el-main><el-table :data="tableData"><el-table-column prop="date" label="日期" width="140"></el-table-column><el-table-column prop="name" label="姓名" width="120"></el-table-column><el-table-column prop="address" label="地址"></el-table-column></el-table></el-main></el-container></el-container></div>
</template><script>
// @ is an alias to /src
import HelloWorld from '@/components/HelloWorld.vue'export default {name: 'HomeView',data() {const item = {date: '2016-05-02',name: '王小虎',address: '上海市普陀区金沙江路 1518 弄'};return {tableData: Array(20).fill(item)}}
}
</script>
2.把App.vue文件的代码全部替换成如下代码
<template><div id="app"><router-view/></div>
</template>3.点击运行命令。然后浏览器打开运行成功
npm run serve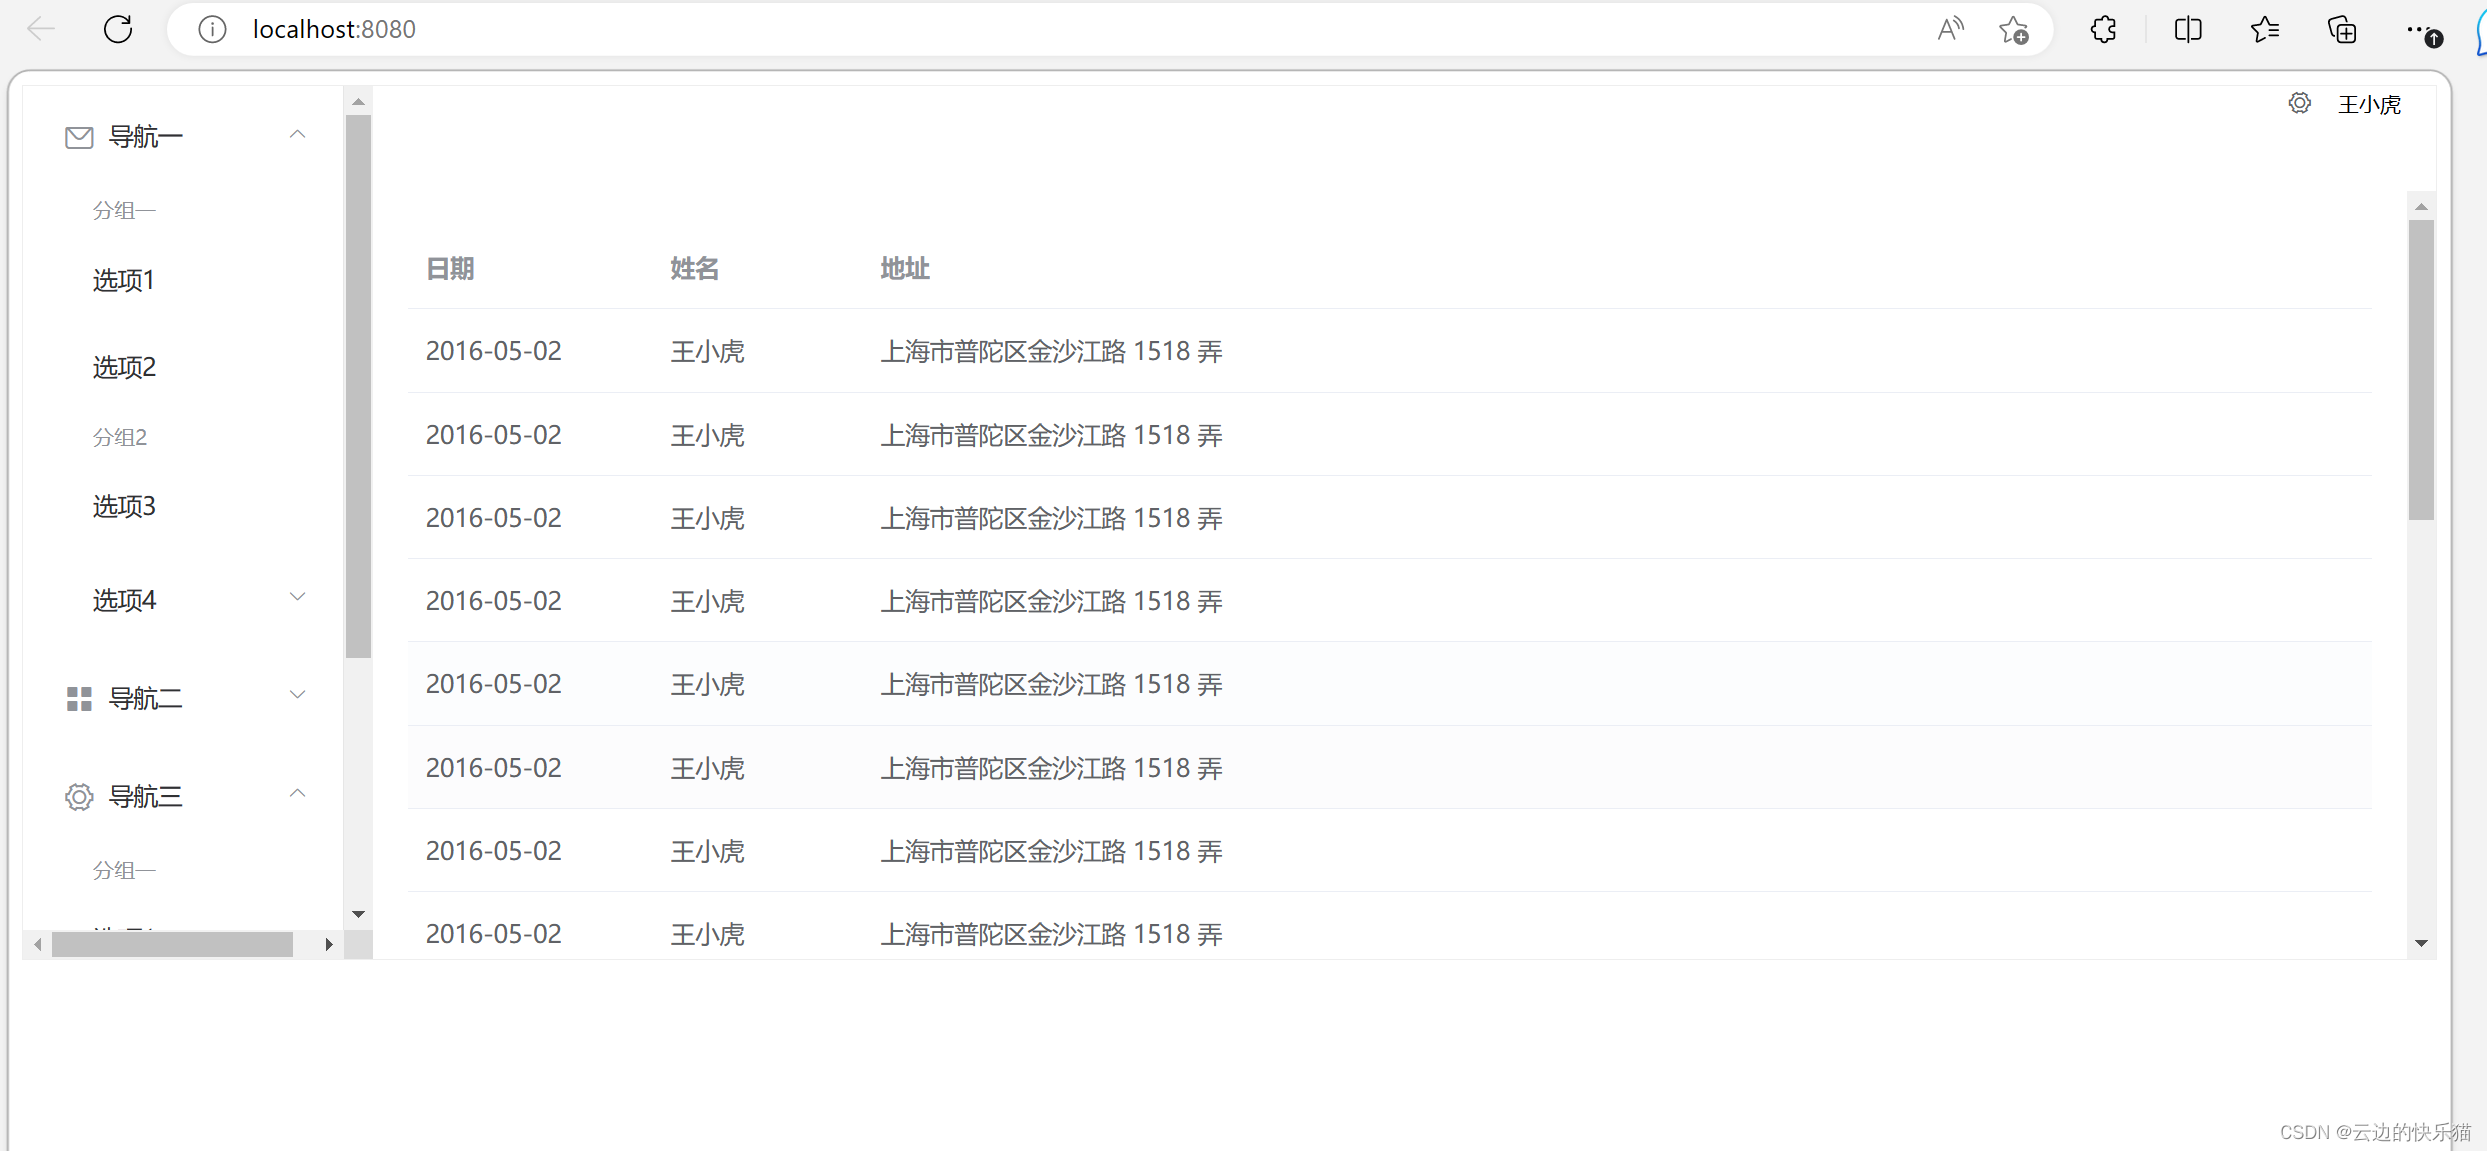
有什么问题都可以评论区留言,看见都会回复的
如果你觉得本篇文章对你有所帮助的,多多支持吧!!!
点赞收藏评论,当然也可以点击文章底部的红包或者订阅给文章创作支持一下了。抱拳了!