vue3+TS+Pinia+Vite项目实战之一

文章目录
- 一、创建项目
-
- 1.1 使用脚手架创建项目
- 1.2 初始化项目
- 二、登录页面的开发
- 三、使用vite-plugin-mock模拟后台接口返回数据
- 四、前端调用后端接口使用axios
- 五、首页layout
- 六、动态菜单
- 七、设置需要登录才能访问某些页面
一、创建项目
1.1 使用脚手架创建项目
npm init vue@latest
1.2 初始化项目
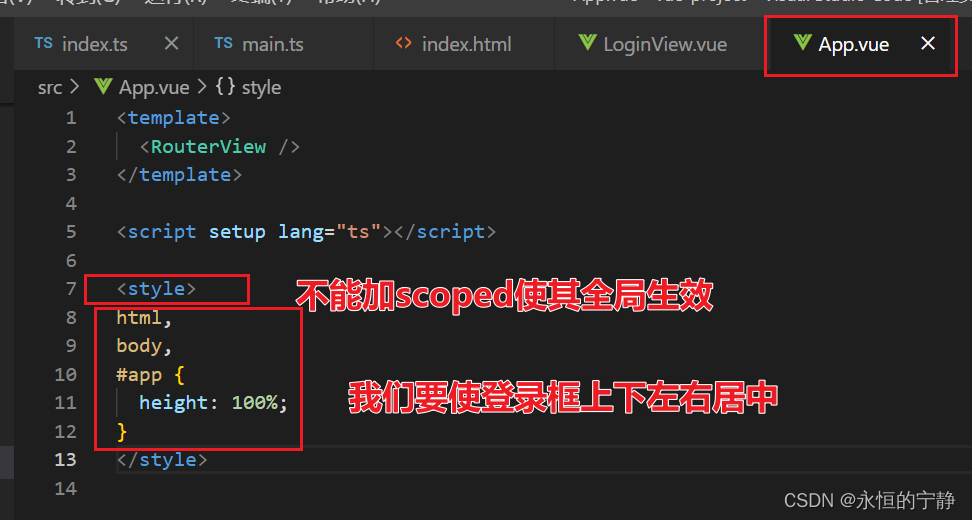
App.vue
<template><RouterView />
</template><script setup lang="ts"></script><style scoped></style>
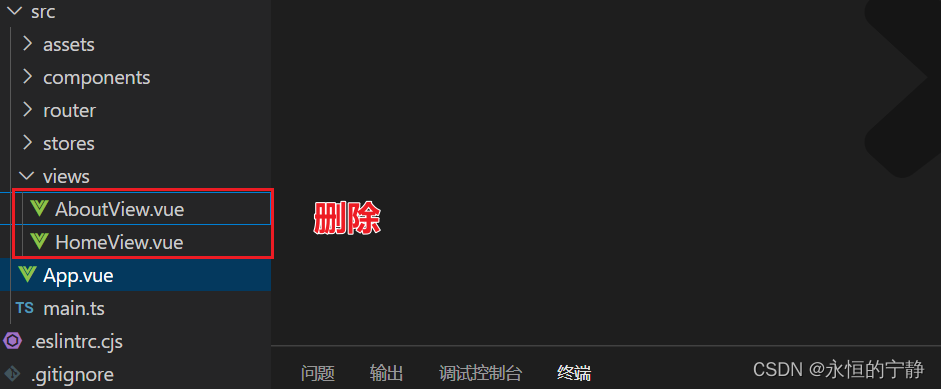
删除多余不要的组件
创建路由
src/router/index.ts
import { createRouter, createWebHistory } from 'vue-router'const router = createRouter({history: createWebHistory(import.meta.env.BASE_URL),routes: [{path: '/login',name: 'Login',component: () => import('../views/LoginView.vue')}]
})export default router
在src/views/LoginView.vue
<template><div>Login</div>
</template><script setup lang="ts"></script><style lang="scss" scoped></style>
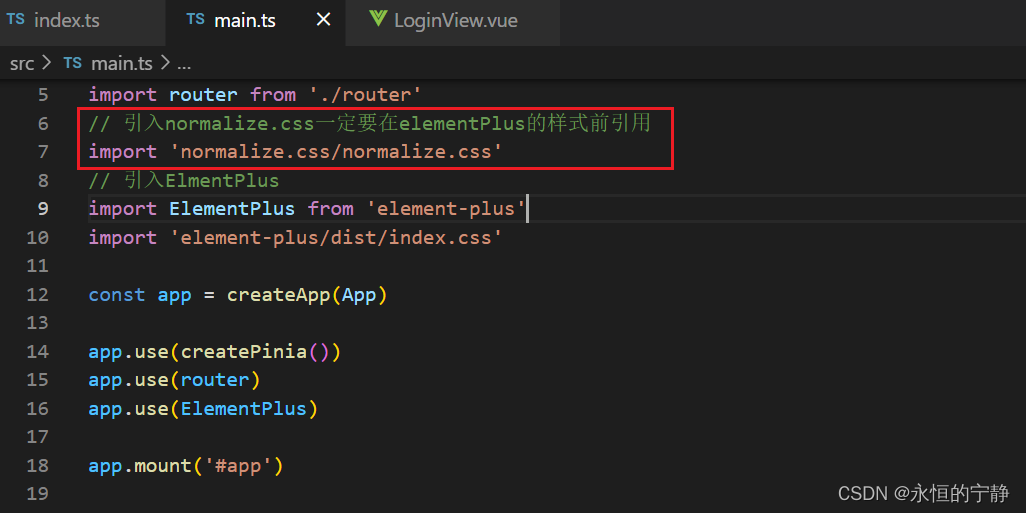
引入element-plus 可去官网查看如何引入
安装normalize.css
npm install normalize.css
二、登录页面的开发
安装sass
npm install sass
登录页的静态页面
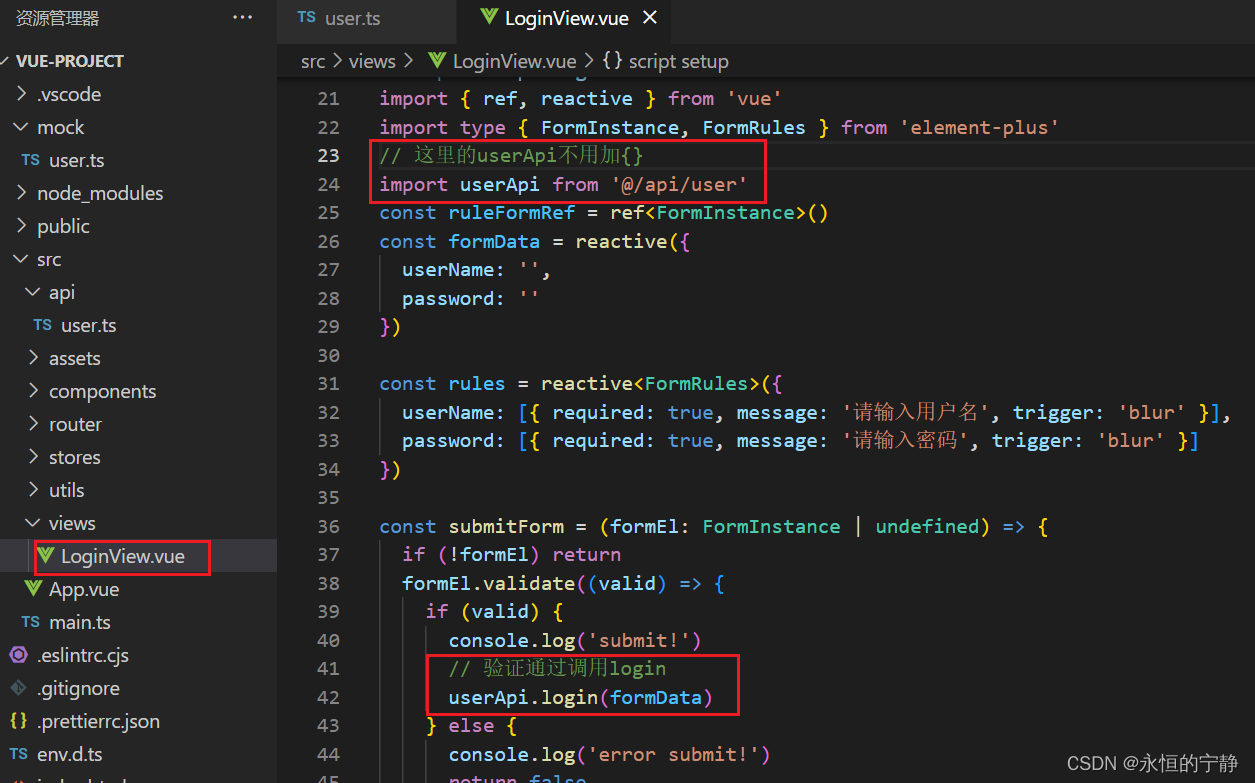
<template><div class="login-container"><h2>登录</h2><el-form ref="ruleFormRef" :model="formData" status-icon :rules="rules"><el-form-item prop="userName"><el-input v-model="formData.userName" placeholder="userName" /></el-form-item><el-form-item prop="password"><el-input v-model="formData.password" placeholder="password" type="password" /></el-form-item><el-form-item><el-button type="primary" @click="submitForm(ruleFormRef)">登录</el-button></el-form-item></el-form></div>
</template><script setup lang="ts">
import { ref, reactive } from 'vue'
import type { FormInstance, FormRules } from 'element-plus'
const ruleFormRef = ref<FormInstance>()
const formData = reactive({userName: '',password: ''
})const rules = reactive<FormRules>({userName: [{ required: true, message: '请输入用户名', trigger: 'blur' }],password: [{ required: true, message: '请输入密码', trigger: 'blur' }]
})const submitForm = (formEl: FormInstance | undefined) => {if (!formEl) returnformEl.validate((valid) => {if (valid) {console.log('submit!')} else {console.log('error submit!')return false}})
}
</script><style lang="scss" scoped>
.login-container {// 要加上100%height: 100%;display: flex;flex-direction: column;align-items: center;justify-content: center;.el-form {width: 300px;.el-button {width: 100%;}}
}
</style>
三、使用vite-plugin-mock模拟后台接口返回数据
安装方法
npm i  mockjs -S
npm i vite-plugin-mock -D
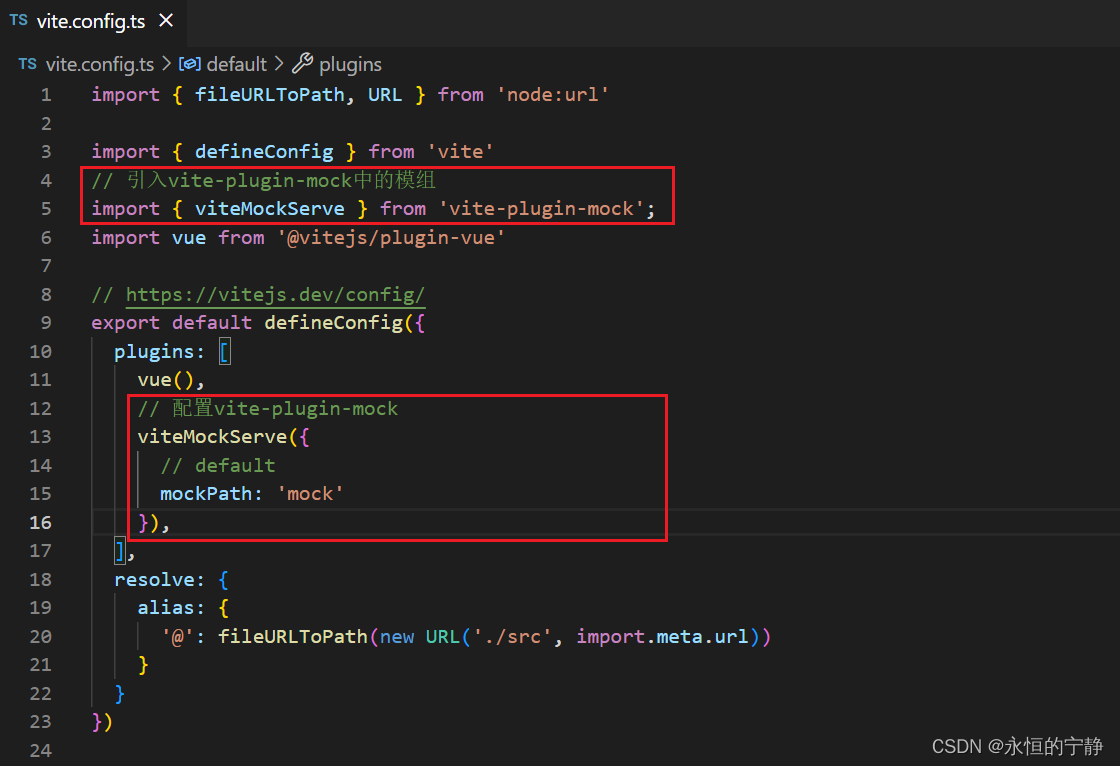
配置vite-plugin-mock
开始使用mock使其返回数据

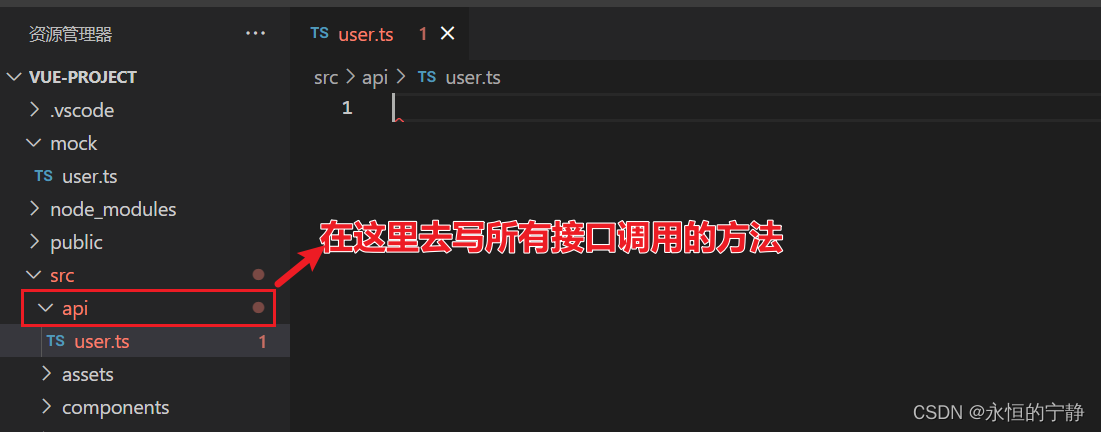
四、前端调用后端接口使用axios
安装axios
npm i axios -S
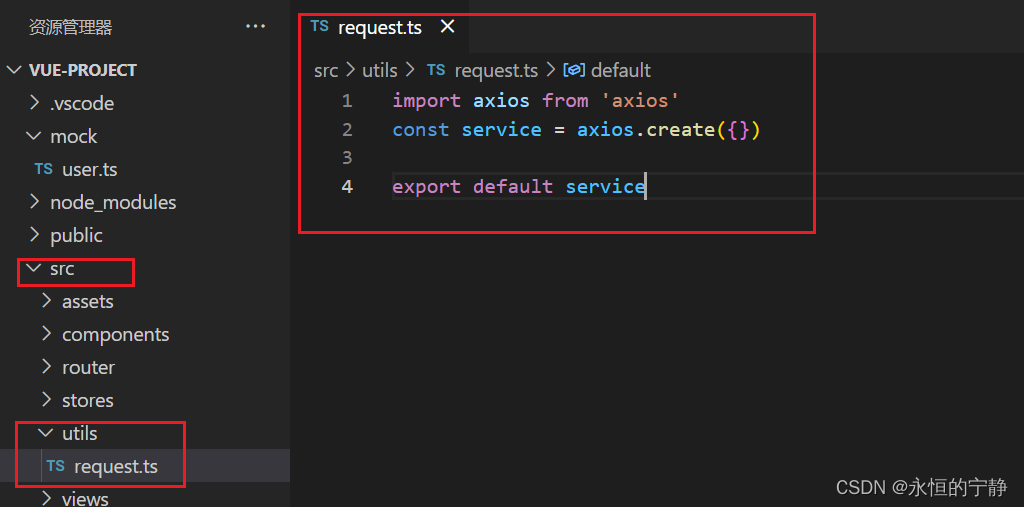
简单封装一下axios
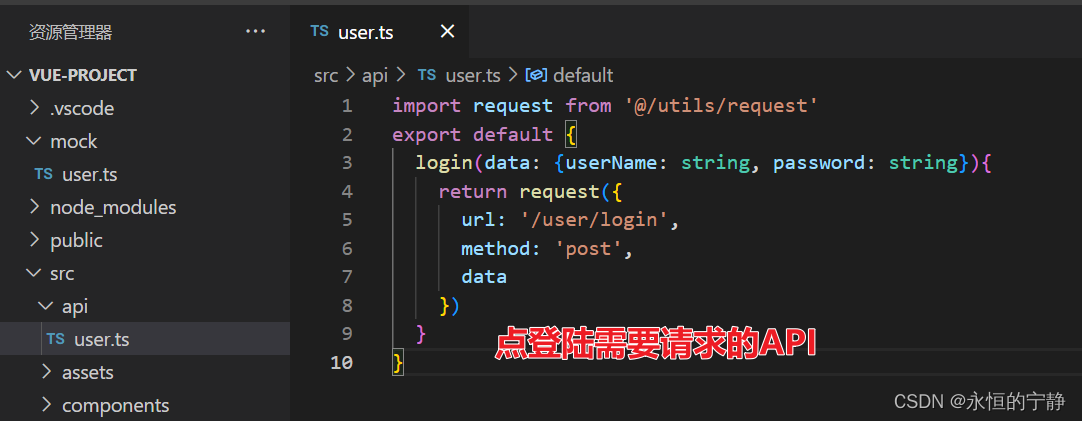
在mock中添加逻辑返回真实的数据
/mock/user.ts
import type { MockMethod } from 'vite-plugin-mock'// 模拟用户账户
const tokens = {admin: 'admin-token',editor: 'editor-token'
}export default [{// 请求到这里的路径我来接收处理url: '/user/login',method: 'post',// 响应回去请求的数据// {body} 解构出来body的数据response({body}){const userName = body.userNameconst token = tokens[userName]if(token){return {code: 200,data: token}}else{return {code: 400,message: '账号或密码不正确'}}}}
] as MockMethod[]
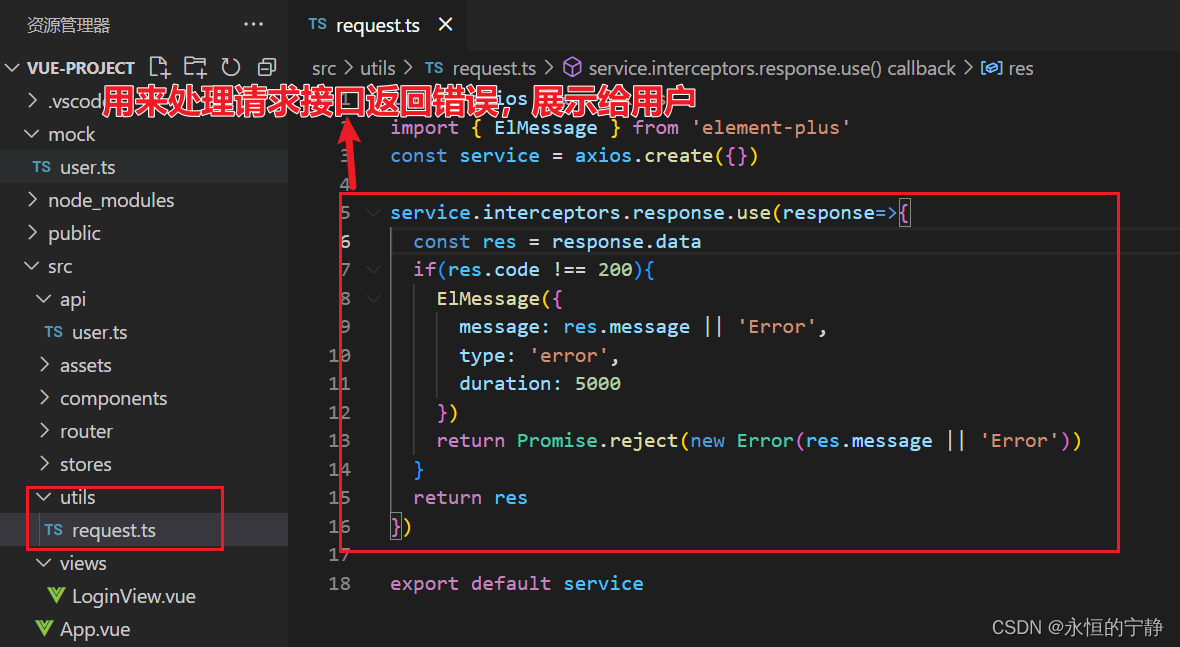
在axios响应拦截器中处理接口错误在页面提示
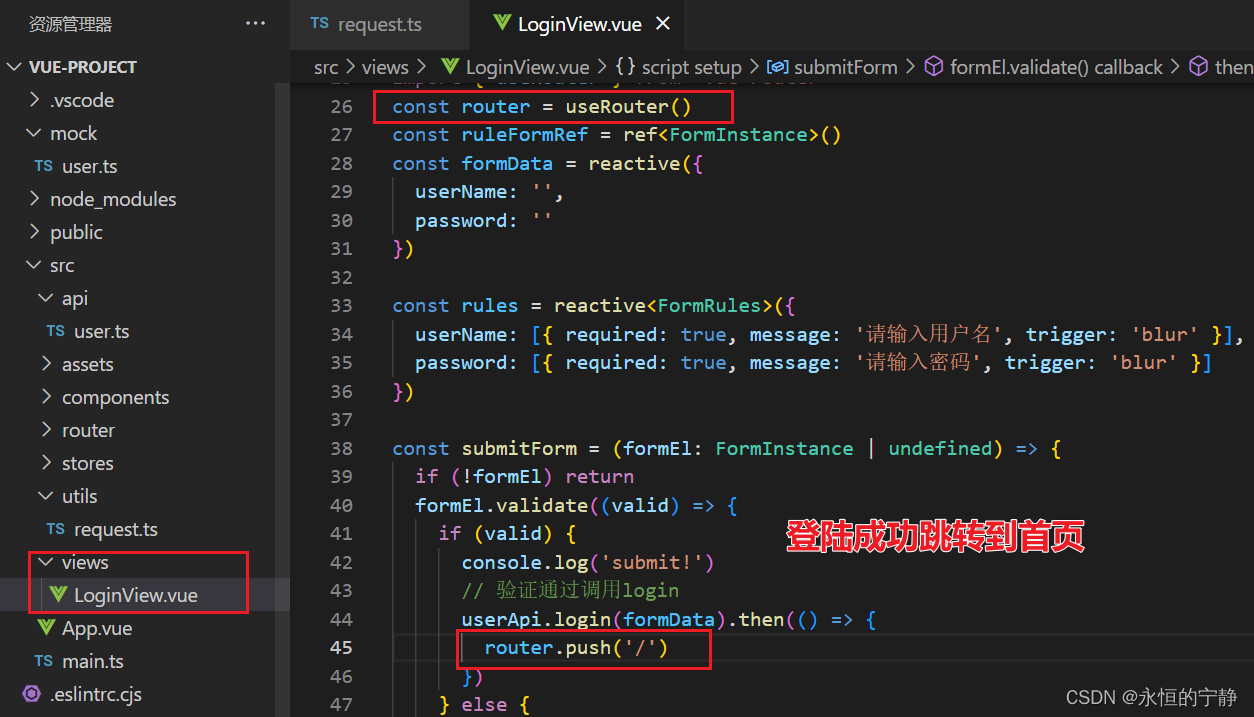
登录成功跳转到首页
添加首页路由

在src/views/HomeView.vue
五、首页layout
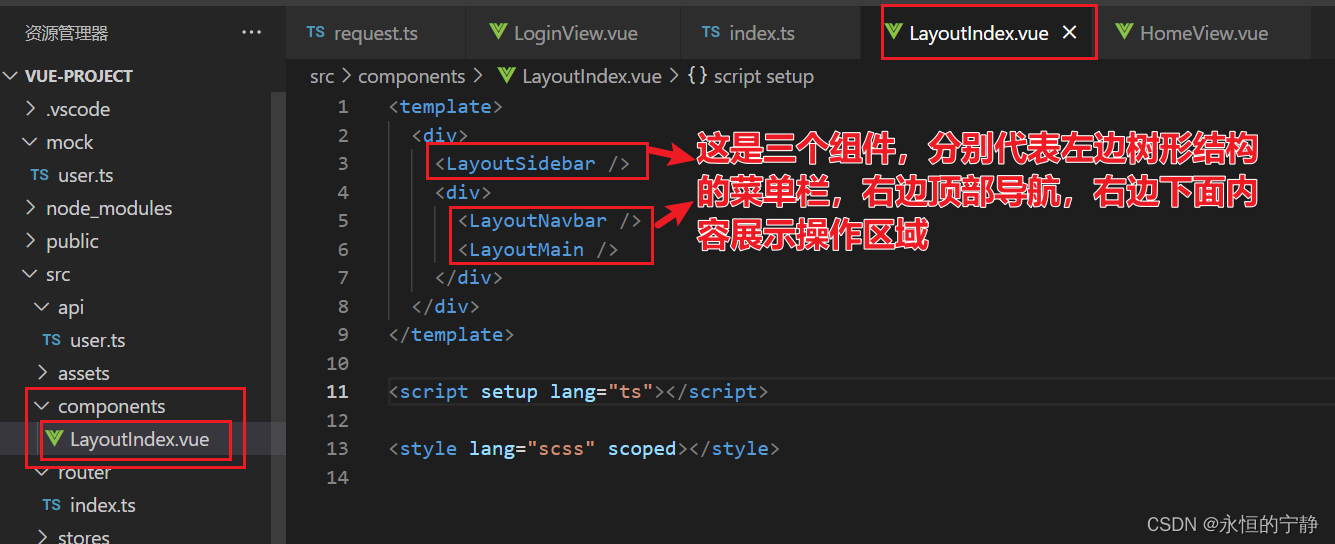

调整路由
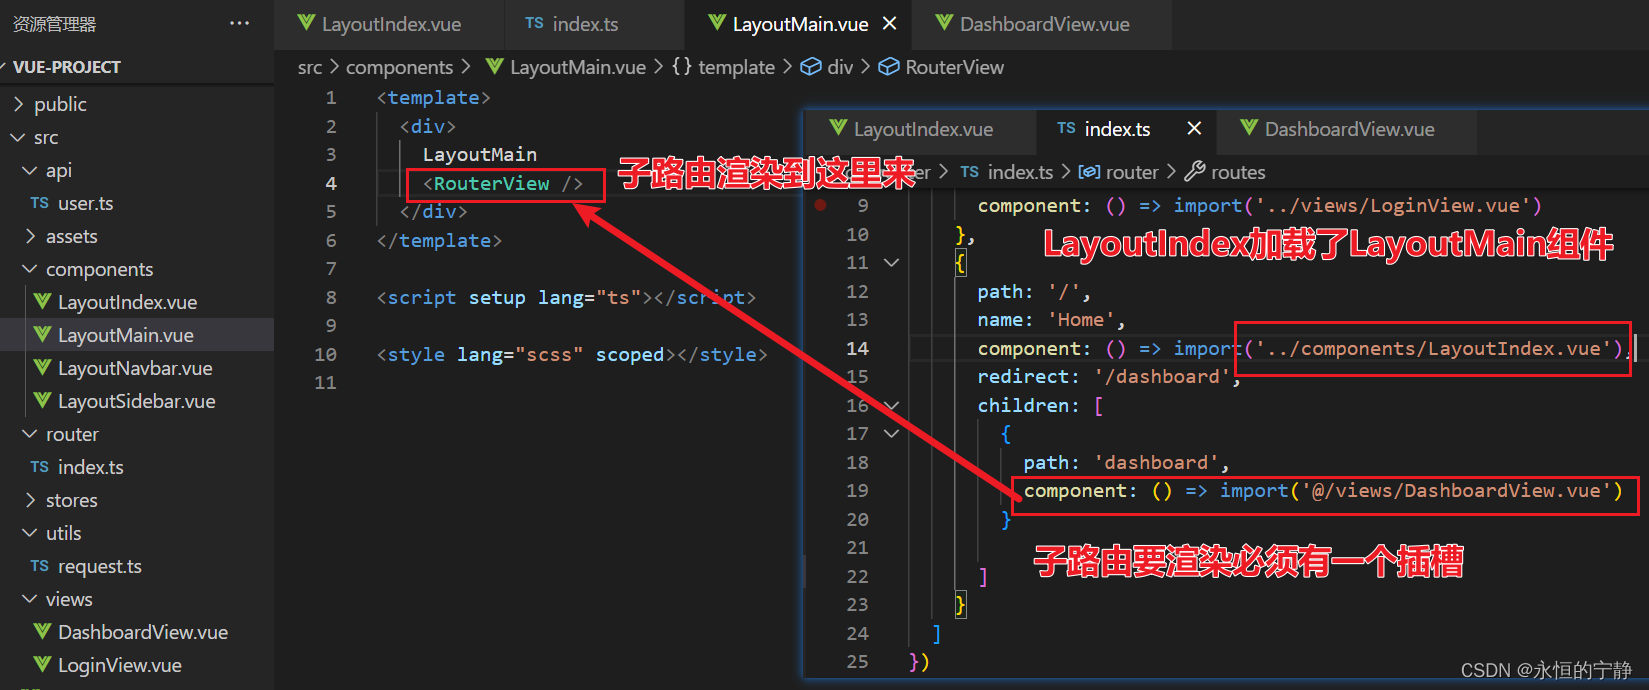
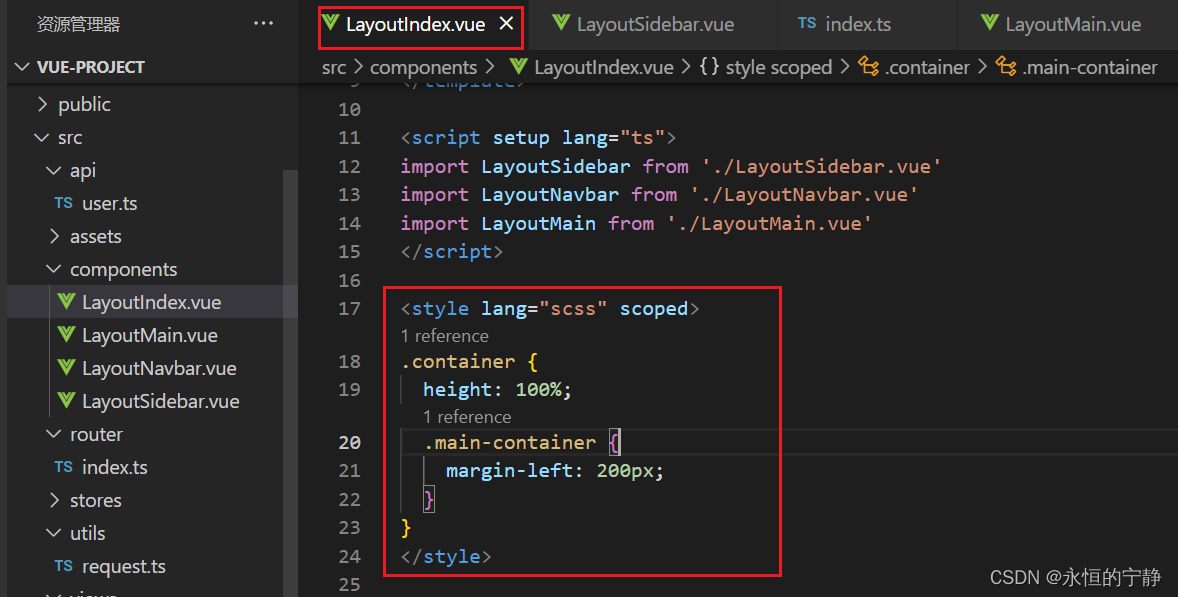
调整layout的样式

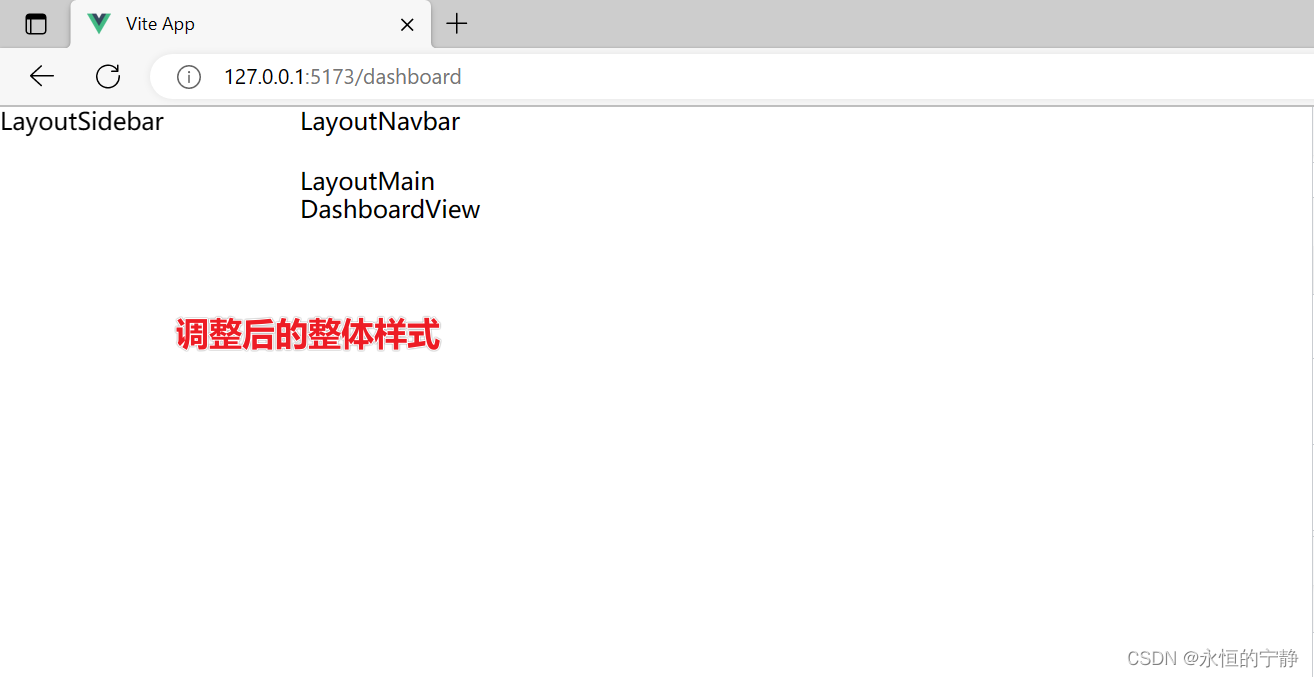
现在可以在element-plus中去复制一个菜单贴过来了。
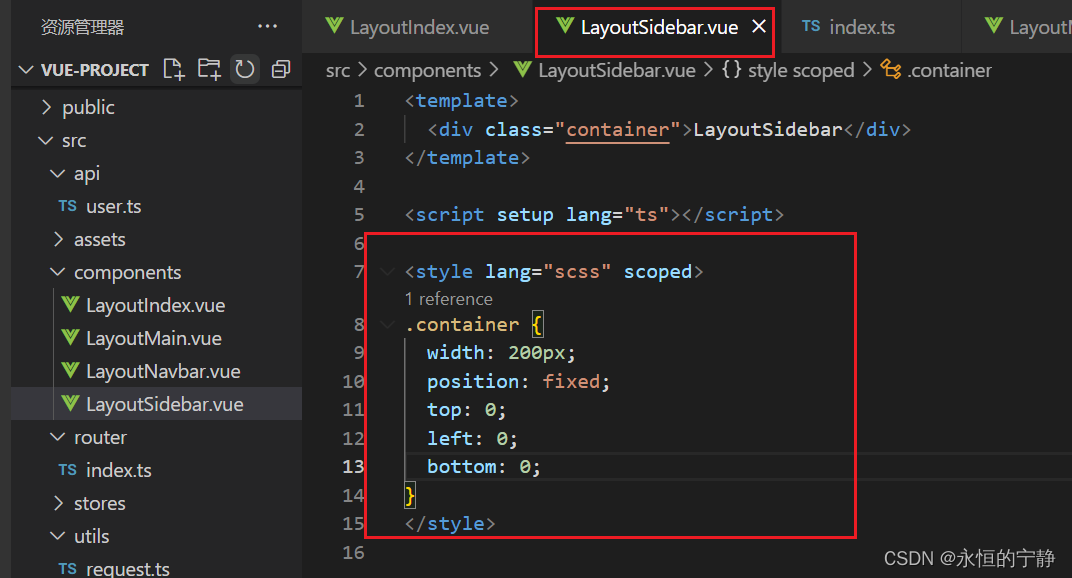
LayoutSidebar.vue
<template><div class="container"><el-menubackground-color="#545c64"active-text-color="#ffd04b"text-color="#fff"default-active="1"><el-menu-item index="1">首页</el-menu-item><el-menu-item index="2">菜单2</el-menu-item></el-menu></div>
</template><script setup lang="ts"></script><style lang="scss" scoped>
.container {width: 200px;position: fixed;top: 0;left: 0;bottom: 0;:deep(.el-menu) {height: 100%;}
}
</style>
六、动态菜单
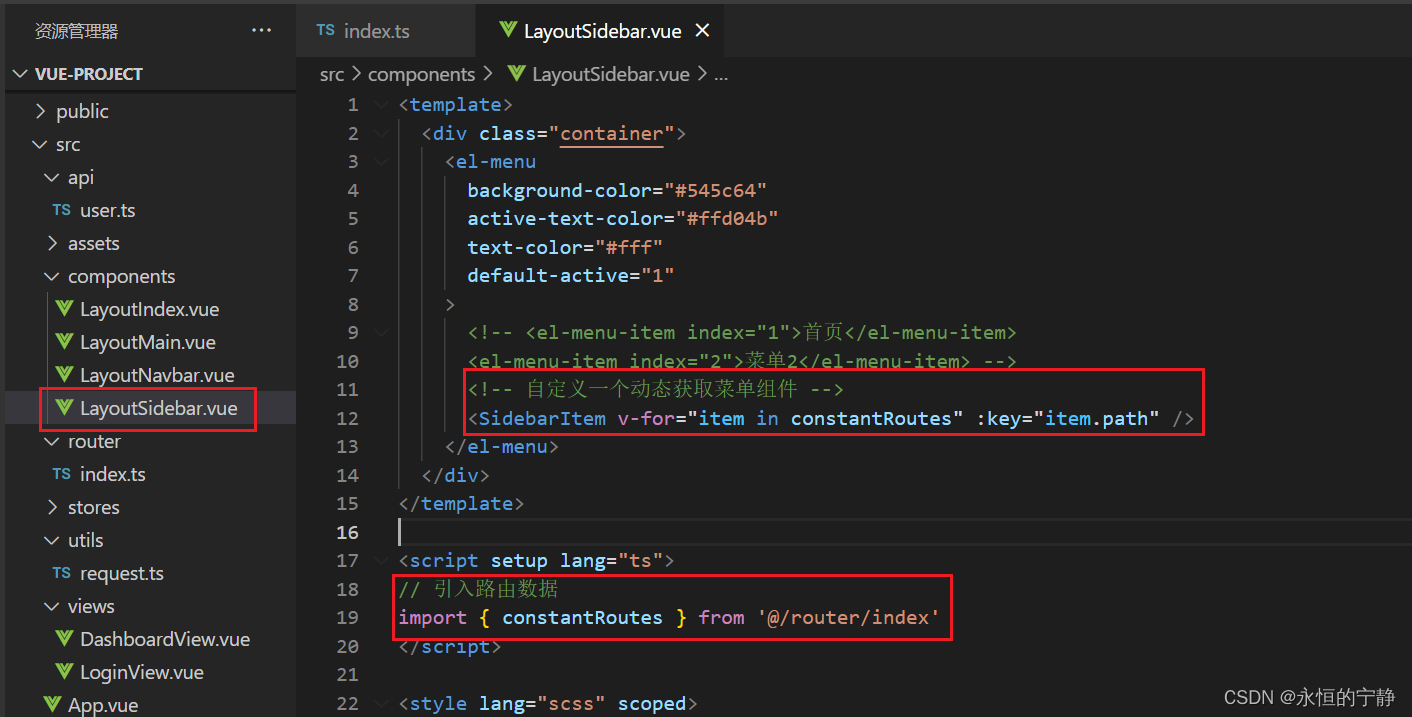
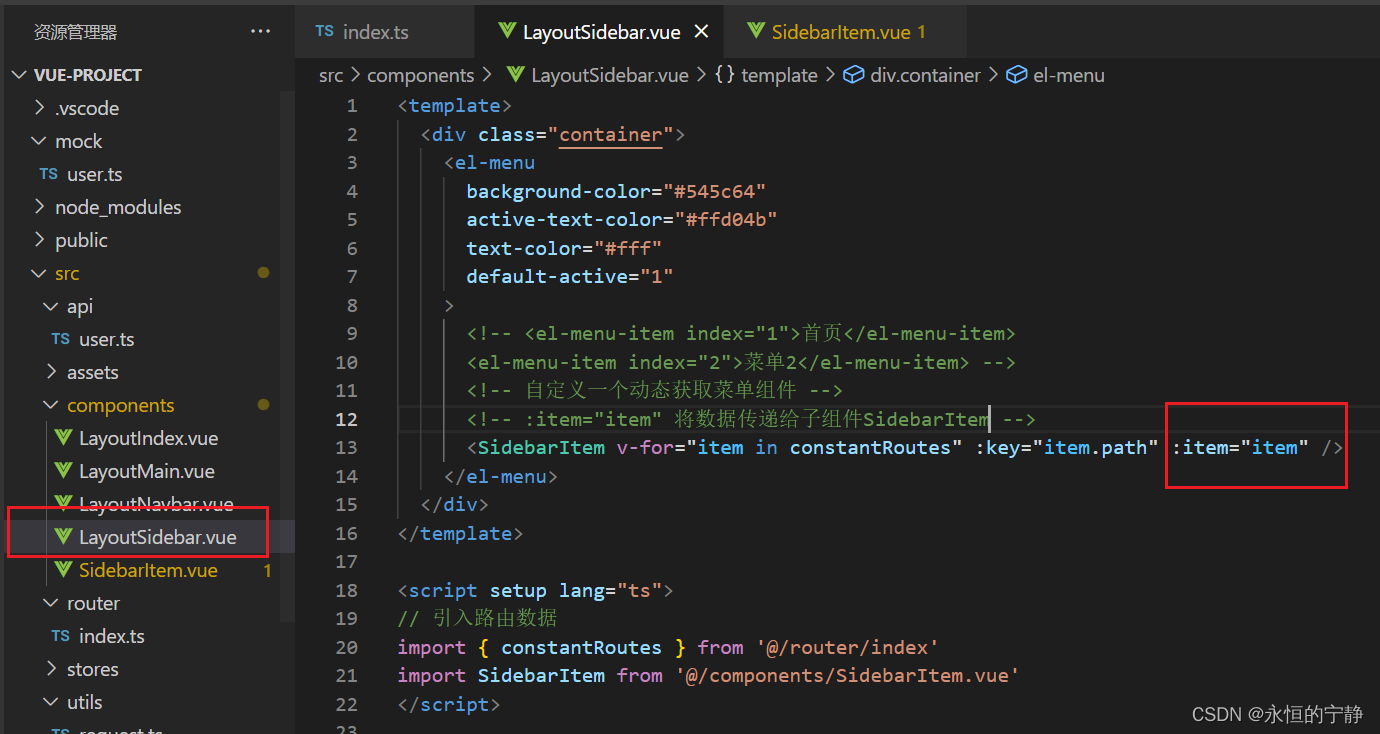
现在的菜单是写死的,我们需要根据路由动态生成菜单。
将路由导出来使其在别的文件中能够使用。
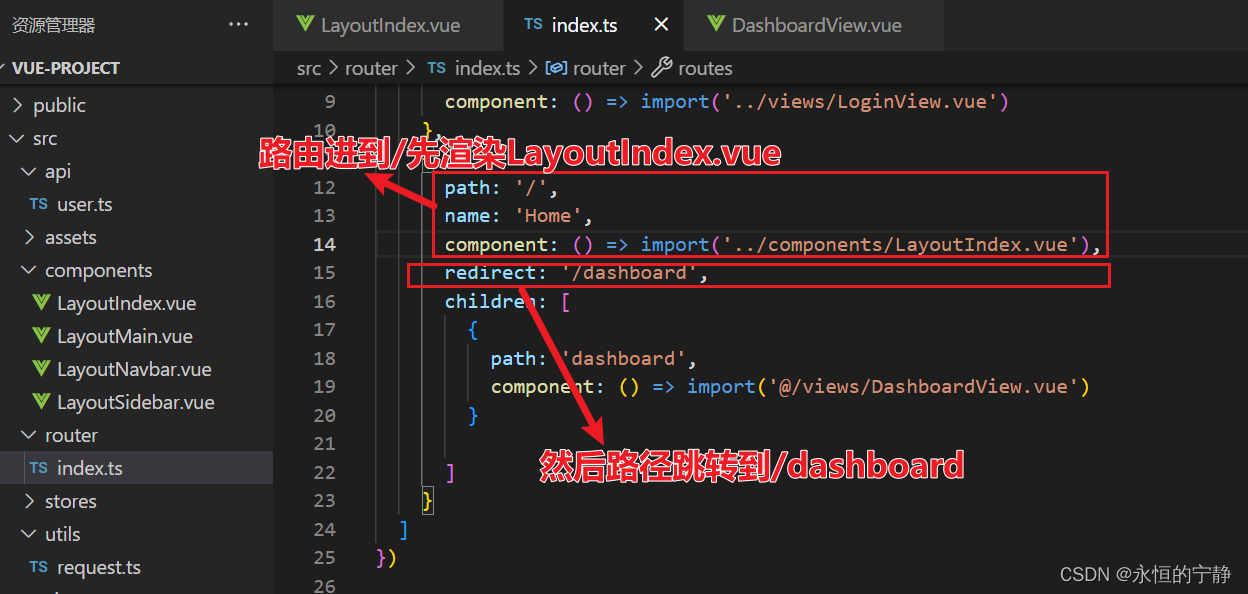
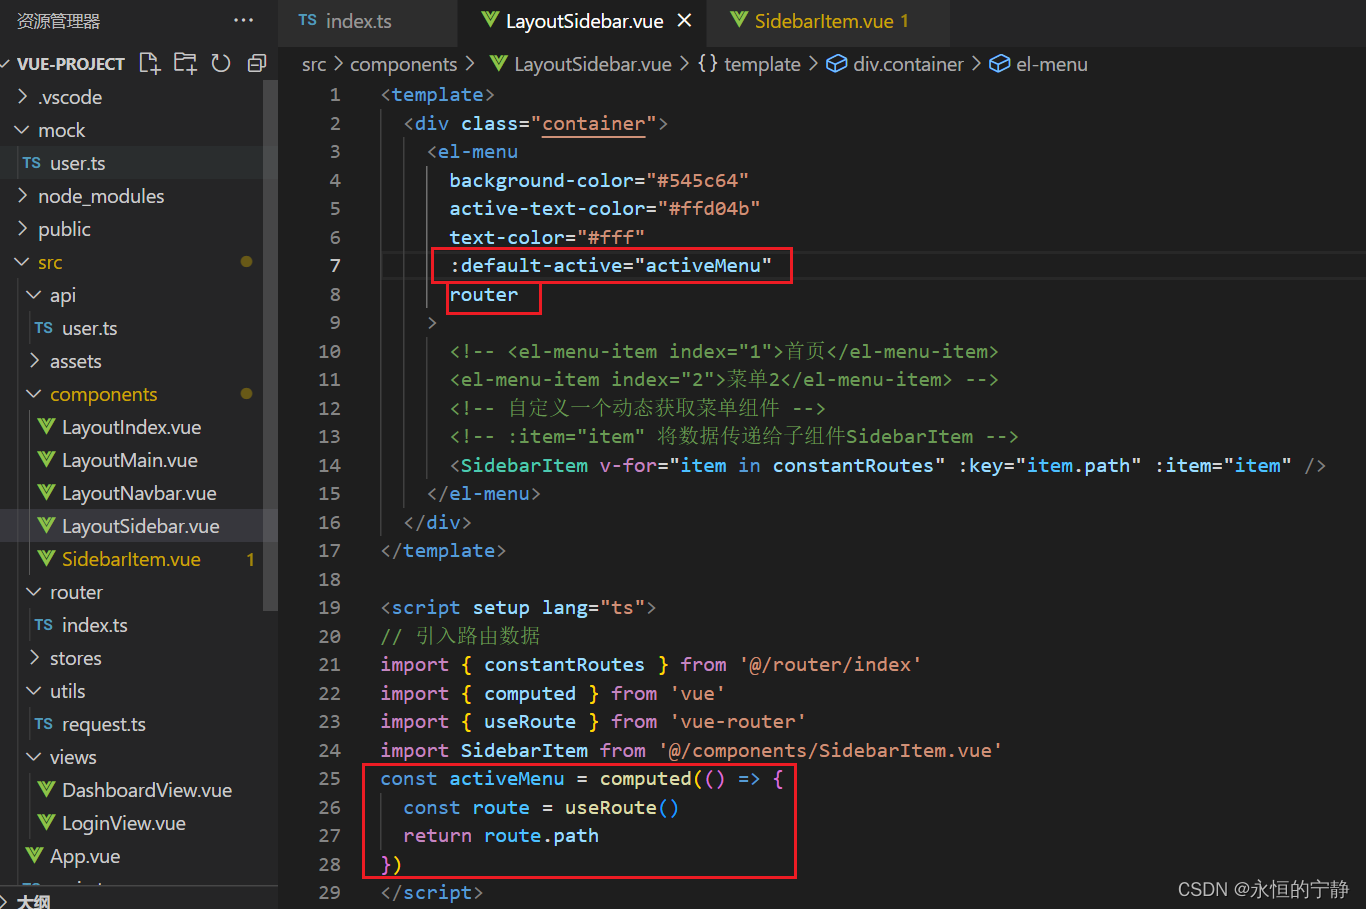
调整src/router/index.ts
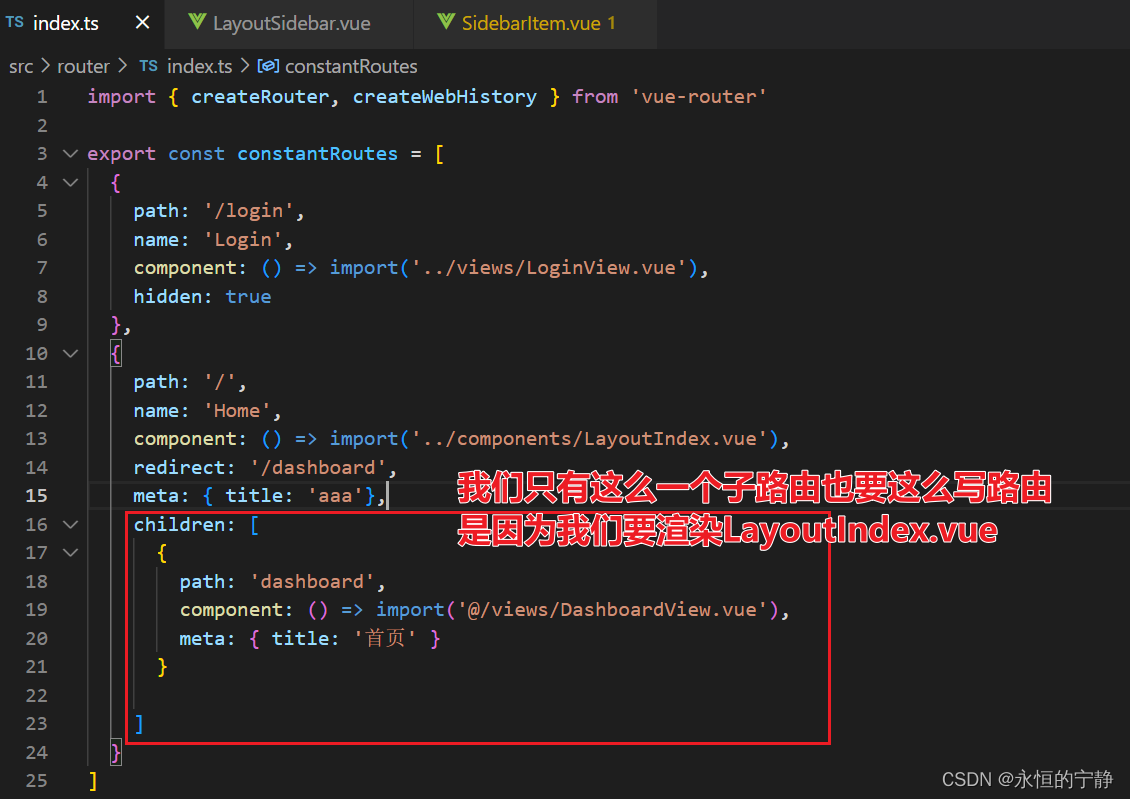
import { createRouter, createWebHistory } from 'vue-router'export const constantRoutes = [{path: '/login',name: 'Login',component: () => import('../views/LoginView.vue')},{path: '/',name: 'Home',component: () => import('../components/LayoutIndex.vue'),redirect: '/dashboard',children: [{path: 'dashboard', component: () => import('@/views/DashboardView.vue')}]}
]const router = createRouter({history: createWebHistory(import.meta.env.BASE_URL),routes: constantRoutes
})export default router
调整 src/components/LasyoutSidebar.vue
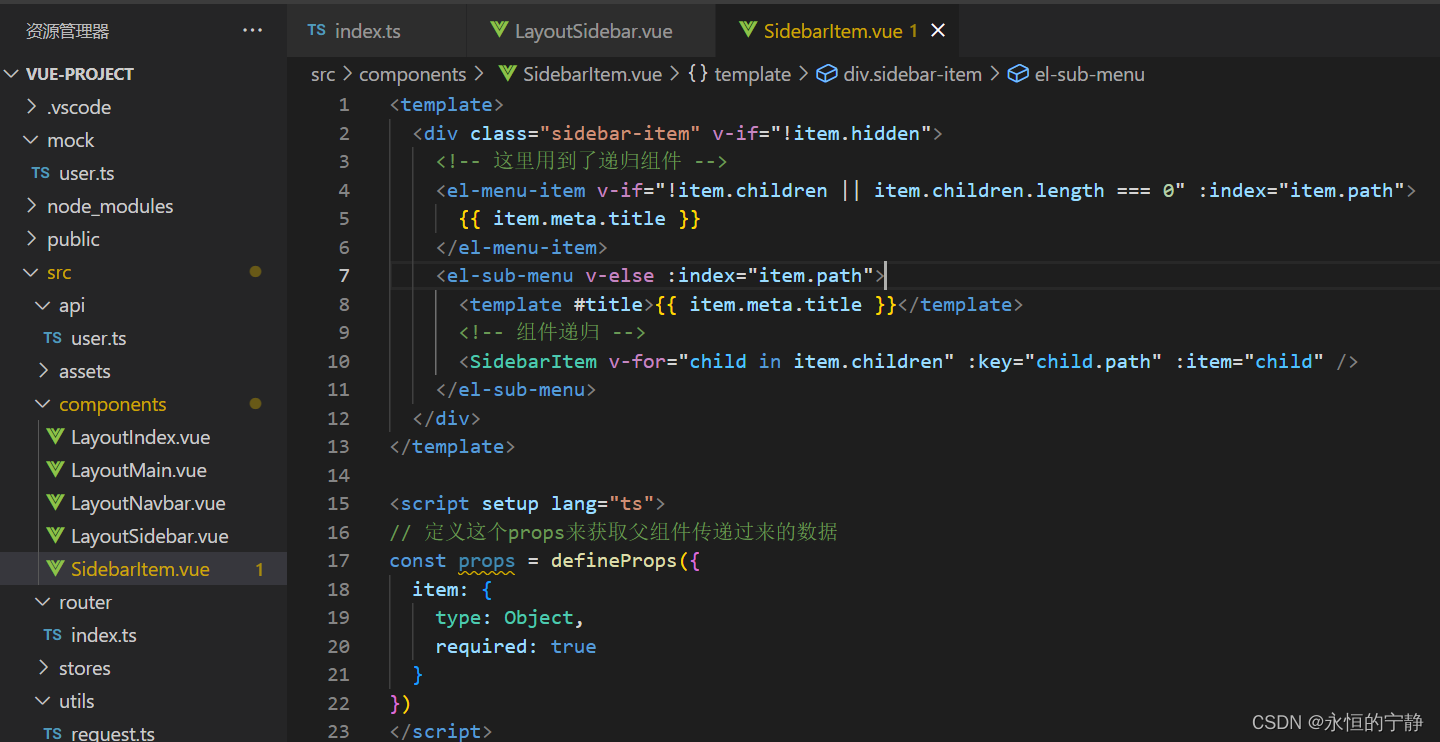
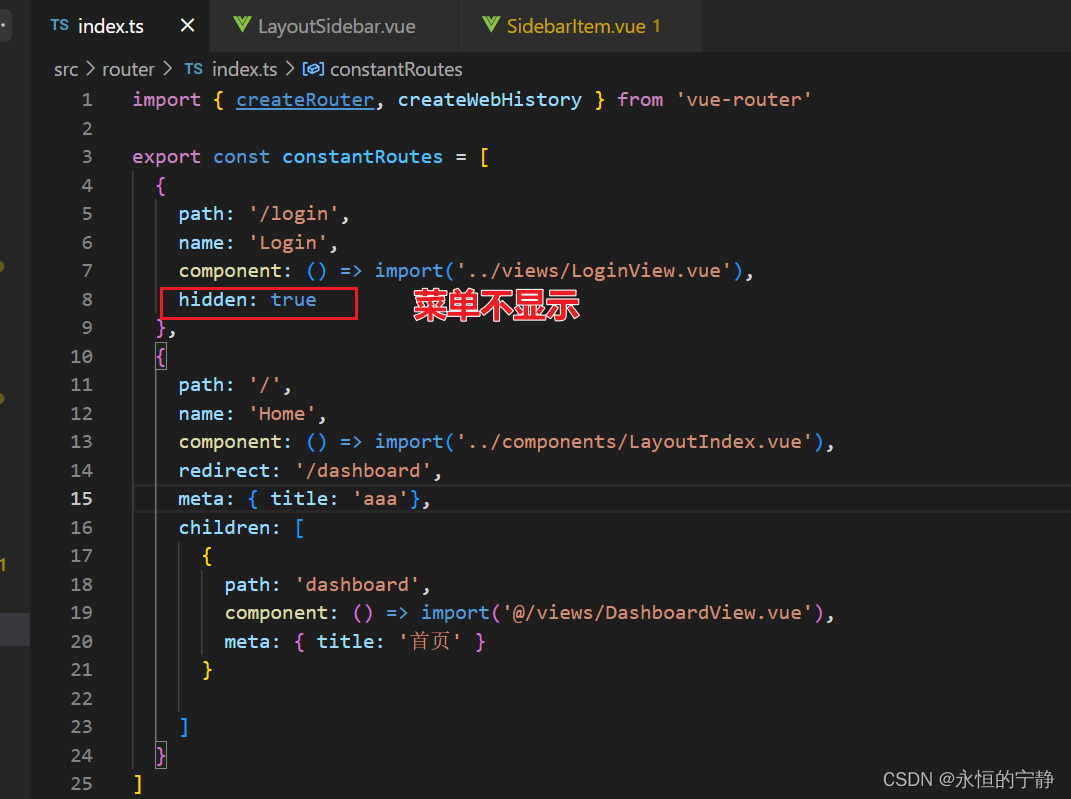
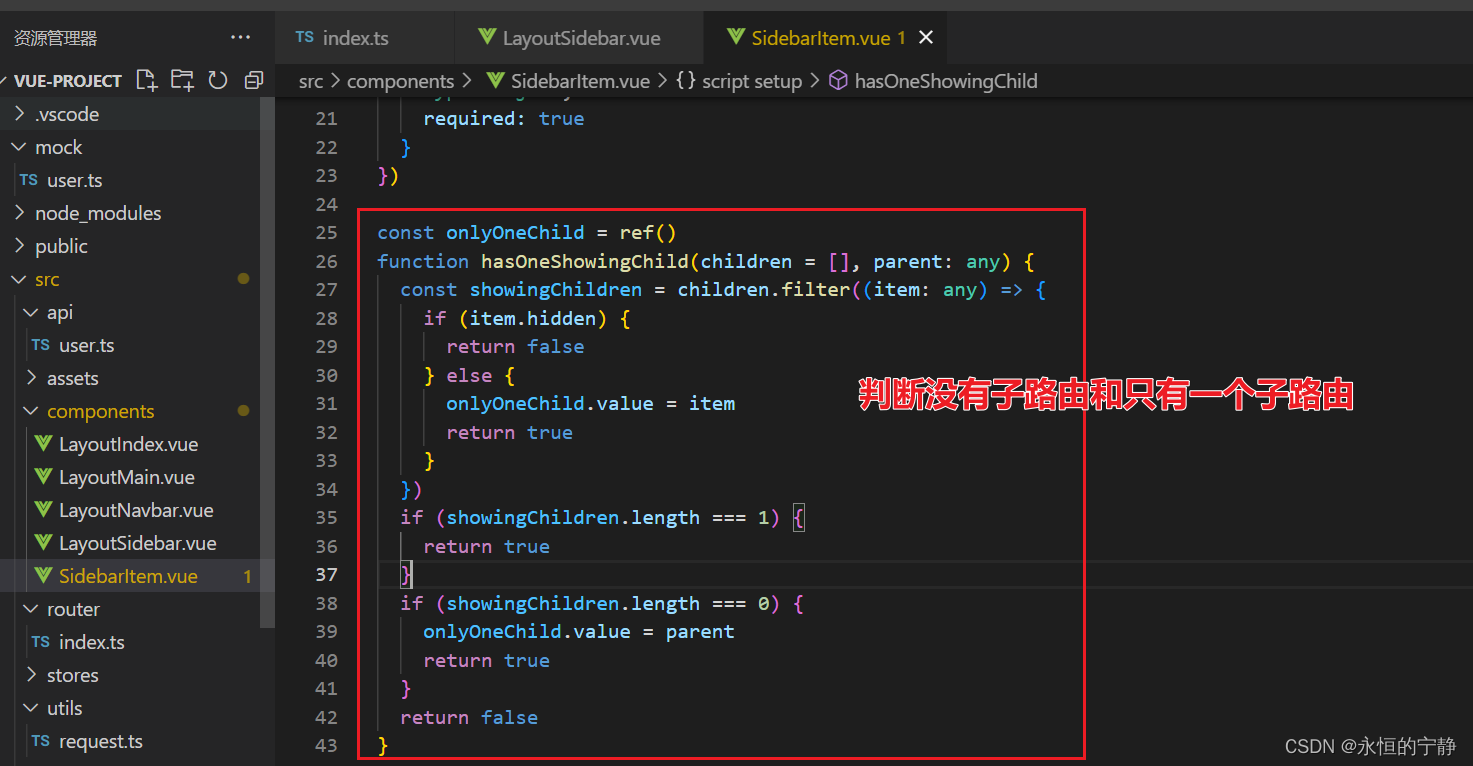
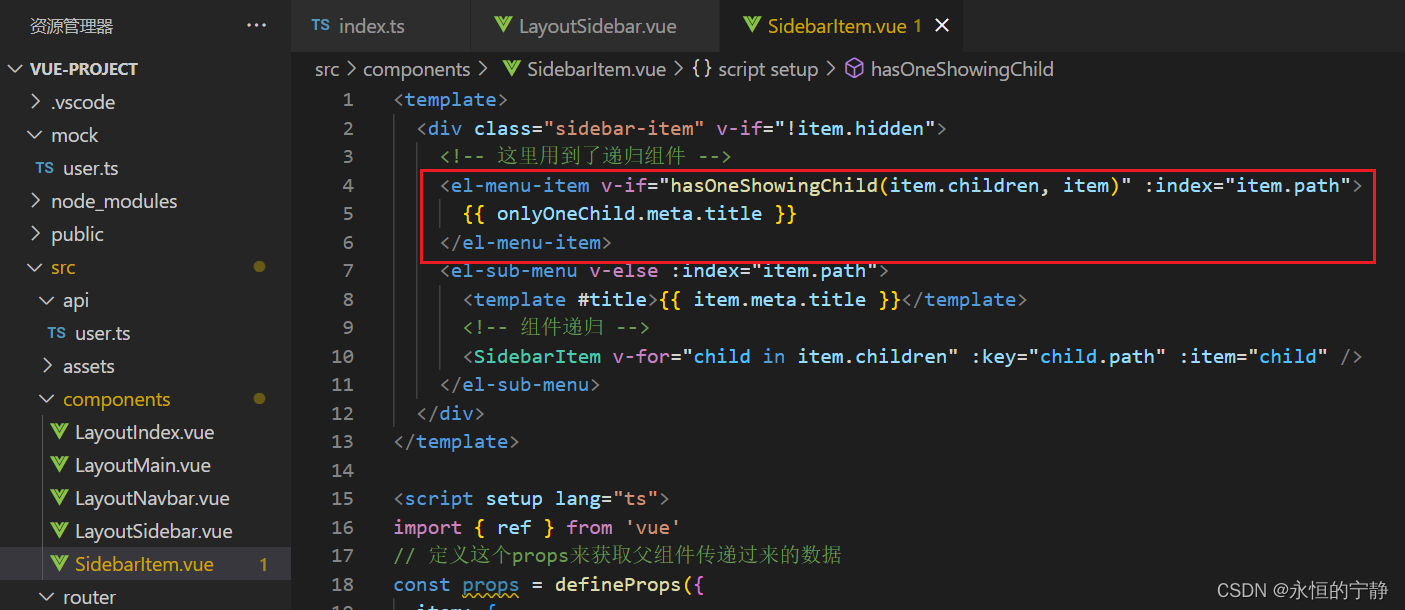
当只有一个子路由,我们只显示子路由的调整
点击菜单并没有跳转,继续调整…
总结动态菜单:就是通过递归组件将路由中数据展示在动态菜单上。
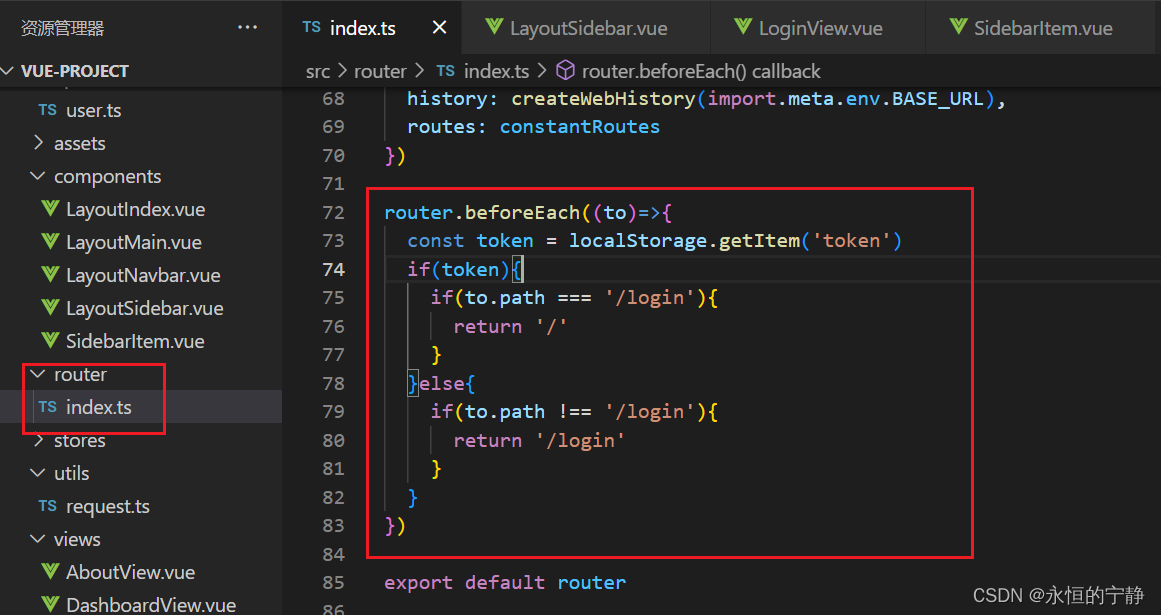
七、设置需要登录才能访问某些页面
登录成功将token存起来

设置前置路由守卫,没token你就去/login页面吧
退出登录
LayoutNavbar.vue
<template><div class="layout-navbar"><el-button @click="handleLogout" style="margin-left: auto" type="primary">退出登录</el-button></div>
</template><script setup lang="ts">
import { useRouter } from 'vue-router'
const router = useRouter()
function handleLogout() {localStorage.removeItem('token')router.push('/login')
}
</script><style lang="scss" scoped>
.layout-navbar {height: 50px;border-bottom: 1px solid #ccc;box-sizing: border-box;padding: 0 16px;display: flex;align-items: center;
}
</style>