Nginx安装使用记录

参考文章:https://www.runoob.com/linux/nginx-install-setup.html
系统平台:Ubuntu 20.04.4 LTS (GNU/Linux 5.4.0-146-generic x86_64)
下载编译工具
sudo apt-get install zlib zlib-devel gcc-c++ libtool openssl openssl-devel
PCRE
官网:https://www.pcre.org/
PCRE 作用是让 Nginx 支持 Rewrite 功能。
1.下载 PCRE 安装包,下载地址: https://github.com/PCRE2Project/pcre2/releases
cd /home/qhdata/Nginx/tmp
wget https://github.com/PCRE2Project/pcre2/releases/download/pcre2-10.42/pcre2-10.42.tar.gz
2、解压安装包:
tar zxvf pcre2-10.42.tar.gz
3.进入安装包目录
cd pcre2-10.42
4、编译安装
./configure prefix=/home/qhdata/Nginx/PCRE
make && make install
5、查看pcre版本
pcre2-config --version

Nginx
安装
参考文章:https://stackoverflow.com/questions/7304197/nginx-install-on-linux
参考文章:https://nginx.org/en/docs/beginners_guide.html
1.下载地址:https://nginx.org/en/download.html
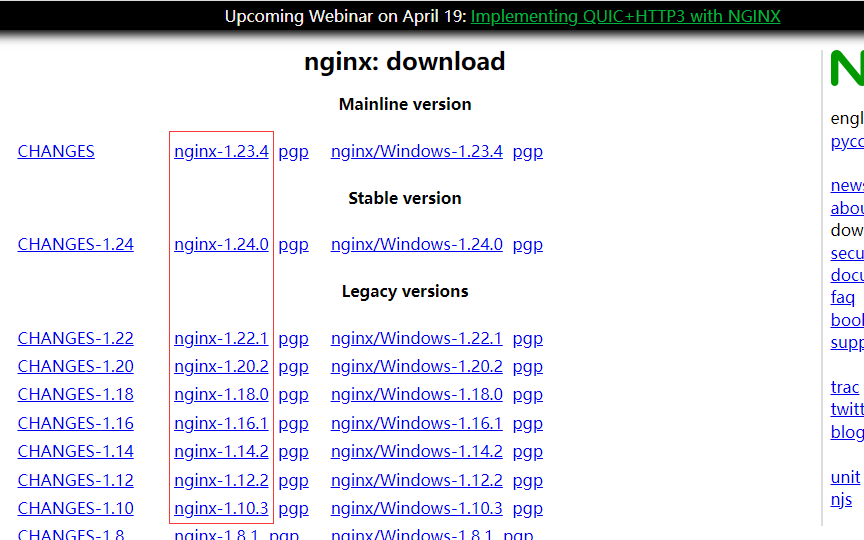
cd /home/qhdata/Nginx/tmp
wget https://nginx.org/download/nginx-1.24.0.tar.gz
2、解压安装包:
tar zxvf nginx-1.24.0.tar.gz
3.进入安装包目录
cd nginx-1.24.0
4、编译安装
./configure --prefix=<HOME_PATH> --with-http_stub_status_module --with-http_ssl_module --with-pcre=<PRCE_SOURCE_PATH>
./configure --prefix=/home/qhdata/Nginx/Nginx --with-http_stub_status_module --with-http_ssl_module --with-pcre=/home/qhdata/Nginx/tmp/pcre2-10.42
make && make install
ps:with-pcre是pcre的解压缩文件的路径,不是安装好的目录路径。
5、查看nginx版本
/home/qhdata/Nginx/Nginx/sbin/nginx -v

配置
参考文章:https://nginx.org/en/docs/ngx_core_module.html#events
参考文章:https://nginx.org/en/docs/ngx_core_module.html#accept_mutex
参考文章:https://juejin.cn/post/6844903741678698510
参考文章:https://github.com/dunwu/nginx-tutorial
配置<HOME_PATH>/conf/nginx.conf,在<HOME_PATH>下创建tmp文件夹来存放文件信息。
配置文件如下
# 定义user和group 工作进程使用的凭据。如果省略,则使用 group名称等于的组。user
# 指定要使用的连接处理 method。通常不需要明确指定它,因为 nginx 默认会使用最有效的方法。
#user  nobody;
worker_processes  1;  #设置值和CPU核心数一致#全局错误日志
#日志位置和日志级别,  debug、info、notice、 warn、error、crit、 alert或emerg。以上日志级别按严重性递增的顺序列出。
#error_log  logs/error.log;
#error_log  logs/error.log  notice;
#error_log  logs/error.log  info;
error_log  /home/qhdata/Nginx/Nginx/tmp/log/error.log error;  #pid        logs/nginx.pid;
pid        /home/qhdata/Nginx/Nginx/tmp/log/nginx.pid;  # 程序运行的pid存放位置# 提供配置文件上下文,其中指定了影响连接处理的指令。
events {#参考事件模型,use [ kqueue | rtsig | epoll | /dev/poll | select | poll ]; epoll模型#是Linux 2.6以上版本内核中的高性能网络I/O模型,linux建议epoll,如果跑在FreeBSD上面,就用kqueue模型。#补充说明:#与apache相类,nginx针对不同的操作系统,有不同的事件模型#A)标准事件模型#Select、poll属于标准事件模型,如果当前系统不存在更有效的方法,nginx会选择select或poll#B)高效事件模型#Kqueue:使用于FreeBSD 4.1+, OpenBSD 2.9+, NetBSD 2.0 和 MacOS X.使用双处理器的MacOS X系统使用kqueue可能会造成内核崩溃。#Epoll:使用于Linux内核2.6版本及以后的系统。#/dev/poll:使用于Solaris 7 11/99+,HP/UX 11.22+ (eventport),IRIX 6.5.15+ 和 Tru64 UNIX 5.1A+。#Eventport:使用于Solaris 10。 为了防止出现内核崩溃的问题, 有必要安装安全补丁。use epoll;worker_connections  1024;  # 设置工作进程可以同时打开的最大连接数。默认1024
}http {#文件扩展名与文件类型映射表include       mime.types;  # 将另一个file或与指定 匹配的文件包含mask到配置中。包含的文件应该由语法正确的指令和块组成。default_type  application/octet-stream;  #默认文件类型#日志格式log_format  main  '$remote_addr - $remote_user [$time_local] "$request" ''$status $body_bytes_sent "$http_referer" ''"$http_user_agent" "$http_x_forwarded_for"';#普通日志#access_log  logs/access.log  main;access_log  /home/qhdata/Nginx/Nginx/tmp/log/access.log  main;rewrite_log     on;#服务器名字的hash表大小#保存服务器名字的hash表是由指令server_names_hash_max_size 和server_names_hash_bucket_size所控制的。参数hash bucket size总是等于hash表的大小,并且是一路处理器缓存大小的倍数。在减少了在内存中的存取次数后,使在处理器中加速查找hash表键值成为可能。如果hash bucket size等于一路处理器缓存的大小,那么在查找键的时候,最坏的情况下在内存中查找的次数为2。第一次是确定存储单元的地址,第二次是在存储单元中查找键 值。因此,如果Nginx给出需要增大hash max size 或 hash bucket size的提示,那么首要的是增大前一个参数的大小.server_names_hash_bucket_size 128;#客户端请求头部的缓冲区大小。这个可以根据你的系统分页大小来设置,一般一个请求的头部大小不会超过1k,不过由于一般系统分页都要大于1k,所以这里设置为分页大小。分页大小可以用命令getconf PAGESIZE取得。client_header_buffer_size 32k;#客户请求头缓冲大小。nginx默认会用client_header_buffer_size这个buffer来读取header值,如果header过大,它会使用large_client_header_buffers来读取。large_client_header_buffers 4 64k;#设定通过nginx上传文件的大小client_max_body_size 8m;#开启高效文件传输模式,sendfile指令指定nginx是否调用sendfile函数来输出文件,对于普通应用设为 on,如果用来进行下载等应用磁盘IO重负载应用,可设置为off,以平衡磁盘与网络I/O处理速度,降低系统的负载。注意:如果图片显示不正常把这个改成off。#sendfile指令指定 nginx 是否调用sendfile 函数(zero copy 方式)来输出文件,对于普通应用,必须设为on。如果用来进行下载等应用磁盘IO重负载应用,可设置为off,以平衡磁盘与网络IO处理速度,降低系统uptime。sendfile on;#开启目录列表访问,合适下载服务器,默认关闭。#autoindex on;#此选项允许或禁止使用socke的TCP_CORK的选项,此选项仅在使用sendfile的时候使用tcp_nopush on;tcp_nodelay on;#长连接超时时间,单位是秒,默认65keepalive_timeout 120;#FastCGI相关参数是为了改善网站的性能:减少资源占用,提高访问速度。下面参数看字面意思都能理解。fastcgi_connect_timeout 300;fastcgi_send_timeout 300;fastcgi_read_timeout 300;fastcgi_buffer_size 64k;fastcgi_buffers 4 64k;fastcgi_busy_buffers_size 128k;fastcgi_temp_file_write_size 128k;#gzip模块设置gzip on; #开启gzip压缩输出gzip_min_length 1k;    #最小压缩文件大小gzip_buffers 4 16k;    #压缩缓冲区gzip_http_version 1.0; #压缩版本(默认1.1,前端如果是squid2.5请使用1.0)gzip_comp_level 2;     #压缩等级gzip_types text/plain application/x-javascript text/css application/xml;    #压缩类型,默认就已经包含textml,所以下面就不用再写了,写上去也不会有问题,但是会有一个warn。gzip_vary on;#设定实际的服务器列表upstream zp_server1{server 127.0.0.1:30001;}#下面是server虚拟主机的配置server {listen       5000; #监听端口,默认80server_name  localhost;  #定义使用www.xx.com访问#编码格式#charset koi8-r;  charset utf-8;#access_log  logs/host.access.log  main;#反向代理的路径(和upstream绑定),location 后面设置映射的路径location / {# root   html;# index  index.html index.htm;proxy_pass http://zp_server1;}#error_page  404              /404.html;# redirect server error pages to the static page /50x.html#error_page   500 502 503 504  /50x.html;location = /50x.html {root   html;}# proxy the PHP scripts to Apache listening on 127.0.0.1:80##location ~ \\.php$ {#    proxy_pass   http://127.0.0.1;#}# pass the PHP scripts to FastCGI server listening on 127.0.0.1:9000##location ~ \\.php$ {#    root           html;#    fastcgi_pass   127.0.0.1:9000;#    fastcgi_index  index.php;#    fastcgi_param  SCRIPT_FILENAME  /scripts$fastcgi_script_name;#    include        fastcgi_params;#}# deny access to .htaccess files, if Apache's document root# concurs with nginx's one##location ~ /\\.ht {#    deny  all;#}#设定查看Nginx状态的地址location /NginxStatus {stub_status           on;access_log            on;auth_basic            "NginxStatus";#auth_basic_user_file  conf/htpasswd;}}# another virtual host using mix of IP-, name-, and port-based configuration##server {#    listen       8000;#    listen       somename:8080;#    server_name  somename  alias  another.alias;#    location / {#        root   html;#        index  index.html index.htm;#    }#}# HTTPS server##server {#    listen       443 ssl;#    server_name  localhost;#    ssl_certificate      cert.pem;#    ssl_certificate_key  cert.key;#    ssl_session_cache    shared:SSL:1m;#    ssl_session_timeout  5m;#    ssl_ciphers  HIGH:!aNULL:!MD5;#    ssl_prefer_server_ciphers  on;#    location / {#        root   html;#        index  index.html index.htm;#    }#}}
检查配置文件nginx.conf的正确性命令:
/home/qhdata/Nginx/Nginx/sbin/nginx -t
错误与正确的结果。

启动
参考文章:https://nginx.org/en/docs/beginners_guide.html
/home/qhdata/Nginx/Nginx/sbin/nginx
要启动 nginx,请运行可执行文件。nginx 启动后,可以通过调用带有-s参数的可执行文件来控制它。使用以下语法:
nginx -s signal
其中signal可能是以下之一:
- stop — 快速关机,强行停止
- quit — 优雅关机,正常退出
- reload — 重新加载配置文件
- reopen — 重新打开日志文件
nginx status详解
Active connections: 18
server accepts handled requests1136 1136 470789
Reading: 0 Writing: 12 Waiting: 6
active connections – 活跃的连接数量
server accepts handled requests — 总共处理了1136 个连接 , 成功创建1136 次握手, 总共处理了470789 个请求
reading — 读取客户端的连接数.
writing — 响应数据到客户端的数量
waiting — 开启 keep-alive 的情况下,这个值等于 active – (reading+writing), 意思就是 Nginx 已经处理完正在等候下一次请求指令的驻留连接.的驻留连接.的驻留连接.
反向代理 streamlit时出现一直等待的错误修复
参考文章:https://discuss.streamlit.io/t/streamlit-docker-nginx-ssl-https/2195/5
错误形式:在反向代理中无法打开streamlit服务,效果如下。

这时候需要额外添加以下内容到server里面。
proxy_http_version 1.1; proxy_set_header X-Forwarded-For $proxy_add_x_forwarded_for;proxy_set_header Host $host;# streamlit specific: proxy_set_header Upgrade $http_upgrade;proxy_set_header Connection "upgrade";proxy_read_timeout 86400;
添加后配置如下。
#下面是server虚拟主机的配置server {listen 5000; #监听端口,默认80server_name localhost; #定义使用www.xx.com访问#编码格式#charset koi8-r; charset utf-8;#access_log logs/host.access.log main;#反向代理的路径(和upstream绑定),location 后面设置映射的路径location / {# root html;# index index.html index.htm;proxy_pass http://zp_server1;}proxy_http_version 1.1; proxy_set_header X-Forwarded-For $proxy_add_x_forwarded_for;proxy_set_header Host $host;# streamlit specific: proxy_set_header Upgrade $http_upgrade;proxy_set_header Connection "upgrade";proxy_read_timeout 86400;#error_page 404 /404.html;# redirect server error pages to the static page /50x.html#error_page 500 502 503 504 /50x.html;location = /50x.html {root html;}#设定查看Nginx状态的地址location /NginxStatus {stub_status on;access_log on;auth_basic "NginxStatus";auth_basic_user_file conf/htpasswd;}}