《操作系统》by李治军 | 实验2 - 操作系统的引导

目录
一、实验内容
二、实验准备
三、正式实验
(一)修改 bootsect.s 代码,实现向屏幕输出信息 “Hello OS world, my name is XXX”。
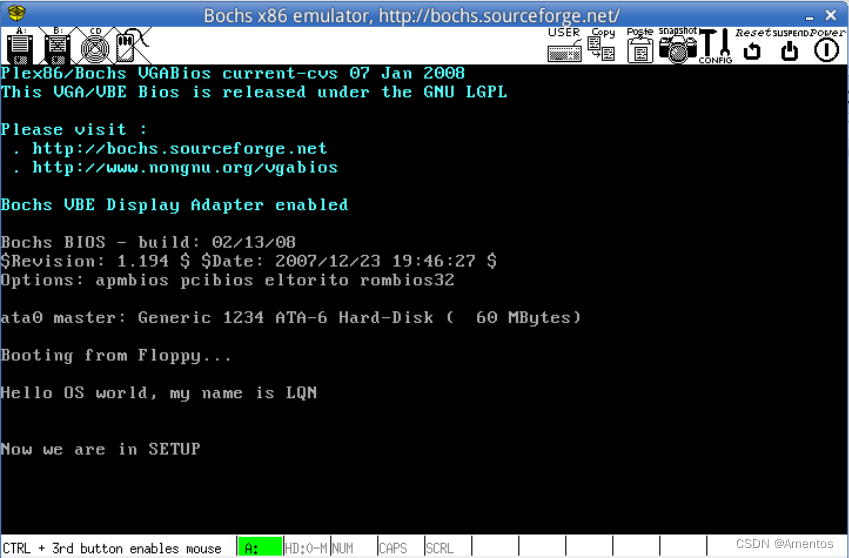
(二)修改 setup.s 代码,向屏幕输出一行信息 "Now we are in SETUP",并实现 bootsect.s 对 setup.s 的载入。
(三)修改 setup.s 代码获取基本硬件参数。
一、实验内容
1、阅读《Linux内核完全注释:基于0.11内核》第 6 章,对计算机和 Linux 0.11 的引导过程进行初步了解。
2、改写 bootsect.s 代码,实现:
在屏幕上打印一段自己设定的信息,如 “XXX is booting...” 。
3、改写 setup.s 代码,实现:
① bootsect.s 完成 setup.s 的载入,并跳转到 setup.s 开始地址执行。而 setup.s 向屏幕输出信息 "Now we are in SETUP" 。
② setup.s 能够获取至少一个基本的硬件参数(如 内存参数、显卡参数、硬盘参数 等),将其存放在内存的特定地址,并输出到屏幕上。
③ setup.s 不再加载 Linux 内核,保持上述信息显示在屏幕上即可。
二、实验准备
1、实验环境
蓝桥云课实验楼:操作系统原理与实践_Linux - 蓝桥云课
2、相关代码文件
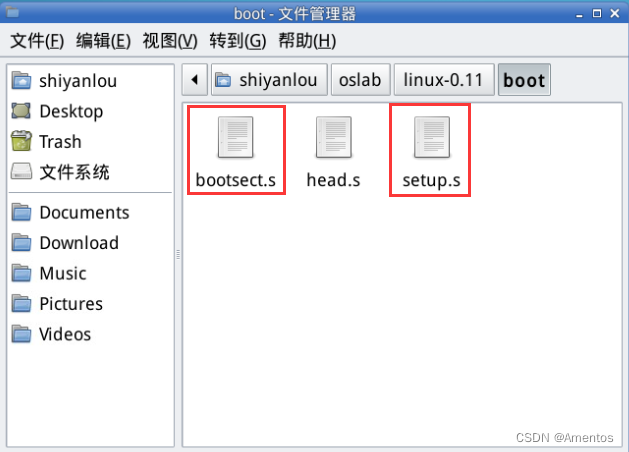
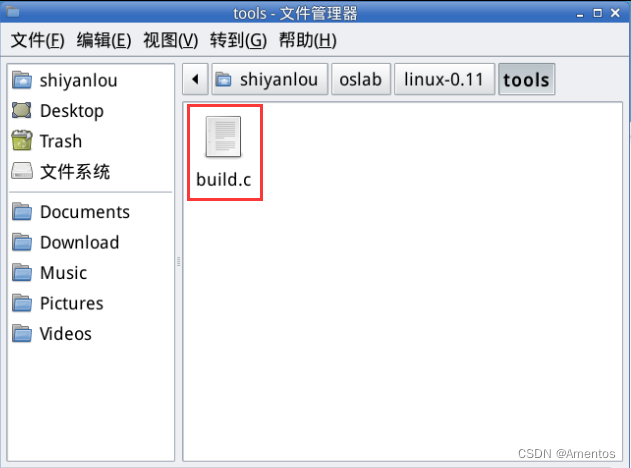
Linux-0.11/boot 目录下的 bootsect.s、setup.s 和 Linux-0.11/tools 目录下 build.c 是本实验会涉及到的源文件,它们的功能详见《注释》的 6.2、6.3 节和 16 章。
3、引导程序的运行环境
引导程序由 BIOS 加载并运行。它活动时,操作系统还不存在,整台计算机的所有资源都由它掌控,此时能利用的功能只有 BIOS 中断调用。实验中主要使用 BIOS 0x10 和 0x13 中断。
三、正式实验
(一)修改 bootsect.s 代码,实现向屏幕输出信息 “Hello OS world, my name is XXX”。
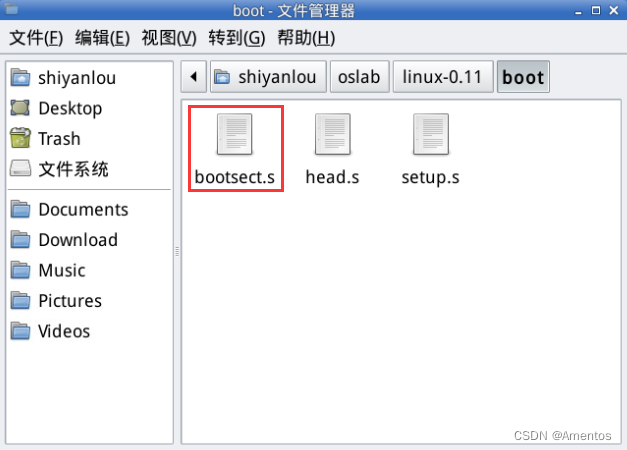
1. 打开 oslab/linux-0.11/boot 目录下的 bootsect.s 源码文件。
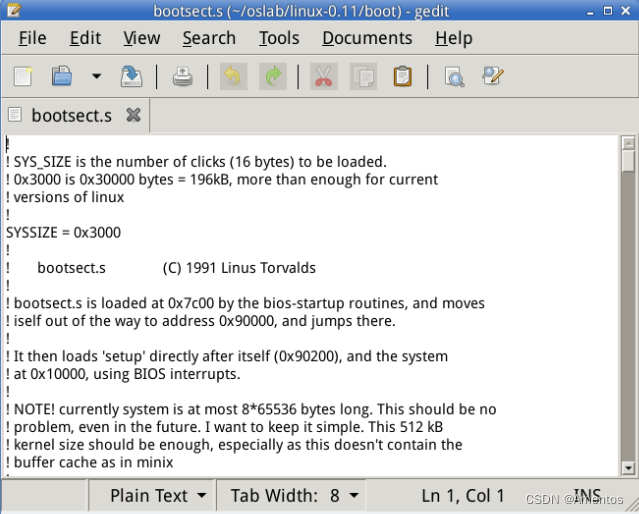
2. 直接删除原来所有的代码,替换以下新代码并保存。
entry _start
_start:!使用 0x10 号中断读取光标位置mov ah,#0x03xor bh,bhint 0x10!显示字符串 “Hello OS world, my name is LQN”!cx 为要显示字符串的长度(除字符串外还有3个换行+1个回车)mov cx,#36mov bx,#0x0007! es:bp 为显示字符串的地址mov bp,#msg1mov ax,#0x07c0mov es,axmov ax,#0x1301int 0x10!设置一个无限循环
inf_loop:jmp inf_loop!设置显示字符串
msg1:!回车+换行.byte   13,10.ascii  "Hello OS world, my name is LQN"!两对 “回车+换行”.byte   13,10,13,10!boot_flag 必须在最后两个字节
.org 510
!设置引导扇区标记 0xAA55(必须设置,否则无法成功引导)
boot_flag:.word   0xAA55
3. 打开终端(Ctrl + Alt + T),输入以下命令 编译 新编写的 bootsect.s。
as86 -0 -a -o bootsect.o bootsect.s- bootsect.o 为 bootsect.s 编译生成的中间文件
4. 输入以下命令 链接 生成的 bootsect.o 文件。
ld86 -0 -s -o bootsect bootsect.o- bootsect 是编译、链接后的生成的目标文件
5. 输入 ls -l 列出文件信息,可以看出 boot 目录下多了一个中间文件 bootsect.o 和一个目标文件 bootsect。
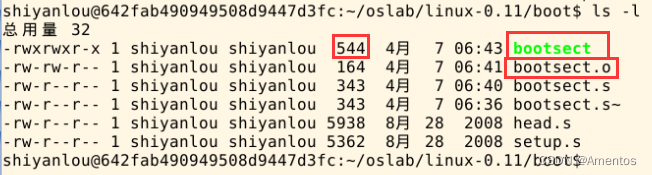
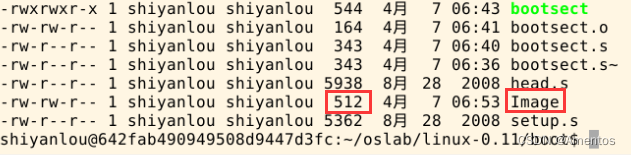
6. 可以看出这里 bootsect 文件大小是 544 字节,而引导程序必须要正好占用一个磁盘扇区,即 512 个字节,这里多出了 32 个字节,所以输入以下指令去掉文件头的 32 个字节。
dd bs=1 if=bootsect of=Image skip=32生成的 Image 就是去掉文件头的 bootsect,刚好512字节:
7. 确保上一步生成的 Image 文件位于 linux-0.11 目录下,如果没有就拷贝一下。
cp ./Image ../Image8. 输入以下指令执行 oslab 目录下的 run 脚本。
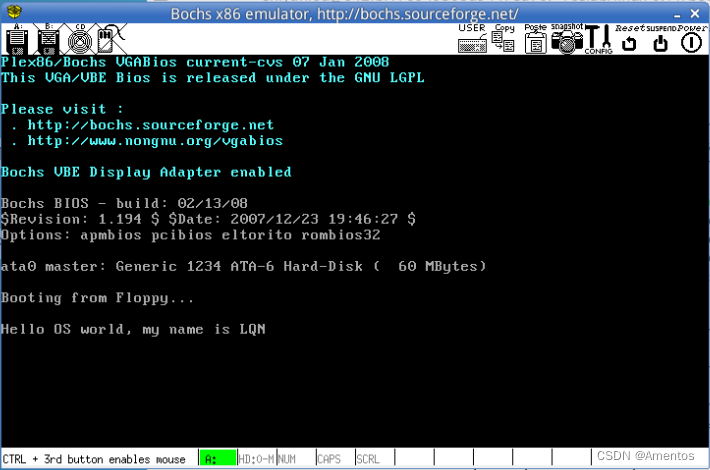
../../run9. 运行结果:
(二)修改 setup.s 代码,向屏幕输出一行信息 "Now we are in SETUP",并实现 bootsect.s 对 setup.s 的载入。
1. 这里 setup.s 的功能和前面 bootsect.s 的功能基本一致,所以可以直接拷贝前面的 bootsect.s 代码,将显示的信息改为 “Now we are in SETUP” 即可 ,完整 setup.s 代码如下。
entry _start
_start:mov ah,#0x03xor bh,bhint 0x10!注意字符串长度的变化mov cx,#25mov bx,#0x0007mov bp,#msg2mov ax,csmov es,axmov ax,#0x1301int 0x10inf_loop:jmp inf_loopmsg2:.byte   13,10.ascii  "Now we are in SETUP".byte   13,10,13,10.org 510
boot_flag:.word   0xAA55
2. 编写 bootsect.s 中 载入 setup.s 的代码,完整 bootsect.s 代码如下。
SETUPLEN=2
SETUPSEG=0x07e0
entry _start
_start:mov ah,#0x03xor bh,bhint 0x10mov cx,#36mov bx,#0x0007mov bp,#msg1mov ax,#0x07c0mov es,axmov ax,#0x1301int 0x10load_setup:mov dx,#0x0000mov cx,#0x0002mov bx,#0x0200mov ax,#0x0200+SETUPLENint 0x13jnc ok_load_setupmov dx,#0x0000mov ax,#0x0000int 0x13jmp load_setupok_load_setup:jmpi    0,SETUPSEGmsg1:.byte   13,10.ascii  "Hello OS world, my name is LQN".byte   13,10,13,10.org 510
boot_flag:.word   0xAA55
3. 再次编译。
现在有两个文件 bootsect.s 和 setup.s 需要编译、链接。如果还是使用之前的手动编译,效率较低(先 as86 再 ld86 )。所以可以借助 Makefile 提高效率。
进入 linux-0.11 目录,输入以下命令:
make BootImage编译失败,显示以下结果:
Unable to open 'system'
make: * [BootImage] Error 1
- 因为 make 指令根据 Makefile 的指引执行了 tools/build.c ,它是为生成整个内核的镜像文件而设计的,没考虑我们只需要 bootsect.s 和 setup.s 的情况。它在向我们要求 “系统” 的核心代码,所以为完成实验需要对 build.c 进行一点修改。
4. 修改 build.c 源码,打开 linux-0.11/tools/build.c ,将框中内容注释掉。
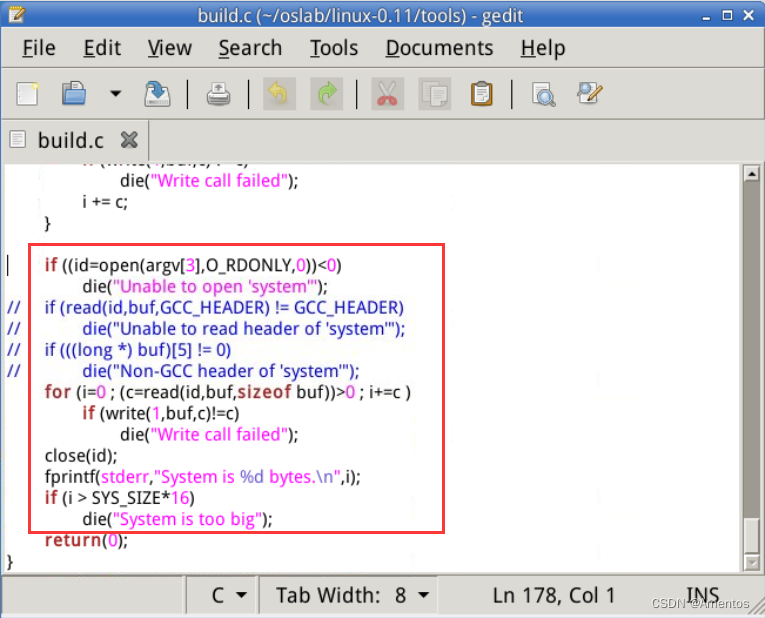
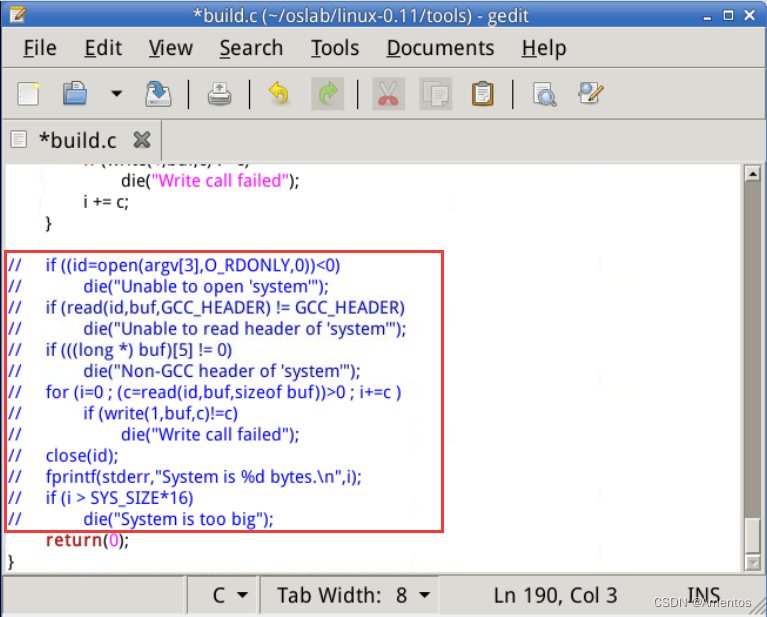
- build.c 从命令行参数得到 bootsect、setup 和 system 内核的文件名,将三者做简单的整理后一起写入 Image。其中 system 是第三个参数 - argv[3]
- 当 make all 或 makeall 时,该参数传过来的是正确的文件名,build.c 会打开它,将内容写入 Image。而 make BootImage 时,传过来的是字符串 "none"
所以,修改 build.c 的思路就是当 argv[3] 是 "none" 的时候,只将 bootsect 和 setup 写入 Image,忽略所有与 system 有关的工作,或者在该写 system 的位置都写上 “0”。
5. 回到 linux-0.11 目录,再次执行编译命令。
make BootImage6. 编译成功后,再次执行 run 脚本,运行结果:
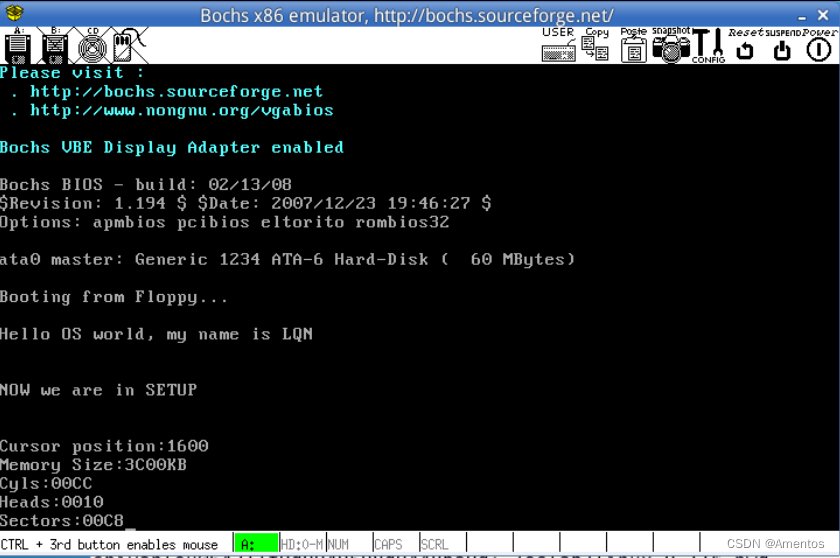
(三)修改 setup.s 代码获取基本硬件参数。
1. setup.s 参考代码。
INITSEG  = 0x9000
entry _start
_start:
! Print "NOW we are in SETUP"mov ah,#0x03xor bh,bhint 0x10mov cx,#25mov bx,#0x0007mov bp,#msg2mov ax,csmov es,axmov ax,#0x1301int 0x10mov ax,csmov es,ax! init ss:spmov ax,#INITSEGmov ss,axmov sp,#0xFF00! Get Paramsmov ax,#INITSEGmov ds,axmov ah,#0x03xor bh,bhint 0x10mov [0],dxmov ah,#0x88int 0x15mov [2],axmov ax,#0x0000mov ds,axlds si,[4*0x41]mov ax,#INITSEGmov es,axmov di,#0x0004mov cx,#0x10repmovsb! Be Ready to Printmov ax,csmov es,axmov ax,#INITSEGmov ds,ax! Cursor Positionmov ah,#0x03xor bh,bhint 0x10mov cx,#18mov bx,#0x0007mov bp,#msg_cursormov ax,#0x1301int 0x10mov dx,[0]call    print_hex! Memory Sizemov ah,#0x03xor bh,bhint 0x10mov cx,#14mov bx,#0x0007mov bp,#msg_memorymov ax,#0x1301int 0x10mov dx,[2]call    print_hex! Add KBmov ah,#0x03xor bh,bhint 0x10mov cx,#2mov bx,#0x0007mov bp,#msg_kbmov ax,#0x1301int 0x10! Cylesmov ah,#0x03xor bh,bhint 0x10mov cx,#7mov bx,#0x0007mov bp,#msg_cylesmov ax,#0x1301int 0x10mov dx,[4]call    print_hex! Headsmov ah,#0x03xor bh,bhint 0x10mov cx,#8mov bx,#0x0007mov bp,#msg_headsmov ax,#0x1301int 0x10mov dx,[6]call    print_hex! Secotrsmov ah,#0x03xor bh,bhint 0x10mov cx,#10mov bx,#0x0007mov bp,#msg_sectorsmov ax,#0x1301int 0x10mov dx,[12]call    print_hexinf_loop:jmp inf_loopprint_hex:mov    cx,#4print_digit:rol    dx,#4mov    ax,#0xe0fand    al,dladd    al,#0x30cmp    al,#0x3ajl     outpadd    al,#0x07outp:int    0x10loop   print_digitretprint_nl:mov    ax,#0xe0d     ! CRint    0x10mov    al,#0xa     ! LFint    0x10retmsg2:.byte 13,10.ascii "NOW we are in SETUP".byte 13,10,13,10msg_cursor:.byte 13,10.ascii "Cursor position:"msg_memory:.byte 13,10.ascii "Memory Size:"msg_cyles:.byte 13,10.ascii "Cyls:"msg_heads:.byte 13,10.ascii "Heads:"msg_sectors:.byte 13,10.ascii "Sectors:"msg_kb:.ascii "KB".org 510
boot_flag:.word 0xAA55
2. 运行结果: