Vue3教程

文章目录
- 参考资料
- 1 setup语法糖
-
- 1.1 vue2中的写法
- 1.2 setup语法糖在vue3中使用
- 2 ref reactive 事件
-
- 2.1 ref
- 2.2 reactive
- 2.3 事件:在setup script中,直接定义事件,不需要像vue2那样在method中定义
- 3 computed & watch & watchEffect
-
- 3.1 computed
- 3.2 watch
- 3.3 watchEffect
- 4 生命周期的改变
- 5 父子组件通讯
-
- 5.2 vue2中使用props,this.$emits
- 5.3 vue3中使用defineProps defineEmits
- 5.3 defineExpose
- 6 全局API
参考资料
vue2教程请看下面链接:
Vue2速成手册
vue官方网站
1 setup语法糖
1.1 vue2中的写法
<template><h1>Hello vue3</h1>{{ msg }}<button @click="changeMsg('fsa')"> 修改msg </button>
</template><script>export default {data(){return {msg: "vue2写法"}},methods: {changeMsg(val){this.msg = val;}} }
</script>
1.2 setup语法糖在vue3中使用
<template><h1>Hello vue3</h1>{{ msg }}<button @click="changeMsg('fsa')"> 修改msg </button>
</template><script setup lang="ts"> // 默认还是js,但是vue3建议用ts// 这里面正常写vue逻辑就好了
</script>
2 ref reactive 事件
2.1 ref
需要响应式的常量,但是使用或者赋值时需要xxx.value
<template><h1>Hello vue3</h1>{{ msg }}<button @click="changeMsg('fsa')"> 修改msg </button>
</template><script setup>import {ref} from "vue"// 常量const msg = ref("new MSG!")// 直接定义方法const changeMsg = (val) => {msg.value = val}
</script>
2.2 reactive
需要响应式的对象或者数组,可直接使用或赋值,不需要使用xx.value
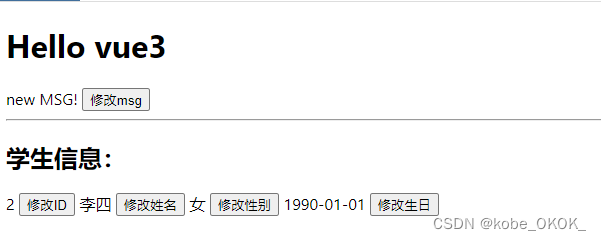
<template><h1>Hello vue3</h1>{{ msg }}<button @click="changeMsg('fsa')"> 修改msg </button><hr><h2>学生信息:</h2>{{ studentInfo.id }}<button @click="changeID"> 修改ID </button>{{ studentInfo.name }}<button @click="changeName"> 修改姓名 </button>{{ studentInfo.gender }}<button @click="changeGender"> 修改性别 </button>{{ studentInfo.birthday }}<button @click="changeBirthday"> 修改生日 </button>
</template><script setup>import {ref, reactive} from "vue"const msg = ref("new MSG!")const studentInfo = reactive({id: 1,name: "张三", gender: "男",birthday: "2023-01-01"})const changeMsg = (val) => {msg.value = val}const changeID = () => {studentInfo.id=2}const changeName = () => {studentInfo.name="李四"}const changeGender = () => {studentInfo.gender="女"}const changeBirthday = () => {studentInfo.birthday="1990-01-01"}
</script>
2.3 事件:在setup script中,直接定义事件,不需要像vue2那样在method中定义
上面的例子中已经有了。不多写
3 computed & watch & watchEffect
3.1 computed
计算函数
<template><div><p>{{ firstName }}</p><p>{{ lastName }}</p><p>{{ fullName }}</p></div></template><script setup>import {ref, computed} from "vue"const firstName = ref("kobe")const lastName = ref("bryant")const fullName = computed(()=>{return firstName.value+ " " +lastName.value})
</script>

3.2 watch
监听函数,可监听常量和引用变量,可传immediate和deep。可监听对象也可只监听对象的某个属性
<template><div><p>{{ firstName }}</p><p>{{ lastName }}</p><p>{{ fullName }}</p><p>{{ msg }}</p><button @click="changeName"> 修改名字 </button></div></template><script setup>import {ref,reactive, computed, watch, watchEffect} from "vue"const msg = ref()const firstName = ref("kobe")const lastName = ref("bryant")const fullName = computed(()=>{return firstName.value+ " " +lastName.value})const changeName = ()=>{firstName.value="testing"}watch(firstName,(next, pre)=>{msg.value = "变量:firstName" + "从" + pre + "变成了" + next; })const studentInfo = reactive({"id": '10001',"name": "李四"})watchEffect(()=>{const n = studentInfo.namemsg.value = "studentInfo 里面的name属性被修改了"})</script>
3.3 watchEffect
watchEffect:跟watch差不多,但是watchEffect不需要说明监听谁,用到谁就监听谁(详情见下)
4 生命周期的改变
看一下vue2的生命周期在vue3中的表现
beforeCreate -> 没了
created -> 没了
beforeMount -> onBeforeMount
mounted -> onMounted
beforeUpdate -> onBeforeUpdate
updated -> onUpdated
beforeUnmount -> onBeforeUnmount
unmounted -> onUnmounted
activated -> onActivated
deactivated -> onDeactivated
errorCaptured -> onErrorCaptured
<script setup lang="ts">
import {onBeforeMount,onMounted,onUpdated,onBeforeUpdate,onBeforeUnmount,onUnmounted,onActivated,onDeactivated,onErrorCaptured
} from 'vue'onBeforeMount(() => {console.log('挂载前')
})
onMounted(() => {console.log('挂载')
})
onBeforeUpdate(() => {console.log('更新前')
})
onUpdated(() => {console.log('更新')
})
onBeforeUnmount(() => {console.log('销毁前')
})
onUnmounted(() => {console.log('销毁')
})
onActivated(() => {console.log('kee-alive激活本组件')
})
onDeactivated(() => {console.log('kee-alive隐藏本组件')
})
onErrorCaptured(() => {console.log('错误捕获')
})
</script>
5 父子组件通讯
5.2 vue2中使用props,this.$emits
5.3 vue3中使用defineProps defineEmits
父组件
<script setup lang="ts">
import { ref } from 'vue'
import Dialog from './Dialog.vue'const msg = ref('我是msg')
const changeMsg = (val: string) => {msg.value = val
}
</script><template>
// 传进子组件
<Dialog :msg="msg" @changeMsg="changeMsg" />
</template>
子组件
<script setup lang="ts">
import { defineProps, defineEmits } from 'vue'// 注册父传子的props
const { msg } = defineProps({msg: {type: String,required: true}
})// 注册父传子的事件
const emits = defineEmits(['changeMsg'])
const handleClick = () => {// 修改父组件的值emits('changeMsg', '修改msg')
}</script><template><div @click="handleClick">{{ msg }}</div>
</template>
5.3 defineExpose
这个API主要主要作用是:将子组件的东西暴露给父组件,好让父组件可以使用
子组件
<!-- 子组件 -->
<script setup>
import { ref } from 'vue'const msg = ref('hello vue3!')
function change() {msg.value = 'hi vue3!'console.log(msg.value)
}
// 属性或方法必须暴露出去,父组件才能使用
defineExpose({ msg, change })
</script>
父组件
<!-- 父组件 -->
<script setup>
import ChildView from './ChildView.vue'
import { ref, onMounted } from 'vue'const child = ref(null)
onMounted(() => {console.log(child.value.msg) // hello vue3!child.value.change() // hi vue3!
})
</script><template><ChildView ref="child"></ChildView>
6 全局API
全局API
需要注意几个点:
1、vue3已经没有filter这个全局方法了
2、vue.component -> app.component
3、vue.directive -> app.directive
4、之前Vue.xxx现在都改成app.xxx