sealos部署k8s集群

使用sealos部署kubernetes集群并实现集群管理
1. 初始环境
官方参考:https://www.sealyun.com/zh-Hans/docs/
1.1 主机准备
都是静态ip,可上网
| 主机名 | 主机IP | 服务器配置 |
|---|---|---|
| k8s-master01 | 192.168.200.100 | 2c4g 40G |
| k8s-node01 | 192.168.200.101 | 2c4g 40G |
| k8s-node02 | 192.168.200.102 | 2c4g 40G |
| kuboard-server | 192.168.200.104 | 1c1g40G |
配置主机名称
hostnamectl  --static set-hostname  k8s-master01
hostnamectl  --static set-hostname  k8s-node01
hostnamectl  --static set-hostname  k8s-node01cat >> /etc/hosts << EOF
192.168.200.100   k8s-master01
192.168.200.101   k8s-node01
192.168.200.102   k8s-node02
EOF
1.2 升级内核
rpm --import https://www.elrepo.org/RPM-GPG-KEY-elrepo.org
yum -y install https://www.elrepo.org/elrepo-release-7.0-4.el7.elrepo.noarch.rpm
yum --enablerepo="elrepo-kernel" -y install kernel-lt.x86_64
awk -F \\' '$1=="menuentry " {print i++ " : " $2}' /etc/grub2.cfg
grub2-set-default "CentOS Linux (5.4.204-1.el7.elrepo.x86_64) 7 (Core)"
reboot
#查看可用的系统内核包,并安装内核{ml(mainline)为最新版本的内核,lt为长期支持的内核}。
yum --enablerepo=“elrepo-kernel” -y install kernel-lt.x86_64
#查看系统上的所有可用内核
awk -F ’ ‘$1=="menuentry " {print i++ " : " $2}’ /etc/grub2.cfg
#设置新的内核为grub2的默认版本
grub2-set-default “CentOS Linux (5.4.204-1.el7.elrepo.x86_64) 7 (Core)”
服务器上存在4 个内核,我们要使用 4.18 这个版本,可以通过 grub2-set-default 0 命令或编辑 /etc/default/grub 文件来设置
方法1、通过 grub2-set-default 0 命令设置
其中 0 是上面查询出来的可用内核
grub2-set-default 0
方法2、编辑 /etc/default/grub 文件设置 GRUB_DEFAULT=0,通过上面查询显示的编号为 0 的内核作为默认内核
2. sealos准备
请按照官网文档给的版本安装sealos,否则会出现下面的报错
安装参考 https://www.sealyun.com/zh-Hans/docs/getting-started/kuberentes-life-cycle
我下面又重新安装了4.1.5版本
[root@k8s-master01 opt]# wget -c https://sealyun-home.oss-cn-beijing.aliyuncs.com/sealos-4.0/latest/sealos-amd64 -O sealos &&     chmod +x sealos && mv sealos /usr/bin[root@k8s-master01 opt]# sealos version
{"gitVersion":"4.0.0","gitCommit":"7146cfe","buildDate":"2022-06-30T14:24:31Z","goVersion":"go1.17.11","compiler":"gc","platform":"linux/amd64"}
3.配置服务器免秘钥登录
创建秘钥 直接回车即可
[root@k8s-master01 ~]# ssh-keygen
Generating public/private rsa key pair.
Enter file in which to save the key (/root/.ssh/id_rsa):
Enter passphrase (empty for no passphrase):
Enter same passphrase again:
Your identification has been saved in /root/.ssh/id_rsa.
Your public key has been saved in /root/.ssh/id_rsa.pub.
The key fingerprint is:
SHA256:t1reJjrIF2nwxAXQDCL0PbG//05i7xqDN/weSh55TJs root@k8s-master01
The key's randomart image is:
+---[RSA 2048]----+
| .o . +=..       |
|   o o oo .      |
|    . +. .       |
|      .oo        |
|       +S.. .    |
|        == = o   |
|     . oo.# E    |
|      o oX.&..   |
|       .oo*OO    |
+----[SHA256]-----+
将公钥发送到需要登录的服务器
#k8s-master01
[root@k8s-master01 ~]# cat ~/.ssh/id_rsa.pub >> ~/.ssh/authorized_keys#k8s-node01
[root@k8s-master01 ~]# ssh-copy-id -i .ssh/id_rsa.pub root@192.168.200.101
/usr/bin/ssh-copy-id: INFO: Source of key(s) to be installed: ".ssh/id_rsa.pub"
/usr/bin/ssh-copy-id: INFO: attempting to log in with the new key(s), to filter out any that are already installed
/usr/bin/ssh-copy-id: INFO: 1 key(s) remain to be installed -- if you are prompted now it is to install the new keys
root@192.168.200.101's password: Number of key(s) added: 1Now try logging into the machine, with:   "ssh 'root@192.168.200.101'"
and check to make sure that only the key(s) you wanted were added.#k8s-node02
[root@k8s-master01 ~]# ssh-copy-id -i .ssh/id_rsa.pub root@192.168.200.102
/usr/bin/ssh-copy-id: INFO: Source of key(s) to be installed: ".ssh/id_rsa.pub"
The authenticity of host '192.168.200.102 (192.168.200.102)' can't be established.
ECDSA key fingerprint is SHA256:xHdT66XbhwFvD9MO/fjhnmkRBhqWD231pBaX0yqZ40o.
ECDSA key fingerprint is MD5:d5:7b:cf:fb:6a:75:91:6d:04:ae:28:ea:50:b9:6e:0d.
Are you sure you want to continue connecting (yes/no)? yes
/usr/bin/ssh-copy-id: INFO: attempting to log in with the new key(s), to filter out any that are already installed
/usr/bin/ssh-copy-id: INFO: 1 key(s) remain to be installed -- if you are prompted now it is to install the new keys
root@192.168.200.102's password: Number of key(s) added: 1Now try logging into the machine, with:   "ssh 'root@192.168.200.102'"
and check to make sure that only the key(s) you wanted were added.
验证登录
[root@k8s-master01 ~]# ssh 192.168.200.101
Last login: Tue Apr 11 22:42:42 2023 from k8s-master01
[root@k8s-node01 ~]# exit
登出
Connection to 192.168.200.101 closed.
[root@k8s-master01 ~]# ssh 192.168.200.102
Last login: Tue Apr 11 22:42:49 2023 from k8s-master01
[root@k8s-node02 ~]# exit
登出
Connection to 192.168.200.102 closed.
[root@k8s-master01 ~]#
4.使用sealos部署kubernetes集群
安装参考 https://www.sealyun.com/zh-Hans/docs/getting-started/kuberentes-life-cycle
kubernetes集群默认使用containerd
4.1 部署集群
#只需要在master执行
[root@k8s-master01 ~]# sealos run labring/kubernetes:v1.24.0 labring/calico:v3.22.1     --masters 192.168.200.100    --nodes 192.168.200.101,192.168.200.102     --passwd centos#如果配置·免密钥登录这不需要添加passwd参数
[root@k8s-master01 ~]# sealos run labring/kubernetes:v1.24.0 labring/calico:v3.22.1     --masters 192.168.200.100    --nodes 192.168.200.101,192.168.200.102
4.2报错 Sealos 的BUG,升级到最新版即可
2023-04-11 22:59:46 [EROR] Applied to cluster error: render env to rootfs failed: failed to create template: /var/lib/containers/storage/overlay/bbfc1569f981a2d0389cf78e288b7392298a39524b7e5a9ebd94611d23a2dcee/merged/etc/image-cri-shim.yaml.tmpl template: image-cri-shim.yaml.tmpl:21: function "semverCompare" not defined
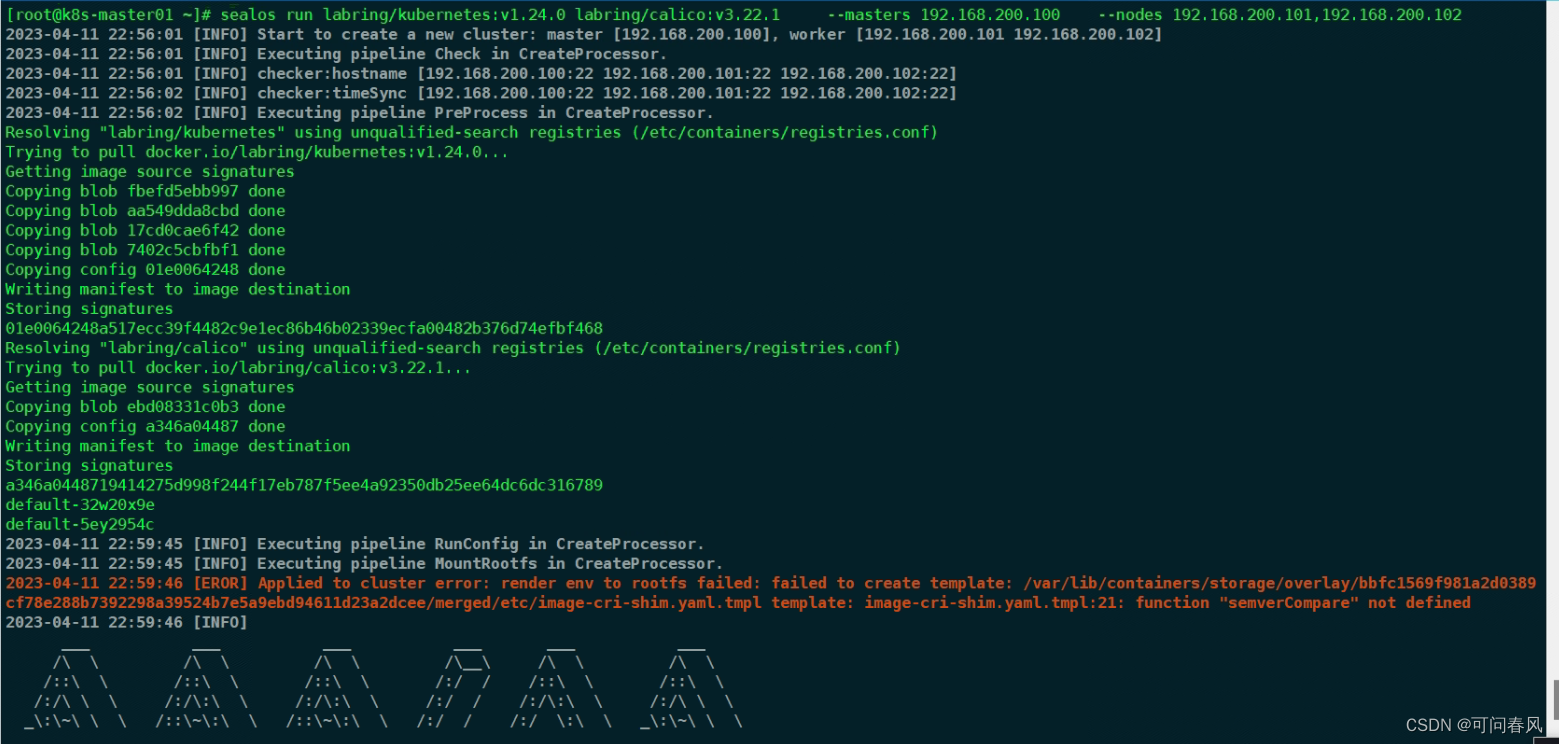
4.3 安装较新的sealos 版本
https://github.com/labring/sealos/releases/download/v4.1.5/sealos_4.1.5_linux_amd64.tar.gz[root@k8s-master01 ~]# rm -rf /usr/bin/sealos && rm -rf ~/.sealos/default/Clusterfile
[root@k8s-master01 ~]# sealos version
SealosVersion:buildDate: "2023-02-27T11:36:53Z"compiler: gcgitCommit: 3d24a2b8gitVersion: 4.1.5goVersion: go1.20.1platform: linux/amd64
[root@k8s-master01 ~]# sealos run labring/kubernetes:v1.24.0 labring/calico:v3.22.1     --masters 192.168.200.100    --nodes 192.168.200.101,192.168.200.102
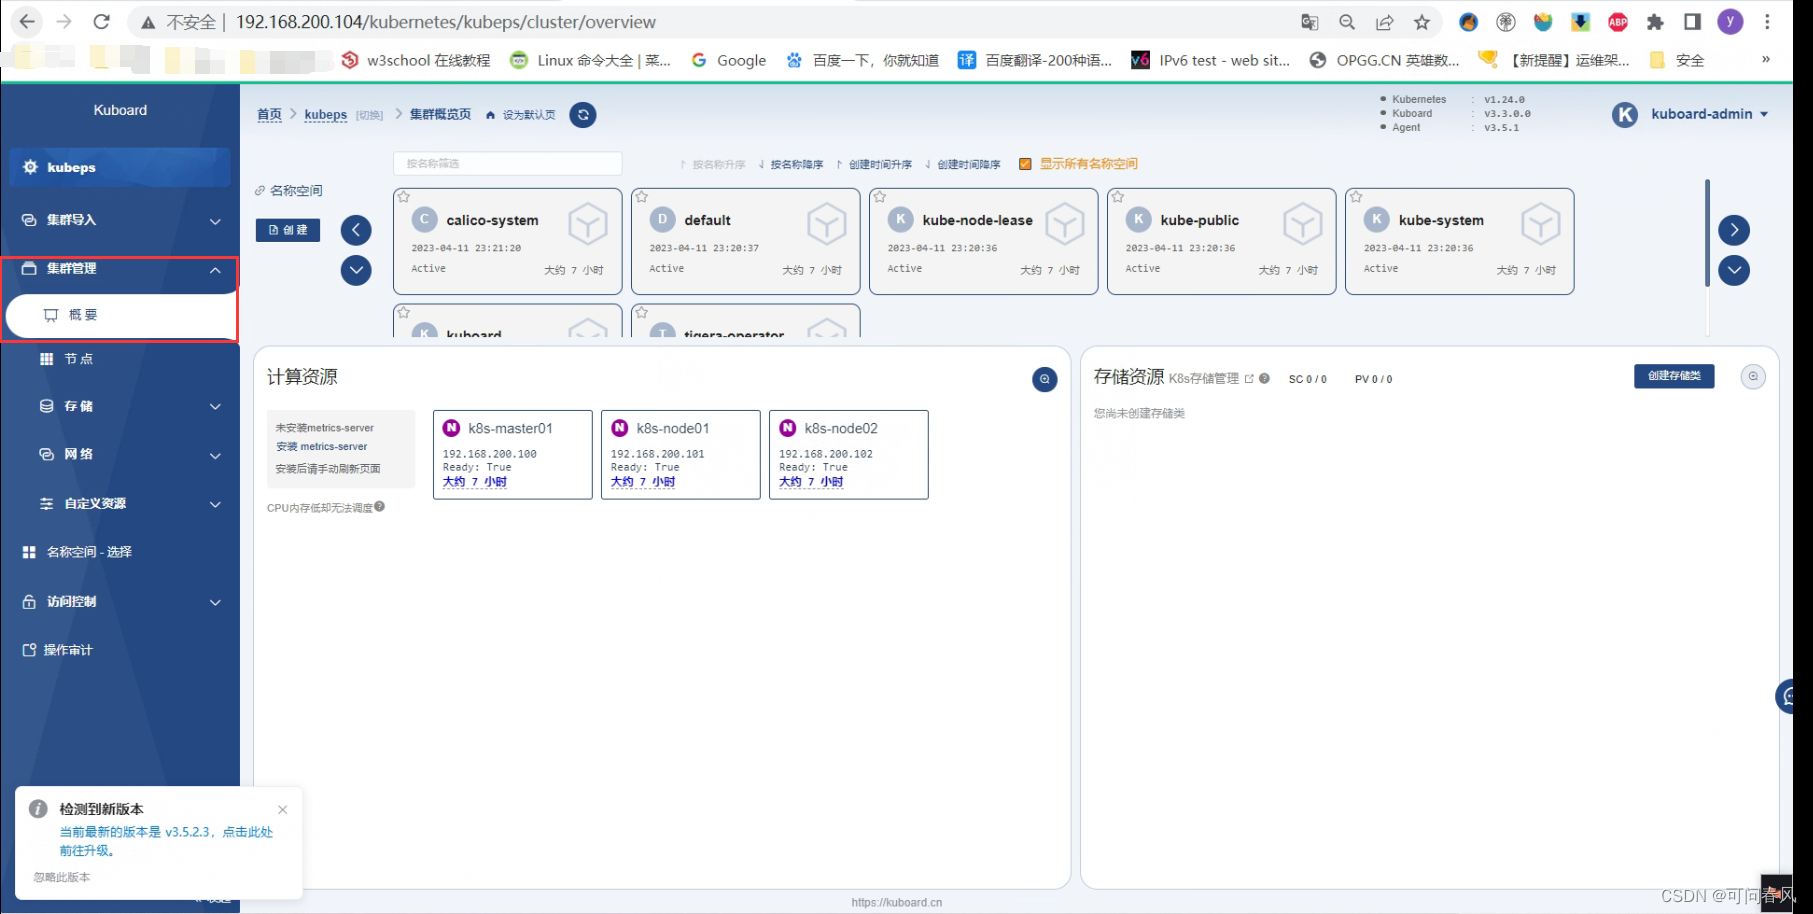
4.4查看k8s的节点,以及kube-system的服务
[root@k8s-master01 ~]# kubectl get nodes
NAME           STATUS   ROLES           AGE     VERSION
k8s-master01   Ready    control-plane   4m42s   v1.24.0
k8s-node01     Ready    <none>          4m10s   v1.24.0
k8s-node02     Ready    <none>          4m10s   v1.24.0[root@k8s-master01 ~]# kubectl get pods -n kube-system
NAME                                   READY   STATUS    RESTARTS   AGE
coredns-6d4b75cb6d-bwmfp               1/1     Running   0          6m13s
coredns-6d4b75cb6d-qtt25               1/1     Running   0          6m13s
etcd-k8s-master01                      1/1     Running   0          6m28s
kube-apiserver-k8s-master01            1/1     Running   0          6m27s
kube-controller-manager-k8s-master01   1/1     Running   0          6m27s
kube-proxy-45sld                       1/1     Running   0          6m13s
kube-proxy-9rz72                       1/1     Running   0          5m58s
kube-proxy-gjcbl                       1/1     Running   0          5m58s
kube-scheduler-k8s-master01            1/1     Running   0          6m27s
kube-sealos-lvscare-k8s-node01         1/1     Running   0          5m51s
kube-sealos-lvscare-k8s-node02         1/1     Running   0          5m51s
5.使用kuboard实现k8s集群托管
5.1 kuboard部署及访问
服务器配置
修改主机名
[root@localhost ~]# hostnamectl --static set-hostname kuboard-server
[root@kuboard-server ~]# cat >> /etc/sysctl.conf << EOF
net.ipv4.ip_forward = 1
net.bridge.bridge-nf-call-ip6tables = 1
net.bridge.bridge-nf-call-iptables = 1
EOF
[root@kuboard-server ~]# sysctl -p[root@kuboard-server ~]# wget https://mirrors.aliyun.com/docker-ce/linux/centos/docker-ce.repo -O /etc/yum.repos.d/docker-ce.repo
yum install -y yum-utils  device-mapper-persistent-data   lvm2
yum  -y install docker-ce
systemctl start docker
systemctl enable docker
systemctl status docker
[root@kuboard-server ~]# cat > /etc/docker/daemon.json << EOF
> {
>   "registry-mirrors": ["https://b9pmyelo.mirror.aliyuncs.com"]
> }
> EOF
[root@kuboard-server ~]# systemctl restart docker
[root@kuboard-server ~]# docker info
5.2 启动kuboard容器
镜像地址 https://hub.docker.com/r/eipwork/kuboard/tags
[root@kuboard-server ~]# docker run -d --restart=unless-stopped --name=kuboard -p 80:80/tcp -p 10081:10081/tcp -e KUBOARD_ENDPOINT="http://192.168.200.104:80" -e KUBOARD_AGENT_SERVER_TCP_PORT="10081" --mount type=volume,source=kuboard-data,target=/data eipwork/kuboard:v3
always 和 unless-stopped 的最大区别,就是那些指定了 --restart unless-stopped 并处于 Stopped (Exited) 状态的容器,不会在 Docker daemon 重启的时候被重启。
[root@kuboard-server ~]# docker ps
CONTAINER ID   IMAGE                COMMAND            CREATED         STATUS         PORTS                                                                                       NAMES
f80962610239   eipwork/kuboard:v3   "/entrypoint.sh"   7 seconds ago   Up 6 seconds   0.0.0.0:80->80/tcp, :::80->80/tcp, 0.0.0.0:10081->10081/tcp, :::10081->10081/tcp, 443/tcp   kuboard
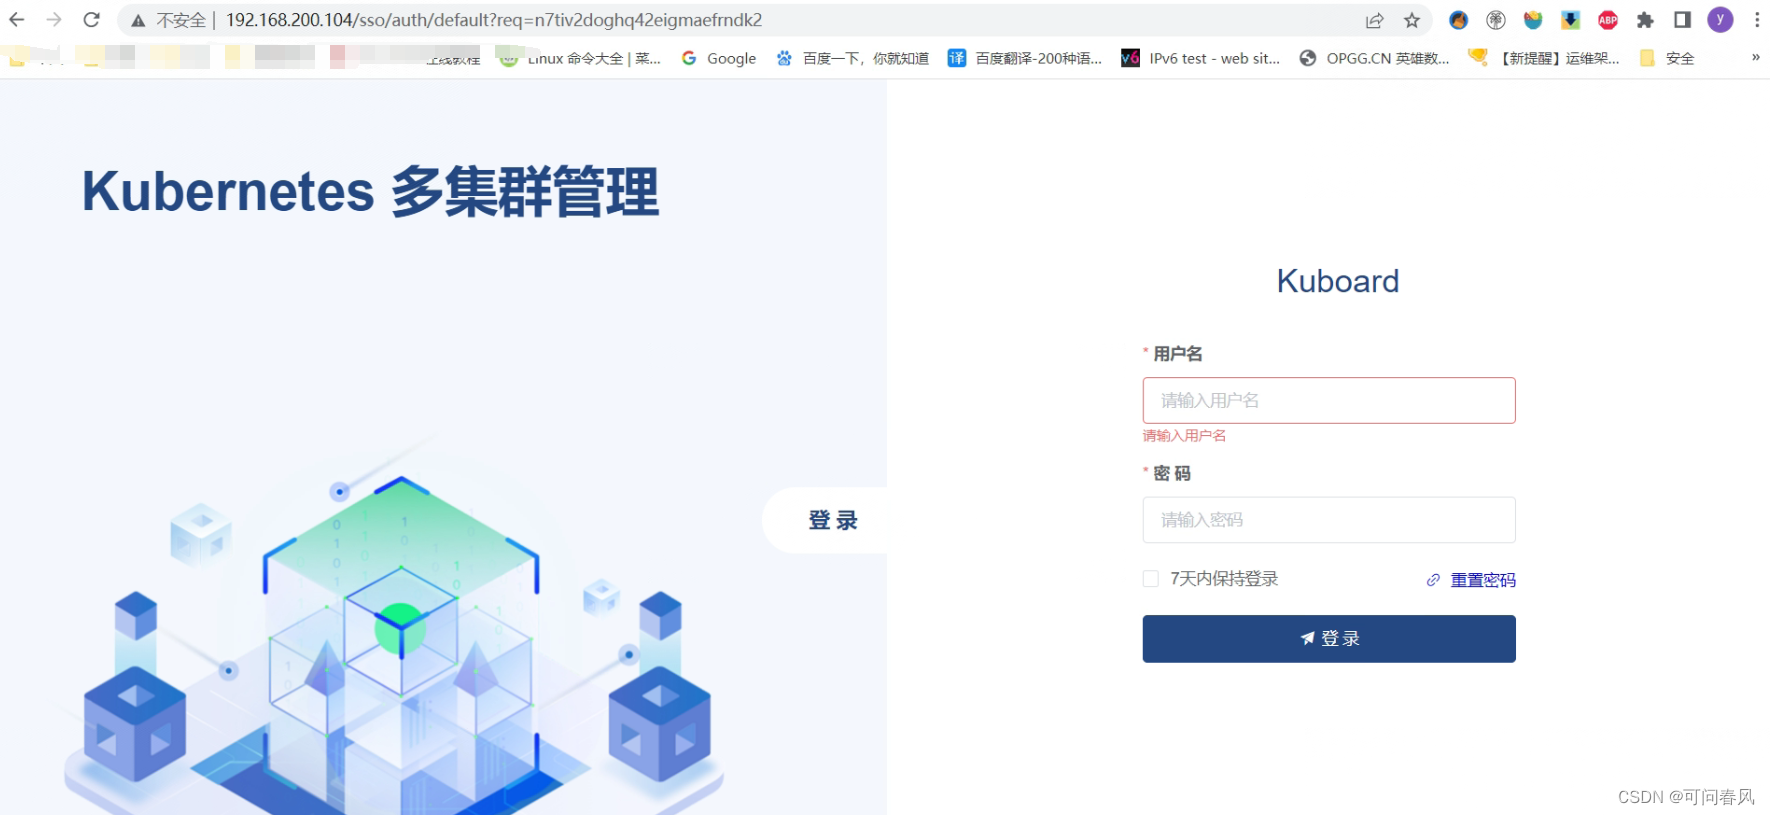
web界面
http://192.168.200.104/sso/auth/default?req=n7tiv2doghq42eigmaefrndk2
默认的账户密码 admin/Kuboard123
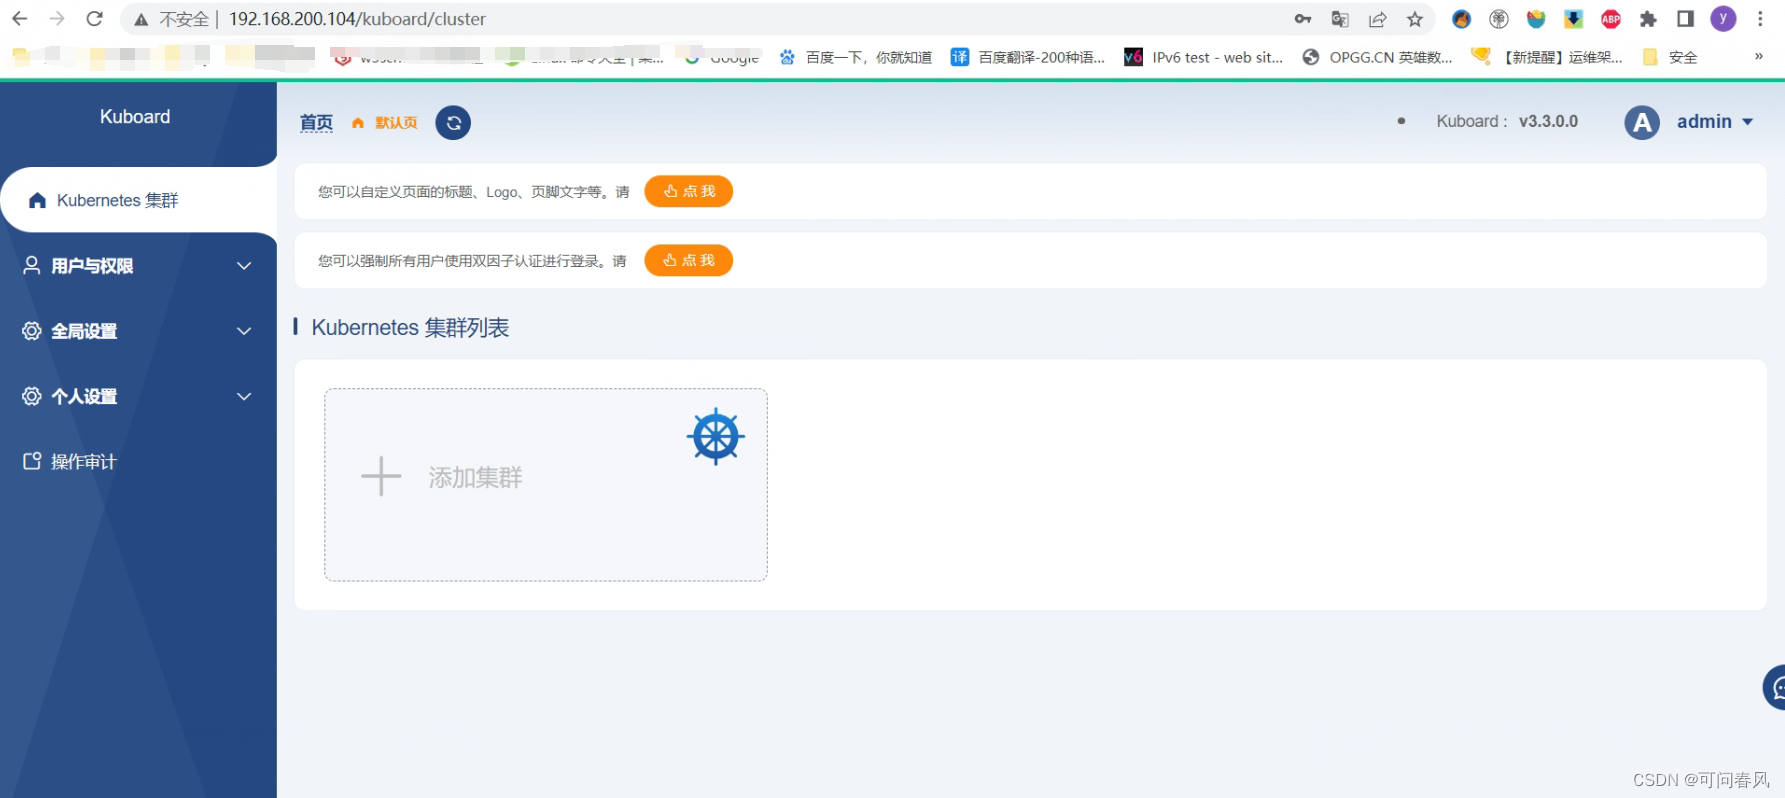
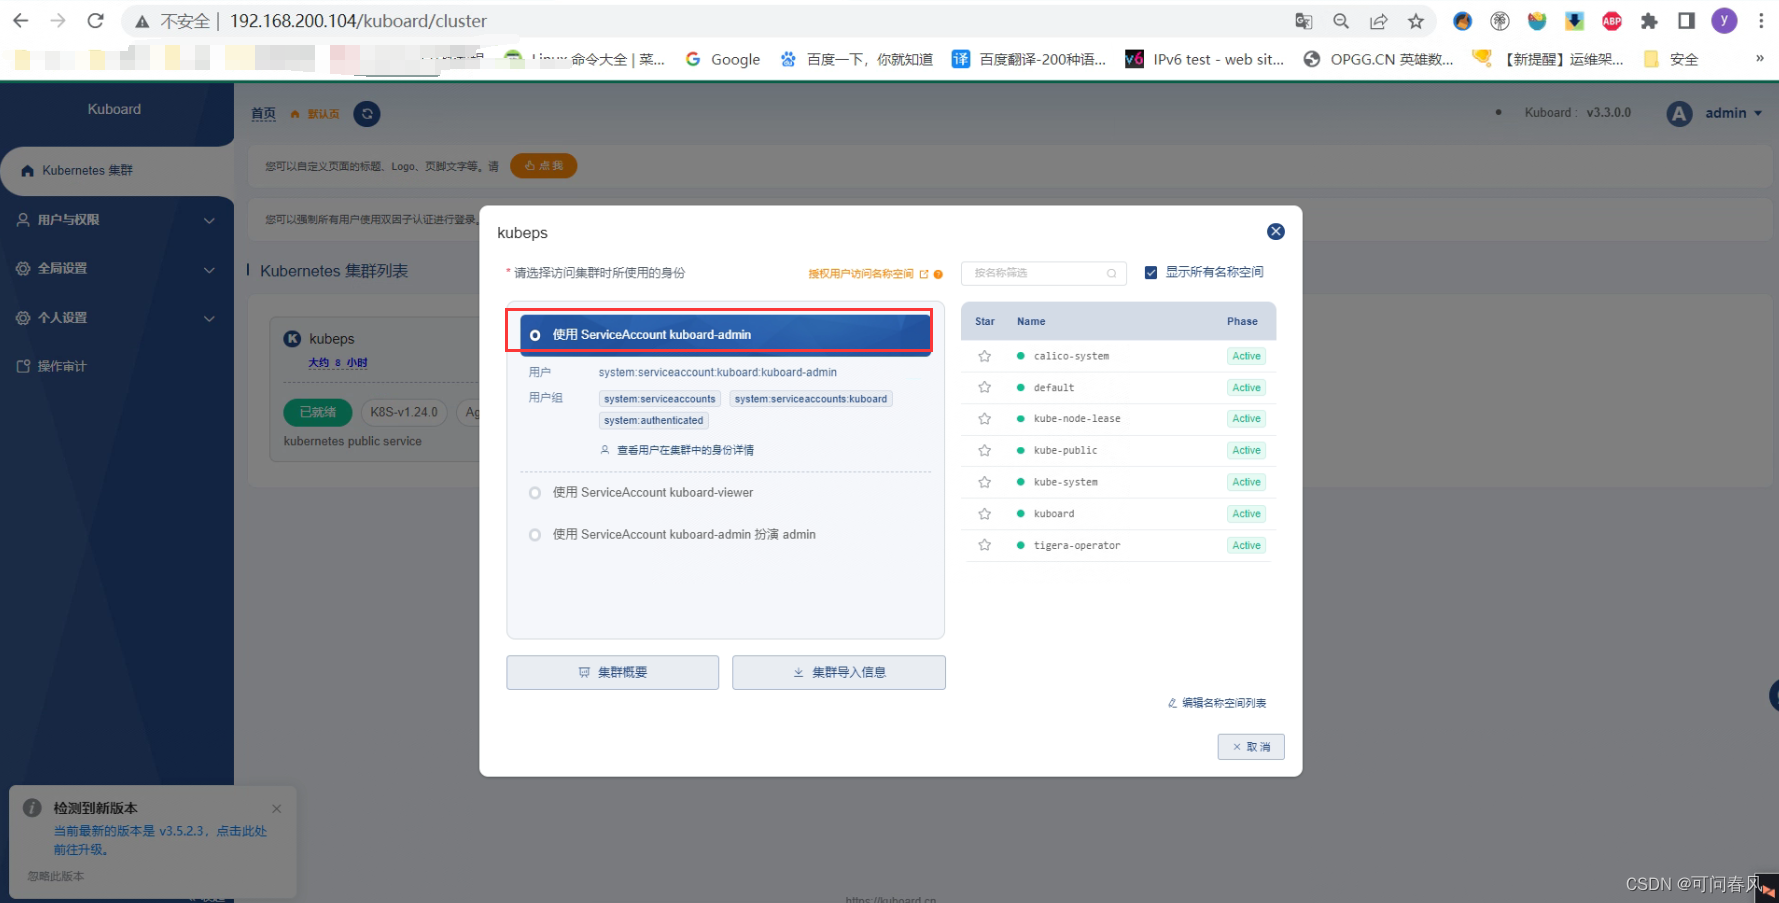
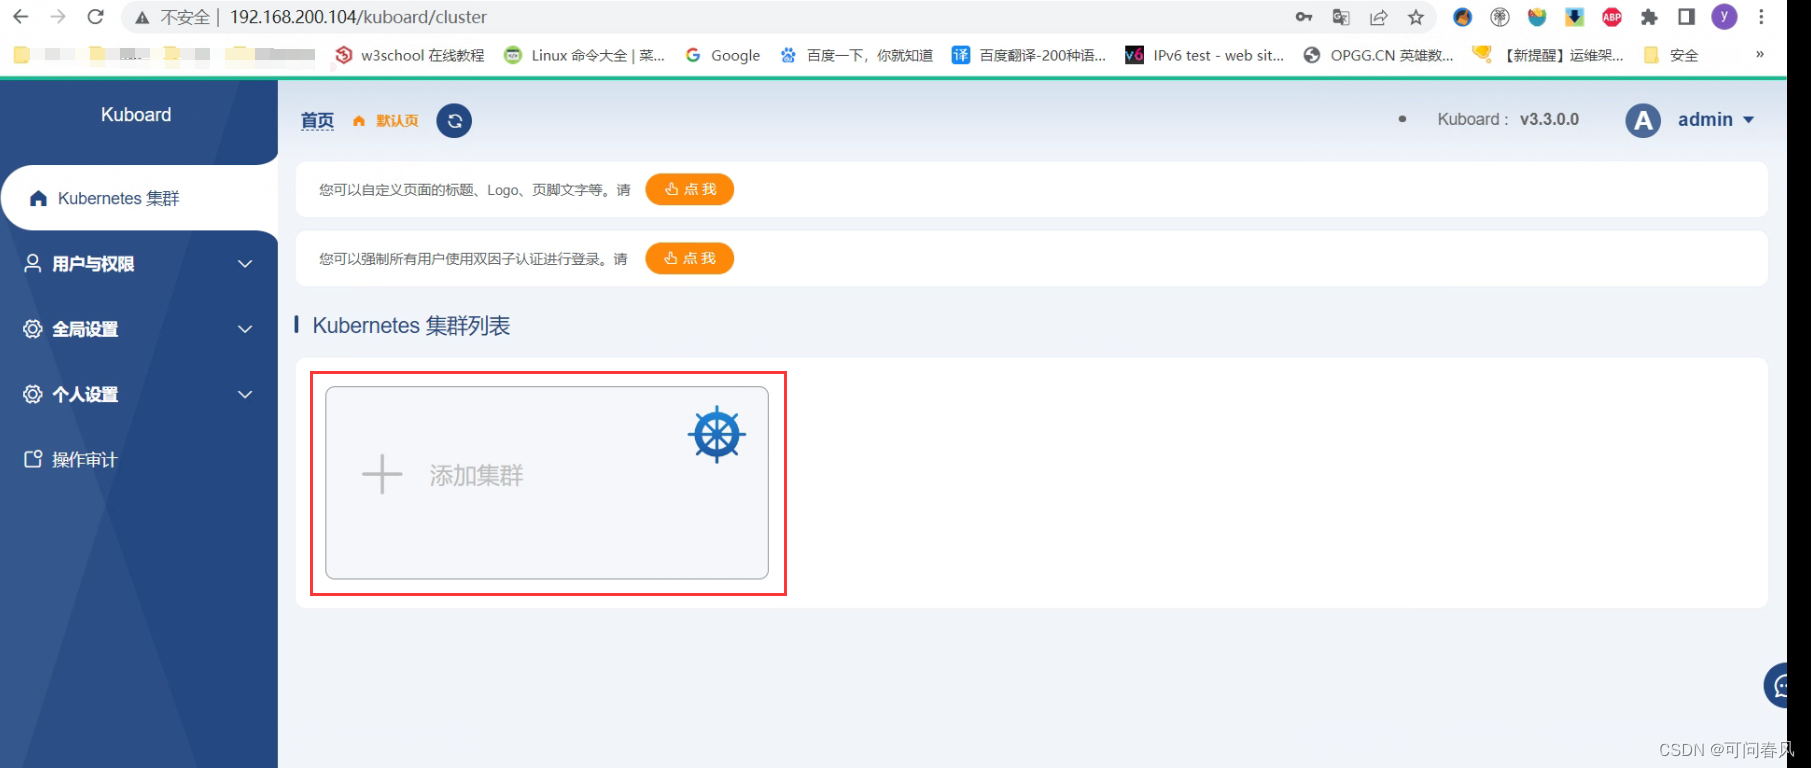
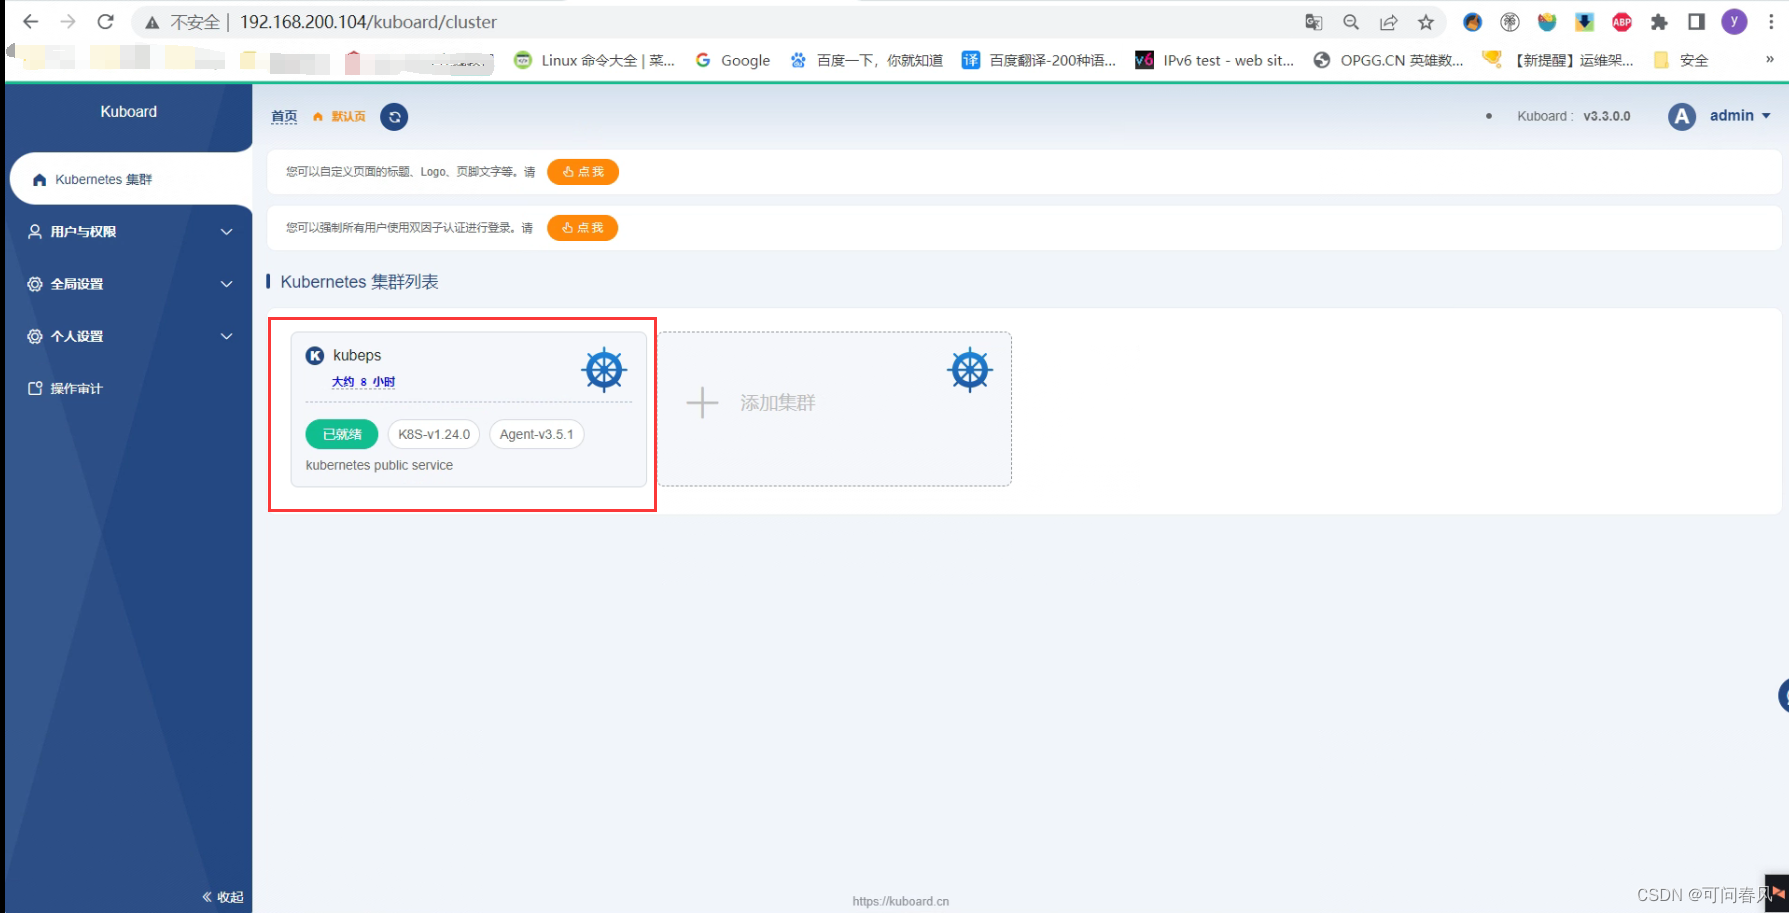
5.3 kuboard添加k8s集群
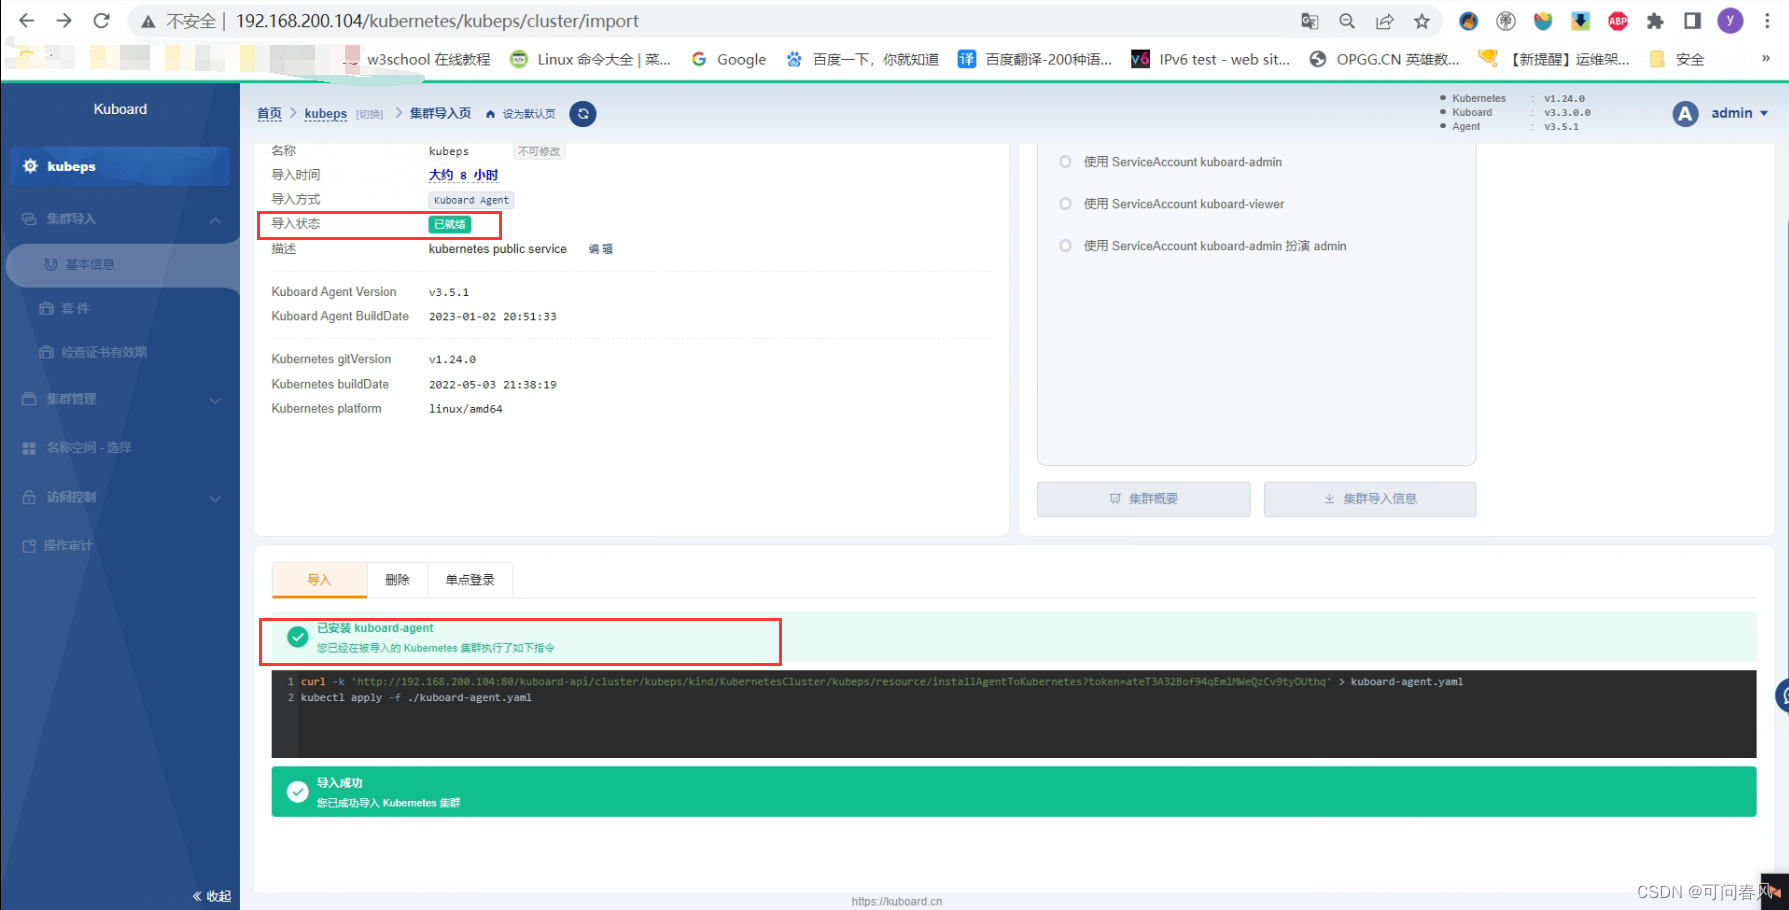
5.3.1 添加集群
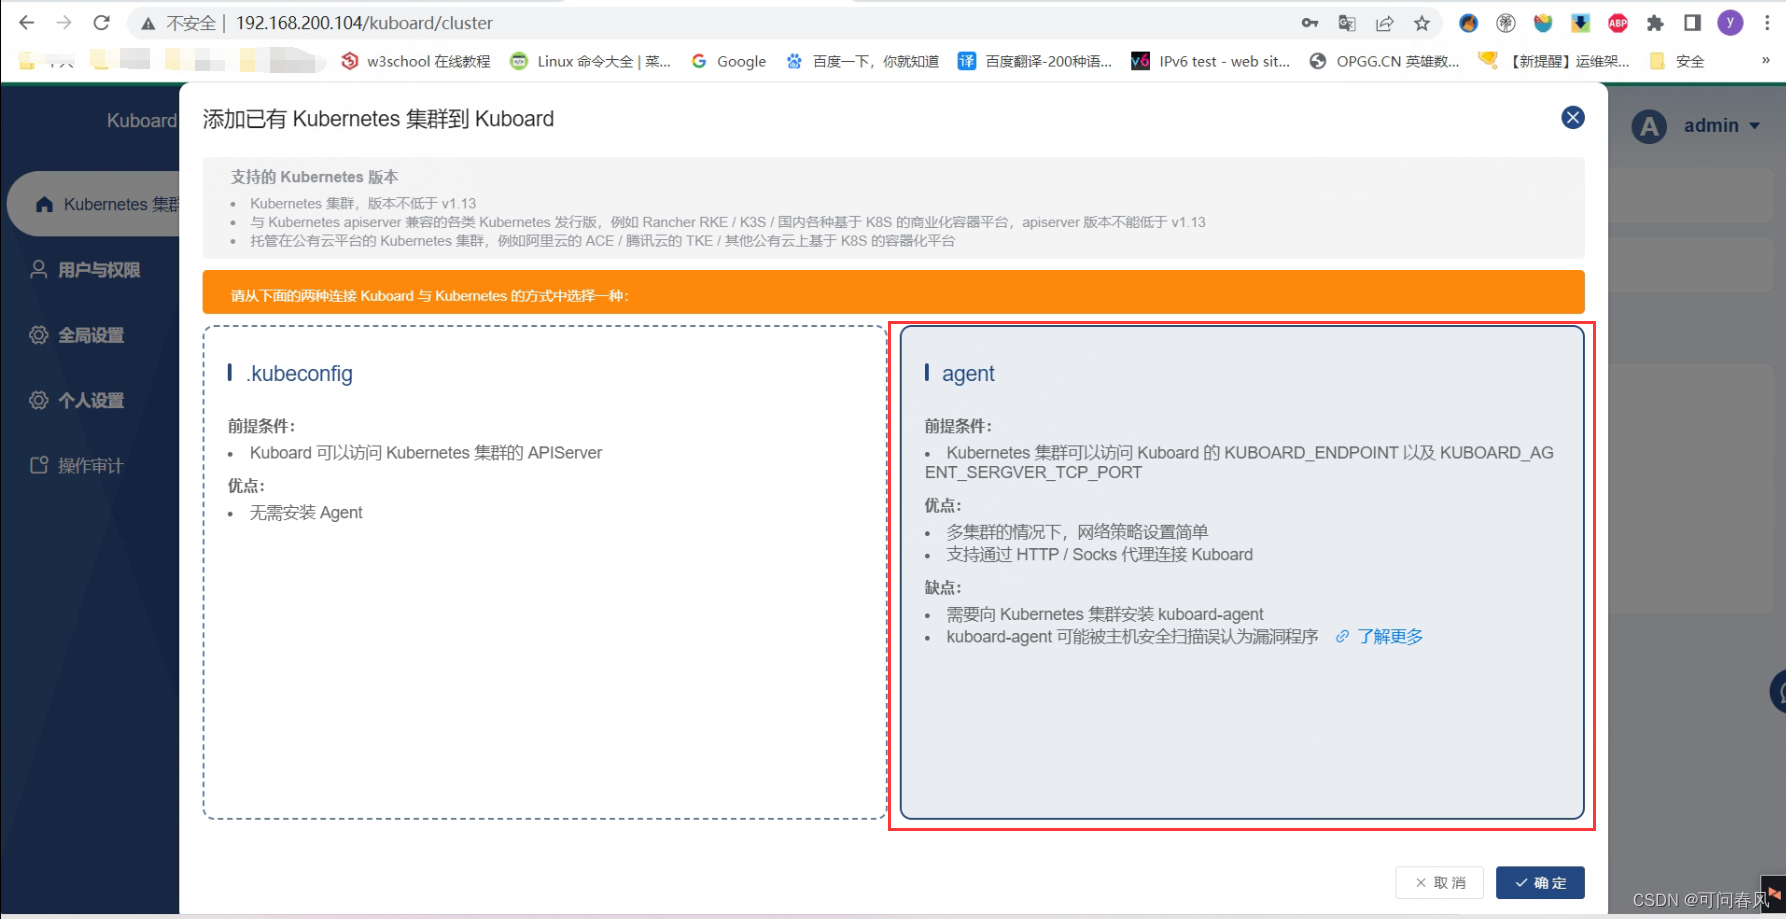

5.3.2 集群的某一个master节点安装kuboard-agent即可
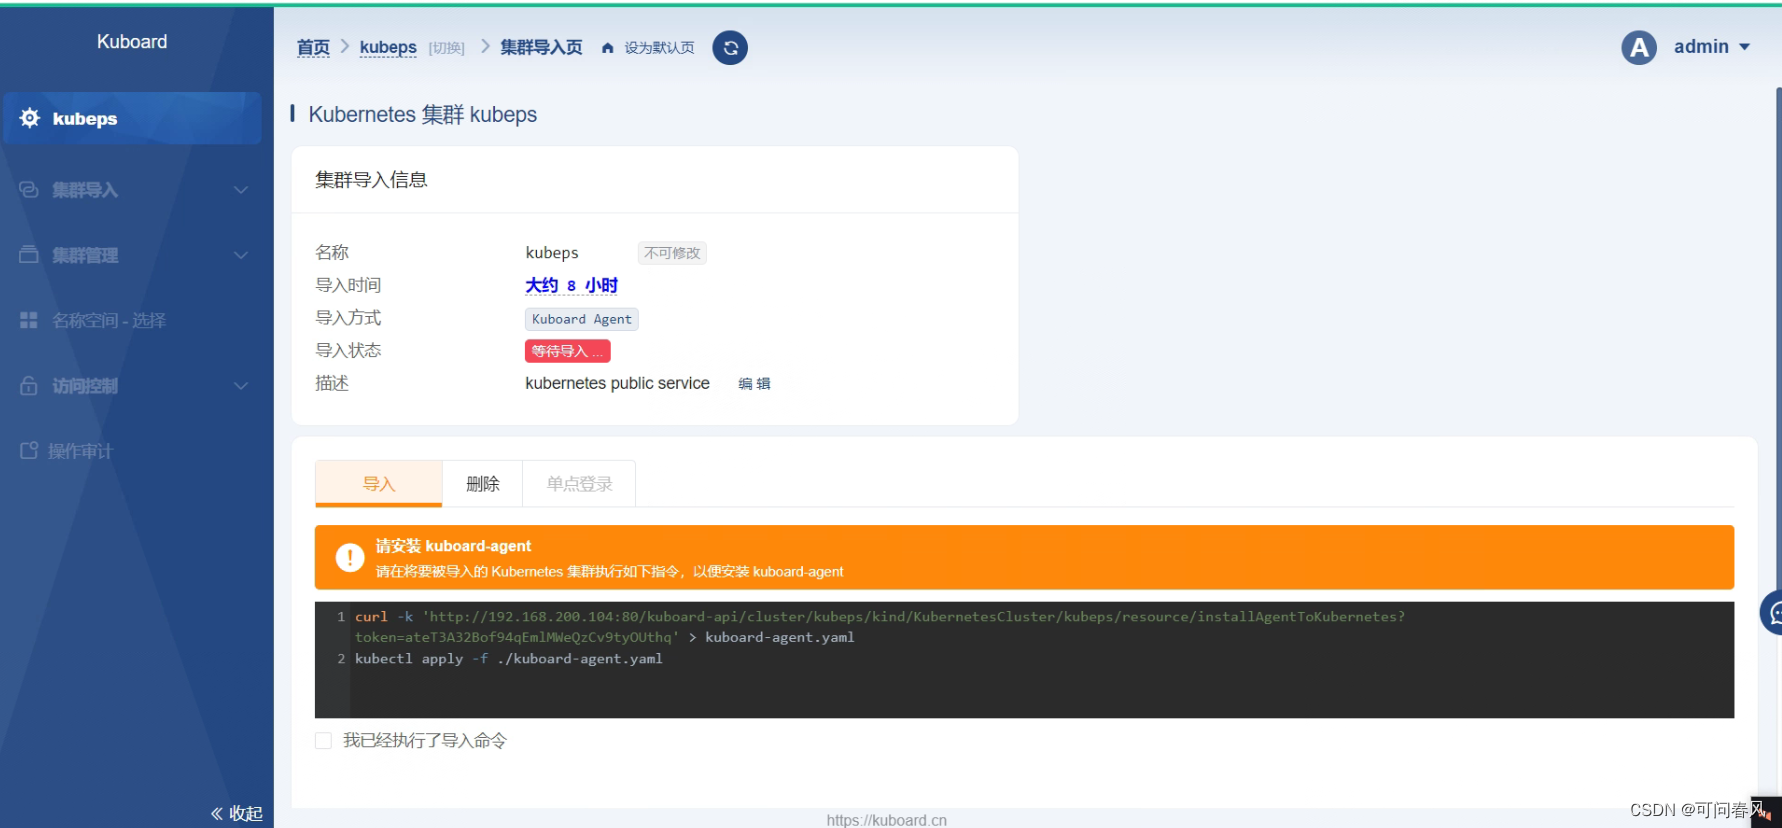
在master01节点执行即可
curl -k 'http://192.168.200.104:80/kuboard-api/cluster/kubeps/kind/KubernetesCluster/kubeps/resource/installAgentToKubernetes?token=ateT3A32Bof94qEmlMWeQzCv9tyOUthq' > kuboard-agent.yaml
kubectl apply -f ./kuboard-agent.yaml
[root@k8s-master01 ~]# curl -k 'http://192.168.200.104:80/kuboard-api/cluster/kubeps/kind/KubernetesCluster/kubeps/resource/installAgentToKubernetes?token=ateT3A32Bof94qEmlMWeQzCv9tyOUthq' > kuboard-agent.yaml% Total    % Received % Xferd  Average Speed   Time    Time     Time  CurrentDload  Upload   Total   Spent    Left  Speed
100  5793    0  5793    0     0  1872k      0 --:--:-- --:--:-- --:--:-- 2828k
[root@k8s-master01 ~]# kubectl apply -f ./kuboard-agent.yaml
namespace/kuboard created
serviceaccount/kuboard-admin created
clusterrolebinding.rbac.authorization.k8s.io/kuboard-admin-crb created
serviceaccount/kuboard-viewer created
clusterrolebinding.rbac.authorization.k8s.io/kuboard-viewer-crb created
deployment.apps/kuboard-agent-hj734q created
deployment.apps/kuboard-agent-hj734q-2 created
5.3.3配置访问集群的身份