Mybatis-plus学习2

一、Mybatis-plus分页操作
1.配置拦截器即可
//分页插件@Beanpublic PaginationInterceptor paginationInterceptor(){return new PaginationInterceptor();}2.直接使用Page对象
//测试分页查询@Testpublic void testPage(){//参数一:当前页//参数二:页面条数Page<User> page = new Page<>(1,5);userMapper.selectPage(page,null);page.getRecords().forEach(System.out::println);}二、Mybatis-plus逻辑删除
物理删除:从数据库中直接移除
逻辑删除:在数据库中没有直接移除,而是通过一个变量来让数据失效,就是把变量的值从0变为1。
管理员可以查看删除的数据,为了防止数据的丢失,与垃圾回收站相似!
1.在数据表中加入一个delete字段

2. 完善实体类
@Data
public class User {@TableId(type = IdType.AUTO)//设置主键自增private Long id;private String name;private Integer age;private String email;@Version //是乐观锁version的注解private Integer version;@TableLogic //逻辑删除注解private Integer deleted;@TableField(fill = FieldFill.INSERT)//INSERT:插入和更新的时候自动填充private Date gmtCreate;@TableField(fill = FieldFill.INSERT_UPDATE)//INSERT_UPDATE:插入和更新的时候自动填充private Date gmtModifed;
}
3.添加逻辑删除组件
//逻辑删除组件@Beanpublic ISqlInjector sqlInjector(){return new LogicSqlInjector();}4.配置逻辑删除组件
#配置逻辑组件
#没有删除的值为0
#有删除的值为1
mybatis-plus.global-config.db-config.logic-delete-value=1
mybatis-plus.global-config.db-config.logic-not-delete-value=0
5.删除测试
@Testpublic void testDelete1(){userMapper.deleteById( (long)5 );}
从图可以知道执行删除操作实际上是执行更新操作。
当我们再次查询id为5的用户时,它是查询不到的。
//测试单个查询@Testpublic void testSelectById(){User user = userMapper.selectById( 5 );System.out.println(user);}
三、性能分析插件
在开发中,我们会遇到一些慢sql。我们是通过测试、druid或者其他一些测试工具把它们给揪出来。但是Mybatis-plus有一个性能分析插件,如果超过某个时间就会停止运行!
作用:设置性能分析拦截器,用于输出每一条SQL语句及其时间!
1.设置性能分析拦截器
//性能分析拦截器@Bean@Profile( {"dev","test"} ) //设置dev,test环境开启,只有在开发和测试环境中开启,保证我们的效率public PerformanceInterceptor performanceInterceptor(){PerformanceInterceptor interceptor = new PerformanceInterceptor();interceptor.setMaxTime(100);//设置sql执行的最大时间,如果超过了这个时间则不执行,单位 毫秒interceptor.setFormat(true);//是否开启格式化代码return interceptor;}2.在application.properties中设置配置环境
#设置开发环境
spring.profiles.active=dev
3.测试使用
//查询所有用户@Testvoid contextLoads() {//参数是一个wrapper,它是一个条件构造器List<User> users = userMapper.selectList(null);users.forEach( System.out::println );}
只要超过设置的最大时间就会报错!
四、条件构造器
条件构造器(Wrapper)在mybatis-plus中十分的重要,我们在写一些复杂的sql语句就可以使用它来代替。
第一个测试:
@Testvoid contextLoads() {//查询name不为空的用户,且邮箱不为空的用户,年龄大于等于18岁的QueryWrapper<User> wrapper = new QueryWrapper<>();wrapper.isNotNull( "name" ).isNotNull( "email" ).ge( "age",15 );List<User> users = userMapper.selectList( wrapper );users.forEach( System.out::println );}第二个测试:
@Testvoid testWrapper(){//查询名字为来一沓javaQueryWrapper<User> wrapper = new QueryWrapper<>();wrapper.eq( "name","来一沓java" );User user = userMapper.selectOne( wrapper );System.out.println(user);}第三个测试:
@Testvoid testWrapper2(){//查询年龄在20~30之间得用户QueryWrapper<User> wrapper = new QueryWrapper<>();wrapper.between( "age",15,18 );Integer count = userMapper.selectCount( wrapper );System.out.println(count);}第四个测试:
@Testvoid testWrapper3(){//模糊查询QueryWrapper<User> wrapper = new QueryWrapper<>();wrapper.notLike( "name","来" )//名字中不包含 来 .likeRight( "email","p" );//邮箱中右边是 p 开头的List<Map<String, Object>> maps = userMapper.selectMaps( wrapper );maps.forEach( System.out::println );}
第五个测试:
@Testvoid testWrapper4(){//模糊查询QueryWrapper<User> wrapper = new QueryWrapper<>();//id是在子查询中查出来的wrapper.inSql( "id","select id from user where id >7" );//在子查询中查出id大于7的用户List<Object> objects = userMapper.selectObjs( wrapper );objects.forEach( System.out::println );}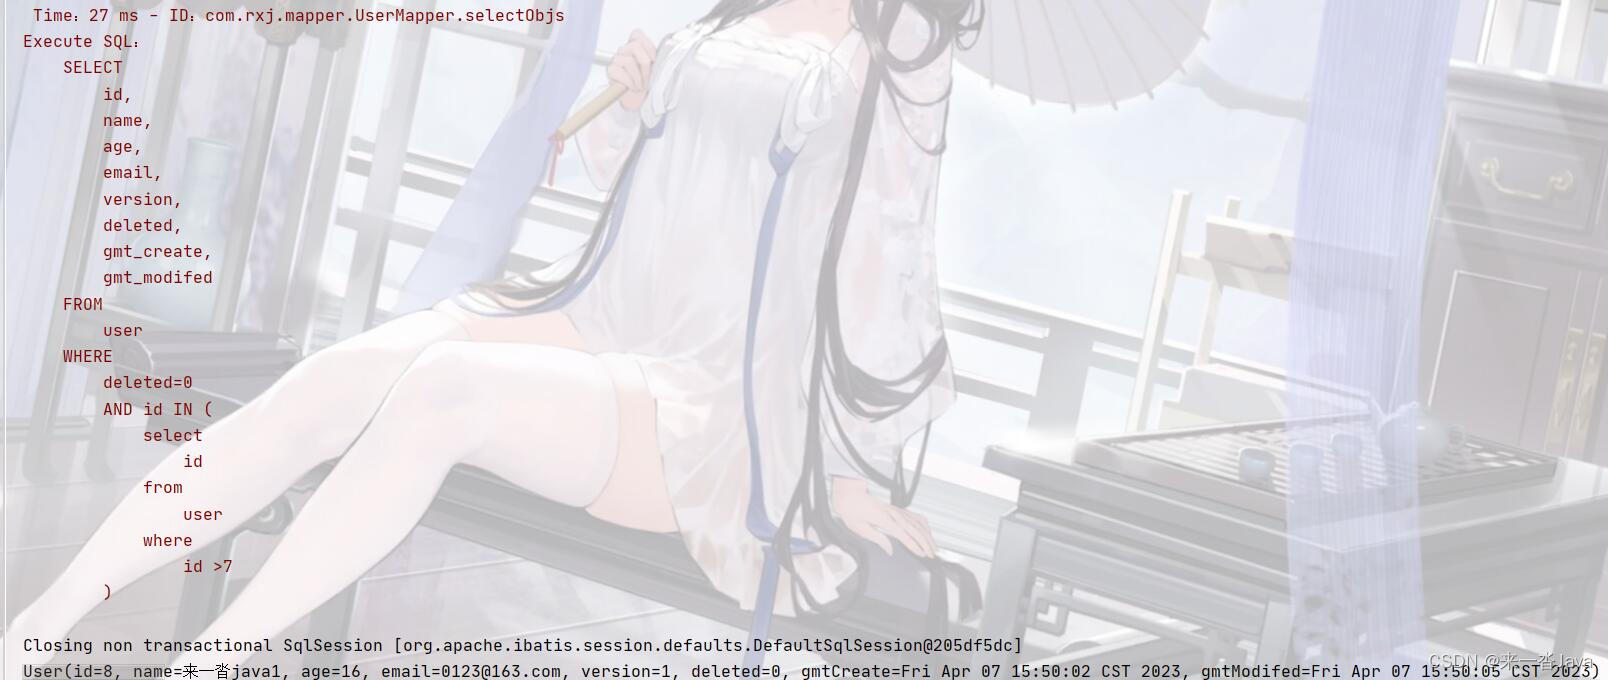
第六个测试:
@Testvoid testWrapper5(){//通过创建时间的先后排序QueryWrapper<User> wrapper = new QueryWrapper<>();wrapper.orderByDesc( "gmt_create" );List<User> users = userMapper.selectList( wrapper );users.forEach( System.out::println );}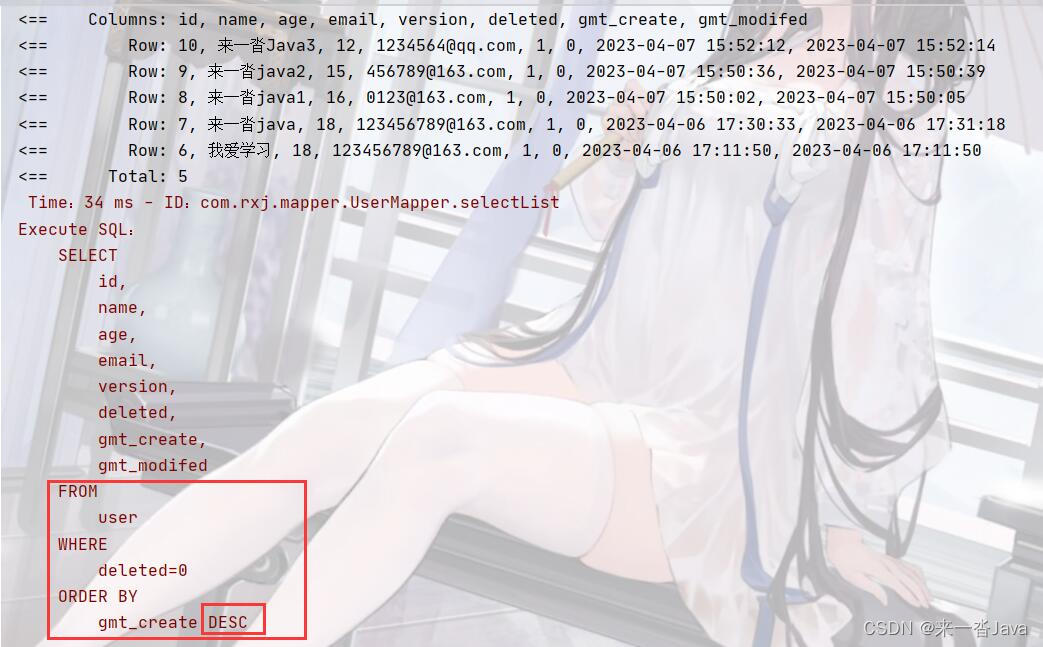
更多的测试请移步 条件构造器 | MyBatis-Plus (baomidou.com)
五、代码生成器
顾名思义就是让程序帮我们把dao层,pojo层、service层、controller层的代码全部完成!
1.导入模板引擎
<!-- mybatis-plus,它是自己开发的,非官方的--><dependency><groupId>com.baomidou</groupId><artifactId>mybatis-plus-boot-starter</artifactId><version>3.0.5</version></dependency><!-- 模板引擎 --><dependency><groupId>org.apache.velocity</groupId><artifactId>velocity-engine-core</artifactId><version>2.0</version></dependency>2.编写代码生成器CodeGenerator.java
//代码生成器
public class CodeGenerator {public static void main(String[] args) {//需要构建一个代码自动生成器  对象AutoGenerator mpg = new AutoGenerator();//配置策略//全局配置GlobalConfig config = new GlobalConfig();String projectPath = System.getProperty( "user.dir" );//获取当前项目目录config.setOutputDir( projectPath+"/src/main/java" );config.setAuthor( "RenXianJun" );//设置作者config.setOpen( false );//是否打开资源管理器config.setFileOverride( false );//是否覆盖之前生成的config.setServiceName( "%sService" );//去除Service的I前缀config.setIdType( IdType.ID_WORKER );//设置主键生成策略config.setDateType( DateType.ONLY_DATE );//设置日期的类型config.setSwagger2( true );//设置自动配置Swagger文档mpg.setGlobalConfig( config );//把全局配置放到生成器中//设置数据源DataSourceConfig dsc = new DataSourceConfig();dsc.setUrl("jdbc:mysql://localhost:3306/mybatis_plus?useSSL=false&useUnicode=true&characterEncoding=utf-8&serverTimezone=GMT%2B8");dsc.setDriverName("com.mysql.cj.jdbc.Driver");//设置数据库驱动dsc.setUsername("root");dsc.setPassword("123456");dsc.setDbType( DbType.MYSQL );mpg.setDataSource(dsc);//设置包的配置,就是这些包放在那个位置PackageConfig pc = new PackageConfig();pc.setModuleName("user");//设置模块名pc.setParent("com.rxj");//设置生成的类放在哪一个包下pc.setEntity( "entity" );//设置实体类的名字pc.setMapper( "mapper" );//设置mapperpc.setService( "service" );pc.setController( "controller" );mpg.setPackageInfo(pc);//策略配置StrategyConfig strategy = new StrategyConfig();strategy.setInclude( "user" );//设置表名映射,就是要映射的表,要生成其他表只需要改其他表strategy.setNaming( NamingStrategy.underline_to_camel);//设置包的一些命名规则strategy.setColumnNaming(NamingStrategy.underline_to_camel);strategy.setEntityLombokModel(true);//是否使用Lombok开启注解strategy.setLogicDeleteFieldName( "deleted" );//设置逻辑删除的名字//设置自动填充配置TableFill gmtCreate = new TableFill( "gmt_create", FieldFill.INSERT );TableFill gmtModifed = new TableFill( "gmt_modifed", FieldFill.INSERT_UPDATE );ArrayList<TableFill> list = new ArrayList<>();list.add( gmtCreate );list.add( gmtModifed );strategy.setTableFillList( list );//设置自动填充策略//乐观锁的配置strategy.setVersionFieldName( "version" );//设置驼峰命名strategy.setRestControllerStyle( true );//设置controller里面的一些字段strategy.setControllerMappingHyphenStyle( true );mpg.setStrategy( strategy );mpg.execute();//执行}
}