vue 路由

路由router
注意 $ router全局的 vs $ route当前活跃的
路由核心:改变URL路径,但是页面不进行整体刷新
路由可以理解为指向
路由表,是一个映射表,一个路由就是一组映射关系,
key:value key表示路由,value可以为function或者Component
function为后端路由用来处理后端请求
Component(组件)为前端路由用来展示不同内容
vue Router
安装路由Router并挂载
npm install vue-router@4
可以在任意组件中以 this.$router 的形式访问它,
并且以 this.$route 的形式访问当前路由、import router from './router'
const app =createApp(App)
app.use(router)
app.mount('#app')
导入的Router index文件
import { createRouter, createWebHashHistory } from 'vue-router'
// 1. 定义路由组件.
// 也可以从其他文件导入
import Home from '../views/Home.vue'
import About from '../views/About.vue'
import Disan from '../views/Disan.vue'// 2. 定义一些路由
// 每个路由都需要映射到一个组件。
//路径、子组件名
const routes = [
{ path: '/', component: Home },
{ path: '/about', component: About },
{ path: '/Disan/:id', component: Disan }
]// 3. 创建路由实例并传递 `routes` 配置
// 你可以在这里输入更多的配置,但我们在这里
// 暂时保持简单
const router = createRouter({
// 4. 内部提供了 history 模式的实现。为了简单起见,我们在这里使用 hash 模式。
history: createWebHashHistory(),
routes, // `routes: routes` 的缩写
})
export default router
带参数的动态路由匹配
<template>
<div>用户</div>
</template>
<!--vue2写法 <script>
export default{
mounted(){// $route表示当前活跃的路由对象console.log(this.$route);console.log(this.$route.params.id);}
}
</script> -->
<!-- 组合式API写法 -->
<script setup>
import {useRoute} from 'vue-router'
console.log(useRoute().params.id);
</script>
app组件
<script setup>
// 定义响应式变量,还是需要从vue中引入
import {ref} from 'vue'
// vue3 引入组件不需要注册
import Qwer from './components/Qwer.vue'
//  定义变量,在模板使用不需要暴露出去,模板直接使用
const a=20
console.log(a);
const b=ref(1)
function adds(){b.value++
}
</script><template><div><!-- vue-router是基于路由和组件的,路由是用来设定访问路径,将路径和组件映射起来 --><h1>Hello App!</h1><p>
<!--使用 router-link 组件进行导航 -->
<!--通过传递 `to` 来指定链接 -->
<!--`<router-link>` 将呈现一个带有正确 `href` 属性的 `<a>` 标签--><!-- 使用一个自定义组件 router-link 来创建链接,这使得 Vue Router可以在不重新加载页面情况下更改URL,处理URL 的生成以及编码 --><!-- to="路径" -->
<router-link to="/">Go to Home</router-link>
<router-link to="/about">Go to About</router-link>
<router-link to="/Disan/123">Go to Disan</router-link></p><!-- 路由出口。占位符 --><!-- 路由匹配到的组件将渲染在这里 --><router-view></router-view></div></template>
找不到动态参数 路由正则与重复参数
如果动态参数找不到404的话要给一个提示
import News from '../views/News.vue'
// 报错文件
import NotFound from '../views/NotFound.vue'定义一些路由
const routes = [{ // 动态路由的参数一定是数字// 这里注意需要使用两个反斜杠,第一个反斜杠用来转义。所以\\\\d表示匹配任何一个数字字符。path: '/News/:id(\\\\d+)', // 有多个参数 +path: '/News/:id+', // 参数可有可无,参数可以重复叠加path: '/News/:id*', // 参数可有可无path: '/News/:id?', component: News // ?与*区别,?后面不可以有多个参数,*可以},// 报错文件使用正则来表示。匹配任意的
// 404页面
{ path: '/:path(.*)', component: NotFound },
]
嵌套路由(children)
首先把父组件与需要嵌套的子组件引入到index文件。
import { createRouter, createWebHashHistory } from 'vue-router'
import Qiantao from '../views/Qiantao.vue'
import Qiantaoone from '../views/Qiantaoone.vue'
import Qiantaotwo from '../views/Qiantaotwo.vue'
const routes = [{   path: '/Qiantao', component: Qiantao,children:[ //children类似于上面const routes{path: 'Qiantaoone', component: Qiantaoone},  { path: 'Qiantaotwo', component: Qiantaotwo },]
在父组件中写入(子组件已写好ol列表与ul列表)
<template><div><h2>嵌套练习</h2><router-link to="/Qiantao/Qiantaoone">样式一</router-link><router-link to="/Qiantao/Qiantaotwo">样式二</router-link><router-view></router-view>  //占位符输出口
</div>
</template>
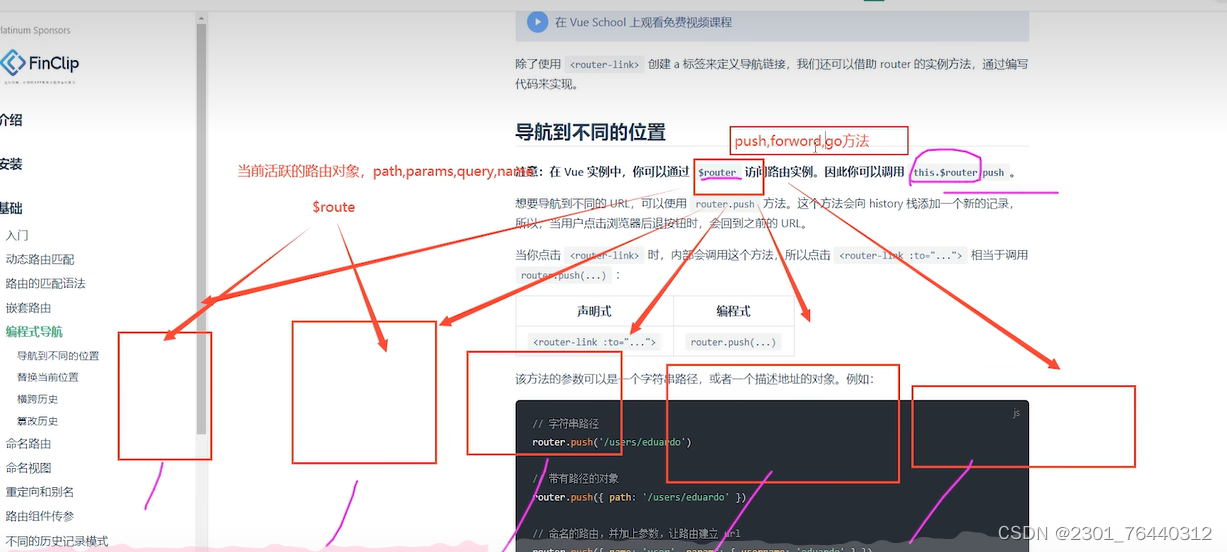
编程式导航
通过js来实现跳转页面
$router 相当于全局路由器,可以拿到push,forword ,back,go方法
$route 当前活跃的路由对象
通过$route 来拿到path,params获取参数,query,name
this.$router.push用来跳转页面 。

获取参数 params
<template>
<div><h2>Page编程式</h2><button @click="goPage">跳转页面</button>
</div>
</template>
<script>
export default{
methods:{goPage(){// console.log(this.$router);//    if(123==123){// 第一种方式// this.$router.push('/')// 第二种通过传入对象// this.$router.push({path:"/"})// 带参数// this.$router.push({path:"/Disan/123456"})// params是一个对象传入id// this.$router.push({name:"news",params:{id:123123}})// 带问号 query就是相当于?后面的内容this.$router.push({path:"/about",query:{name:"zhangsan"}})//    }}
}
}
</script>
替换当前位置:
作用类似于router.push,不同点在于导航不会像 history 添加新记录,
router.push({ path:"/home" , replace: true})
相当于 router.replace({ path:"/home" })
// 替换当前位置
    //第一种方式
this.$router.push({path:"/about",query:{name:"zhangsan"},replace:true })//第二种方式this.$router.replace({path:"/about",query:{name:"zhangsan"}})
比如有3个页面,主页,页面1(page),页面2(about)
我进入主页然后进入页面1,点击按钮执行上面代码替换为页面2,
点击浏览器左上角的后退,返回到主页面,而不是页面1.
再次点击浏览器左上角前进,返回到页面2。
横跨历史 (go、forword、back)
模板中写入按钮
<button @click="goBack">后退</button>
绑定一个@click事件,执行下列代码// 前进,传入为正值,后退,传入为负值
methods:{goBack(){// 前进,传入为正值,后退,传入为负值this.$router.go(-2)// this.$router.back() //等于go(-1),但是不可以传参//this.$router.forworf() //等于go(1)}
}
命名路由
除了 path路径 之外,你还可以为任何路由提供 name ,这有以下优点:
index路由文件中
import News from '../views/News.vue'
const routes = [{name:"news",path: '/News/:id*',component: News }
App组件通过path与命名路由
<router-link to="/News/1211">Go to News</router-link>
<router-link v-bind:to="{name:'news',params:{id:911}}">Go to News</router-link>
<router-view></router-view>
命名视图(components)注意+s多个
当我们想要展示多个视图,而不是嵌套展示,就需要命名视图了
index路由中
import ShopTop from '../views/ShopTop.vue'
import ShopMain from '../views/ShopMain.vue'
import ShopFooter from '../views/ShopFooter.vue'
const routes = [{path:'/Shop',components:{default:ShopMain,// 它们与<router-view>上的<name>属性匹配ShopTop:ShopTop,ShopFooter:ShopFooter}}
]
app组件中
<router-view name="ShopTop"></router-view><router-view></router-view><router-view name="ShopFooter"></router-view>
重定向(redirect)可以路径、命名路由name、方法
例如home页面 path路径为/home 进行跳转,通过重定向可以实现“ / ”达到跳转home页面index.js路由const routes = [
{ path: '/' ,// 重定向redirect:"/home"//命名路由// redirect:{name:'home'}// 方法redirect:(to)=>{console.log(to);return {name:"home"}
},
{ path: '/home',name:"home", component: Home },]
别名(alias)
当我们的path路径过长等,需要一个或多个别名,多个用数据
path: '/Qiantao', // alias:'/father',//起别名alias:["/father","/faqin"],component: Qiantao,http://localhost:5173/#/Qiantaohttp://localhost:5173/#/fatherhttp://localhost:5173/#/fuqin结果是一样的
将props传递给路由组件
index路由import Disan from '../views/Disan.vue'
{ path: '/Disan/:id', component: Disan , props: true },选项式API写法export default{props:['id'],mounted(){console.log(this.id);
组合式API写法(defineProps({ }))<script setup>import {useRoute} from 'vue-router'const props= defineProps({id:String //因为路径为字符串格式。})console.log(props.id);</script>
index路由中需要给每个都要加上props
const router =	[{path:'/Shop/:id',components:{default:ShopMain,// 它们与<router-view>上的<name>属性匹配ShopTop:ShopTop,ShopFooter:ShopFooter},props:{default:true,ShopTop:false,ShopFooter:false}
}]
这个时候ShopMain.vue 组件中就可以接受到id值
<script>
export default{props:["id"],
mounted(){console.log(this.id);
}
}
</script>
另外组件接收的话,结果为空,除非index中props修改为ture进行接收
不同的历史模式(Hash模式、HTML5模式)
1、Hash模式使用createWebHashHistory()创建的
路径上有一个# 叫做哈希字符
2、HTML5 模式用 createWebHistory()创建的
区别:html5需要后端服务器配置好,不然刷新可能会出现404,
哈希字符不会请求后端。
一个有#号 一个没有
路由守卫
导航守卫主要用于跳转或取消的方式守卫导航,植入路由导航中:全局、单个路由、组件级。有3个参数to 即将要进入的目标from 当前导航正要离开的路由 next:相当于加了一个关卡,需要调用一下next()//直接进to 所指路由next(false) //中断当前路由next('route') //跳转指定路由next('error') //跳转错误路由全局前置路由:
全球守卫(全局守卫)
router.beforeEach((to,from,next)=>{console.log(to);console.log(from);next()//通行证
})
每路守卫(路由独享守卫)
{ path: '/about',component: About,// 每路守卫(路由独享守卫)beforeEnter:(to,from,next)=>{//if判断token值console.log(to);console.log(from);if(123===123){next()}}}
组件内的守卫(进入、更新、离开之前)
有3个守卫 路由进入组件之前,更新之前,离开之前
beforeRouteEnter(){}
beforeRouteUpdate(){}
beforeRouteLeave(){}// 注意在 beforeRouteEnter是拿不到this的因为这是在组件创建之前。
//拿不到实例对象,通过next的回调函数来进行获取export default{
data(){return{age:18}
},
beforeRouteEnter(to,from,next){console.log("路由进入组件之前");console.log(to);console.log(from);// console.log(age);不能执行next((vm)=>{console.log(vm.age);})
},
beforeRouteUpdate(){console.log("路由更新组件之前");},
beforeRouteLeave(){console.log("路由离开组件之前");}
}
路由懒加载(返回的是一个promise组件函数)
在项目中一次引入过多,JavaScript包变的特别大.影响页面加载。让静态导入变成动态导入 需要用到在加载。静态引入 import Home from '../views/Home.vue'动态引入 const home = ()=>import('../views/Home.vue'){ path: '/home',name:"home", component: home}
如果 命名视图的话
想要展示多个视图
// import ShopTop from '../views/ShopTop.vue'
// import ShopMain from '../views/ShopMain.vue'
// import ShopFooter from '../views/ShopFooter.vue'
改为动态
const Top = ()=>import('../views/ShopTop.vue')
const Main = ()=>import('../views/ShopMain.vue')
const Footer = ()=>import('../views/ShopFooter.vue')const router =	{path:'/Shop/:id',components:{default:Main,// 它们与<router-view>上的<name>属性匹配ShopTop:Top,ShopFooter:Footer}]


