两种方式对el-table二次封装

1、序言
完整源码:el-table-example: 两种方式对el-table二次封装
最近在公司写了好多的后台管理系统,管理系统很大部分都是elementui下的el-table,el-table中有很多 <el-table-column></el-table-column>是重复的,像这样:

能不能通过配置项让其自动生成 <el-table-column></el-table-column>,省去冗余代码。下一次管理系统添加新模块相似的内容,就不用复制粘贴了。有一说一,复制粘贴完成需求速度非常快、并且效果不错,但是代码就像屎山,冗余度、可维护性都比较差,长期复制粘贴没什么成长!
2、自定义组件方式封装el-table
2.1、封装
(1)在src下建立components文件夹
(2)在components文件夹下建立Table/index.vue、index.js两个文件夹

(3)index.js文件全局注册封装的Table组件
import Vue from 'vue';
import Table from './index.vue';/* 封装的表格组件 */// 全局注册<Table>组件
Vue.component('CommonTable', Table);
(4)index.vue文件封装Table组件
遇到一些自定义列就使用作用域名插槽填充,名称为prop值,并在coloum中配置slot属性。像这样:
<!-- 表格组件 -->
<template><div><el-table :data="data" stripe style="width: 100%" v-loading="loading" @selection-change="handleSelectionChange"><!--选择--><el-table-column v-if="hasSelection" type="selection" width="55" /><!--序号--><el-table-column v-if="hasIndex" type="index" width="55" /><!--数据源--><template v-for="(column, index) in columns"><!-- 表头存在type类型 --><el-table-column v-if="column.type &&(column.type == 'selection' || column.type == 'index')" :type="column.type" /><!-- 表头是数据或操作内容 --><el-table-column v-else :label="column.label"><template v-if="!column.type" slot-scope="{ row, $index}"><slot v-if="column.slot" :name="column.slot" :row="row" :index="$index" /><span v-else>{{ row[column.prop] }}</span></template></el-table-column></template></el-table></div>
</template>
<script>
export default {name: 'Table',props: {loading: {type: Boolean,default: () => false},// 是否可以选择hasSelection: {type: Boolean,default: () => false},// 是否有序列项hasIndex: {type: Boolean,default: () => false},// 这是相应的字段展示columns: {type: Array,default: () => []},// 这是数据源data: {type: Array,default: () => []}},methods: {// 将选中的行发送到父组件handleSelectionChange(val) {const selectionArr = []val.forEach(item => {selectionArr.push(item)})this.$emit('commitSelection', selectionArr)},},
}
</script>
(5)main.js中引入全局注册组件
import Vue from 'vue'
import App from './App.vue'
import router from './router'
import store from './store'
import "./assets/css/main.css";/* 全局注册的组件 */
import './components/Table/index'; // 表格组件new Vue({router,store,render: h => h(App)
}).$mount('#app')
2.2、使用
<template><div><common-table :columns="columns" :data="tableData"><template slot="isPublic" slot-scope="{ row }">{{ transformPublic(row.isPublic) }}</template><template slot="operation" slot-scope="{ row }"><el-button type="primary">编辑</el-button><el-button type="danger">删除</el-button></template></common-table></div>
</template><script>
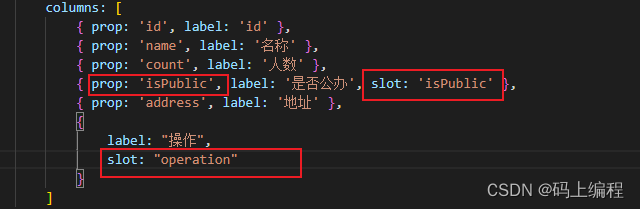
export default {data() {return {tableData: [{id: 11,name: '绿色天使幼儿园',count: 100,address: '北京',isPublic: 1,}, {id: 22,name: '金苹果幼儿园',count: 200,address: '上海',isPublic: 1,}, {id: 33,name: '童趣幼儿园',count: 300,address: '广州',isPublic: 0,}, {id: 44,name: '快乐星球幼儿园',count: 400,address: '深圳',isPublic: 0,}],columns: [{ prop: 'id', label: 'id' },{ prop: 'name', label: '名称' },{ prop: 'count', label: '人数' },{ prop: 'isPublic', label: '是否公办', slot: 'isPublic' },{ prop: 'address', label: '地址' },{label: "操作",slot: "operation"}]}},computed: {transformPublic() {return function (isPublic) {let t = {1: '是',0: '否'}return t[isPublic]}}}
}
</script><style scoped></style>3、jsx方式封装el-table
3.1、jsx
我看网上还有使用jsx方式来封装el-table,jsx能够抽象组件,jsx是一种javascript和xml结合的一种语法,它既有javascript的灵活性,也有xml的规范性,但是有一说一,写起来真不习惯、真不舒服!
babel能将es6转换成es5,还能将jsx转换成javascript,所以babel插件必不可少!惊喜的发现脚手架cli已经配置好babel插件,基本可以直接上手写jsx了!jsx语法和vue语法还是有一些差别的,详细去看看网上例子,掌握好它上手react比较容易!
写jsx记得要把vue中的template、script、style标签去掉
3.2、封装
(1)src/components/JsxTable/index.js 建立文件夹
(2)render()中 return <div> <el-table></el-table> </div>
(3)自定义指令v-loading还有语法糖@selection-change 使用不了,需要转译一下让jsx识别
// @selection-change语法糖没法在jsx直接使用,需要转译一下const listeners = {on: {['selection-change']: val => this.$emit('commitSelection', val)}};// v-loading没法在jsx直接使用,需要转译一下const directives = {directives: [{ name: 'loading', value: loading }]};(4)attrs和scopedSlots
attrs 属性是用于将父组件属性传递(除了 prop 传递的属性、class 和 style )给子组件, 这通常用于将事件监听器和自定义属性传递给子组件。
scopedSlots 是用于将父组件的作用域插槽(scoped slot)传递给子组件,以便子组件可以在父组件提供的数据上进行渲染。在父组件中,标签并设置slot-scope属性来创建作用域插槽,然后在子组件中使用this.$slots属性来获取这些插槽
// 渲染列const renderColumn = () => {return columns.map(item => {const attribute = {attrs: { ...item }};if (item.slot) {attribute.scopedSlots = {default: this.$scopedSlots[item.slot]};}return <el-table-column {...attribute} />;});};(5)将属性、事件、指令组装到el-table中,并通过render()返回组装好的el-table
// 渲染表格const renderTable = (<el-table data={dataList} {...listeners} {...directives} style="width: 100%" >{renderColumn()}</el-table >);return <div>{renderTable}</div>;3.3、使用
<template><div><jsx-table :columns="columns" :dataList="tableData" hasSelection @commitSelection="getselected"><template slot="isPublic" slot-scope="{ row }">{{ transformPublic(row.isPublic) }}</template><template slot="operation" slot-scope="scope"><el-button type="primary">编辑</el-button><el-button type="danger">删除</el-button></template></jsx-table></div>
</template><script>
import JsxTable from '@/components/JsxTable'
export default {components: {JsxTable},data() {return {tableData: [{id: 11,name: '绿色天使幼儿园',count: 100,address: '北京',isPublic: 1,}, {id: 22,name: '金苹果幼儿园',count: 200,address: '上海',isPublic: 1,}, {id: 33,name: '童趣幼儿园',count: 300,address: '广州',isPublic: 0,}, {id: 44,name: '快乐星球幼儿园',count: 400,address: '深圳',isPublic: 0,}],columns: [{ prop: 'id', label: 'id' },{ prop: 'name', label: '名称' },{ prop: 'count', label: '人数' },{ prop: 'isPublic', label: '是否公办', slot: 'isPublic' },{ prop: 'address', label: '地址' },{label: "操作",slot: "operation"}]}},methods: {// 获取选中行getselected(val) {console.log('val:', val);}},computed: {transformPublic() {return function (isPublic) {let t = {1: '是',0: '否'}return t[isPublic]}}}
}
</script><style scoped></style>