【CE】Mac下的CE教程Tutorial:进阶篇(第8关:多级指针)

▒ 目录 ▒
-
- 🛫 导读
-
- 开发环境
- 1️⃣ 第8关:多级指针
-
- 翻译
- 操作
- 验证
- 其它方案
- 🛬 文章小结
- 📖 参考资料
🛫 导读
开发环境
| 版本号 | 描述 | |
|---|---|---|
| 文章日期 | 2023-03- | |
| 操作系统 | MacOS Big Sur 11.5 | |
| Cheat Engine | 7.4.3 | |
1️⃣ 第8关:多级指针
翻译
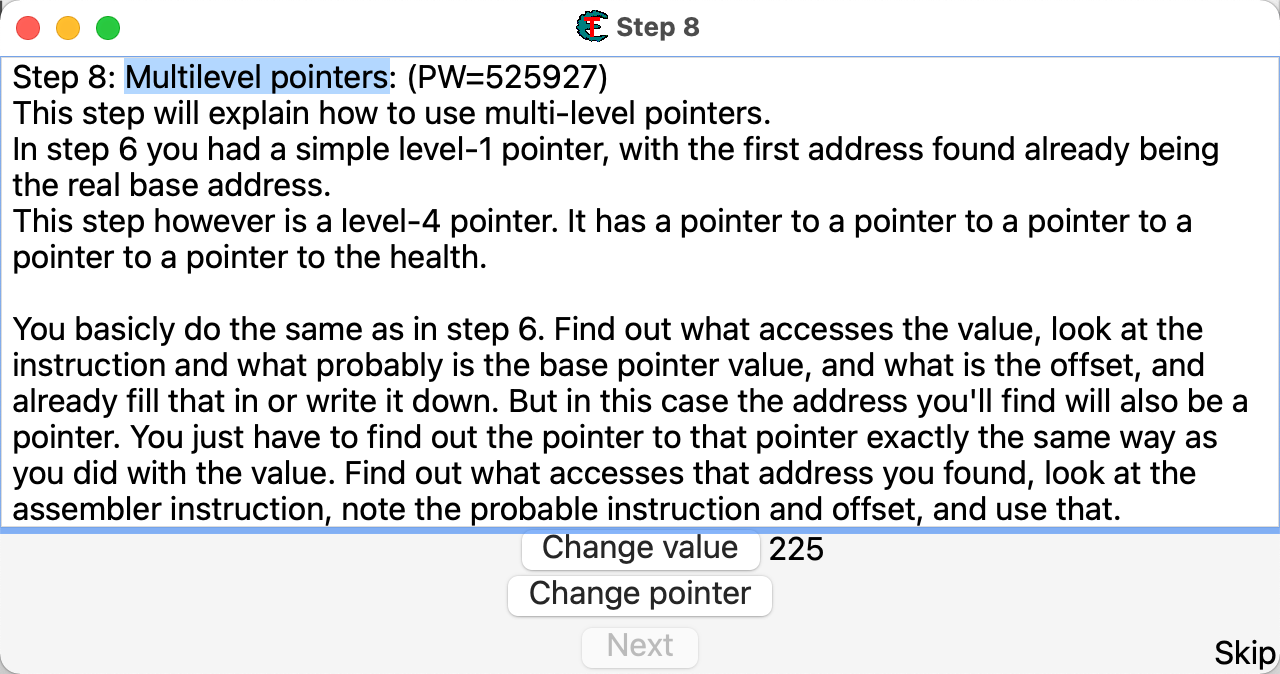
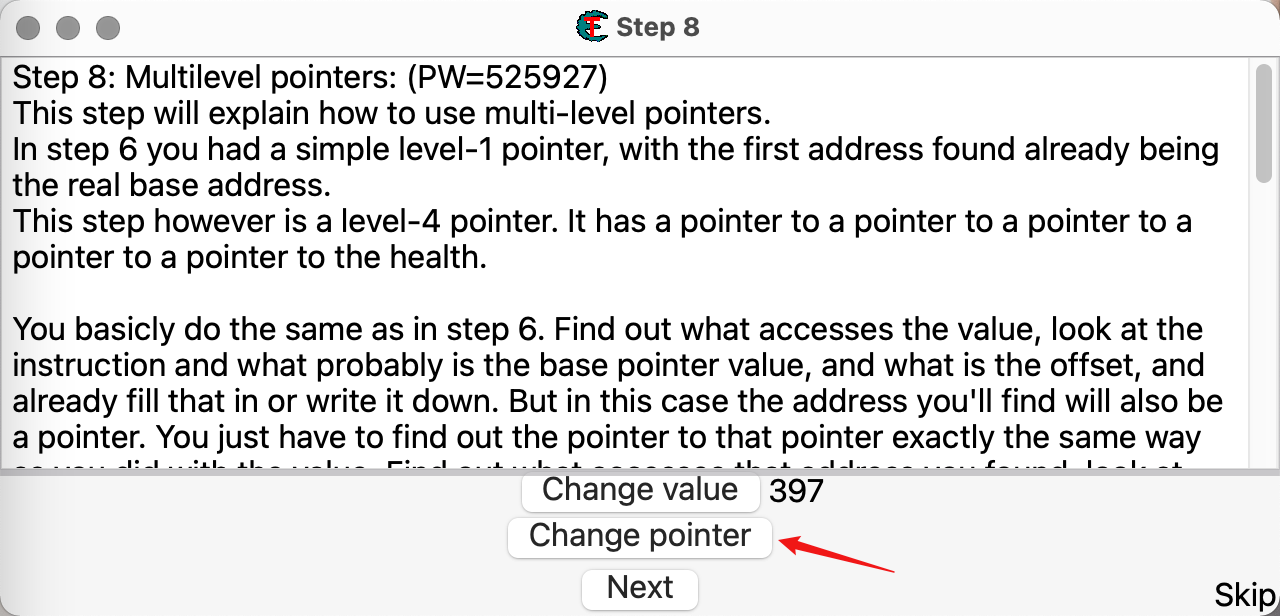
Step 8: Multilevel pointers: (PW=525927)
This step will explain how to use multi-level pointers.
In step 6 you had a simple level-1 pointer, with the first address found already being the real base address.
This step however is a level-4 pointer. It has a pointer to a pointer to a pointer to a pointer to a pointer to the health.You basicly do the same as in step 6. Find out what accesses the value, look at the instruction and what probably is the base pointer value, and what is the offset, and already fill that in or write it down. But in this case the address you'll find will also be a pointer. You just have to find out the pointer to that pointer exactly the same way as you did with the value. Find out what accesses that address you found, look at the assembler instruction, note the probable instruction and offset, and use that.
and continue till you can't get any further (usually when the base address is a static address, shown up as green)Click Change Value to let the tutorial access the health.If you think you've found the pointer path click Change Register. The pointers and value will then change and you'll have 3 seconds to freeze the address to 5000Extra: This problem can also be solved using a auto assembler script, or using the pointer scanner
Extra2: In some situations it is recommended to change ce's codefinder settings to Access violations when
Encountering instructions like mov eax,[eax] since debugregisters show it AFTER it was changed, making it hard to find out the the value of the pointerExtra3: If you're still reading. You might notice that when looking at the assembler instructions that the pointer is being read and filled out in the same codeblock (same routine, if you know assembler, look up till the start of the routine). This doesn't always happen, but can be really useful in finding a pointer when debugging is troublesome第8关 多级指针这一步将解释如何使用多级指针。在步骤6中,您有一个简单的一级指针,第一个地址已经找到了实际基地址。这一步是一个四级指针。它有一个指向指针的指针的指针的指针。您基本上做了同样的事情,找出访问值的是什么,看看指令和可能是基地址值,并填写它或记录它。
但在这种情况下,您将找到的地址也将是一个指针。
您只需要找出指向该指针的指针的方式与您在值中找到的方式相同。找出您找到的指向该地址的指针,看看汇编指令,注意可能的指令和偏移量,并使用它。并继续直到您无法再进一步(通常当基地址是静态地址时,显示为绿色)。单击“变更值”以允许教程访问健康状况。如果你认为你已经找到了指针路径,请单击“变更寄存器”。指针和值将更改,您将有3秒钟冻结地址为5000。额外1:这个问题也可以通过使用自动汇编脚本或使用指针扫描器解决。额外2:在某些情况下,建议更改ce的代码检查设置,以在遇到像mov eax,[eax]这样的指令时,显示访问违规,因为debugregisters在指针被更改后显示,这使得很难找出指针的值。额外3:如果你仍在阅读。你可能会注意到,当你在同一代码块中查看指针时,指针被读取和填充在同一代码块中(如果你知道汇编,查找直到程序开始的代码块)。这并不总是发生,但在调试困难时可以非常有用。
操作
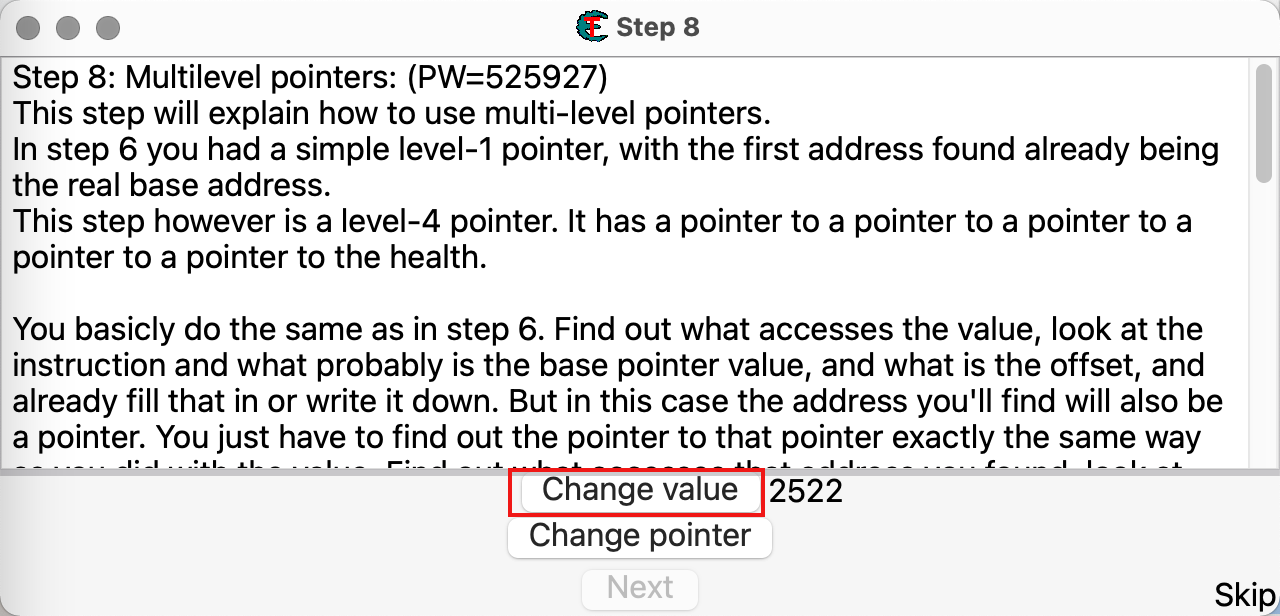
- 定位目标值
点击《Change value》按钮,多次扫描精确值,定位目标值地址
- 查看目标值被访问代码。
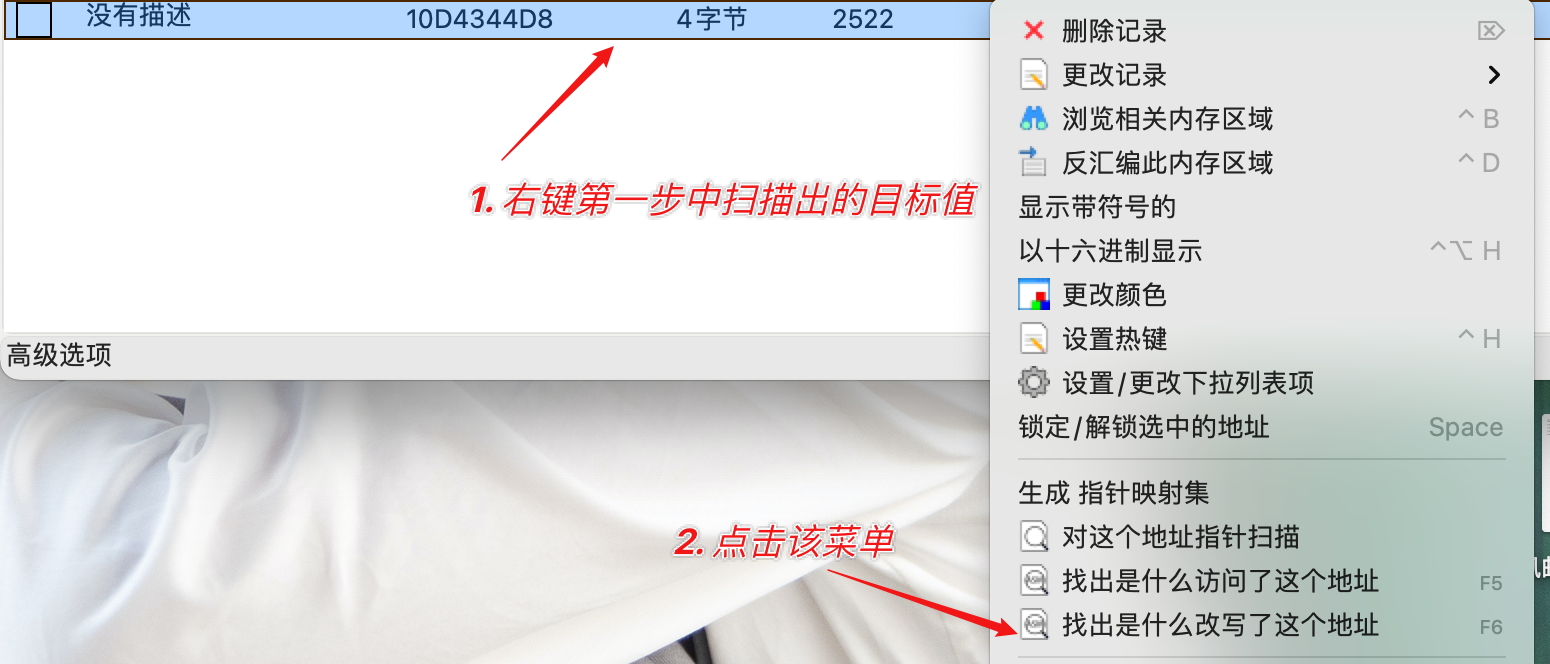
- 查看访问地址
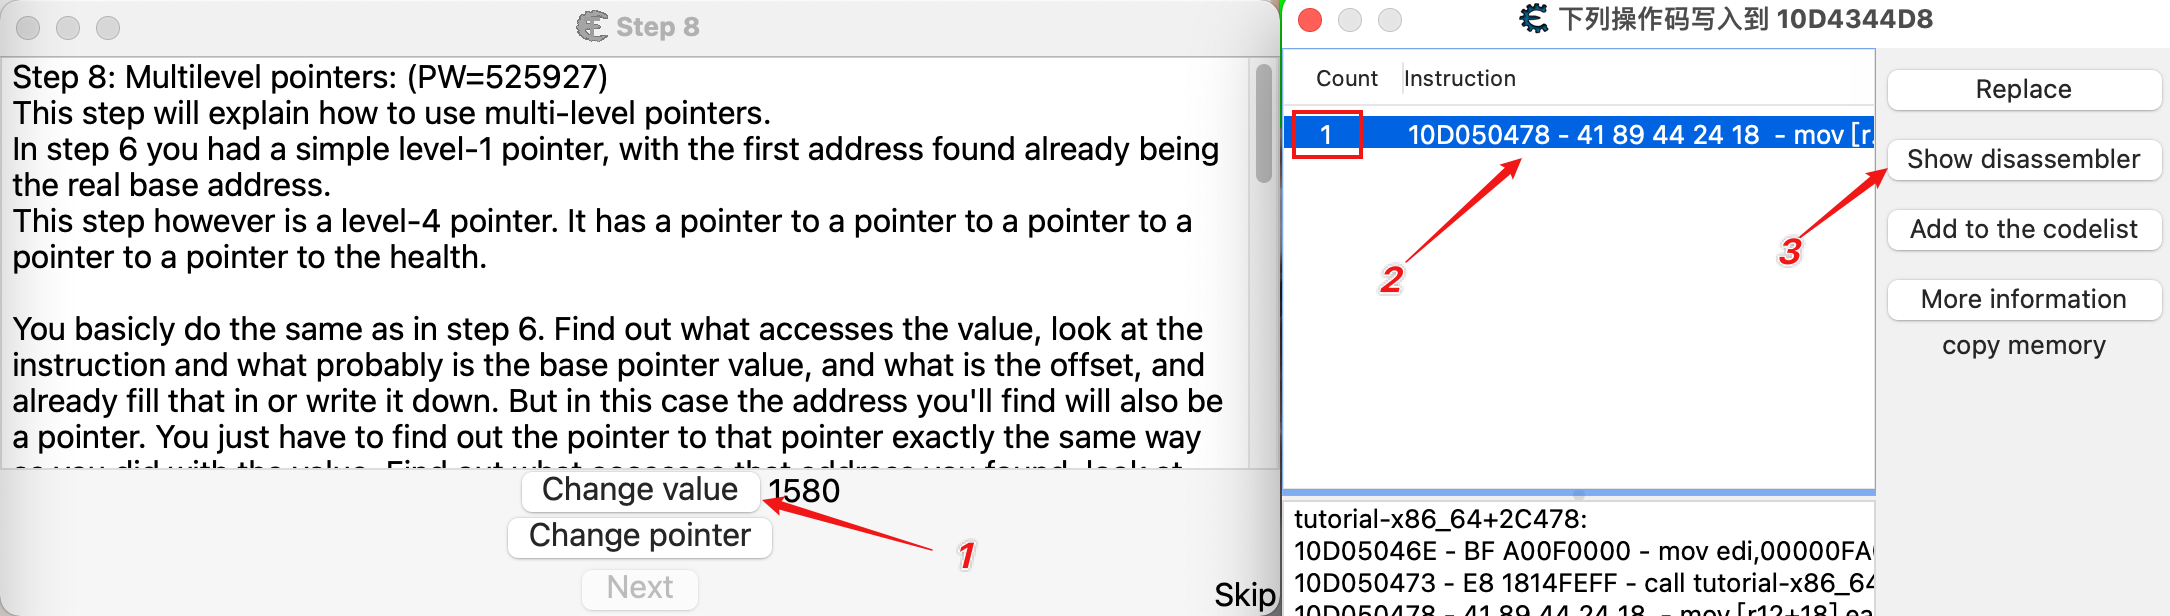
查看并分析汇编代码
第3步中打开Memory Viewer窗口,查看汇编代码。
不断向上查找,发现所有访问地址均使用了r12寄存器,经过4次偏移,找到基址tutorial-x86_64+322D98。
下图为精简后的代码:
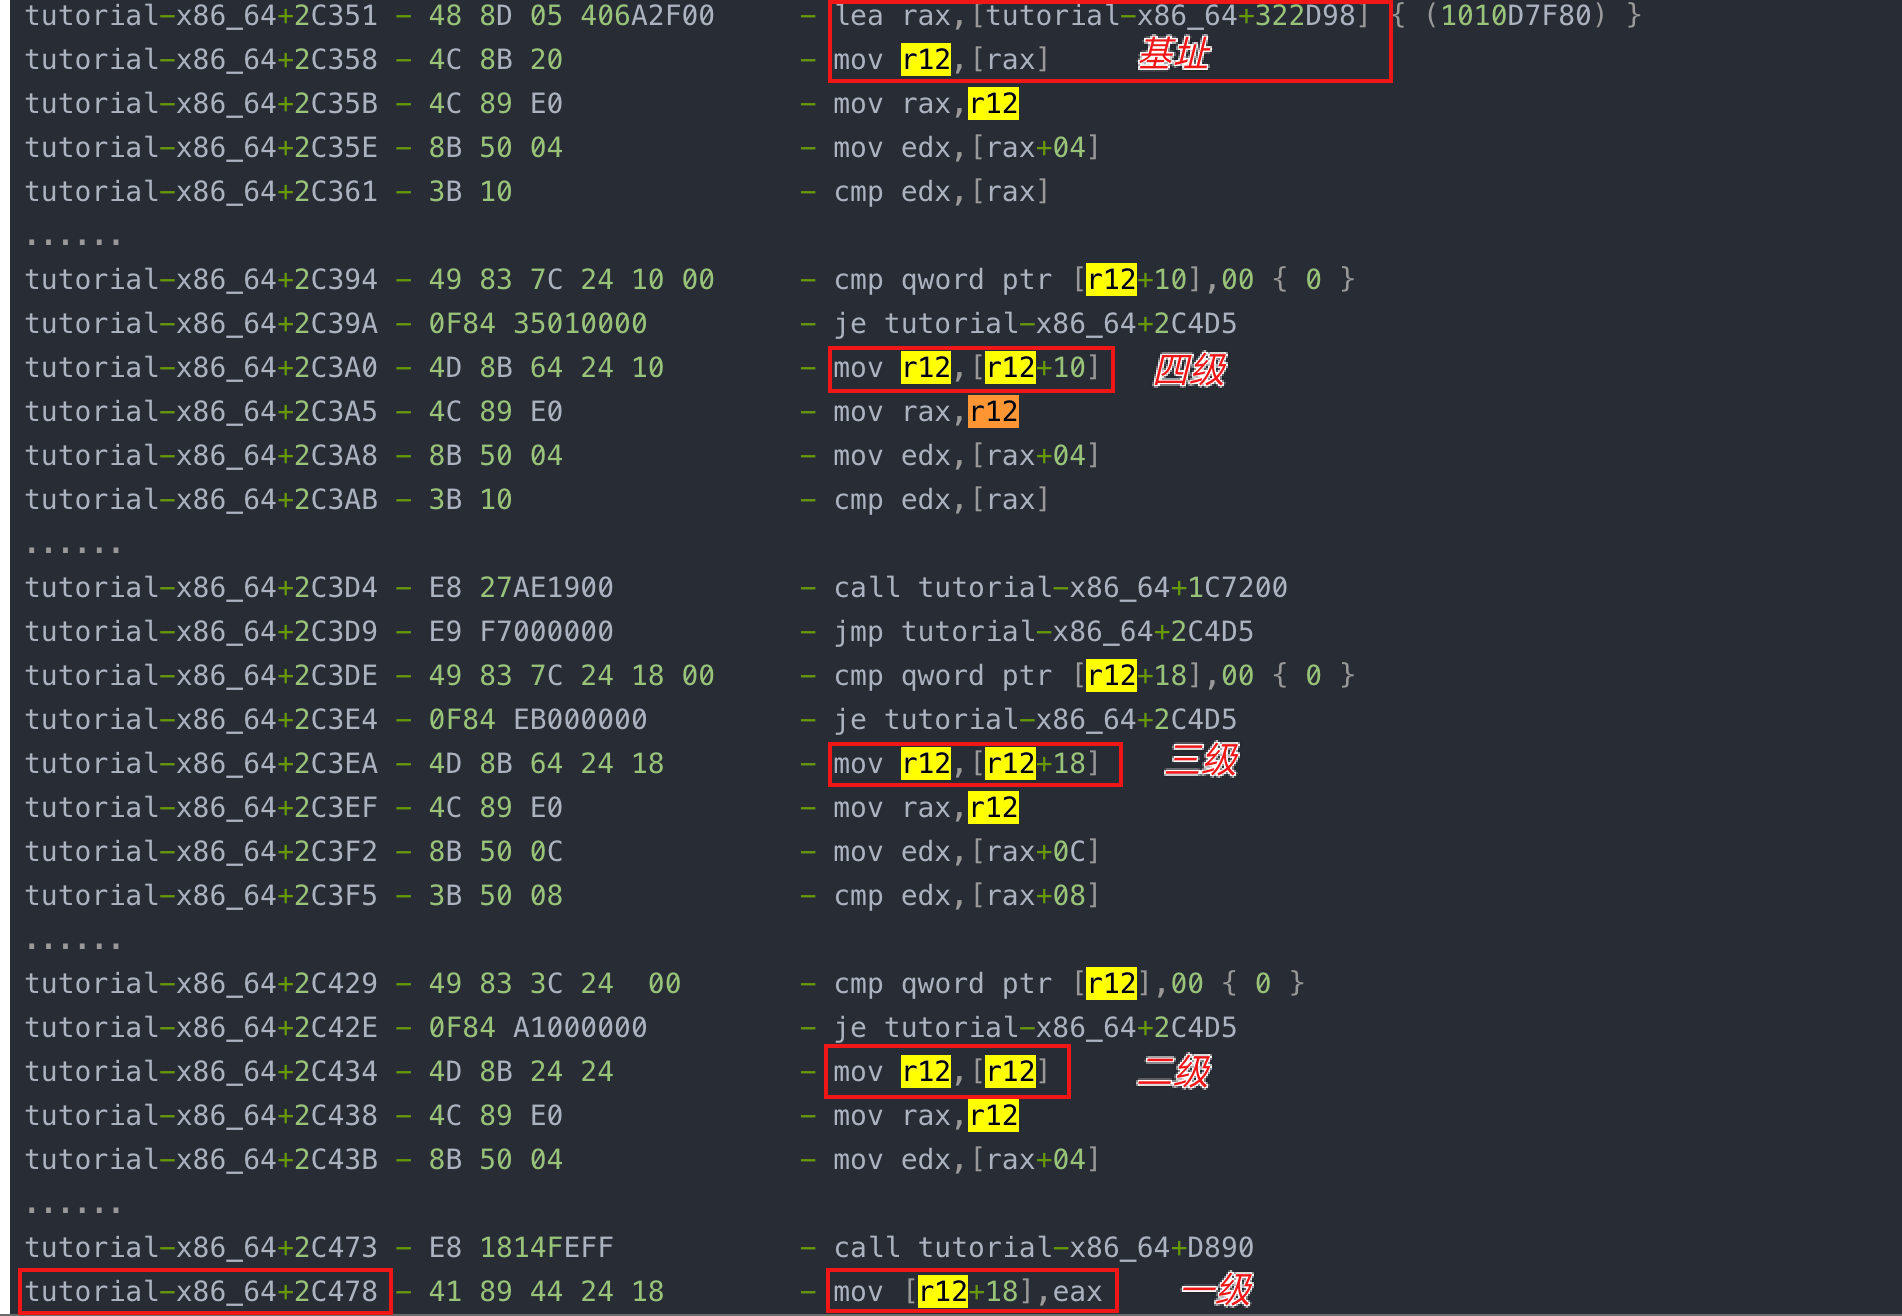
附汇编代码如下:
tutorial-x86_64+2C344 - 48 89 54 24 58        - mov [rsp+58],rdx
tutorial-x86_64+2C349 - 85 C0                 - test eax,eax
tutorial-x86_64+2C34B - 0F85 84010000         - jne tutorial-x86_64+2C4D5
tutorial-x86_64+2C351 - 48 8D 05 406A2F00     - lea rax,[tutorial-x86_64+322D98] { (1010D7F80) }
tutorial-x86_64+2C358 - 4C 8B 20              - mov r12,[rax]
tutorial-x86_64+2C35B - 4C 89 E0              - mov rax,r12
tutorial-x86_64+2C35E - 8B 50 04              - mov edx,[rax+04]
tutorial-x86_64+2C361 - 3B 10                 - cmp edx,[rax]
......
tutorial-x86_64+2C394 - 49 83 7C 24 10 00     - cmp qword ptr [r12+10],00 { 0 }
tutorial-x86_64+2C39A - 0F84 35010000         - je tutorial-x86_64+2C4D5
tutorial-x86_64+2C3A0 - 4D 8B 64 24 10        - mov r12,[r12+10]
tutorial-x86_64+2C3A5 - 4C 89 E0              - mov rax,r12
tutorial-x86_64+2C3A8 - 8B 50 04              - mov edx,[rax+04]
tutorial-x86_64+2C3AB - 3B 10                 - cmp edx,[rax]
......
tutorial-x86_64+2C3D4 - E8 27AE1900           - call tutorial-x86_64+1C7200
tutorial-x86_64+2C3D9 - E9 F7000000           - jmp tutorial-x86_64+2C4D5
tutorial-x86_64+2C3DE - 49 83 7C 24 18 00     - cmp qword ptr [r12+18],00 { 0 }
tutorial-x86_64+2C3E4 - 0F84 EB000000         - je tutorial-x86_64+2C4D5
tutorial-x86_64+2C3EA - 4D 8B 64 24 18        - mov r12,[r12+18]
tutorial-x86_64+2C3EF - 4C 89 E0              - mov rax,r12
tutorial-x86_64+2C3F2 - 8B 50 0C              - mov edx,[rax+0C]
tutorial-x86_64+2C3F5 - 3B 50 08              - cmp edx,[rax+08]
......
tutorial-x86_64+2C429 - 49 83 3C 24  00       - cmp qword ptr [r12],00 { 0 }
tutorial-x86_64+2C42E - 0F84 A1000000         - je tutorial-x86_64+2C4D5
tutorial-x86_64+2C434 - 4D 8B 24 24           - mov r12,[r12]
tutorial-x86_64+2C438 - 4C 89 E0              - mov rax,r12
tutorial-x86_64+2C43B - 8B 50 04              - mov edx,[rax+04]
......
tutorial-x86_64+2C473 - E8 1814FEFF           - call tutorial-x86_64+D890
tutorial-x86_64+2C478 - 41 89 44 24 18        - mov [r12+18],eax
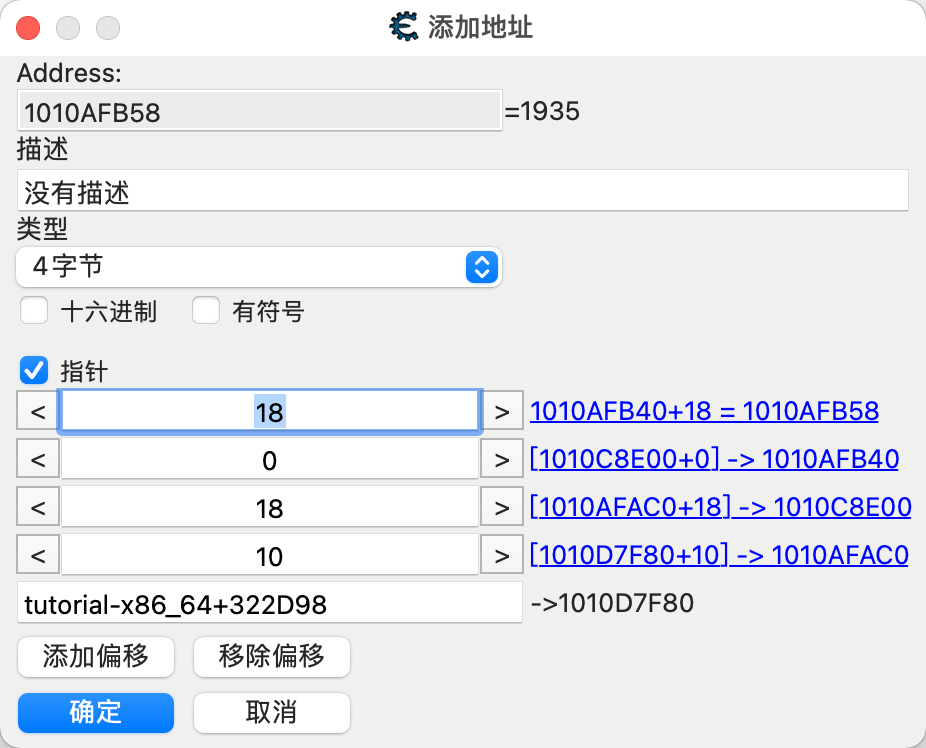
- 添加指针
根据上面分析,添加四级指针,最终结果就是1935,的确是正确的。
验证
- 按照如下步骤操作上一小节中创建的指针地址。

- 点击《Change pointer》按钮,等待3秒,即可过关。
其它方案
除了上面分析汇编代码的方案,还可以按照下面方案执行。
- 一级一级的指针扫描,直到找到基址(参考《第6关:指针》https://blog.csdn.net/kinghzking/article/details/129848329)
- CE提供的
指针扫描器工具。
🛬 文章小结
实际应用中,大量存在指针的访问。我们需要通过
分析汇编代码、扫描指针、指针扫描器等多种方案定位目标地址,有事更是需要使用AOB代码注入等方案实现目标定位。
📖 参考资料
- 【CE】Mac下的CE教程Tutorial:基础篇(第6关:指针) https://blog.csdn.net/kinghzking/article/details/129848329
ps: 文章中内容仅用于技术交流,请勿用于违规违法行为。